
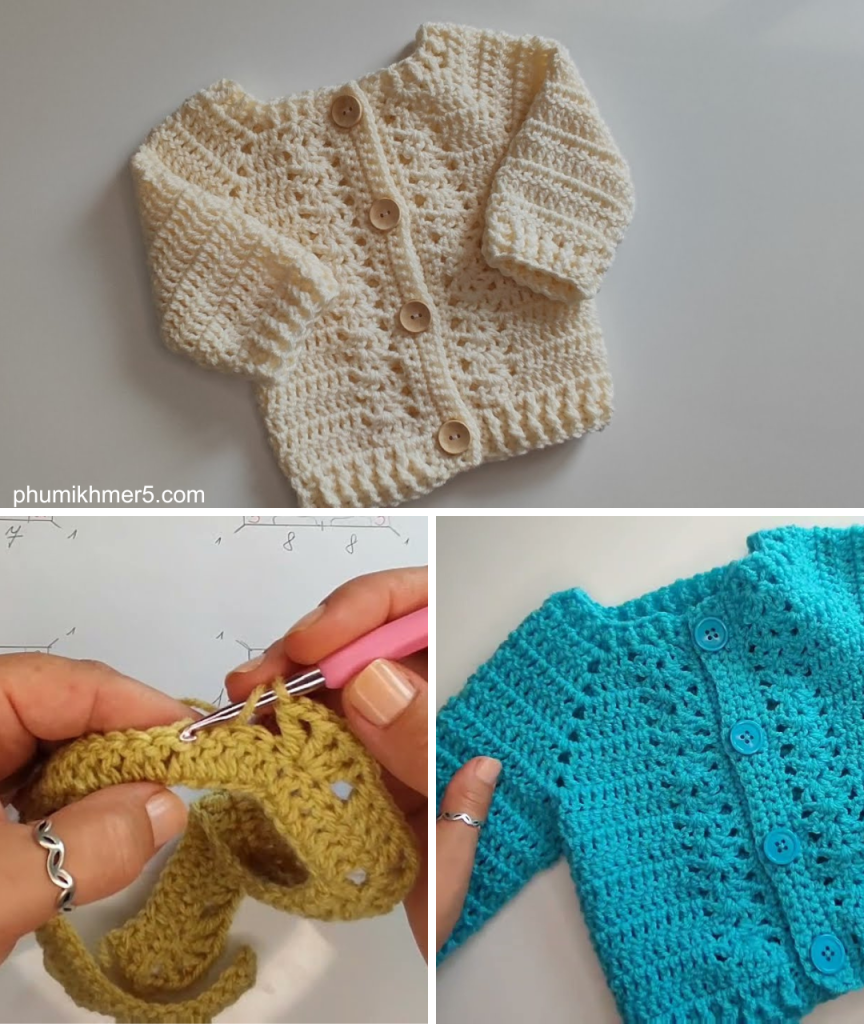
When it comes to crafting for babies, few things are as delightful and cherished as a handmade crochet cardigan. Add to that a beautiful fan stitch pattern, and you have a wearable piece of art — elegant, cozy, and perfect for little ones. The fan stitch, known for its lacy, scalloped appearance, brings a touch of vintage charm and sophistication to baby garments while remaining soft and practical for daily wear.
In this article, we’ll guide you through the journey of crocheting a charming baby cardigan using the fan pattern — from material selection and pattern breakdown to customization tips and care.

🧡 Why Choose a Fan Stitch for Baby Cardigans?
The fan stitch, which involves clusters of stitches (usually double crochets) worked into one stitch or space, creates an open, frilly texture. It is not only aesthetically pleasing but also allows for breathability and a soft drape — ideal for delicate baby skin.
Benefits:
- Soft and breathable texture
- Elegant, vintage-inspired look
- Stretchy and flexible fit
- Suitable for layering
🧵 Materials You’ll Need
Before getting started, make sure you have the following supplies:
✨ Yarn:
- Lightweight yarn (Category 3 – DK/light worsted)
Cotton or cotton-blend yarns are perfect. Look for something labeled baby-safe, hypoallergenic, and machine washable.
Recommended: 300–400 yards (for 0–6 months size)
✨ Hook:
- 4.0 mm (G) crochet hook, or size needed to meet gauge
✨ Notions:
- Yarn needle (for weaving in ends)
- Scissors
- Stitch markers
- Small buttons (3–5)
- Measuring tape or ruler
📐 Gauge and Sizing
This cardigan is designed for 0–6 months, with adjustments possible for other sizes.
Gauge (in fan pattern):
- 4” x 4” = approx. 18 sts x 10 rows
Finished Measurements (approx. for 0–6 months):
- Chest circumference: 18 inches
- Length from shoulder: 9 inches
- Sleeve length: 6.5 inches
🧶 Understanding the Fan Stitch
Before diving into the cardigan construction, let’s break down the fan stitch:
Basic Fan Stitch:
Fan = 5 dc in the same stitch or space
To work across a row:
*Skip 2 sts, 5 dc in next st, skip 2 sts, sc in next st* – repeat
The fan stitch creates an airy and wavy texture, giving the cardigan its signature charm.
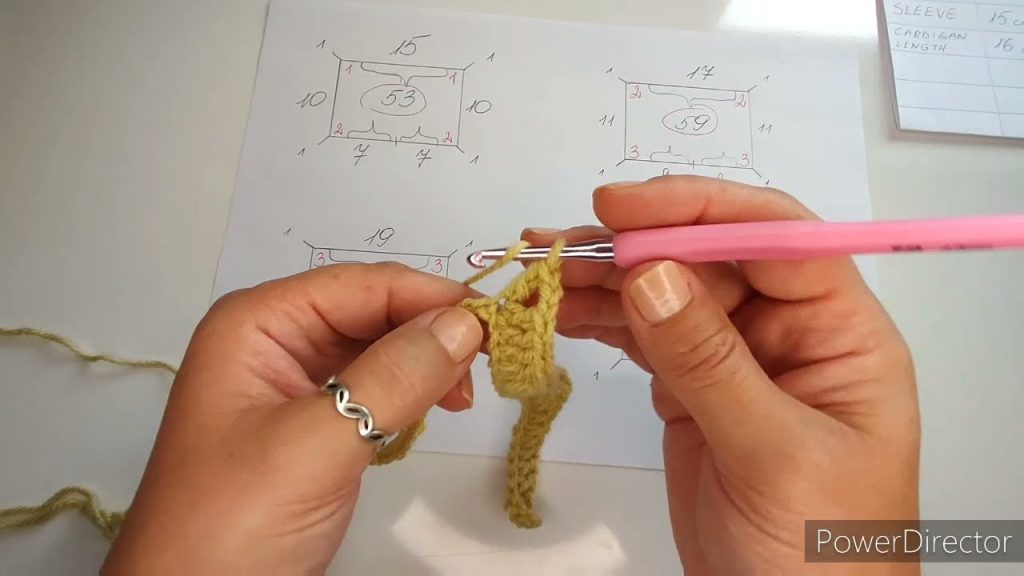
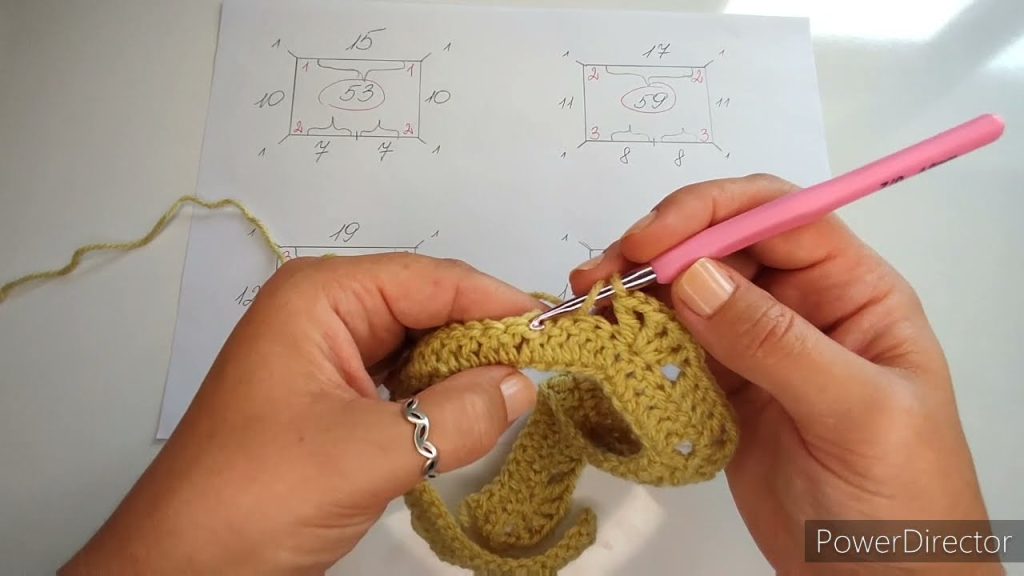
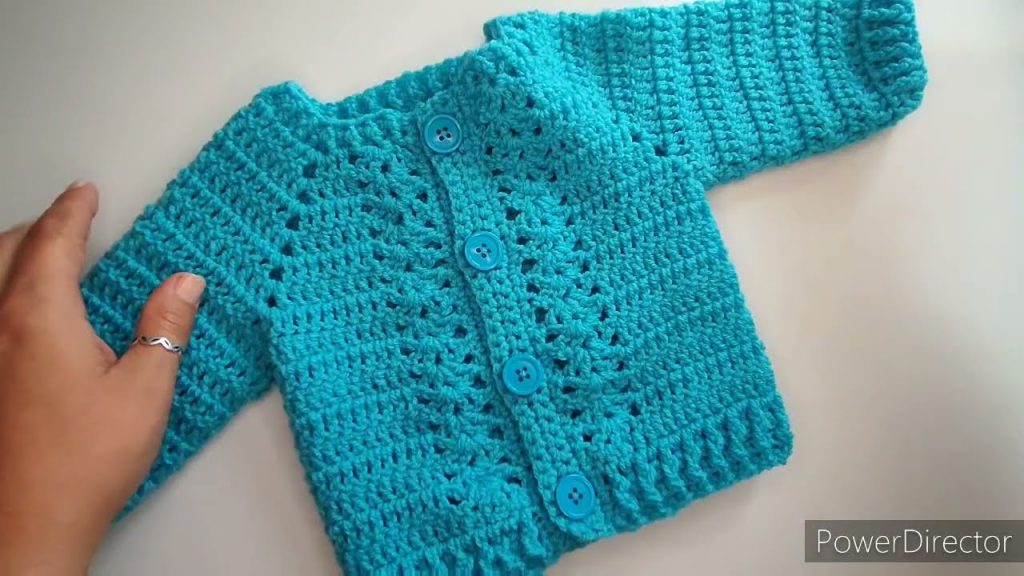
👶 Pattern: Charming Baby Fan Cardigan (0–6 Months)
This pattern uses top-down raglan construction, worked in one piece with sleeves added afterward.
🧵 Step 1: Yoke (Top of the Cardigan)
Foundation Chain:
Ch 60 (for newborn–6 months)
Row 1:
Dc in 4th ch from hook and in each ch across. (57 dc)
Row 2:
Ch 3 (counts as dc), dc in next 7 sts, [dc, ch 1, dc] in next st (place marker),
dc in next 10 sts, [dc, ch 1, dc] in next st (marker),
dc in next 13 sts, [dc, ch 1, dc] in next st (marker),
dc in next 10 sts, [dc, ch 1, dc] in next st (marker),
dc to end.
Rows 3–10 (Increase Rows):
Repeat Row 2 pattern: dc in each st, placing [dc, ch 1, dc] in each marked ch-1 space. Move markers as needed.
After Row 10, you should have a well-shaped yoke with sleeve sections forming.
🧵 Step 2: Divide for Sleeves
Row 11:
Work dc across to 1st ch-1 space, dc in ch-1 space, skip stitches between 1st and 2nd ch-1 spaces (sleeve),
dc in next ch-1 space, continue across back, repeat for other sleeve.
You should now have a body-only section with armholes created.
🧵 Step 3: Body with Fan Pattern
Row 12 (Start Fan Pattern):
Ch 1, sc in first dc, skip 2 sts, 5 dc in next st (fan made), skip 2 sts, sc in next st — repeat across.
Row 13:
Ch 3 (counts as dc), 2 dc in same st, skip 2 dc, sc in 3rd dc of fan, skip 2 dc, 5 dc in next sc — repeat.
Rows 14–24 (or desired length):
Repeat Row 13 to continue fan pattern.
Final Row:
To give a clean edge, sc evenly across, adding a shell border if desired.
Fasten off and weave in ends.
🧵 Step 4: Sleeves
Join yarn at armhole.
Round 1:
Sc evenly around the sleeve edge (30–34 sts), join with sl st.
Rounds 2–8:
Work in fan pattern or simple dc for a solid sleeve.
Optional: Work sc or shell edging for a cuffed sleeve.
Repeat for the second sleeve.
🧵 Step 5: Button Band and Neckline Finishing
Front Button Band:
Join yarn at bottom edge of one front panel.
Row 1:
Sc evenly up edge, placing one sc per row end.
(Place stitch markers where you want buttons or buttonholes.)
Row 2 (Buttonholes):
Sc across, working ch 2, skip 2 sts where buttons go.
Repeat Row 3:
Sc in each st and ch.
Do the same for the opposite panel (no buttonholes), then finish the neckline with a round of sc for a polished look.
🧷 Customizations & Variations
✨ Change the Yarn Color:
Use soft pastels, neutrals, or self-striping yarn for added charm.
✨ Add a Collar:
Work 2–3 rows of fan stitches along the neckline to create a dainty collar.
✨ Add Embellishments:
- Crochet flowers or bows
- Ribbon woven through the yoke
- Embroidered initials or motifs
👕 Styling & Gifting Ideas
This fan-pattern baby cardigan is perfect for:
- Baby showers
- Newborn photo shoots
- First birthdays
- Everyday layering in spring or autumn
Pair it with:
- Soft knit leggings or bloomers
- Cotton dresses
- Booties and matching hat
🧼 Washing & Care Tips
- Hand wash or gentle machine wash in cold water
- Use baby-friendly detergent
- Lay flat to dry
- Store folded (not hung) to avoid stretching

🪡 Conclusion
Crocheting a charming baby cardigan with the fan stitch pattern is both enjoyable and rewarding. The finished piece is not only adorable but also practical — offering comfort, warmth, and handmade love for the little one who wears it. With endless options to customize and embellish, this cardigan can easily become a family heirloom or a treasured gift.
So grab your hook and yarn, and create a beautiful fan-stitch cardigan that will be cherished for years to come.
Video tutorial:


