
There’s something incredibly heartwarming about dressing a little one in something you made yourself. And when it comes to baby fashion, nothing says “special” like a crocheted princess baby dress. Soft, delicate, and dreamy—this is a keepsake piece that’s perfect for birthdays, christenings, or baby showers.
In this article, you’ll learn everything you need to crochet a princess baby dress, from tools and materials to a complete step-by-step tutorial.
✨ What Makes It a “Princess Dress”?
A princess-style baby dress is typically:
- Fluffy or flowy at the skirt
- Features lace or shell stitch patterns
- Has a fitted bodice
- Embellished with ribbons, bows, or pearls
- Made in soft pastel colors (e.g., baby pink, lavender, ivory)
🧶 Materials Needed
| Item | Description |
|---|---|
| Yarn | Light (DK) or Sport-weight yarn, soft acrylic or cotton blend |
| Hook | 3.5 mm or 4.0 mm crochet hook |
| Buttons | Small decorative buttons for back closure |
| Ribbon (optional) | Satin ribbon for waist or shoulder detail |
| Stitch markers | To mark increases or stitch counts |
| Tapestry needle | For weaving in ends |
| Scissors | For cutting yarn |
Recommended yarn: Baby Soft DK yarn (approx. 300–500 yards depending on size)
📐 Sizes (0–3, 3–6, 6–12 months)
Here’s a general sizing guide:
| Size | Chest Circumference | Dress Length |
|---|---|---|
| 0–3 months | 16 in (41 cm) | 12 in (30 cm) |
| 3–6 months | 17 in (43 cm) | 13 in (33 cm) |
| 6–12 months | 18 in (46 cm) | 15 in (38 cm) |
Always check your gauge and measure as you go.
🪡 Stitches Used (US Terms)
- ch – chain
- sc – single crochet
- dc – double crochet
- sl st – slip stitch
- shell – 5 dc in the same stitch
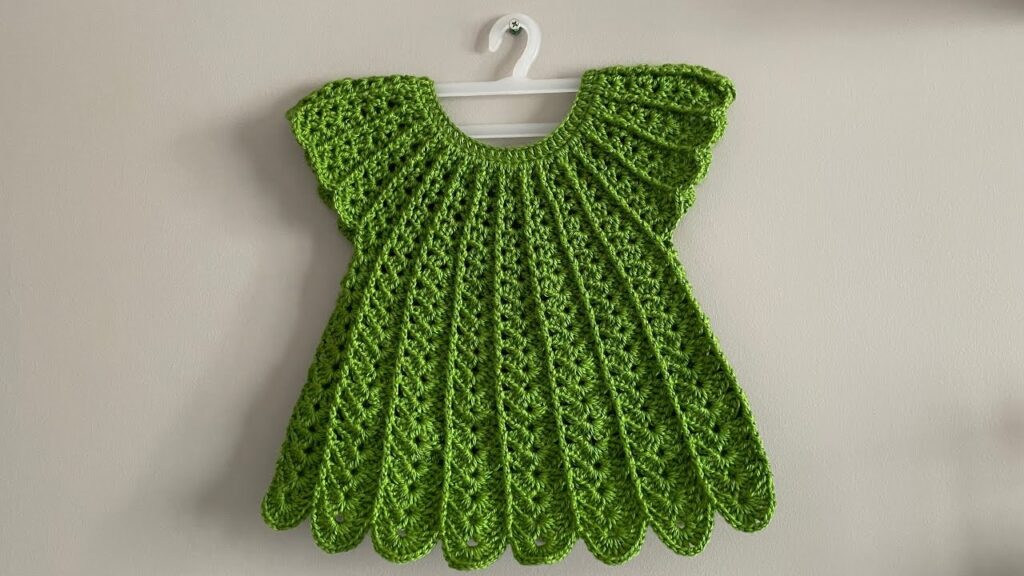
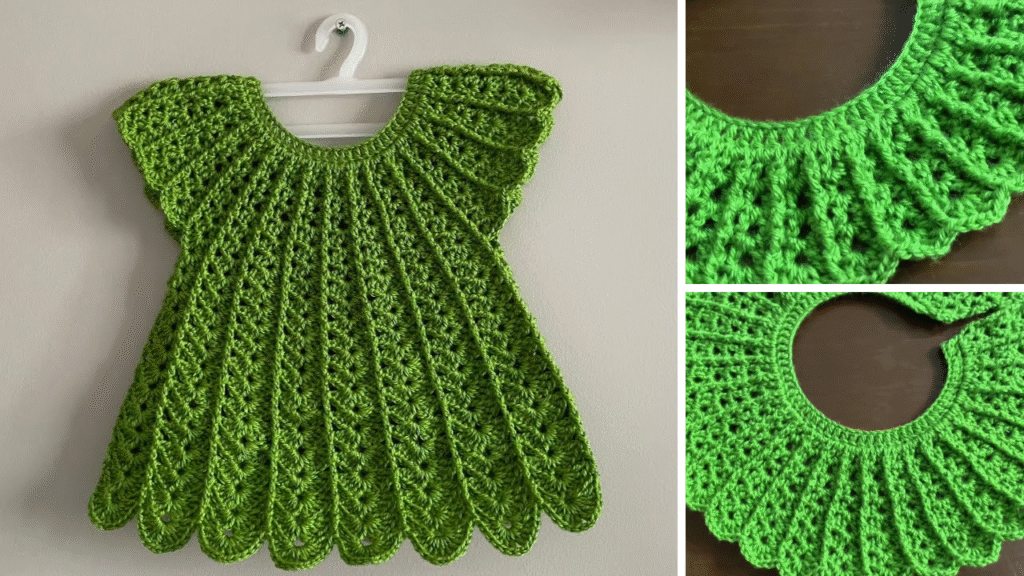
🧵 Step-by-Step Tutorial: Princess Baby Dress
We’ll make a top-down yoke dress with a flared shell-stitch skirt.
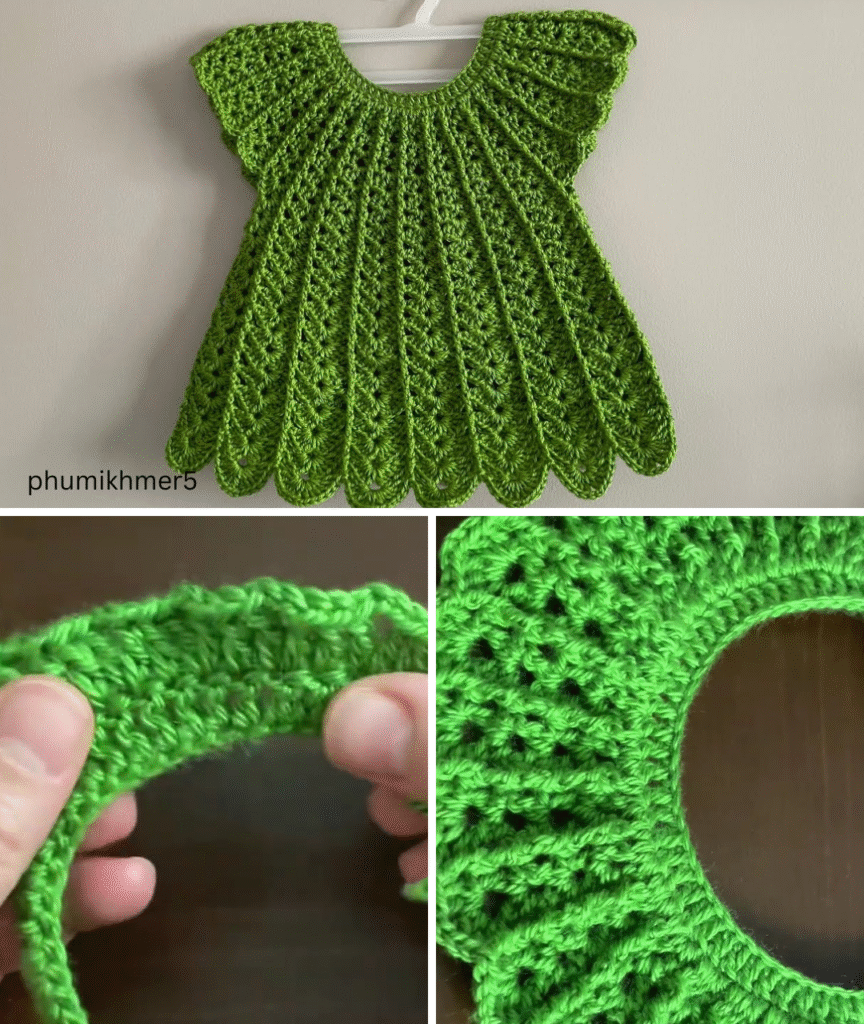
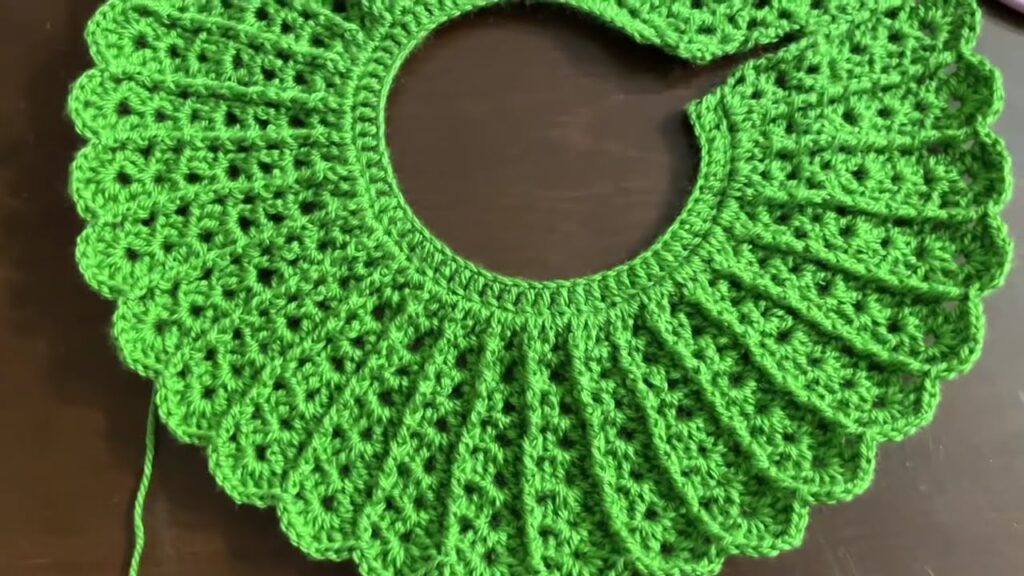
🧁 Step 1: Crochet the Yoke (Bodice)
- Foundation Chain: Ch 52 (adjust based on your size).
- Row 1: Dc in 4th ch from hook and each across. Turn.
- Row 2–6: Ch 2, dc across (increase 4 stitches evenly each row for slight shoulder shaping).
Mark stitches at the shoulder points for armholes.
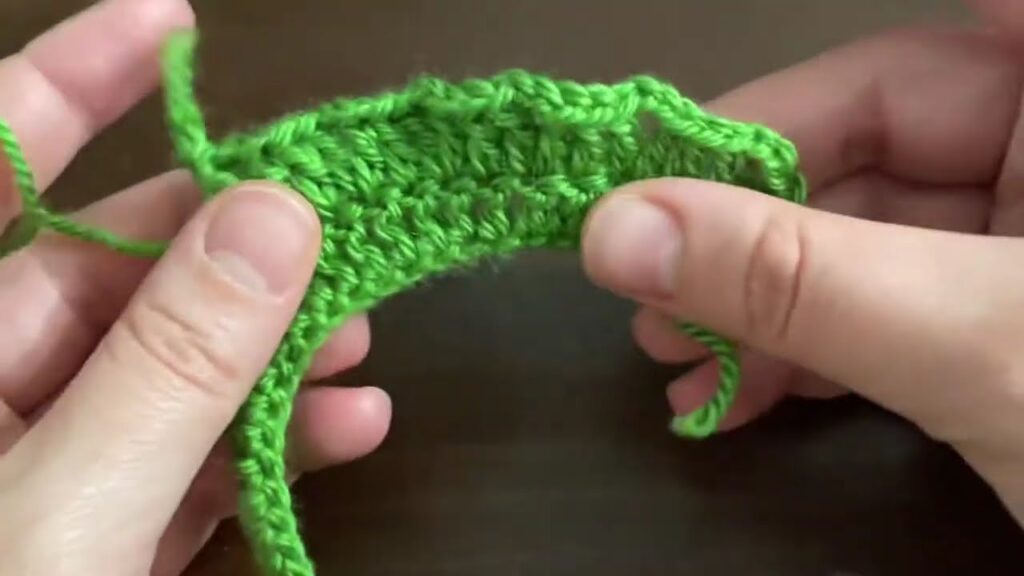
🎀 Step 2: Shape the Armholes
- Row 7:
- Dc across until the first marker.
- Skip the stitches for the first sleeve.
- Chain 6, continue dc across back.
- Skip second sleeve area, chain 6, dc to end.
You now have a front + back connected, and the armholes are created!
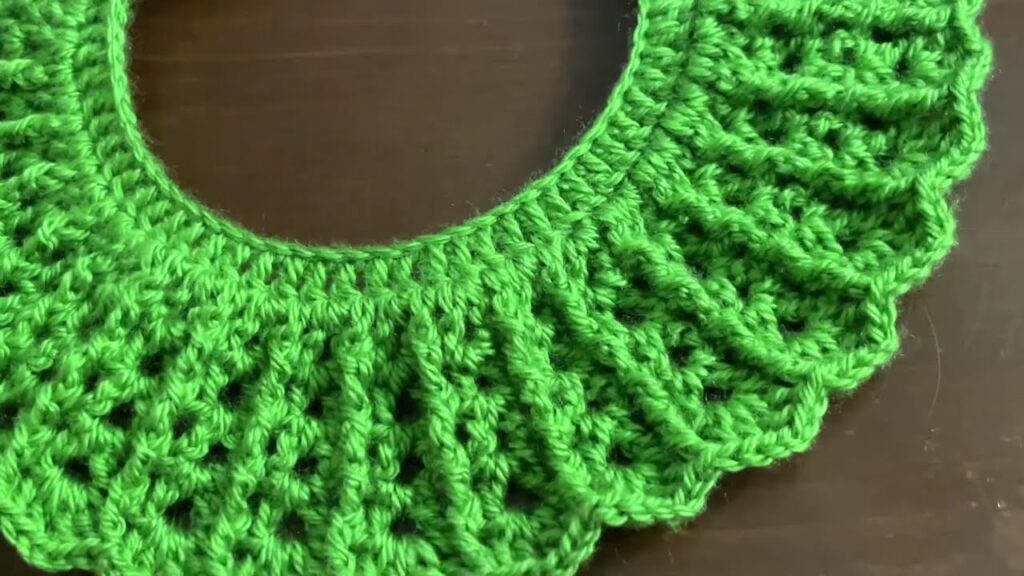
👗 Step 3: Begin the Skirt
- Round 1:
- Join yarn at bottom of bodice.
- Ch 3 (counts as dc), 1 dc in same space.
- Skip 1, 2 dc in next stitch — repeat around.
- Join with sl st.
- Round 2–20 (or desired length):
- Switch to shell stitch:
- Skip 2, 5 dc in next, skip 2, sl st — repeat around.
- Continue until skirt reaches desired length.
- Switch to shell stitch:
You can add more rows for a fuller, longer princess look.
🎀 Step 4: Add Finishing Touches
- Neckline & Armholes:
- Sc around the neckline and armholes for a clean finish.
- Back Closure:
- Leave a 3–4 stitch slit at the back.
- Add 1–2 small buttons and crochet loops for closure.
- Ribbon Waistband (Optional):
- Weave a satin ribbon through the first row of skirt stitches.
- Tie into a bow at the front or back.
- Edge Trim:
- Add a picot or scalloped edge at the skirt hem.
🌸 Optional Embellishments
- Sew on tiny faux pearls or flowers
- Add crochet rose appliqués to the bodice
- Use sparkle yarn for a magical touch
🧼 Step 5: Block the Dress
Gently soak the finished dress in lukewarm water with baby-friendly detergent. Lay flat to dry and shape, especially the skirt edges, to bring out the lace detail.
👶 When to Gift or Use It?
This dress is perfect for:
- Baby photoshoots
- Christenings or baptisms
- First birthdays
- Holiday outfits
- Baby shower gifts
🧵 Final Tips
- Always check gauge before starting.
- Use baby-safe yarns—soft and washable.
- Don’t skip the blocking step—it adds polish.
- Mix and match stitch patterns like pineapple lace, fan stitches, or V-stitches to customize.
Video tutorial:


