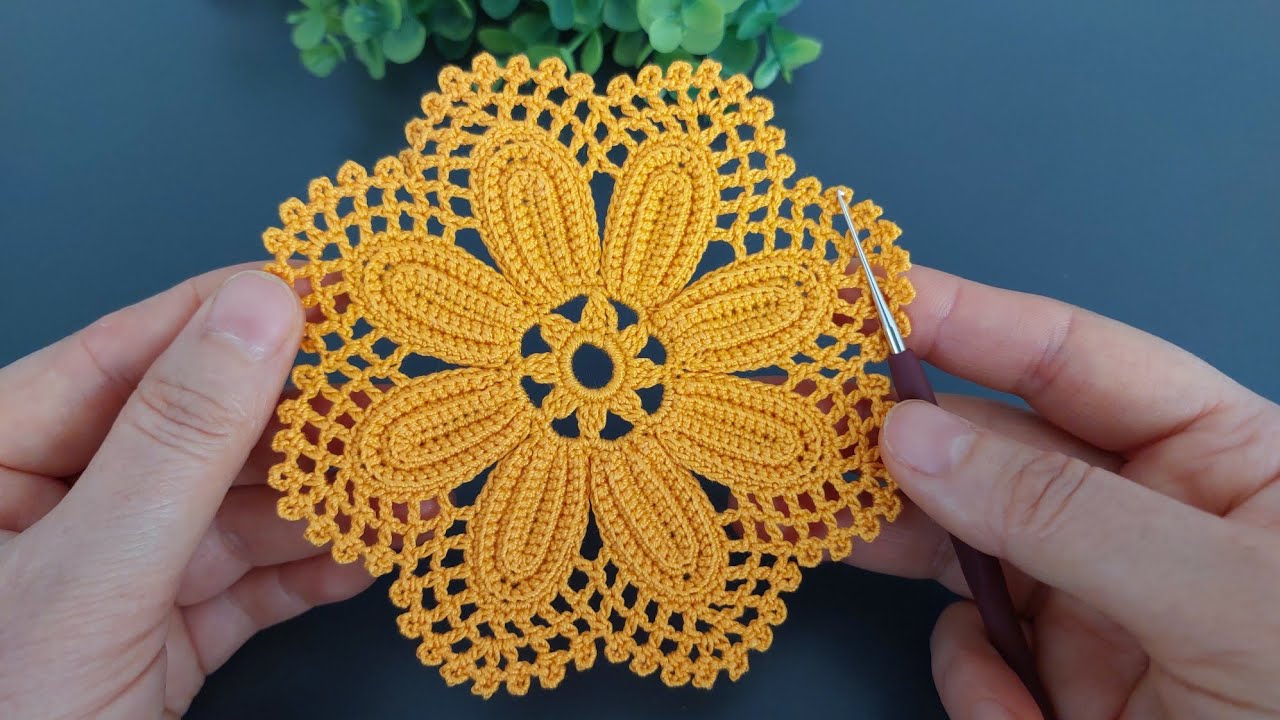
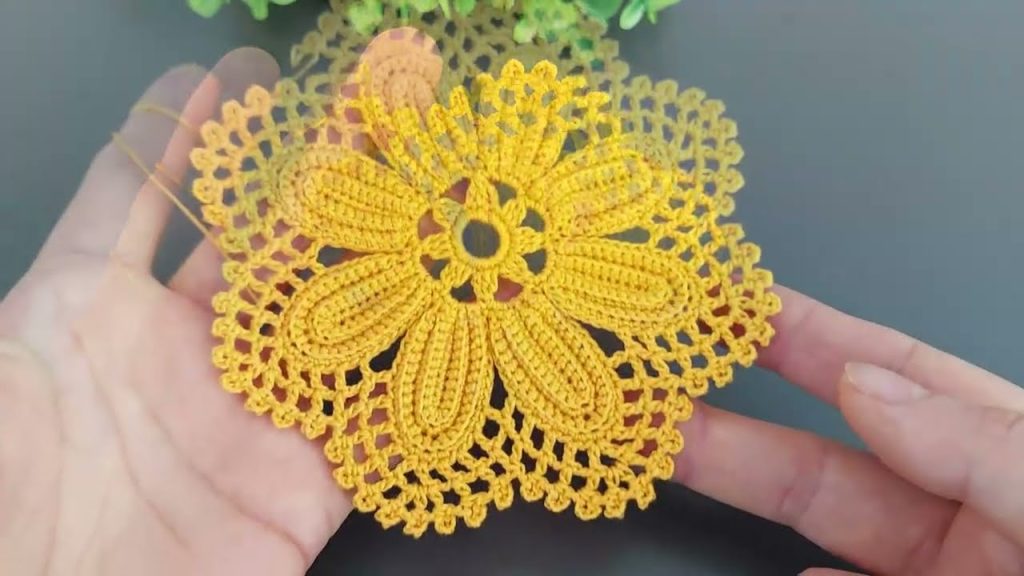
Inspired by the breathtaking lacework shown in the tutorial Beautiful Crochet Flower Doily Tutorial | Easy Lace Motif for Beginners | Crochet Home Decor by Knitting Love, this pattern scales that delicate floral motif into a substantial, stunning circular throw or large decorative tablecloth/mandala rug. The Rose Bloom Mandala features a layered floral center that radiates into intricate lacy shell and trellis work, making it a true statement piece for any home.
This pattern is written for a large 48-inch (4-foot) diameter circular throw.

📋 Project Details & Materials
| Item | Detail | Notes |
| Project | Rose Bloom Mandala Throw | Circular; Approx. 48 inches (122 cm) diameter. |
| Skill Level | Intermediate | Requires attention to detailed shell, picot, and chain counting. |
| Yarn | Worsted Weight (Category 4) or Bulky (Category 5) for a rug/throw. | Use soft acrylic or cotton for a throw, or a durable cotton blend for a floor mandala. Approx. 2000 – 2500 yards. |
| Hook | 6.0 mm (J/10) or size needed to achieve a soft, flexible drape. | Adjust hook size based on yarn weight to meet your gauge/drape preference. |
| Notions | Stitch markers (to mark rounds/repeats), Tapestry needle, Scissors. |
Gauge
Gauge is important for size and flatness.
- After Round 8, the motif should measure approximately 7.5 inches (19 cm) in diameter.
- Stitches should be worked loosely enough to maintain drape, but tightly enough to hold shape.
📚 Abbreviations (US Crochet Terms)
| Abbreviation | Meaning |
| Ch | Chain |
| St(s) | Stitch(es) |
| SC | Single Crochet |
| DC | Double Crochet |
| Tr | Treble Crochet |
| Sl St | Slip Stitch |
| Sp | Space |
| Sk | Skip |
| Beg | Beginning |
✨ Special Stitches
| Stitch Name | Abbreviation | Instruction |
| Picot | Picot | Ch 3, Sl St back into the first chain. |
| Small Shell (SS) | SS | (DC, Ch 1, DC) into the designated space. |
| Large Shell (LS) | LS | (2 DC, Ch 2, 2 DC) into the designated space. |
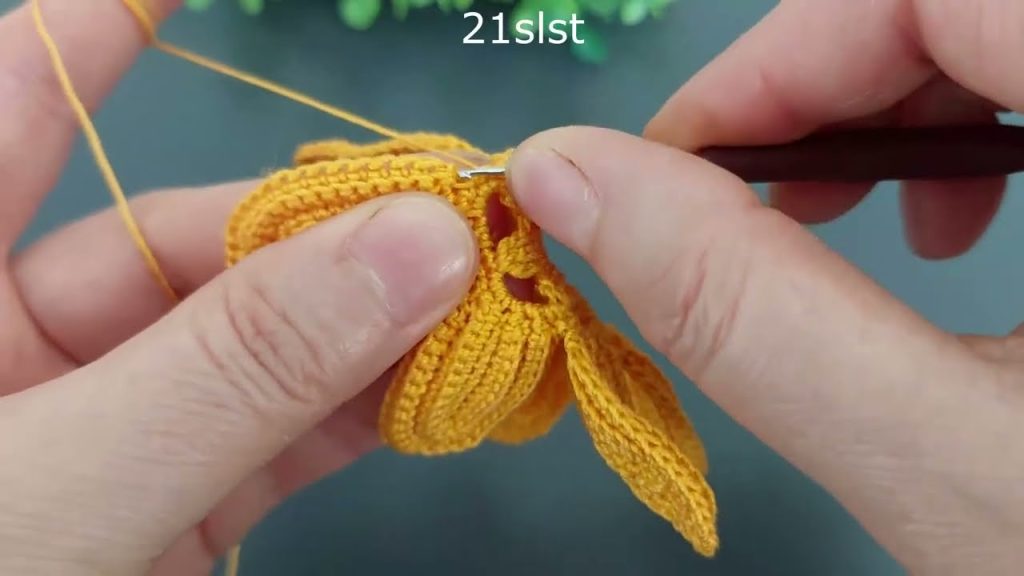
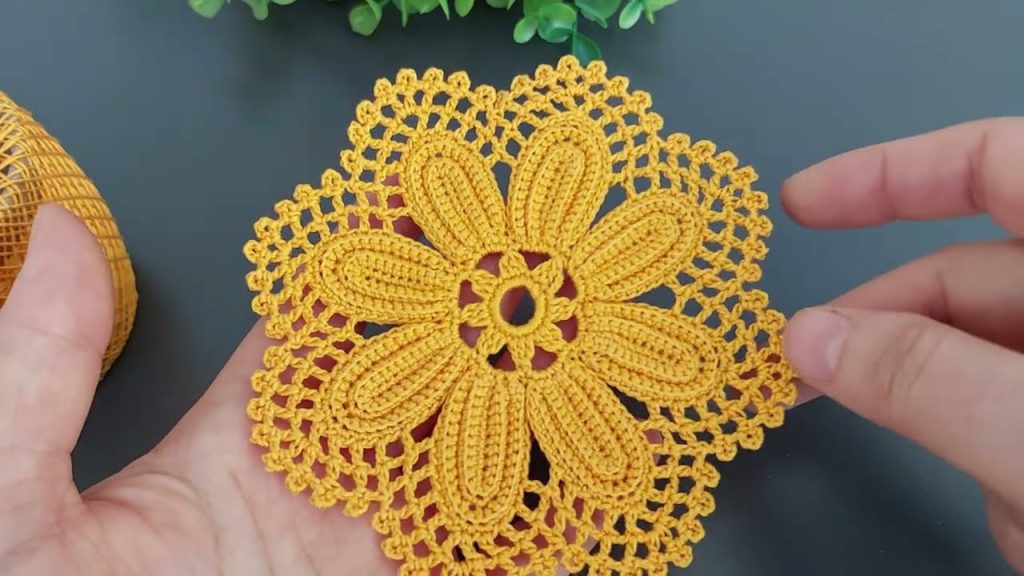
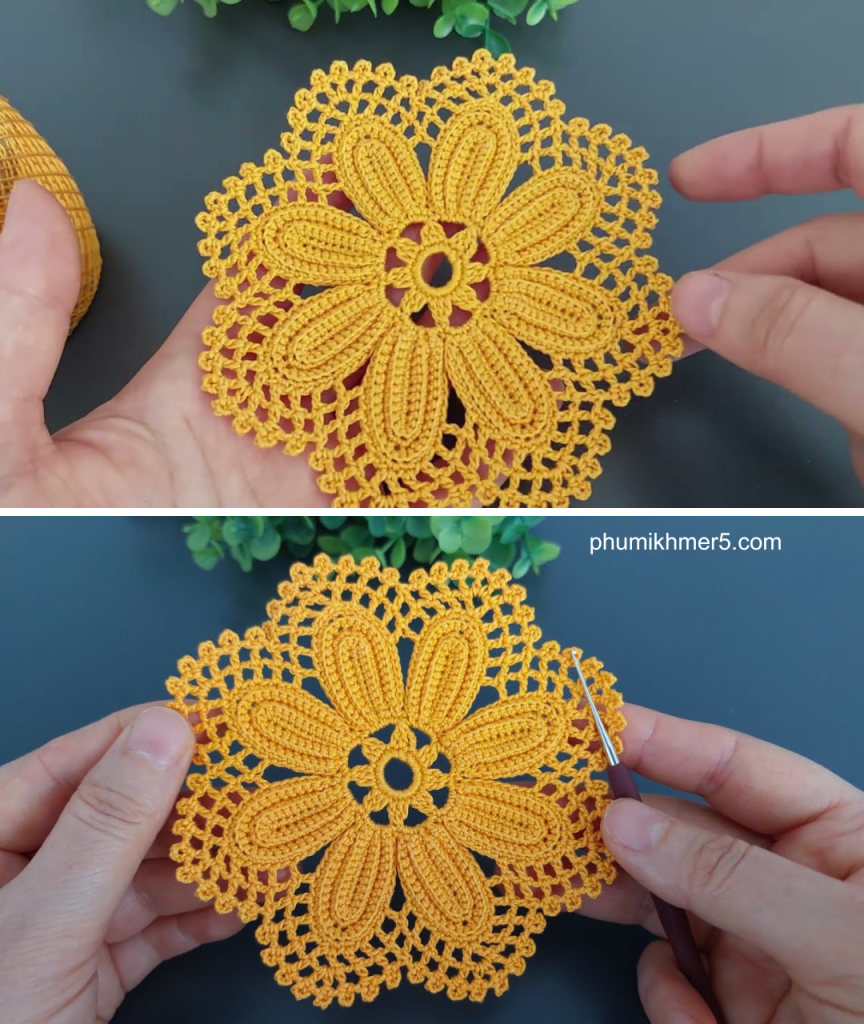
Part 1: The Rose Bloom Center
The throw begins identically to the doily, building a sturdy, layered floral base.
Foundation: Magic Ring (or Ch 4, Sl St to form a ring).
Round 1 (Petal Base): Ch 3 (counts as 1st DC). 11 DC into the ring. Sl St to the top of the Beg Ch 3 to join. (12 DC)
Round 2 (Spoke/Chain Setup): Ch 1 (does not count as st). SC in the same St. *Ch 3, Sk 1 DC, SC in the next DC. Rep from * 5 more times. Ch 3, Sl St to the Beg SC to join. (6 Ch-3 loops)
Round 3 (Large Petal Shells): Sl St into the first Ch-3 Sp. Ch 3 (counts as 1st DC), (3 DC, Ch 2, 4 DC) into the same Ch-3 Sp. *Sk next SC, (4 DC, Ch 2, 4 DC) into the next Ch-3 Sp. Rep from * 4 more times. Sl St to the top of the Beg Ch 3 to join. (6 large shells of 8 DC each)
Round 4 (Trellis Foundation): Ch 1. SC in the same st and in the next 3 DC. *Work (SC, Ch 3, SC) into the Ch-2 Sp of the shell. SC in the next 4 DC. Ch 2, Sk 2 DC of the next shell. Rep from * 5 times. Sl St to the Beg SC.
Round 5 (Picot Layer): Sl St into the next SC until you reach the corner Ch-3 Sp. Ch 1. SC in the corner Ch-3 Sp. *Ch 5, SC in the 3rd DC of the next 4-DC group. Picot in the next SC. Rep from * around, working SC in the corner Ch-3 Sp. Sl St to the Beg SC.
Round 6 (Flower Reinforcement): Ch 4 (counts as 1st DC and Ch 1). DC in the same SC. *Ch 3, SC into the Picot. Ch 3, DC in the next SC. Ch 1, DC in the same SC (forms a V-Stitch base). Rep from * around, ending with Ch 3, SC in the last Picot, Ch 3, Sl St to the 3rd Ch of the Beg Ch 4.
Round 7 (Large Lace Shells): Sl St into the Ch-1 Sp. Ch 3 (counts as 1st DC). Work LS (2 DC, Ch 2, 2 DC) into the Ch-1 Sp. *Ch 3, SC in the next SC. Ch 3, work LS into the next Ch-1 Sp. Rep from * around. Sl St to the top of the Beg Ch 3. (6 LS motifs)
Round 8 (Arc Expansion): Ch 1. SC in the same St. SC in the next 2 DC. Work (SC, Ch 3, SC) into the Ch-2 Sp of the LS. SC in the next 3 DC. *Ch 4, SC in the next SC. Ch 4, SC in the next 3 DC. Work (SC, Ch 3, SC) into the Ch-2 Sp of the LS. Rep from * around. Sl St to the Beg SC.
Part 2: Mandala Expansion (Achieving 48-inch Diameter)
We now transition to larger, spaced-out repeats to increase the diameter quickly and maintain the flat circular shape.
Round 9 (Large Arc & Shell Foundation): Sl St to the corner Ch-3 Sp. Ch 3. Work LS (2 DC, Ch 2, 2 DC) into the Ch-3 Sp. *Ch 5, SC in the center of the next Ch-4 Sp. Ch 5, work LS into the next Ch-3 Sp. Rep from * around. Sl St to the top of the Beg Ch 3. (6 LS motifs and 12 Ch-5 arcs)
Round 10 (Expanding Shells): Ch 1. SC in the same St. SC in the next 2 DC. Work (SC, Ch 5, SC) into the Ch-2 Sp of the LS. SC in the next 3 DC. *Ch 4, SC in the center of the next Ch-5 Sp. Ch 4, SC in the center of the next Ch-5 Sp. Ch 4, SC in the next 3 DC. Work (SC, Ch 5, SC) into the Ch-2 Sp of the LS. Rep from * around. Sl St to the Beg SC.
Round 11 (Double Shells): Sl St into the corner Ch-5 Sp. Ch 3. Work LS (2 DC, Ch 2, 2 DC) into the Ch-5 Sp. Ch 3. *SC in the center of the next Ch-4 Sp. Ch 3. Work LS into the next Ch-5 Sp. Ch 3. SC in the center of the next Ch-4 Sp. Ch 3. Work LS into the next Ch-5 Sp. Rep from * around. Sl St to the top of the Beg Ch 3. (12 LS motifs)
Round 12 (Trellis Repeat): Ch 1. SC in the first 3 DC. Work (SC, Ch 5, SC) into the Ch-2 Sp. SC in the next 3 DC. *Ch 3, SC in the next SC. Ch 3, SC in the next 3 DC. Work (SC, Ch 5, SC) into the Ch-2 Sp. SC in the next 3 DC. Rep from * around. Sl St to the Beg SC.
Round 13 (Picot Edging II): Sl St to the center of the next Ch-5 Sp. Ch 1. SC in the same Sp. *Ch 7, SC in the next Ch-3 Sp. Ch 7, SC in the next Ch-3 Sp. Ch 7, SC in the next Ch-5 Sp. Rep from * around, ending with Ch 7, Sl St to the Beg SC.
Round 14 (V-Stitch Mesh): Sl St into the Ch-7 Sp. Ch 4 (counts as DC, Ch 1). DC in the same Sp (SS). *Ch 3, Sk next SC, SS into the next Ch-7 Sp. Rep from * around, ending with Ch 3, Sl St to the 3rd Ch of the Beg Ch 4.
Round 15 (Increasing Shells): Sl St into the Ch-1 Sp. Ch 3. Work LS into the Ch-1 Sp. *Ch 2, LS into the next Ch-1 Sp. Rep from * around. Sl St to the top of the Beg Ch 3.
(Continue this pattern of increasing the chain count between shells and working SC/Trellis rows to achieve the full 48-inch size. Repeat the principles of Rounds 10-15, increasing Ch counts by 1 or 2 every few rounds to prevent cupping.)
Part 3: Final Border and Finishing
Once the throw reaches your desired diameter (approx. 48 inches), work a final border to stabilize the edge.
(Assuming you end on a Shell Row equivalent to Round 15):
Final Round 1 (SC Stabilizer): Ch 1, SC in the same St and in each DC, Ch, and Sp around the perimeter. Work 3 SC in each corner (Ch-2 Sp) of the LS shells. Sl St to the Beg SC.
Final Round 2 (Picot Scallop): Ch 1, SC in the first 3 Sts. *Sk 3 SC, work (2 DC, Picot, 2 DC) into the next SC. Sk 3 SC, SC in the next SC. Rep from * around for a continuous scallop edge.
Finishing:
- Fasten off and weave in all ends securely.
- Heavy Blocking is Mandatory: Pin the mandala throw firmly to a blocking board or mat, pulling gently to open up all the lace loops and arcs. Dampen thoroughly or steam block. Allow to dry completely before removing the pins. This step ensures the mandala lies perfectly flat and the lace patterns are defined.
Your elegant Rose Bloom Mandala Throw is complete!
Video tutorial: