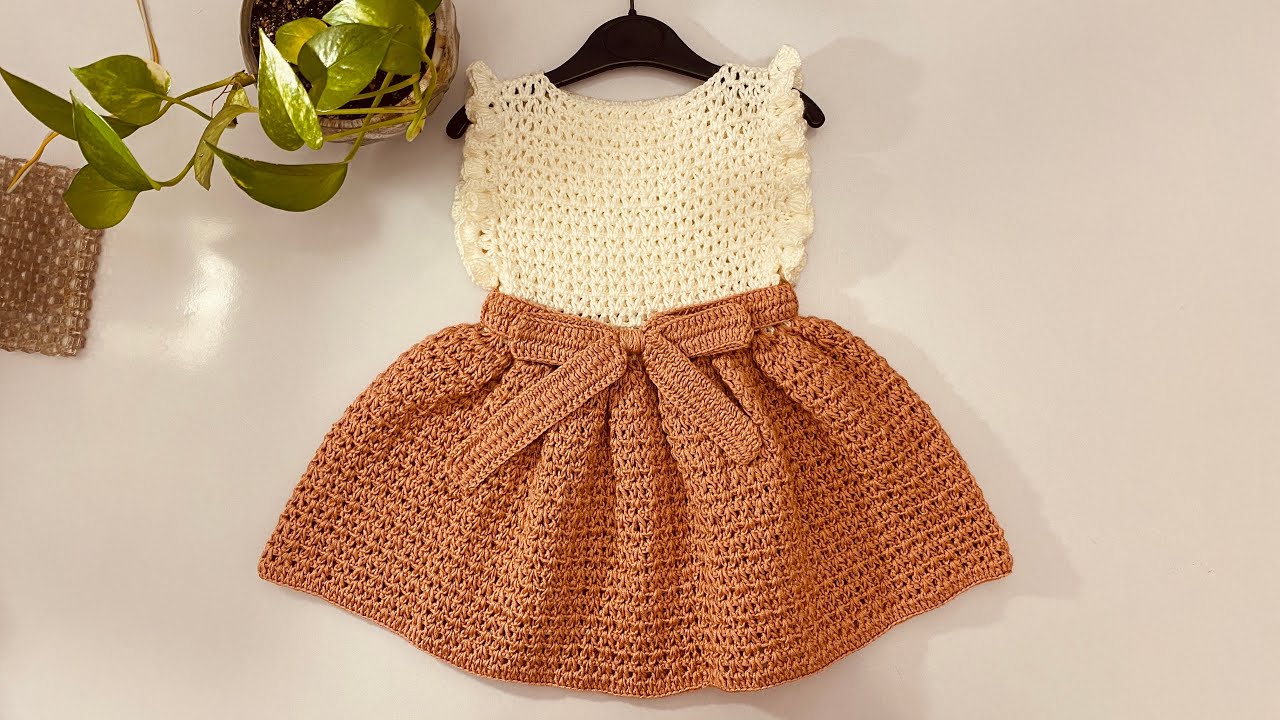
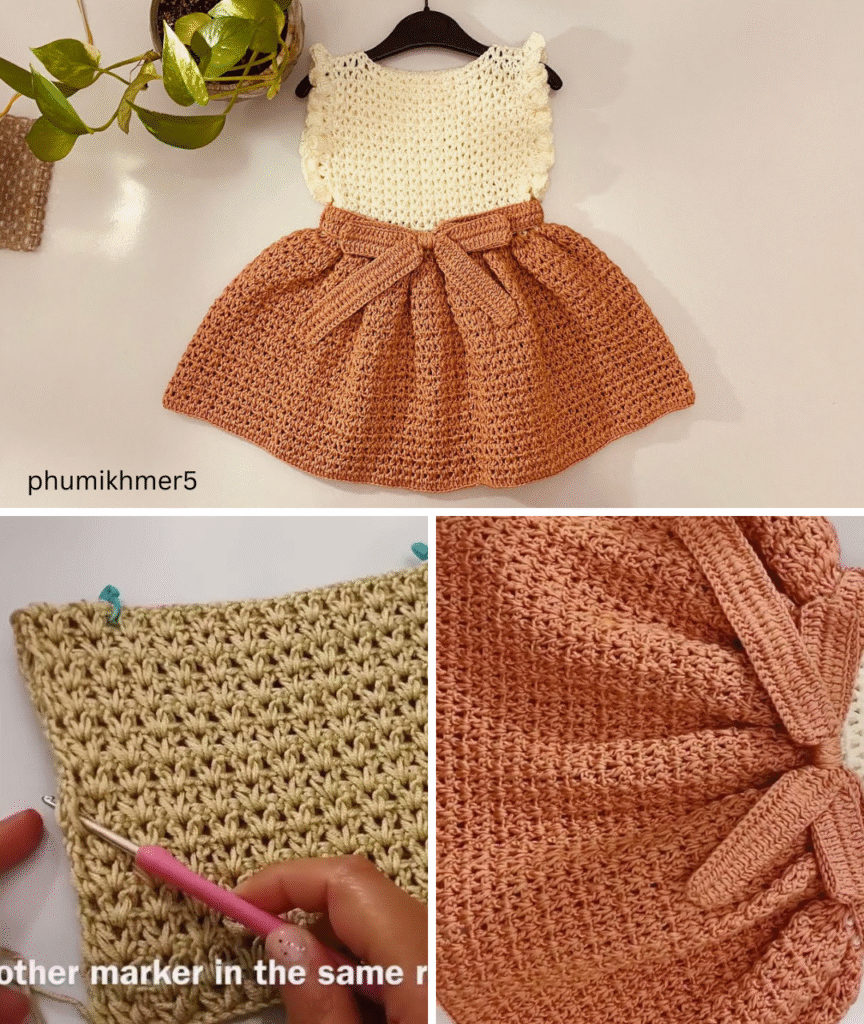
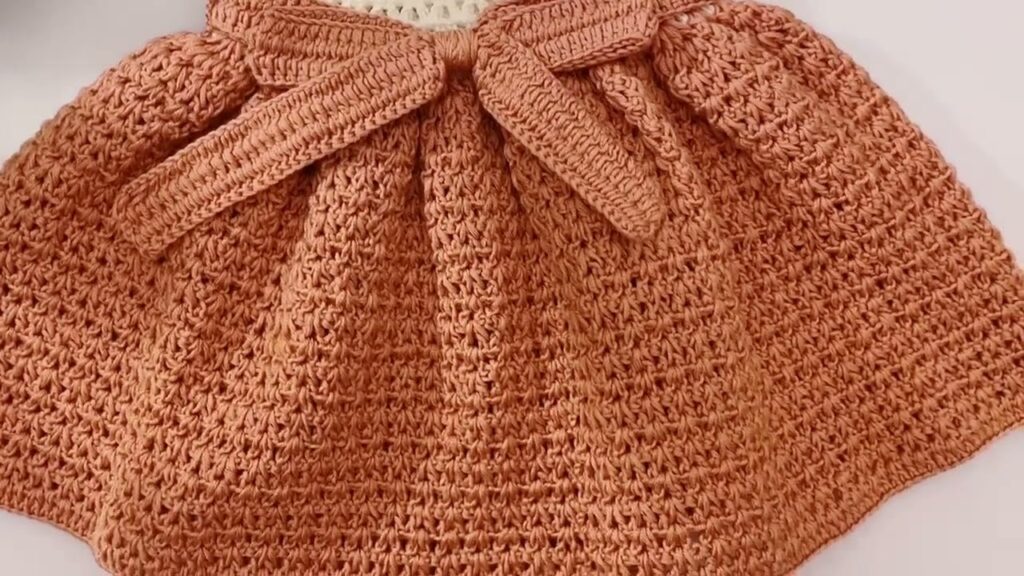
Crocheting your own clothing is a deeply rewarding skill, and few garments are as satisfying to create as a dress. A simple and elegant crochet dress is a versatile piece you can wear casually or dress up for special occasions. Whether you’re a confident beginner or an experienced crocheter looking for a stylish project, this guide will walk you through the process of making your own beautiful crochet dress from scratch.

✨ What Makes a Dress “Simple and Elegant”?
Before diving into the steps, let’s define what we mean by a simple and elegant crochet dress:
- Simple: Clean lines, minimal shaping, basic stitches (e.g., single, half double, double crochet).
- Elegant: Fitted or slightly flared silhouette, lightweight yarns, neutral or soft colors, and delicate stitch patterns like shells, lace, or mesh.
🪡 Simple & Elegant Crochet Dress – Step-by-Step DIY Tutorial
✅ Project Overview
- Skill level: Confident beginner
- Style: Sleeveless, A-line dress with a round neckline
- Construction: Top-down, seamless, worked in the round
- Stitches used: Chain (ch), Double Crochet (dc), Slip Stitch (sl st)
🧶 Materials Needed
| Item | Description |
|---|---|
| Yarn | 1000–1500 yards of DK-weight cotton or bamboo yarn |
| Crochet hook | 4.0 mm (adjust based on gauge) |
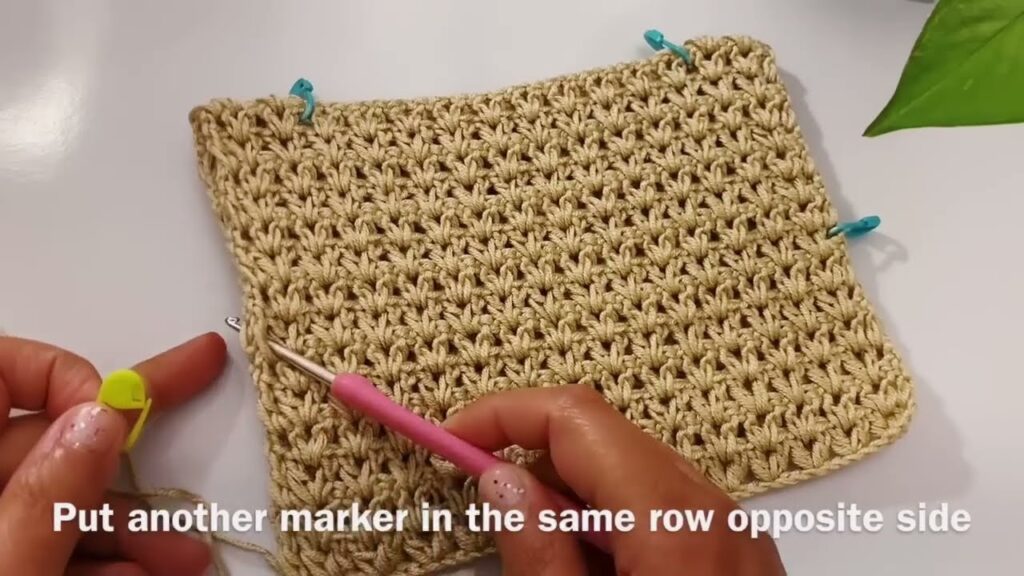
| Stitch markers | To mark raglan points and rounds |
| Tapestry needle | For weaving in ends |
| Measuring tape | To ensure proper fit |
| Scissors | To trim yarn |
📏 Step 1: Take Your Measurements
You’ll need:
- Bust circumference
- Waist circumference
- Hips
- Length from shoulder to hem
- Armhole depth (for sleeveless or sleeves)
Write these down—you’ll refer to them to adjust your dress as you go.
🔁 Step 2: Start the Neckline (Foundation)
- Make a foundation chain long enough to fit around your neck loosely. Example: 80–100 chains.
- Join in a round with a slip stitch (be careful not to twist the chain).
- Round 1: Ch 2 (counts as dc), dc in each chain around. Join with sl st.
🔲 Step 3: Crochet the Yoke (Top to Underarm)
This creates the rounded shoulder area using raglan-style increases.
You’ll place 4 stitch markers for raglan corners.
- Divide your stitches into:
- Front
- Back
- Right sleeve
- Left sleeve
Example for 100 stitches:
- 25 front, 25 back, 25 each sleeve, with markers placed before and after each sleeve section.
- Yoke Rounds:
- Ch 2, dc to first marker, (dc, ch 1, dc) in marked stitch (this increases).
- Repeat for all 4 markers.
- Continue in rounds, increasing at the 4 marked points every other round for 10–14 rounds, or until your yoke reaches just under the arm.
Tip: Try it on or measure from shoulder to underarm (~6–8″).
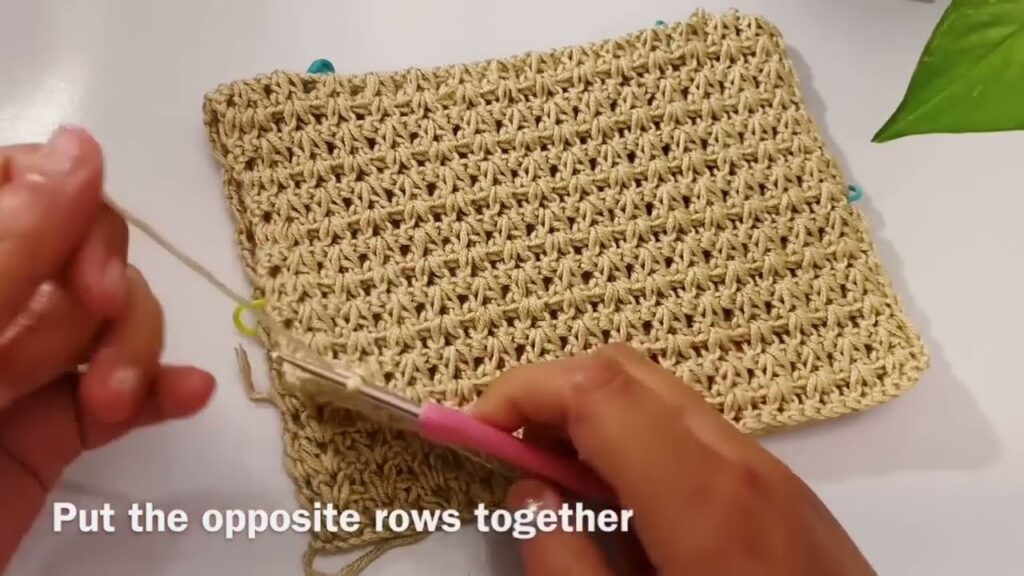
🪡 Step 4: Split for Body and Sleeves
- Skip sleeve stitches and work only on front + back to form the dress body.
- Ch 4–6 under each arm for the underarm gap.
- Join front and back in the round.
Now you’re crocheting just the body of the dress in the round!
👗 Step 5: Work the Dress Body
- Continue in double crochet rounds.
- For an A-line shape (slightly flared):
- Increase 2 stitches every 4–5 rounds on each side.
- Optional:
- Switch to a decorative stitch (like shell or mesh) after the waist.
Try it on often! Stop when the dress reaches your desired length (e.g., knee, midi, maxi).
✨ Step 6: Add Finishing Touches
- Edging: Add a shell stitch hem (5 dc in one stitch, skip 2, sl st to next) or picot edging.
- Neckline: You can crochet a simple border (sc or crab stitch) around the neckline.
- Optional Sleeves: Attach yarn at armhole and work dc or mesh rounds for cap sleeves or elbow-length.
🧼 Step 7: Block the Dress
To even out stitches and soften the fabric:
- Soak the dress in lukewarm water with mild soap.
- Gently squeeze water out (don’t wring).
- Lay flat on a towel or mat and pin to shape.
- Let dry completely.
🎉 You Did It!
You now have a gorgeous, handmade crochet dress that’s:
- Elegant in design
- Breathable and wearable
- One-of-a-kind!
👚 Need Customizations?
- Add a belt: Crochet a long chain, add tassels or beads.
- Lining: Sew or wear a slip underneath for sheer styles.
- Add buttons or a zipper if you want a tighter fit or adjustable closure.
📷 Inspiration and Styling
- Pair your dress with a slip or lining if desired.
- Accessorize with a belt, jewelry, or sandals.
- Try contrasting yarn for stripes or borders.
🧵 Conclusion
Crocheting a simple and elegant dress is a wonderful way to express your style and craftsmanship. By using lightweight yarns, flattering silhouettes, and soft textures, you can create a timeless piece that fits like a dream and feels luxurious. With a bit of planning and creativity, your handmade dress can easily become the most loved item in your wardrobe.
Video tutorial:


