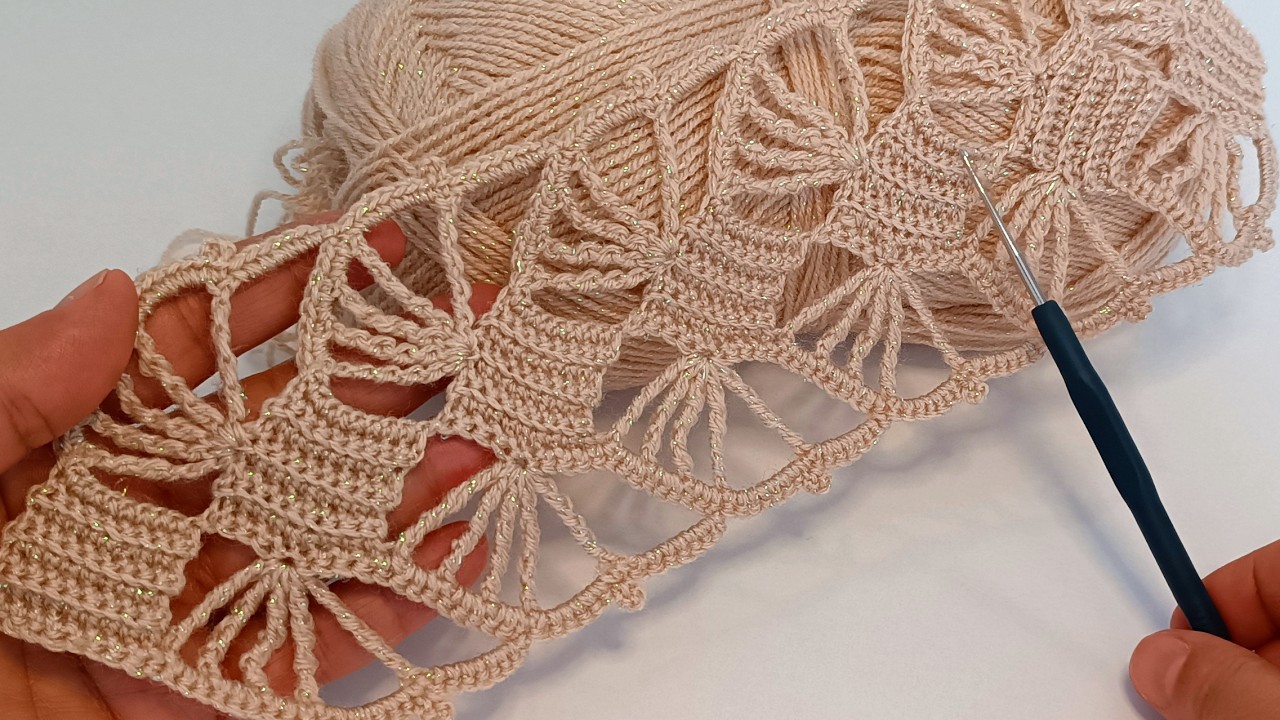
Inspired by the stunning technique showcased in the tutorial “A Crochet Strip Revolution! Magical Touches for Shawls and Blouses!” by Crochet Knitting Sort, this pattern introduces a seamless way to create intricate lace. Unlike traditional motifs that require tedious weaving of ends, this “Tape Lace” or “Ribbon Crochet” technique allows you to create a continuous, flowing garland of delicate flowers and fans without ever cutting your yarn.
This lace is the perfect “magical touch” for the hem of a bohemian blouse, the border of a bridal shawl, or even as a standalone headband or bookmark.

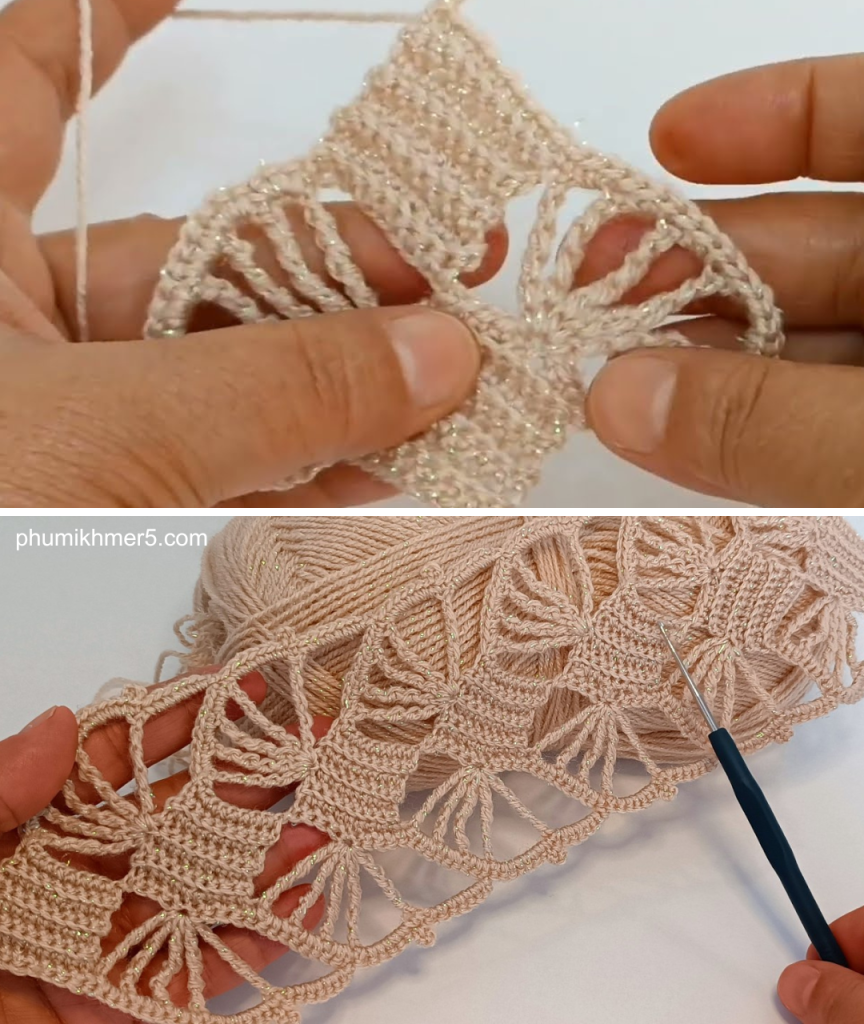
📋 Project Details & Materials
| Item | Detail | Notes |
| Project | The Ethereal Garland Tape | A continuous lace strip of any length. |
| Skill Level | Intermediate | Requires focus on “Join-as-you-go” placement. |
| Yarn | Lace Weight (Category 0) or Fingering (Category 1) | Mercerized cotton provides the best stitch definition. |
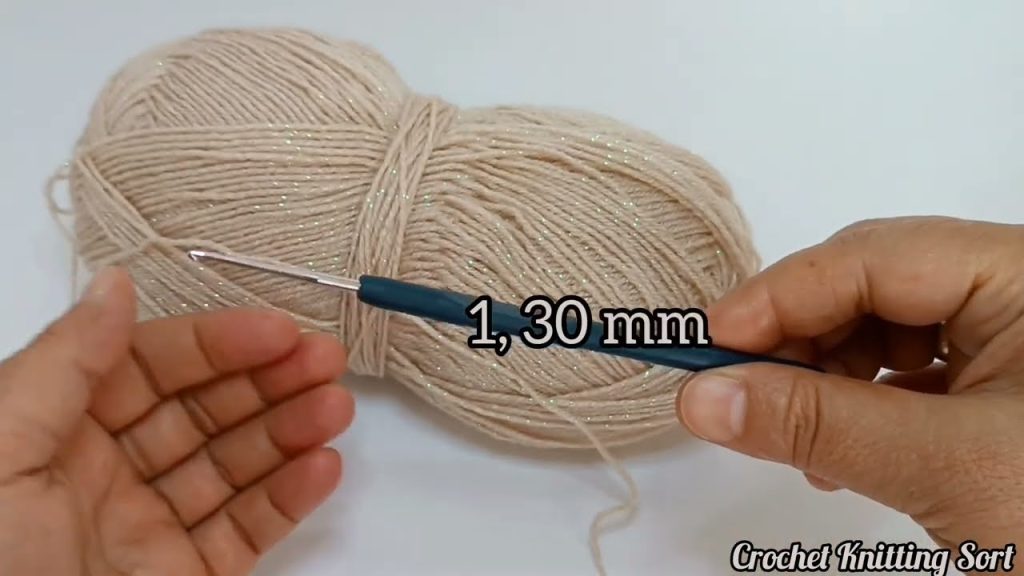
| Hook | 2.0 mm or 2.5 mm | Use a smaller hook to keep the lace crisp and structural. |
| Notions | Tapestry needle, Scissors, Blocking pins. | Essential for “opening” the lace loops. |
Gauge
One completed “Link” or motif segment should measure approximately 1.75 inches wide. Length is determined by your number of repeats.
📚 Abbreviations (US Crochet Terms)
| Abbreviation | Meaning |
| Ch | Chain |
| SC | Single Crochet |
| DC | Double Crochet |
| Tr | Treble Crochet |
| Sl St | Slip Stitch |
| Sp | Space |
| Sk | Skip |
| Picot | Ch 3, Sl St into the first chain. |
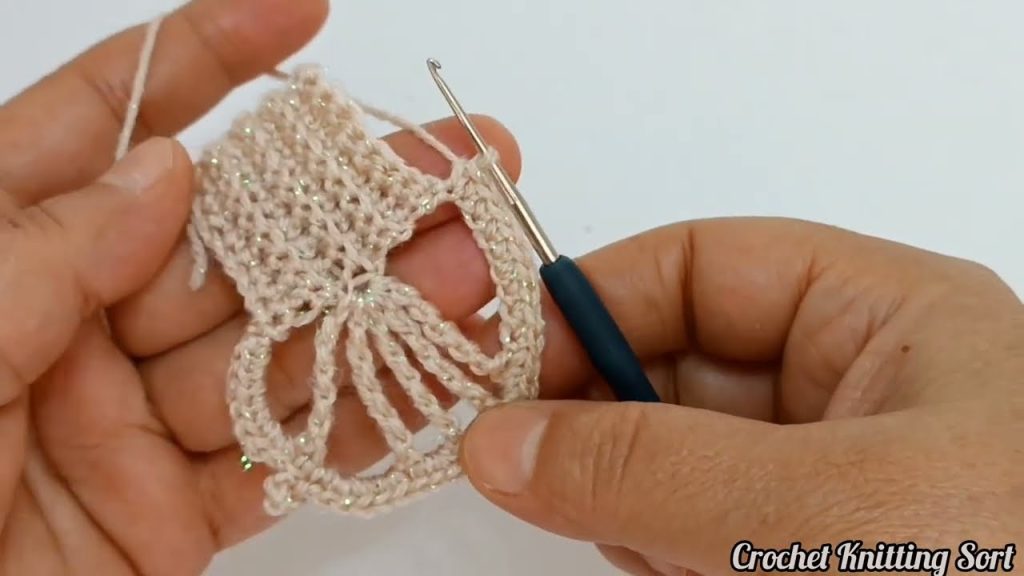
Part 1: The First Link (The Foundation)
Every revolution starts with a single step. For this tape, the first link sets the stage for the entire strip.
Foundation: Ch 8. Sl st to the first chain to form a ring.
Row 1: Ch 4 (counts as 1st Tr). Work 17 Tr into the ring. Sl st to the top of the Beg Ch-4 to join. (18 Tr)
Row 2 (The Scalloped Edge): 1. Ch 6 (counts as DC + Ch 3).
2. *Sk 1 Tr, DC in the next St. Ch 3.
3. Rep from * around. Sl st to the 3rd Ch of the Beg Ch-6 to join. (9 Ch-3 loops)
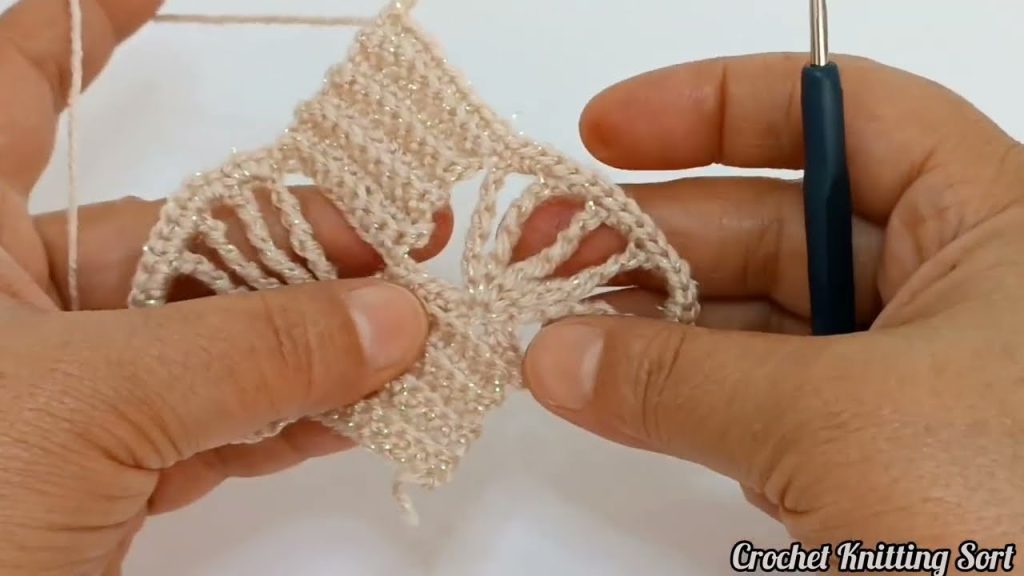
Row 3 (Decorative Picots): 1. Sl st into the first Ch-3 Sp. Ch 1, SC in the same Sp.
2. Work (2 DC, Picot, 2 DC) in the same Sp. SC in the same Sp.
3. *Sk next DC, work (SC, 2 DC, Picot, 2 DC, SC) in the next Ch-3 Sp.
4. Rep from * only 4 times. (You should have 5 petals completed, leaving 4 loops unworked for the transition).
Part 2: The Continuous Transition (The “Revolution”)
Here is where the magic happens! Instead of finishing the motif, we chain out to create the next one.
The Bridge: 1. Ch 10.
2. Sl st into the 8th Ch from the hook to create a new foundation ring. (This leaves 2 chains as a “bridge” between motifs).
The Second Link (Repeat):
- Row 1: Work 18 Tr into this new ring. (Note: On the 9th Tr, Sl st into the center of the 3rd petal of the previous link to join them).
- Row 2: Work the Ch-3 loop row as established in the first link.
- Row 3: Work the Picot petals around. Again, only work 5 petals, leaving the rest open to transition to the third link.
Repeat: Continue this process until your strip is as long as you desire.
Part 3: The Return Pass (Completing the Garland)
Once your tape is at the desired length, you must work back down the “open” side of the motifs to finish the circle.
- At the final link, work the Picot petals around all remaining Ch-3 loops.
- Traveling Back: Work (SC, 2 DC, Picot, 2 DC, SC) into the unworked loops of the previous link.
- SC into the “Bridge” chains between the motifs to keep the tape stable.
- Continue until you reach the very first link and complete its remaining petals. Sl st to the first SC to join.
💡 Creative Usage Ideas
- The Romantic Blouse: Sew this tape along the neckline or vertical button placket of a simple linen shirt to instantly elevate it to “designer” status.
- The Infinity Shawl: Create 10-12 long strips of this tape. Join them side-by-side using a simple Ch-3 mesh to create a full, lacy shawl fabric that looks like complex knitwear.
- Curtain Tie-Backs: Use a heavier weight cotton and a 3.5mm hook to create a chunky version of this lace for home decor.
🧼 Finishing & Blocking
Lace of this complexity must be blocked to show its true beauty.
- Submerge the finished tape in cool water with a drop of delicate wash.
- Lay flat on a towel and roll to remove excess moisture (do not wring!).
- Pin the tape to a blocking mat, pulling each Picot point out and pinning it down.
- Allow to dry completely. This “sets” the stitches and prevents the tape from curling.
Your Ethereal Garland Tape is now ready to add a revolution of style to your handmade wardrobe!
Video tutorial:


