
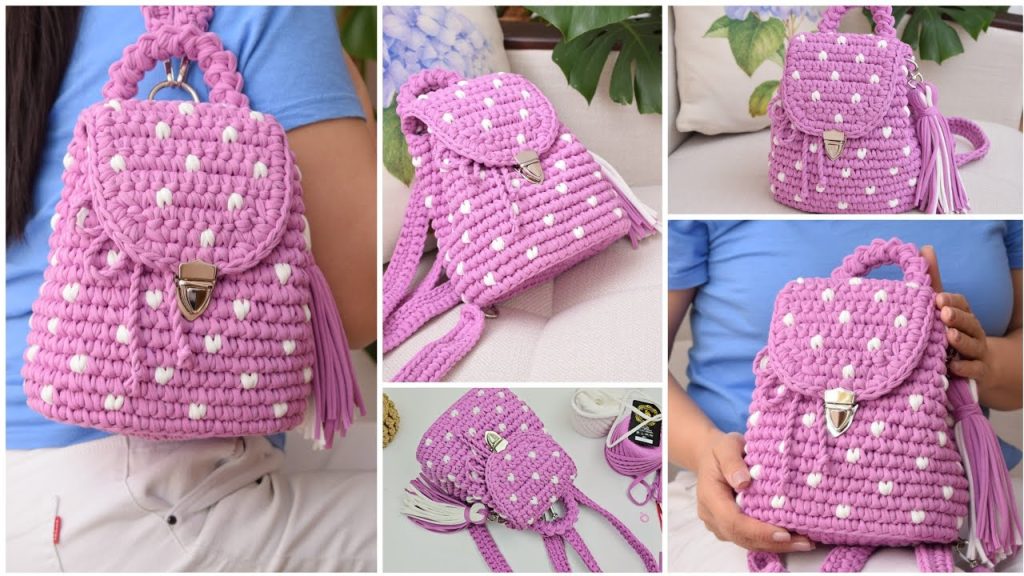
A handmade backpack is a beautiful and personal accessory for a day out, and one made with a unique, textured design is even better. The “Urban Explorer” Crochet Backpack is a perfect project for any crocheter, featuring a stunning, raised stitch that creates a durable and stylish bag. This detailed tutorial will guide you through creating a sturdy, functional backpack with a beautiful, tactile surface and a classic drawstring closure.
This project is an excellent choice for an intermediate crocheter or an adventurous beginner who wants to learn a new, impressive stitch. The repetitive pattern is easy to memorize once you get the hang of it, and the finished result is a sturdy, unique bag with a high-end, handcrafted feel.
Why Crochet the Urban Explorer Backpack?
- Unique 3D Texture: The raised stitch creates a captivating, tactile surface that sets this bag apart.
- Sturdy Construction: The dense nature of the stitch makes the bag strong and helps it hold its shape, making it perfect for carrying your essentials.
- Skill Building: Learn how to create a sturdy oval base, master a unique stitch pattern, and create a functional bag with a flap and straps.
- Impressive Look: The finished bag looks much more complicated than it actually is, making it a great conversation starter.
- Customizable: Easily change the size, colors, or add different hardware to make it your own.
1. Planning Your Backpack: Size & Materials
- Finished Size: The pattern is designed for a versatile backpack, approximately 10 inches (25 cm) in diameter at the base and 12 inches (30 cm) tall.
- Yarn Choice: Choose a yarn that is durable and has good stitch definition to make the 3D effect stand out.
- Fiber: A sturdy, thick yarn like T-shirt yarn or a strong macrame cord is highly recommended. This will give the bag its shape and durability.
- Weight: A chunky or super bulky weight yarn is ideal for this project.
- Color: A single, solid color will best highlight the raised texture of the pattern.
- Quantity: You will need approximately 400-500 yards (365-460 meters) of yarn.
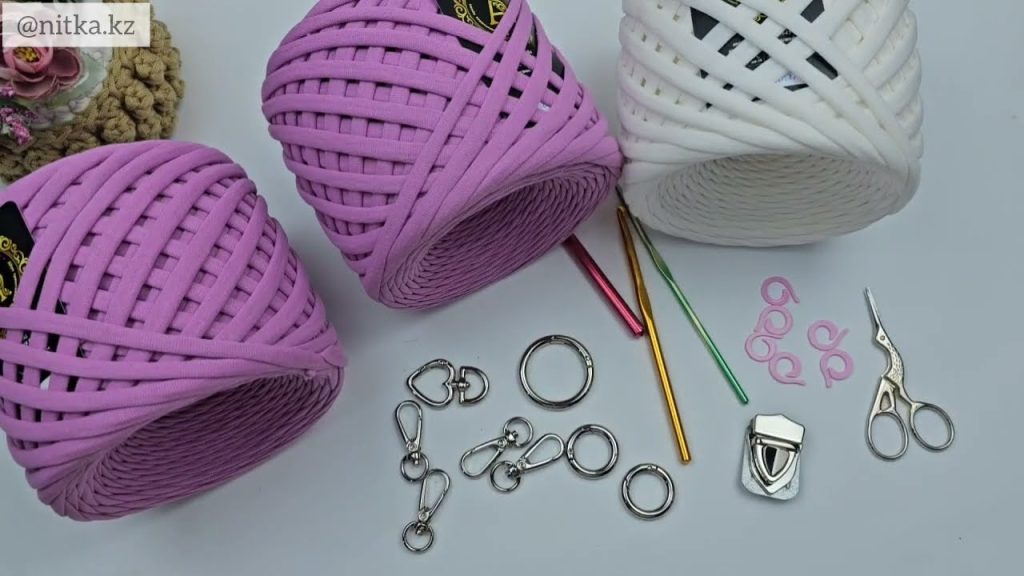
2. Materials You’ll Need
- Yarn: Your chosen quantity of a thick, sturdy yarn.
- Crochet Hook: 8.0 mm (L-11 US) or a hook size that gives you a dense but flexible fabric with your yarn.
- Scissors: For cutting yarn.
- Yarn Needle (Tapestry Needle): For weaving in ends.
- Stitch Markers (Optional): To mark the beginning of rounds and pattern repeats.
- Hardware (Optional): Two D-rings or rectangular rings for the straps.
3. Essential Crochet Stitches & Techniques
- Slip Knot
- Chain (ch)
- Slip Stitch (sl st): For joining and neatening.
- Single Crochet (sc)
- Half Double Crochet (hdc)
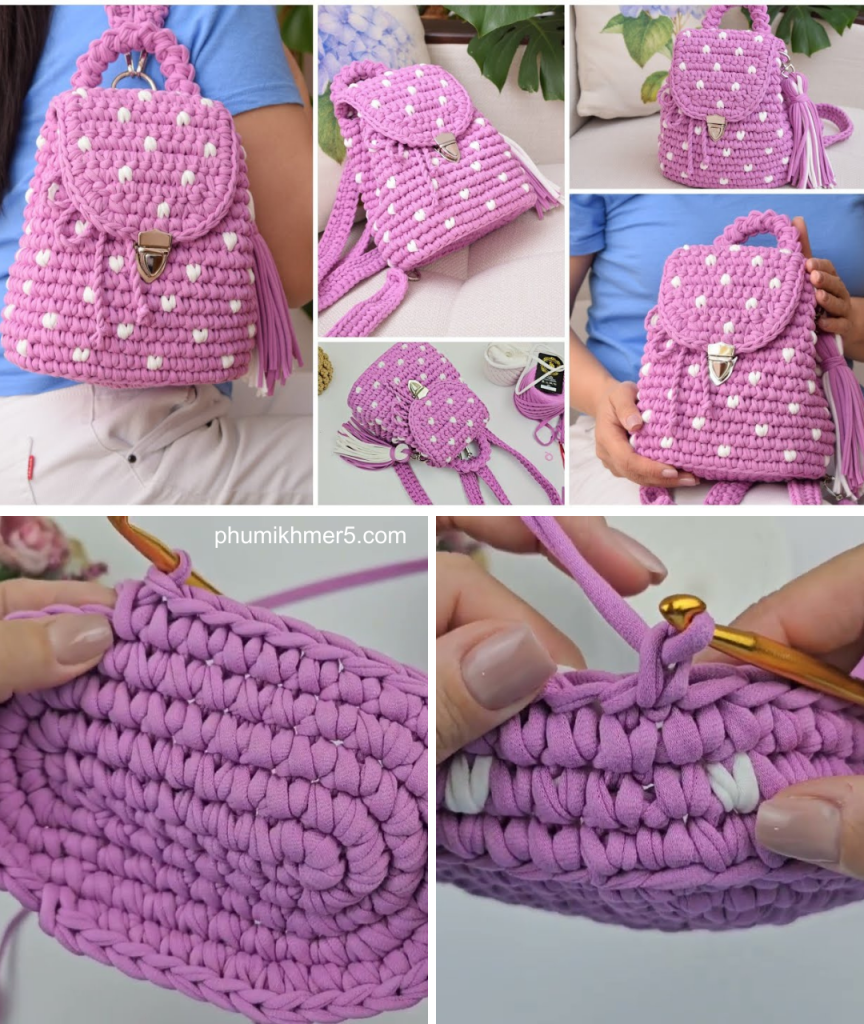
- Working in the Back Loop Only (BLO): This is a key technique for creating a sturdy edge.
- Modified Single Crochet: A simple, dense stitch to create a sturdy fabric.
4. Let’s Crochet the Urban Explorer Backpack!
We’ll start with the base, then work up the body, and finish with the top, straps, and flap.
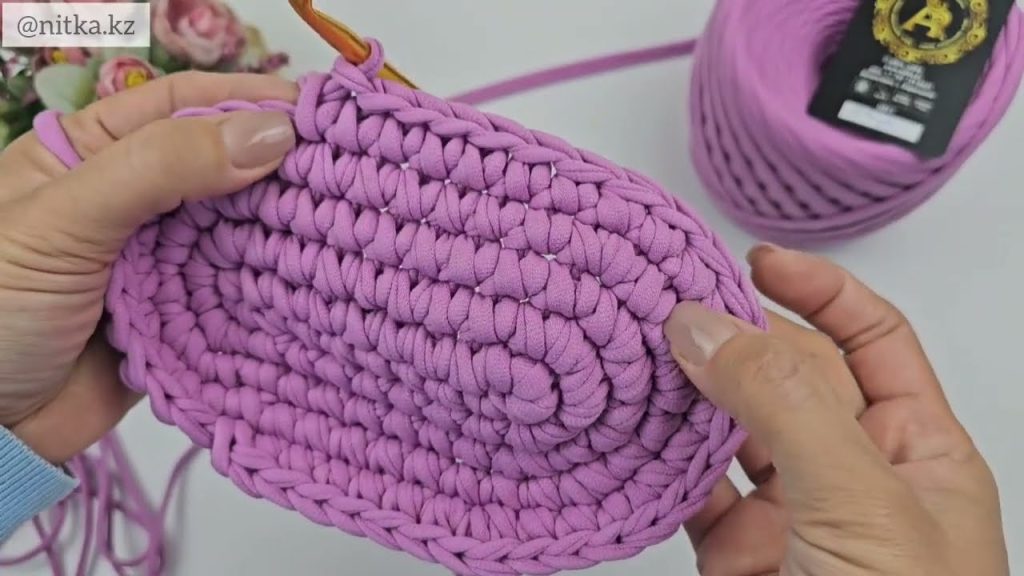
Part 1: The Base (Worked in Oval Rounds)
This creates a flat, sturdy foundation for your backpack.
- Foundation Chain: Ch 26.
- Round 1: Sc in the 2nd ch from hook. Sc in each of the next 23 chs. Work 3 sc in the last ch. Now, working on the opposite side of the foundation chain, sc in each of the next 24 stitches. Work 2 sc in the last stitch. Join with a sl st to the first sc of the round.
- [52 stitches]
- Round 2: Ch 1 (does not count as a stitch). Sc in each stitch around. Join with a sl st to the first sc of the round.
- The base should now be a nice, flat oval shape.
Part 2: The Body (Worked in Rounds)
This is where you’ll create the height and the beautiful texture of the bag.
- Round 1 (Defining the Edge): Ch 1 (does not count as a stitch). Sc in the back loop only (BLO) of each stitch around. Join with a sl st to the first sc.
- Working in the BLO creates a defined ridge, marking the transition from the base to the body of the bag.
- Rounds 2-20: Ch 1. Sc in each stitch around. Join with a sl st to the first sc of the round.
- Continue working these rounds until the backpack reaches your desired height (for this pattern, about 10-12 inches / 25-30 cm tall).
Part 3: The Backpack Straps
You will make two straps.
- Strap 1: Ch 5.
- Row 1: Sc in the 2nd ch from hook and in each ch across. Ch 1, turn.
- Rows 2-60: Sc in each stitch across. Ch 1, turn.
- Continue working these rows until the strap is your desired length. A standard length is around 24-26 inches (61-66 cm).
- Fasten off, leaving a long tail for sewing.
- Repeat for the second strap.
- Sew the straps to the base of the bag and to the back of the bag at the top.
Part 4: The Drawstring & Top Flap
- Top Flap: Ch 15. Sc in the 2nd ch from hook and in each ch across. Ch 1, turn.
- Rows 2-10: Sc in each stitch across. Ch 1, turn.
- Drawstring: Make a long chain (approximately 24 inches / 60 cm) and weave it through the top of the bag. Tie a knot at the end.
Enjoy your beautiful and unique “Urban Explorer” Crochet Backpack. Its elegant design and handmade charm are sure to be a conversation starter!
Video tutorial:


