
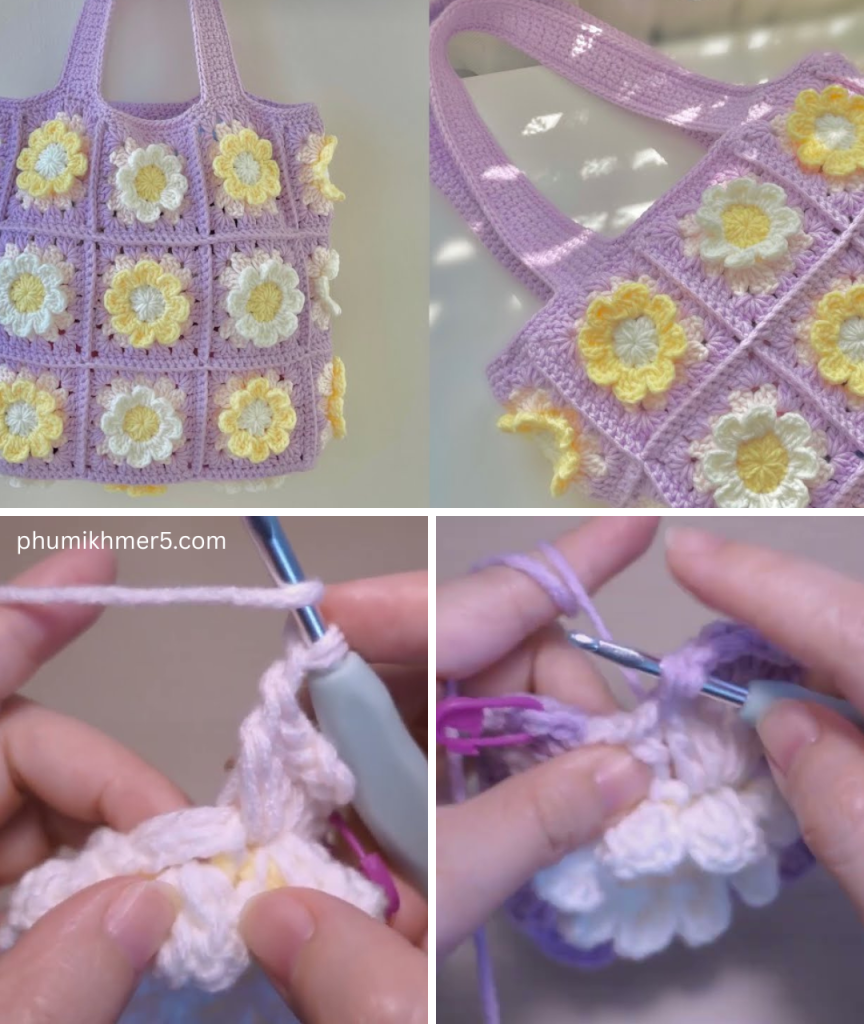
The world of crochet is full of delightful surprises, and few projects combine style, nostalgia, and practicality quite like a flower granny square tote bag. With vintage charm and modern flair, this type of bag is both beautiful and functional — perfect for trips to the market, the beach, or even as a stylish everyday accessory.
In this guide, you’ll learn everything you need to make your own flower granny square tote bag — from choosing materials and mastering the granny square to assembling your bag and finishing it with flair.

🧶 What Is a Flower Granny Square Tote Bag?
A flower granny square tote bag is made by crocheting individual granny squares that each contain a 3D or flat flower motif at their center. These squares are then joined together to form the body of a tote bag, often finished with a strap, lining, and optional embellishments.
This type of project offers a creative mix of textures, colors, and techniques, making it as fun to make as it is to carry!
📦 Materials You’ll Need
To create your flower granny square tote bag, gather the following supplies:
🧵 Yarn:
- Cotton or cotton-blend yarn is ideal for a sturdy tote.
- Use worsted weight (Category 4) or DK weight (Category 3) yarn depending on the desired size and drape.
- Choose at least 2–4 colors: one for flowers, one for the square background, one for joining, and optionally one for borders.
🧷 Tools:
- Crochet hook (Size H/8 or 5 mm for worsted; adjust based on yarn)
- Tapestry needle (for sewing in ends)
- Scissors
- Stitch markers (optional)
🧵 Optional:
- Lining fabric (for extra strength and a polished look)
- Magnetic snap or zipper
- Buttons, beads, or tassels for decoration
🌸 Basic Components of the Tote Bag
Your tote bag will be made in three main phases:
- Crochet flower granny squares (typically 12 to 24 squares)
- Join squares and assemble the bag
- Add strap(s), border, and optional lining
🌼 Part 1: How to Crochet a Flower Granny Square
Here’s a simple but lovely 3D flower granny square pattern.
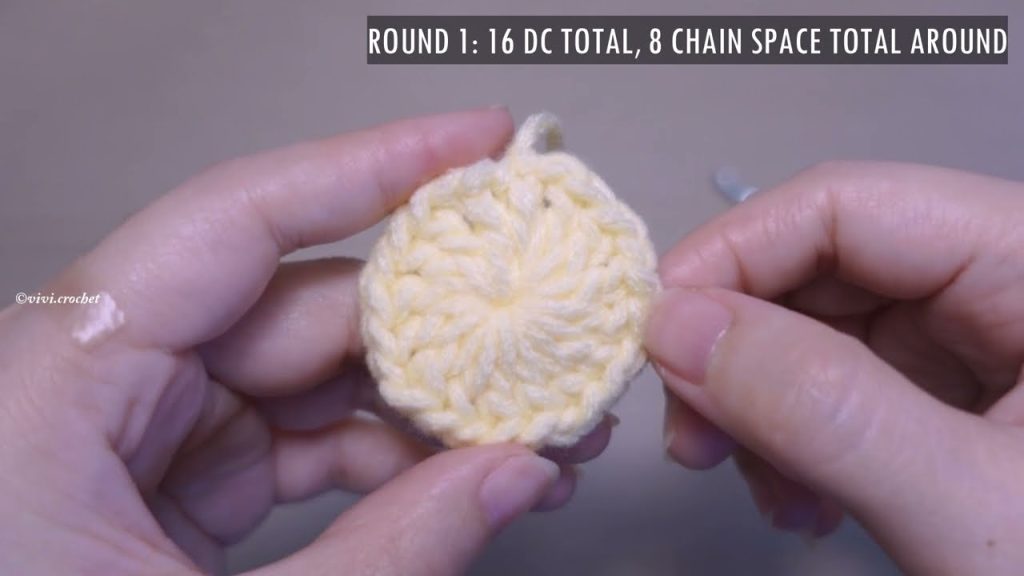
✅ Step 1: Make the Flower Center
Round 1:
- With Color A (center of flower), make a magic ring.
- Ch 1, work 8 sc into the ring. Join with a sl st to first sc. (8 sts)
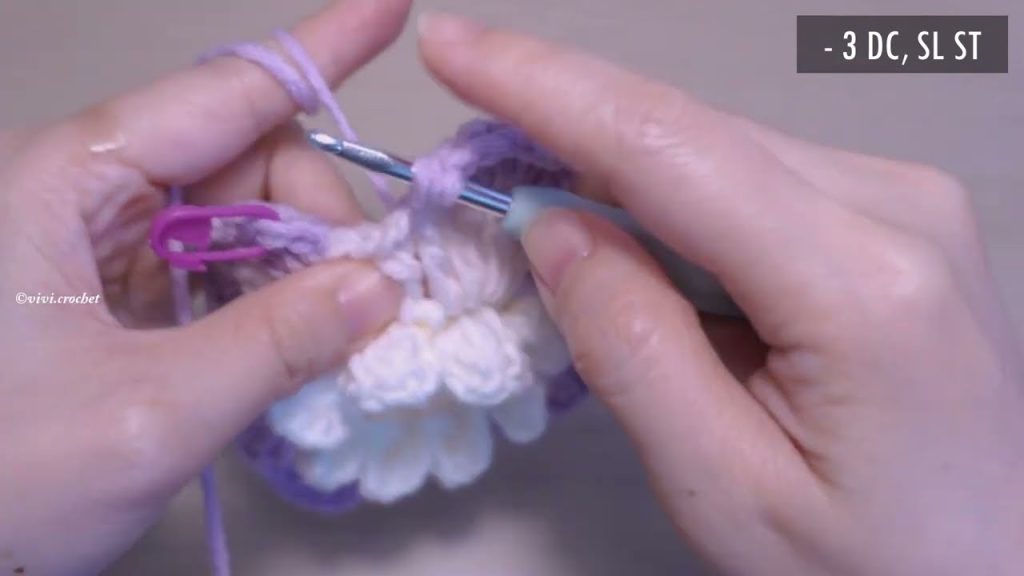
Round 2:
- Switch to Color B (petals).
- (Ch 2, 3 dc in same st, ch 2, sl st in same st) — 1 petal.
- Repeat in each stitch: 8 petals total.
- Fasten off and weave in ends.
✅ Step 2: Forming the Granny Square Around the Flower
Round 3:
- Join Color C (background yarn) in a space between petals.
- Ch 3 (counts as dc), 2 dc in same space, ch 1.
- In next space: 3 dc, ch 1, repeat around (8 clusters total).
- Join with sl st.
Round 4 (Square Shaping):
- Sl st to next ch-1 space. (3 dc, ch 2, 3 dc) in same space (corner).
- In next space: 3 dc; in next: (3 dc, ch 2, 3 dc) — repeat around.
- Join with sl st and fasten off.
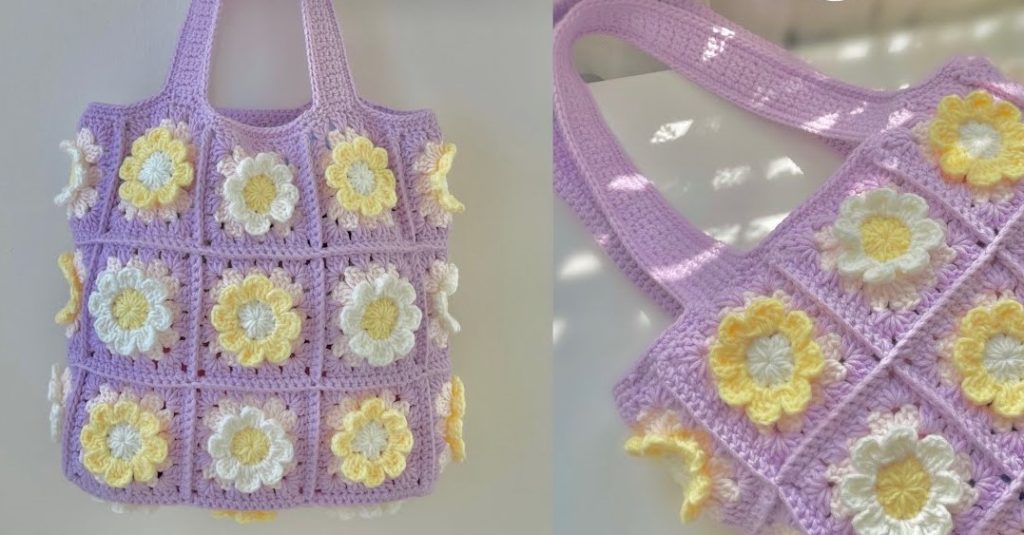
🎉 You’ve made your first flower granny square! Make 12 to 24 squares, depending on the size of the bag you want.

🧵 Part 2: Assembling the Tote Bag
🧱 Layout Options:
Choose a layout based on the size and shape you want:
- Simple Tote (3×4): 12 squares (3 across, 4 high)
- Boxy Tote (4×4): 16 squares
- Large Tote (4×6): 24 squares
Lay them out flat before joining to plan color placement and symmetry.
🔗 Joining the Squares
There are several ways to join granny squares:
1. Whip Stitch (sewn seam)
- Place squares right sides together.
- Use a tapestry needle to sew through back loops only for an invisible seam.
2. Slip Stitch Join (crochet seam)
- Place squares wrong sides together.
- Sl st through both layers across edges. Adds a slight ridge.
3. Join-As-You-Go (JAYG) (crochet in final round)
- When making the last round of each square, join to adjacent squares using sl st or sc. Very neat and time-saving.
After joining all squares for front and back panels, sew or crochet the side and bottom seams to form the bag’s body.
🧶 Part 3: Adding Finishing Touches
🧵 Border (Optional but Recommended)
- Work sc or dc rounds around the top edge of the bag to smooth it out.
- Add picot, shell, or crab stitch for a decorative touch.
👜 Straps
Here are three strap options:
1. Crochet Straps
- Ch the desired length (~60–70 chains).
- Work 3–5 rows of sc or hdc.
- Sew to the inside edge of the bag, reinforcing stitches.
2. I-Cord Straps
- Use an I-cord technique (crochet or knit) for a rounded handle.
3. Ready-Made Leather Straps
- Purchase straps with holes or rivets for sewing/attaching.
Make sure the straps are secure and strong enough to carry weight.
🧵 Optional: Lining Your Tote Bag
Lining adds structure and protects the inside.
- Cut fabric to match your bag dimensions.
- Sew side and bottom seams (like a pillowcase).
- Insert into the bag with the wrong side facing out.
- Hand-sew or machine-stitch around the top inside edge.
Add a pocket, magnetic snap, or zipper if desired.
🌟 Customization Ideas
- Add buttons or wooden beads to flower centers.
- Mix flower types: alternate different floral granny squares.
- Use gradient yarn for a boho look.
- Add fringe or tassels to the bottom edge.
- Crochet a flap closure with a button for extra security.
💧 Care Instructions
- If unlined: hand wash or delicate cycle in cold water.
- If lined: spot clean or dry clean if delicate fabric is used.
- Lay flat to dry, shape while damp.
🧺 Where to Use Your Crochet Flower Granny Square Tote
This stylish and versatile bag is perfect for:
- Daily errands and shopping
- Craft storage or project bag
- Beach trips or picnics
- Farmer’s market
- Gifting to a friend or loved one
✨ Final Thoughts
Crocheting a flower granny square tote bag is a joyful and creative project that combines timeless tradition with modern utility. Not only do you get to practice different crochet skills — from motif-making to seaming and finishing — but you also end up with a handmade accessory that’s both beautiful and practical.
The best part? Each tote can be completely unique, reflecting your own personal color choices, textures, and embellishments.
Video tutorial:


