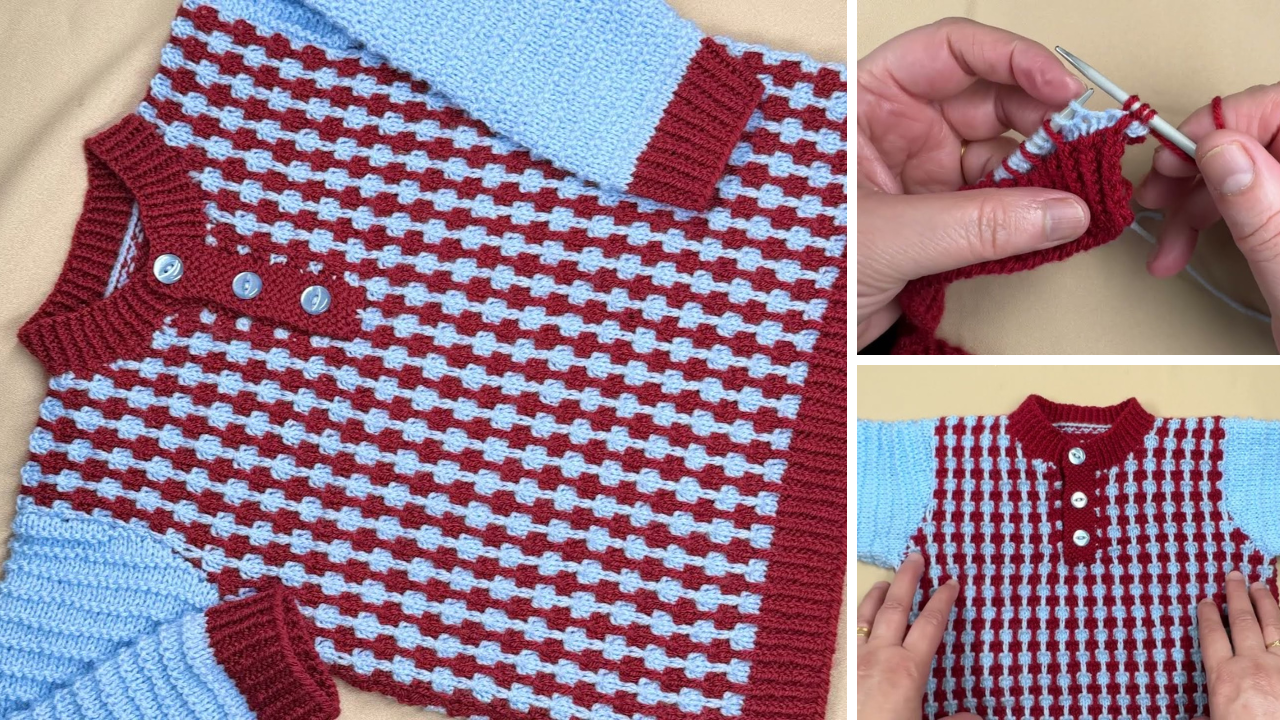
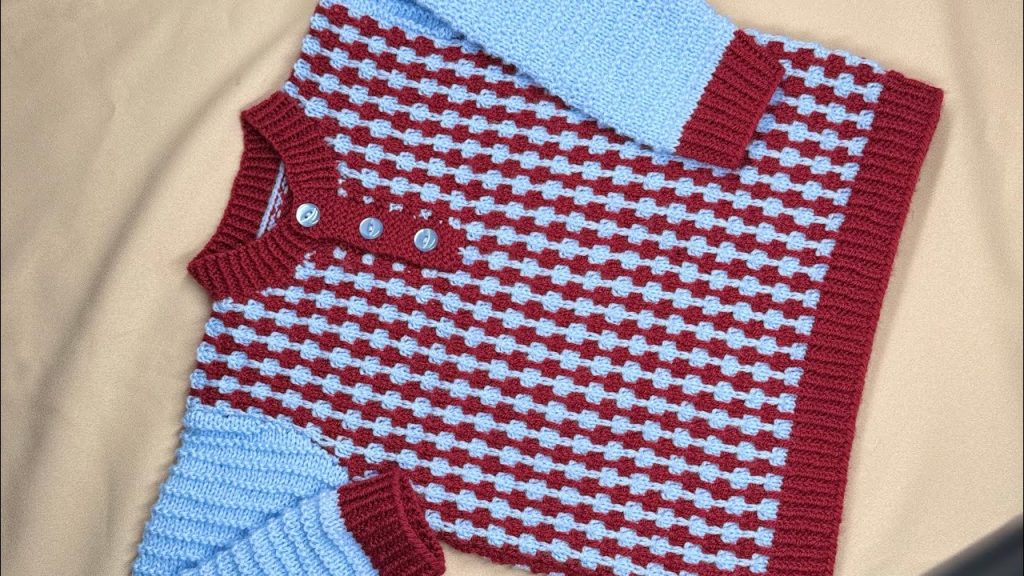
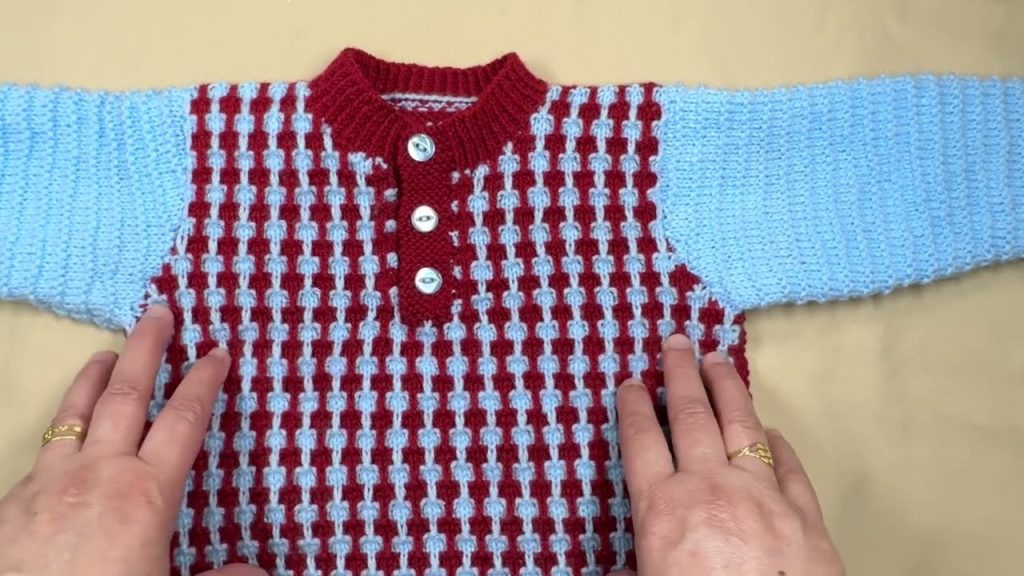
Knitting a sweater by hand for a baby or toddler is a beautiful, heartfelt gift that carries both emotional value and practical use. For boys aged 1 to 2 years, a hand-knitted sweater can be the perfect balance of comfort, warmth, and style. This comprehensive tutorial will guide you step-by-step through creating a cozy, stylish, and age-appropriate sweater from scratch — no matter if you’re a beginner or an experienced knitter.
Why Knit for Toddlers?
Before we dive into the knitting needles and yarn, let’s look at some reasons why hand-knitted sweaters are great for toddlers:
- Soft and Gentle: Handpicked yarn can be softer and safer on sensitive toddler skin than commercial clothing.
- Custom Fit: Tailor the fit perfectly for growing bodies.
- Eco-Friendly: Fewer chemicals, more natural fibers.
- Memorable Keepsake: A handmade sweater can be cherished for generations.
Materials You’ll Need
Before beginning, gather the following materials:
Yarn
- Type: Soft, washable yarn. Look for “baby” or “toddler” labeled yarns.
- Weight: DK (Double Knitting) or worsted weight.
- Yardage: Approximately 400–500 yards (depending on size and style).
- Fiber Content: Wool/acrylic blends are warm and easy to clean. 100% cotton is breathable for warmer climates.
Needles
- Main: US Size 6 (4.0mm) or size needed to obtain gauge.
- Ribbing: One size smaller than your main needle (US Size 5 or 3.75mm).
- Circular needles (for body or yoke, especially if knitting in the round).
- Double-pointed needles (DPNs) (optional for sleeves if not seamed).
Notions
- Stitch markers
- Yarn needle (for weaving in ends)
- Scissors
- Measuring tape
- Buttons (if making a buttoned or cardigan-style sweater)
- Stitch holders or waste yarn

Basic Measurements for Ages 1–2
| Measurement | Average Size |
|---|---|
| Chest circumference | 20–22 inches |
| Body length (shoulder to hem) | 12–14 inches |
| Sleeve length (underarm to wrist) | 7–8 inches |
| Armhole depth | 4.5–5 inches |
Note: These are average sizes. It’s best to measure the child if possible.
Pattern Overview: Top-Down Raglan Sweater (Seamless)
A top-down raglan sweater is great for beginners and pros alike. It’s seamless, customizable, and allows you to try the sweater on as you go.
Skills You Will Use:
- Knit (K)
- Purl (P)
- Increase (Kfb or M1)
- Knit in the round
- Ribbing (K1, P1 or K2, P2)
- Binding off
Step-by-Step Tutorial
Step 1: Gauge Swatch (Crucial!)
Knit a swatch in stockinette stitch to ensure you get the right number of stitches per inch. Your target:
- Gauge: 22 sts x 28 rows = 4 inches in stockinette stitch
Adjust needle size if needed.
Step 2: Neckline and Yoke Setup
Cast-On:
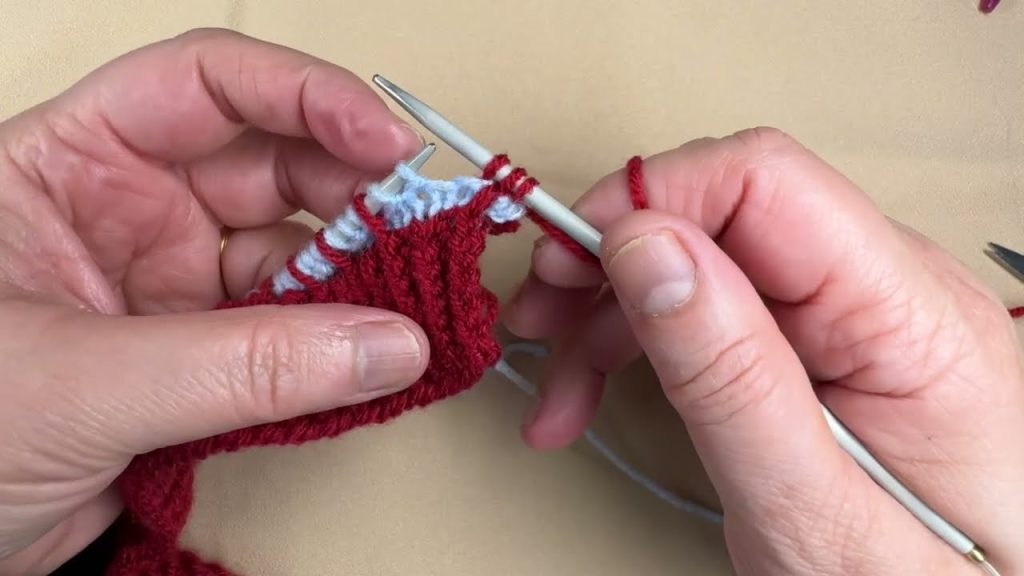
Using smaller needles, cast on 60 stitches using a stretchy cast-on method.
Ribbing:
Work in K1, P1 ribbing for 1 inch.
Switch to Larger Needles and begin raglan increases:
You will divide your stitches for the front, back, and sleeves. Place stitch markers to denote sections:
- 10 sts (Right Front)
- 1 st (Marker)
- 10 sts (Right Sleeve)
- 1 st (Marker)
- 18 sts (Back)
- 1 st (Marker)
- 10 sts (Left Sleeve)
- 1 st (Marker)
- 10 sts (Left Front)
You will increase on either side of each marker every other round.
Raglan Increases:
Every other round, increase by working:
- Knit to 1 st before marker, Kfb (knit front and back),
- Slip marker,
- Kfb, knit to next marker…
Continue until the sleeve sections measure ~5 inches and you have:
- Front: ~30 sts each
- Back: ~40 sts
- Sleeves: ~30–35 sts each
Step 3: Separating the Body and Sleeves
Place sleeve stitches on stitch holders or waste yarn.
Join the front and back sections in the round to continue knitting the body.
You may need to cast on a few stitches (4–6) under each arm to bridge the gap.
Step 4: Knitting the Body
Continue knitting in stockinette stitch (in the round) until the body measures approximately 12–13 inches from the neckline.
Hem Ribbing:
Switch to smaller needles and work 1–1.5 inches of K1, P1 ribbing.
Bind off loosely.
Step 5: Sleeves
Transfer one sleeve’s stitches from the holder to DPNs or circulars.
Pick up stitches from the underarm cast-on (4–6 sts), place a marker at the start of round.
Sleeve Decreases:
- Every 6–8 rounds: K2tog at each end of the round.
Continue until sleeve measures 7–8 inches.
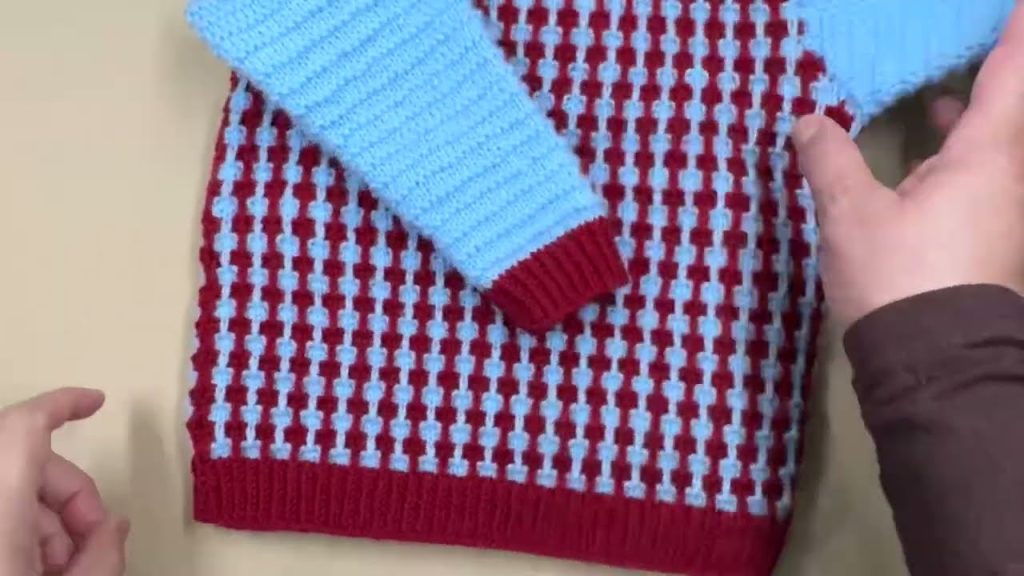
Cuff Ribbing:
Switch to smaller needles, work K1, P1 ribbing for 1 inch.
Bind off.
Repeat for the second sleeve.
Step 6: Finishing
- Weave in all ends neatly with a yarn needle.
- Block the sweater lightly to even out stitches and improve shape.
- If adding buttons or embellishments, sew them on after blocking.
- For cardigans: pick up stitches along the front edges and knit button bands and buttonholes.
Design Variations
You can customize the sweater with these variations:
1. Colorwork
Add stripes, fair isle, or intarsia designs on the yoke or chest.
2. Textures
Use garter stitch, seed stitch, or cables for decorative elements.
3. Cardigan Style
Instead of knitting in the round, work the body flat with a front opening and add a button band.
Tips for Success
- Always use stitch markers to keep track of your raglan increases.
- If you’re new to knitting, keep it simple and avoid colorwork initially.
- Choose machine-washable yarns for easy care.
- Measure the child if possible or use slightly larger sizes so they can grow into the sweater.
- Block the finished sweater before gifting or use.
Free & Paid Patterns (Optional)
Here are a few popular toddler sweater patterns to explore:
- Flax by Tin Can Knits (Free)
- Little Coffee Bean Cardigan (Free)
- Raglan Baby Sweater by Purl Soho
- Petit Mouton Sweater by Marion Crivelli (Paid)
Conclusion
Knitting a hand-made sweater for a 1–2-year-old boy is both an artistic endeavor and a labor of love. Whether you’re crafting a holiday gift, birthday surprise, or just a cozy outfit, the end result will be both beautiful and practical. The timeless nature of hand-knit garments means your effort will be appreciated now and remembered for years to come.
So grab your yarn, settle in with a warm cup of tea, and enjoy the rewarding process of creating a sweater with your own two hands.
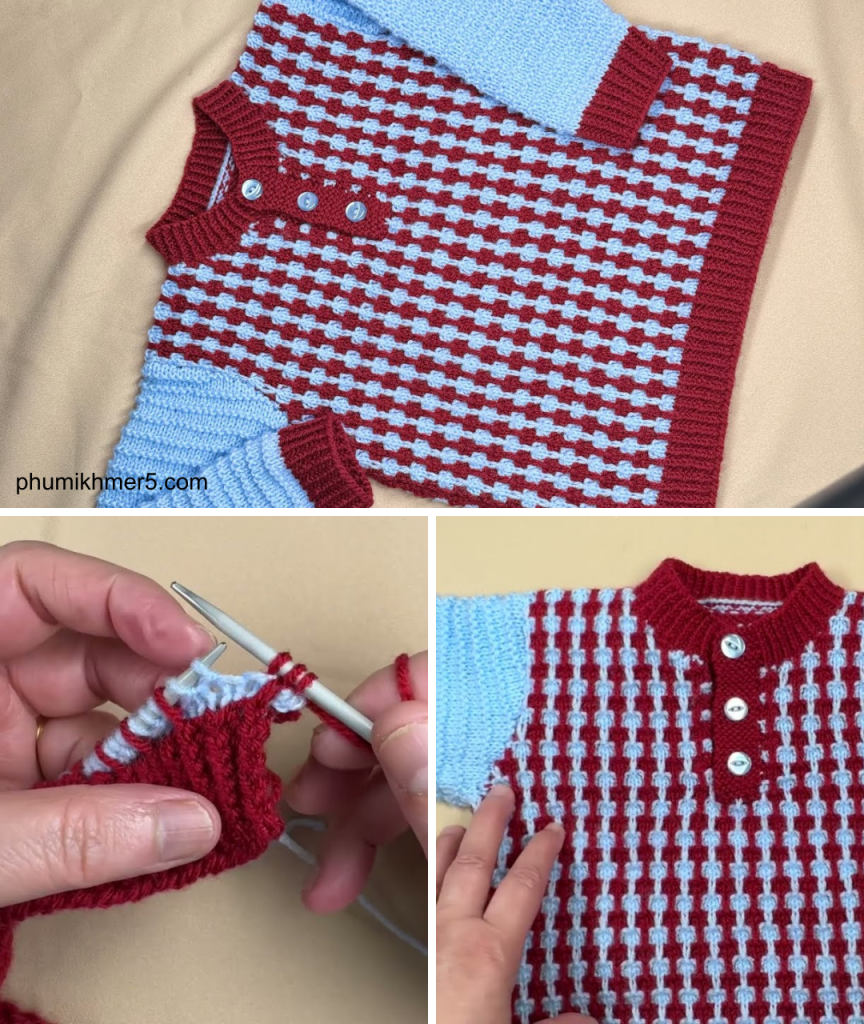
Video tutorial: