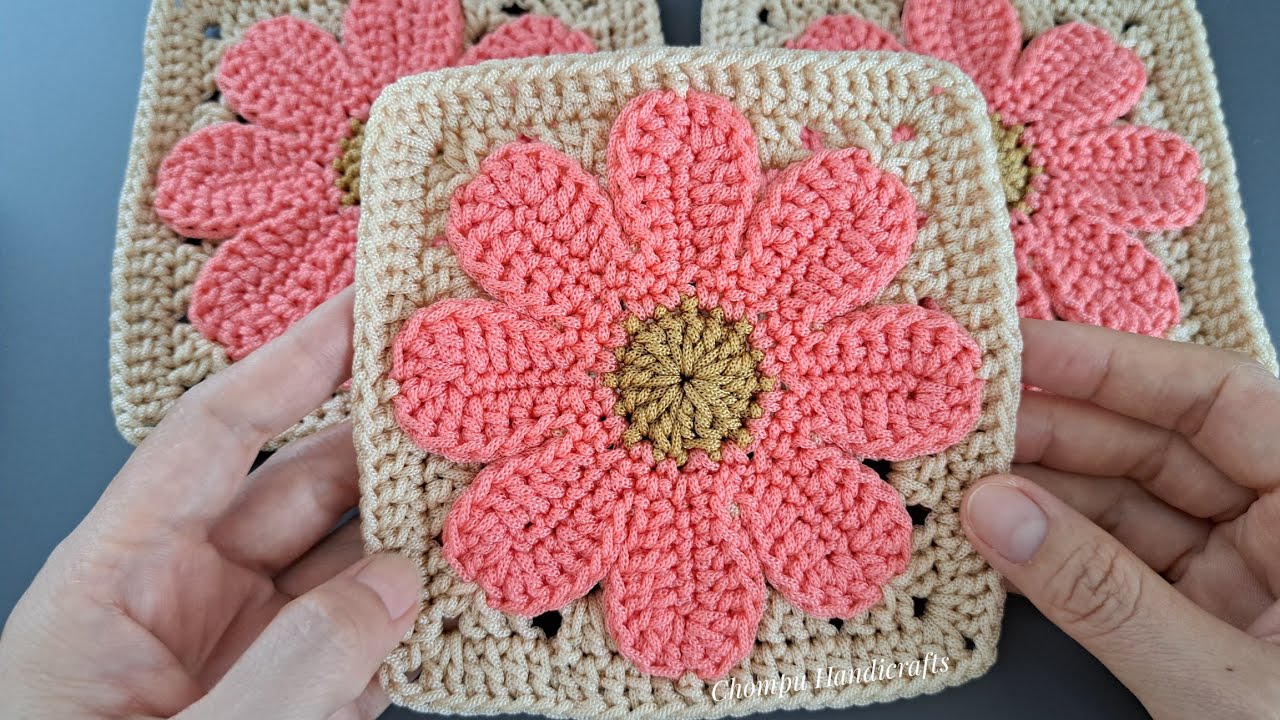
Crochet flower motifs are beloved in the world of fiber arts. But when you add dimension to your floral design—like in a 2-layer flower granny square—you elevate it from simple motif to eye-catching centerpiece. This beautiful design features two layers of petals, giving your square depth, elegance, and visual interest. Whether you use them for a baby blanket, pillow cover, scarf, or wall art, these layered flowers are sure to draw admiration.
In this step-by-step guide, we’ll walk through the entire process: from crocheting the two layers of petals to squaring off the flower and expanding the motif into a granny square.

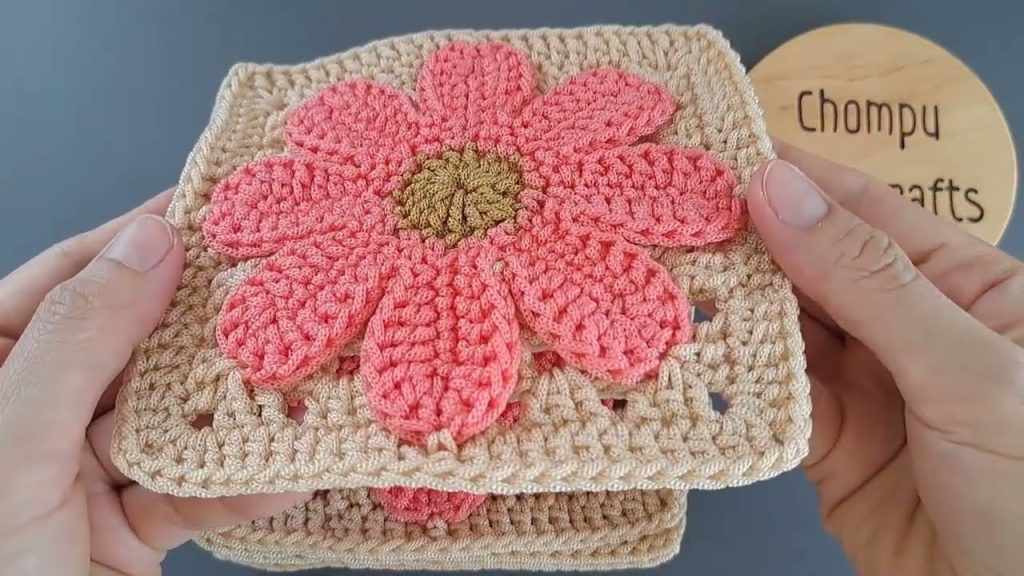
🌺 What Is a 2-Layer Flower Granny Square?
A 2-layer flower granny square features a flower with:
- An inner layer of petals
- An outer layer of petals behind or beneath the first
- A granny square base surrounding the flower
This layered look gives your crochet square a 3D appearance, making it stand out more than flat floral motifs.
🧶 Materials Needed
To create one 2-layer flower granny square, you’ll need:
Yarn
- 3 colors of yarn (optional, but recommended):
- One for flower center
- One for inner petals
- One for outer petals and square background
- Worsted weight (medium/4) or DK weight (light/3) yarn
Crochet Hook
- Size G/6 (4.0 mm) or H/8 (5.0 mm) (check your yarn’s label)
Other Tools
- Tapestry needle (for weaving in ends)
- Scissors
- Stitch markers (optional)
🧵 Crochet Stitches Used
Here are the stitches you’ll need to know:
- ch – chain
- sl st – slip stitch
- sc – single crochet
- hdc – half double crochet
- dc – double crochet
- tr – treble crochet
If you’re new to any of these stitches, it’s worth practicing a few before starting the square.
🌸 Crochet 2-Layer Flower Granny Square: Step-by-Step Tutorial
🌀 Round 1: Flower Center
- Start with a magic ring (or ch 4 and join with sl st to form a ring).
- Ch 1 (does not count as a stitch), then work 12 sc into the ring.
- Join with a sl st to the first sc. (12 sc)
Fasten off if you’re changing colors for inner petals.
🌼 Round 2: Inner Layer of Petals
- Join new color in any sc.
- Ch 2 (counts as first dc).
- In same stitch: dc, ch 2, sl st – first petal made.
- In next stitch: sl st, ch 2, dc, dc, ch 2, sl st.
- Repeat from step 4 around. You will have 12 petals (1 per sc).
Note: These petals will sit on top of the next layer.
Do not fasten off yet if you want to continue with the same color for the second layer.
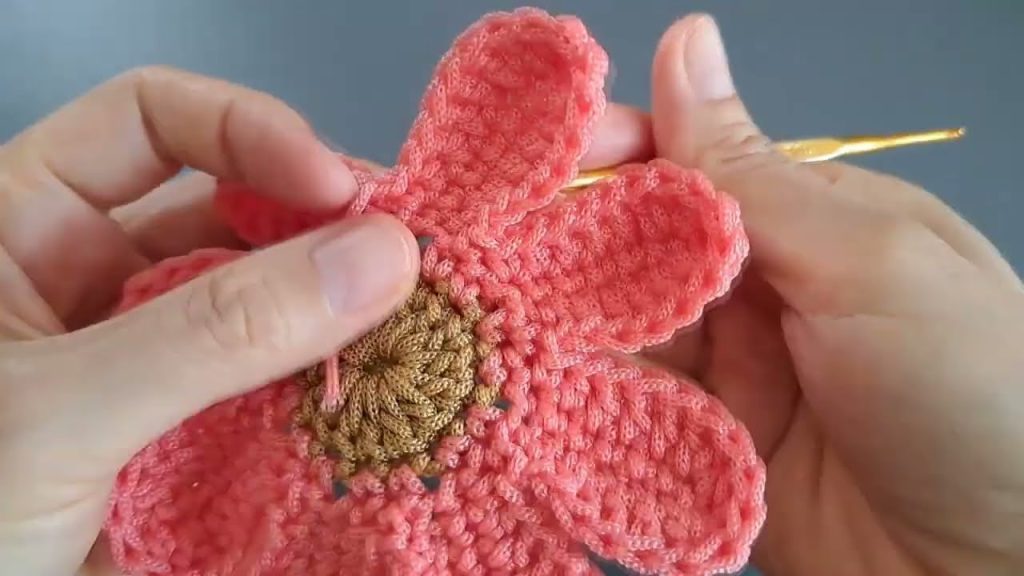
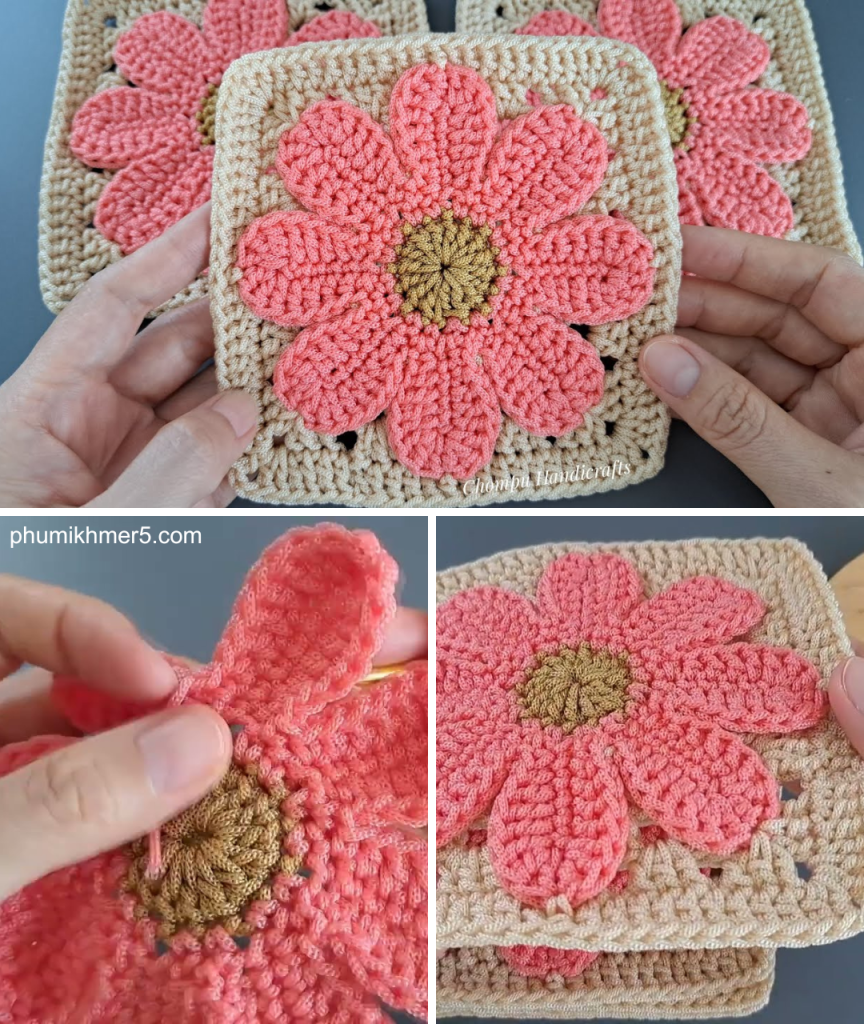
🌹 Round 3: Back Layer of Petals (Layer 2)
To begin this round, we will anchor stitches into the base of Round 1, behind the first layer of petals.
- Insert your hook behind the petals, into the back loops or space between stitches of Round 1.
- Join new yarn if using a different color.
- Ch 3, skip one base stitch, then:
- [dc, tr, dc] into same stitch, ch 3, sl st behind next petal.
- Repeat this process in a circle, working 1 petal in every other base stitch behind the first layer.
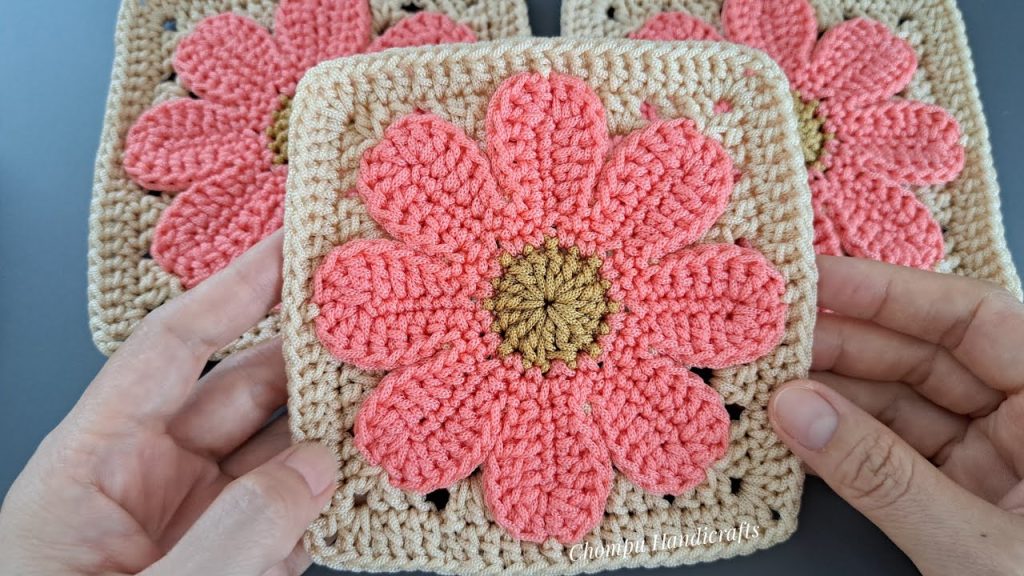
You should now have 6 larger petals forming the second layer, tucked behind the first layer.
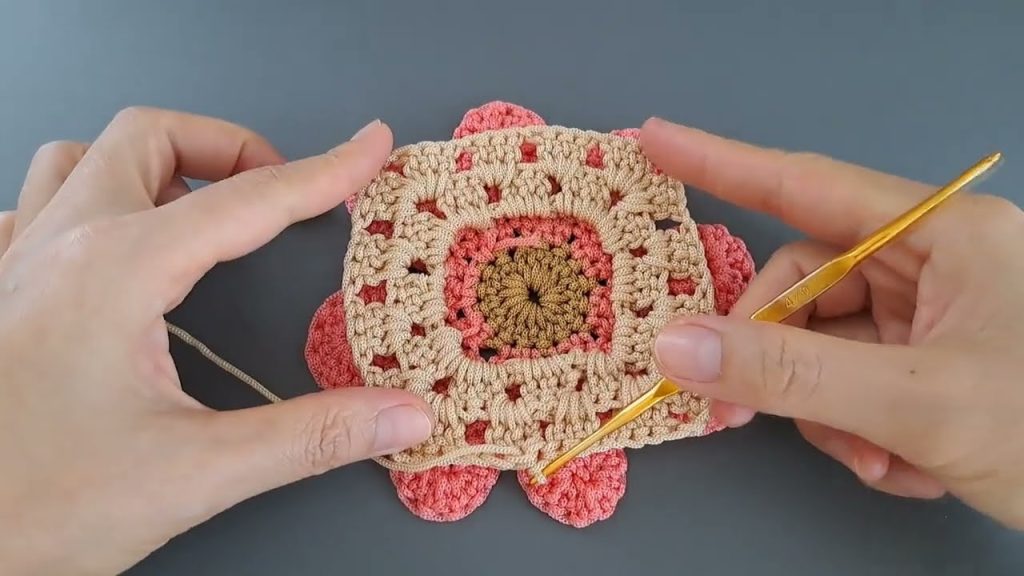
🌿 Round 4: Squaring the Flower
Now it’s time to transform your circular flower into a square granny motif.
- Join new color to the space between two petals from the back layer.
- Ch 3 (counts as dc), 2 dc in same space.
- Ch 1, skip to next space, work 3 dc.
- In four corners, do:
- [3 dc, ch 2, 3 dc] in the same space.
- Continue working in this manner around.
- Join with a sl st to top of beginning ch-3.
Your motif should now be roughly square with the layered flower centered.
🧶 Round 5 (Optional): Expanding the Square
If you want to make the square larger or prep for joining:
- Work a traditional granny square round:
- 3 dc in each space
- Corners remain: 3 dc, ch 2, 3 dc
You can add as many rounds as needed for your desired project size.
🧩 Project Ideas for 2-Layer Flower Granny Squares
Once you’ve made your squares, the possibilities are endless! Here are some popular project ideas:
👶 Baby Blanket
- Use pastel tones for a soft, baby-friendly look.
- Join squares using whip stitch or join-as-you-go method.
- Add a soft shell border for a delicate finish.
👜 Bags and Purses
- Combine 8–10 squares for a simple handbag.
- Add a lining and straps for durability.
🛋️ Pillow Covers
- Use 9 squares (3×3) for a standard cushion cover.
- Back with fabric or another set of squares.
🧥 Wearables
- Use squares as patchwork elements in vests, cardigans, or shawls.
🪢 Joining the Squares
Choose a method based on the finish you prefer:
1. Whip Stitch
- Sew squares together with right sides facing up.
- Simple and nearly invisible from the front.
2. Slip Stitch Join
- Slip stitch through both squares along edge stitches.
- Creates a defined ridge.
3. Join-As-You-Go
- Join new square during the final round.
- Seamless and efficient.
✨ Tips for Success
- Block your squares before joining for a neater finish.
- Use stitch markers to keep corners aligned.
- Choose color combinations that highlight the layered petals.
- Be consistent with your tension to ensure uniform squares.
🌈 Color Ideas
| Color Theme | Center | Inner Petals | Outer Petals | Square Background |
|---|---|---|---|---|
| Spring Garden | Yellow | Pink | Light Green | Cream |
| Sunset Bloom | Gold | Coral | Burgundy | Taupe |
| Pastel Baby | Mint | Peach | Lilac | White |
| Bold & Bright | Red | Orange | Yellow | Black |
| Vintage Chic | Beige | Rose | Olive | Ivory |
Experiment with shades to bring out the layers!
💧 Care Instructions
If you plan to gift or use your final project frequently:
- Machine wash cold on delicate cycle (if using washable yarn).
- Lay flat to dry.
- For best results, use baby-safe or organic yarns.

🧶 Conclusion
The 2-layer flower granny square is a delightful fusion of traditional crochet and 3D floral artistry. With two layers of vibrant petals and the timeless granny square design, this motif adds personality and charm to any crochet project. Whether you’re crafting a baby blanket, wearable accessory, or home décor, this versatile square is sure to stand out.
So pick up your hook, choose your colors, and let your creativity bloom—one beautiful petal at a time!
Video tutorial:


