
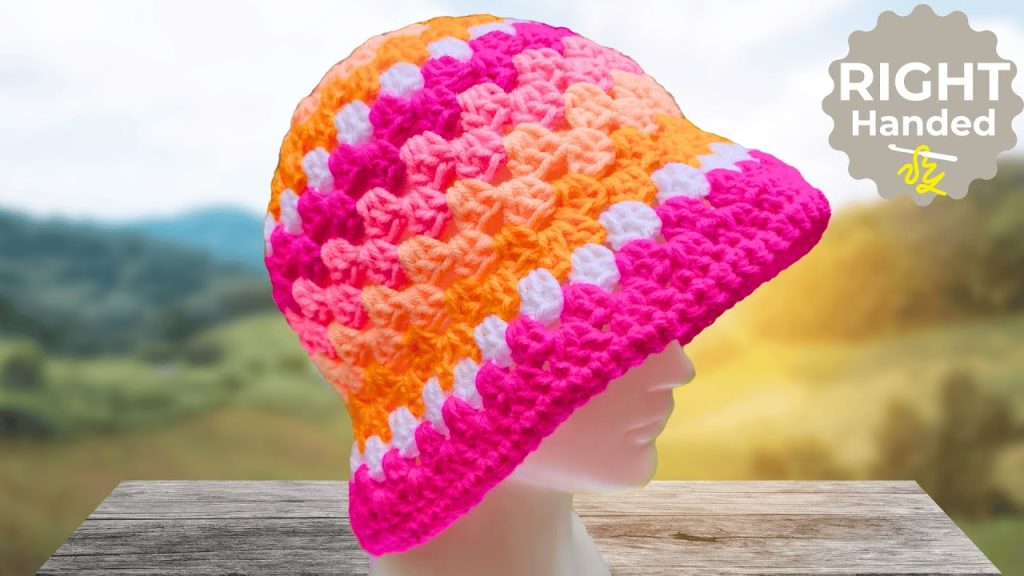
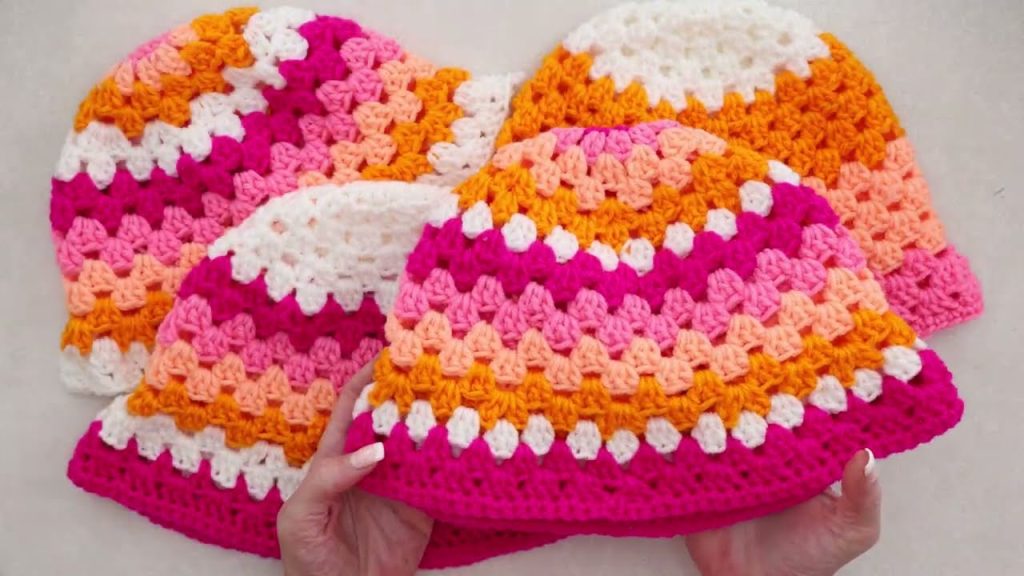
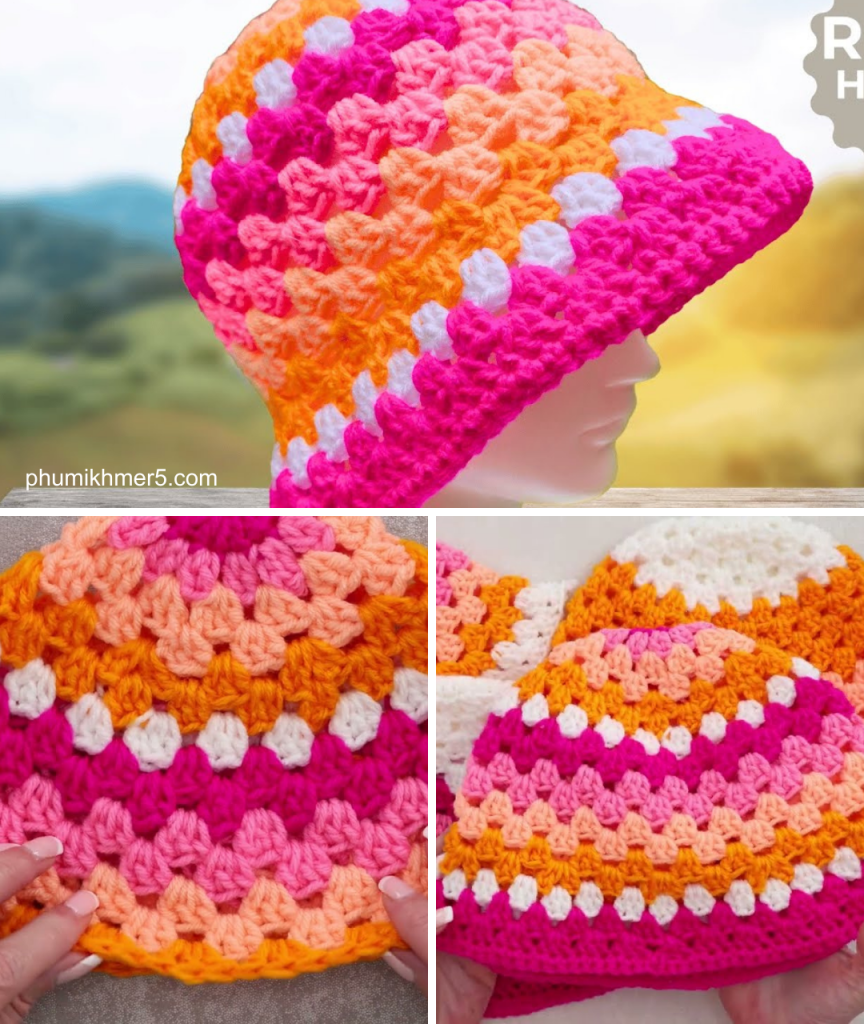
Bucket hats are back in style, and there’s no better way to get a custom, perfect-fitting one than by making it yourself! This detailed guide, inspired by an excellent video tutorial from The Secret Yarnery, will walk you through crocheting a beautiful bucket hat using a simple double crochet shell stitch. It’s a rewarding project that allows for endless color combinations and a chic, finished look.
Why Crochet a Bucket Hat?
- Custom Fit: Unlike store-bought hats, you can easily adjust the size to get a perfect fit for your head.
- Fashion-Forward: The bucket hat is a versatile accessory that can be worn in any season.
- Relaxing and Rewarding: The repetitive nature of the stitches makes this a great project for unwinding, and you’ll have a stylish, handmade item to show for your efforts.
- Skill Building: This pattern is perfect for practicing fundamental stitches, working in the round, and creating a seamless, invisible join.
Gathering Your Materials
The video provides a clear list of what you’ll need to get started.
- Yarn: Approximately 165 meters of size 4 worsted weight yarn. The tutorial uses acrylic, but you can experiment with other fibers like cotton for a more structured hat.
- Crochet Hook: A 6 mm hook is recommended for this project.
- Stitch Marker: This is optional but highly recommended, especially for beginners, to keep track of the beginning of your rounds.
- Yarn Needle: Essential for weaving in your ends at the end of the project.
- Scissors
The Pattern: Step-by-Step Instructions
This hat is worked from the top down, starting with the crown and then working your way to the brim.
1. The Crown (Top of the Hat):
- Starting the Circle: Begin with a magic ring or a chain three ring. This creates a neat, closed center for the top of your hat.
- Round 1: Work 11 double crochets into the center of the ring. Make sure to work over the yarn tail so you can pull it tight to close the center. Join with a slip stitch.
- Round 2 (Color Change): If you’re changing colors, the video shows a simple method for doing so. Then, work two double crochets into each stitch around the entire round.
- Round 3: The pattern for this round is a “shell” stitch. You’ll work a cluster of three double crochets into each space between the stitch pairs from the previous round. Continue this pattern for subsequent rounds, working the three double crochets into each space. The hat will start to “dish up,” which is a completely normal part of the process.
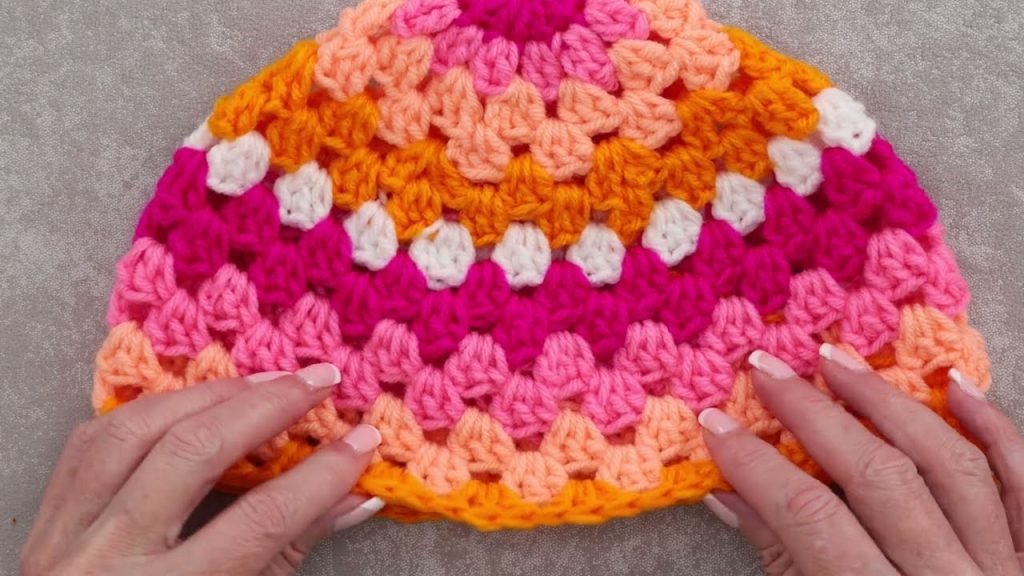
2. The Body of the Hat (Side):
- Adjusting Size: The tutorial includes an increase round to get the hat to the desired size. To do this, you’ll create a shell by working two double crochets, chaining one, and then working two more double crochets into the same space.
- Working the Shells: For the body of the hat, you’ll continue to work the three-double-crochet shell into each space. The video shows how this creates a consistent, textured side for the hat. Continue crocheting until the hat reaches the top of your ears, or your desired length.
3. The Brim:
- Starting the Brim: The brim begins with an increase round to make it flare out. The video demonstrates an alternating pattern of a regular three-double-crochet shell and an “increase shell” (the two-double-crochet, chain one, two-double-crochet shell) in each space.
- Finishing the Brim: After the increase round, work three double crochets into each space for two more rows.
- The Final Row: To help the brim lay perfectly flat and give it a crisp edge, the final row is a round of single crochet stitches. Make one single crochet into each stitch around the entire hat.
4. The Finishing Touches:
- Invisible Join: The video shows a fantastic technique for an invisible join, which makes the final seam almost disappear. This creates a professional, seamless edge.
- Weaving in Ends: The final step is to sew in any remaining yarn tails with your yarn needle to give your hat a clean, polished look.
Ready to Make Your Own?
Happy crocheting, and get ready to create a new favorite accessory!
Video tutorial:


