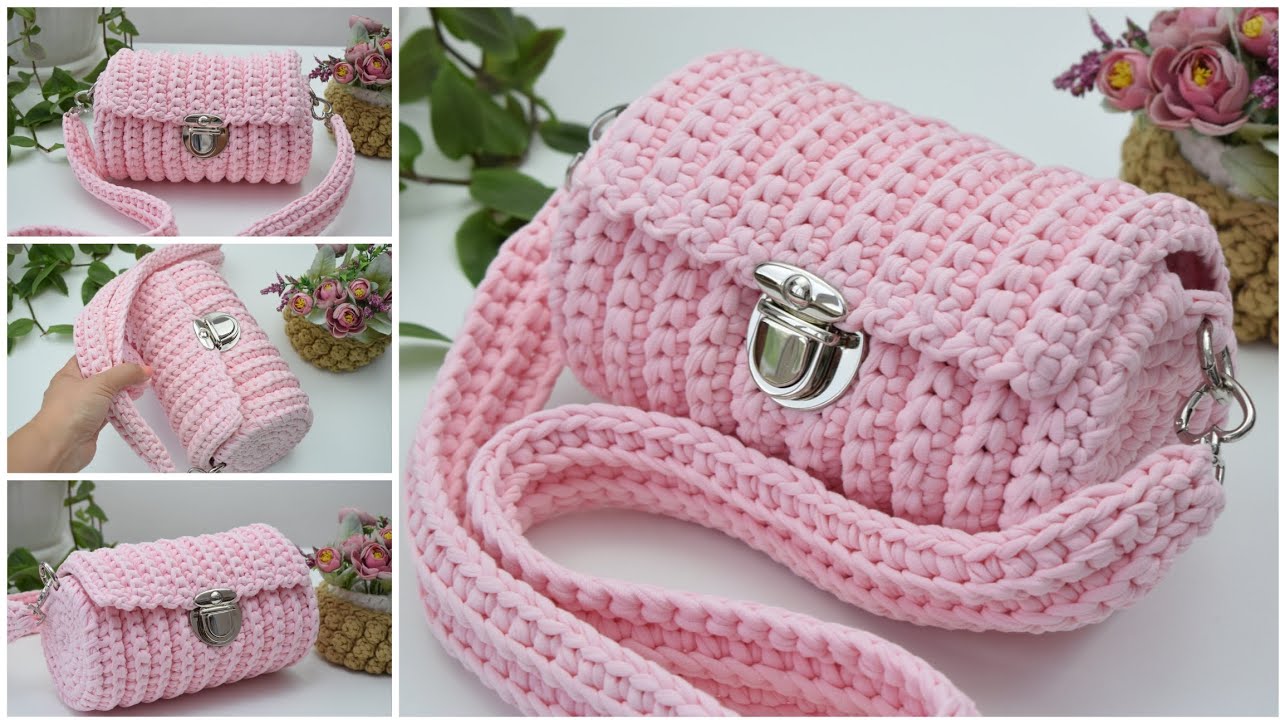
Crochet is more than just a craft—it’s a creative expression that allows you to transform yarn into functional, stylish accessories. Among the many crochet projects out there, a cylinder handbag stands out for its unique shape, versatility, and chic appeal. This article will guide you step-by-step on how to crochet a comfortable and beautiful cylinder handbag that’s perfect for casual outings, handmade gifts, or even as a boutique item.
Why Choose a Cylinder Handbag?
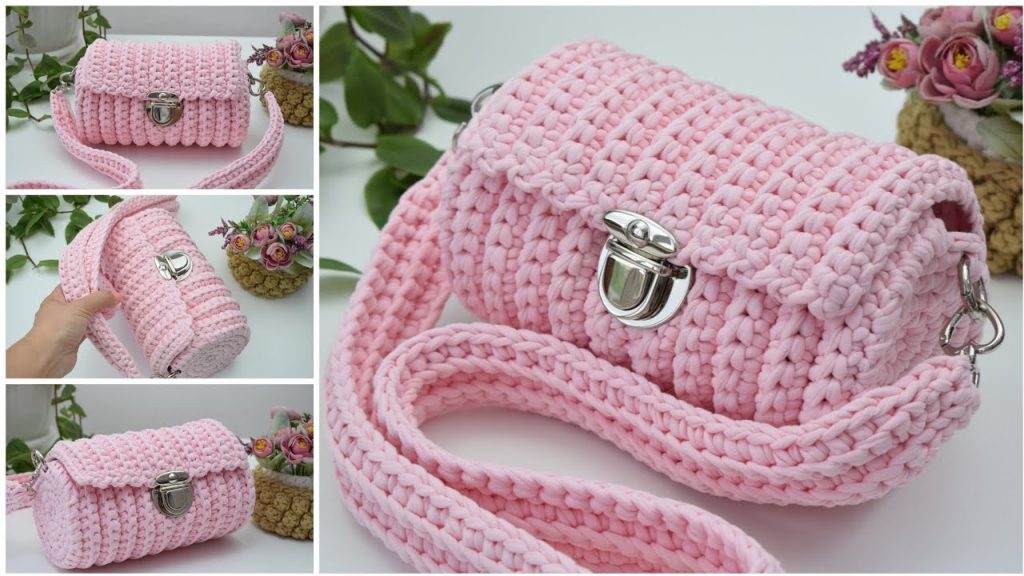
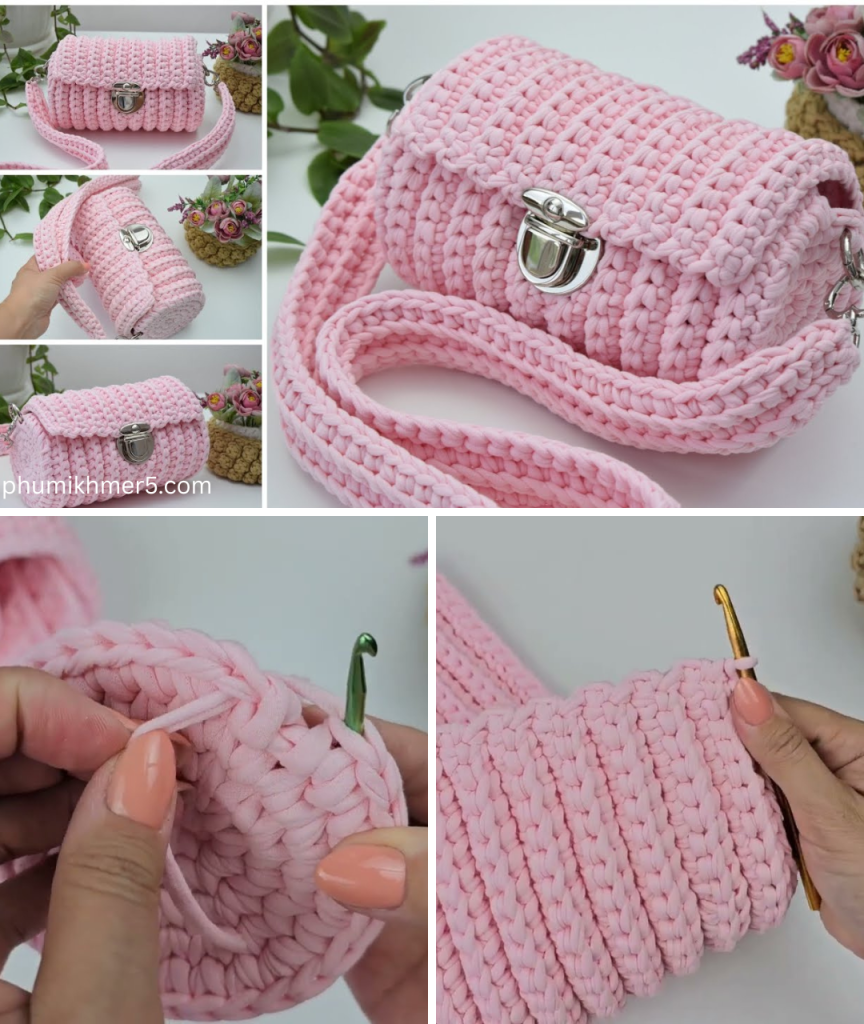
The cylindrical shape offers a refreshing alternative to typical tote or square bags. It’s roomy, structured, and eye-catching. Plus, its shape naturally lends itself to being both comfortable to carry and fashion-forward. With the right yarn and embellishments, you can tailor your bag to any style—boho, modern, vintage, or minimalist.
Materials You’ll Need
To create your own crochet cylinder handbag, gather the following:
- Yarn: Choose a medium to bulky weight yarn for durability. Cotton or a cotton blend is ideal for structure.
- Hook: Size H (5.0 mm) to J (6.0 mm), depending on your yarn choice.
- Stitch markers
- Yarn needle
- Scissors
- Lining fabric (optional but recommended)
- Magnetic clasp or zipper
- Handles or strap hardware (leather or crocheted strap)
- Plastic canvas or interfacing (optional for added stiffness)
Crochet Stitches to Know
- Chain (ch)
- Single crochet (sc)
- Slip stitch (sl st)
- Half double crochet (hdc) (optional for texture)
- Back loop only (BLO) (for visual detail and flexibility)

Step-by-Step Instructions
Step 1: Crochet the Base (Circular Bottom)
- Magic ring, ch 1.
- Work 6 sc into the ring. Join with a sl st. (6 sts)
- Round 2: Ch 1, 2 sc in each st around. Join. (12 sts)
- Round 3: Ch 1, sc in next st, 2 sc in next st, repeat around. Join. (18 sts)
- Continue increasing evenly until your base reaches the desired diameter (typically 6–8 inches for a handbag).
- Do NOT increase anymore after reaching the desired base size.
Tip: Use stitch markers to keep track of rounds.
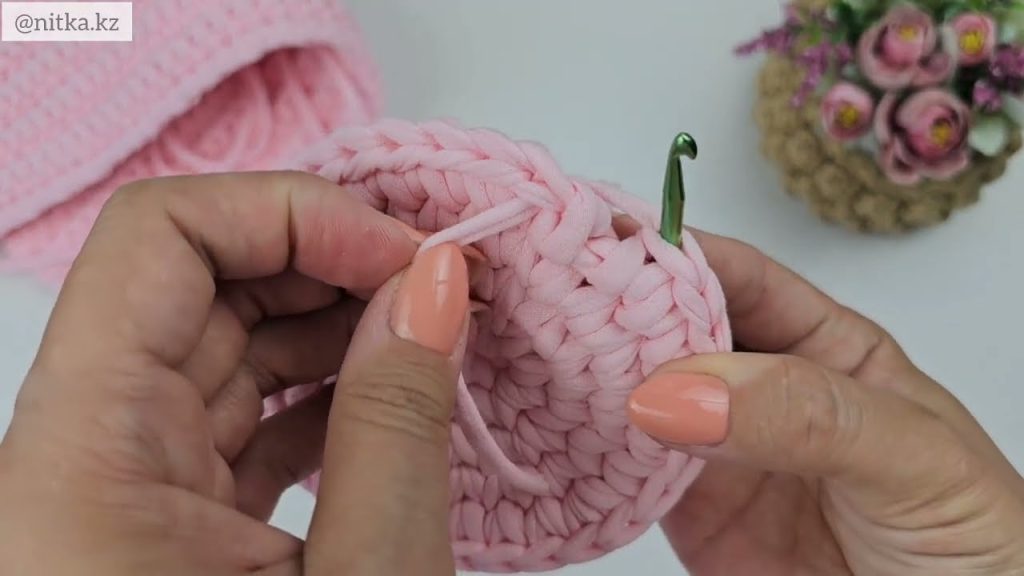
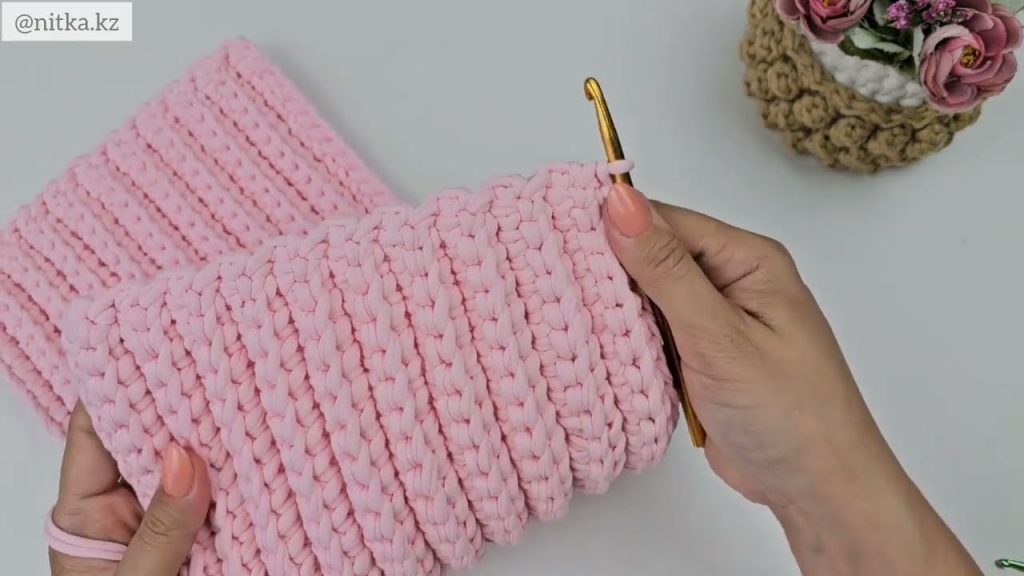
Step 2: Build the Cylinder Body
- Next round: Work in the back loop only (BLO) of each stitch around. This creates a clean edge between the base and body.
- Continue working sc in each stitch around for about 8–10 inches in height, or your preferred depth.
- Optional: Alternate rows with hdc or decorative stitches for texture.
- Fasten off and weave in the end.
Step 3: Add a Closure and Handles
Closure Options:
- Sew a zipper along the top edge.
- Attach a magnetic clasp to the lining and top flap (if you crochet a lid).
Handle Options:
- Crocheted Strap: Chain to desired length and sc back across. Reinforce by folding and sewing the ends inside the bag.
- Leather or Faux Leather Handles: Use rivets or sew them onto the sides.
- Crossbody Option: Add D-rings on each side and attach an adjustable strap.
Step 4: Line the Bag (Optional, but Recommended)
- Cut your fabric to match the interior dimensions (circular base + cylindrical body).
- Sew the side seam and bottom of the lining fabric.
- Insert it into the bag and hand-stitch around the top edge.
- This helps the bag maintain shape and prevents items from poking through stitches.
Customization Ideas
- Color Blocking: Use two or more yarn colors for a bold statement.
- Tapestry Crochet: Add geometric or floral patterns.
- Tassels or Pom-Poms: Attach for a playful touch.
- Embroidery: Stitch initials or motifs directly onto the bag.
Care Instructions
- Spot clean with a damp cloth.
- Hand wash if necessary, using cold water and mild detergent.
- Lay flat to dry.
Final Thoughts
Crocheting a cylinder handbag is a rewarding project for crafters of all levels. Not only do you get to enjoy the meditative rhythm of stitching, but you also end up with a practical and beautiful accessory that reflects your personality and creativity.
Whether you’re making it for yourself or as a heartfelt handmade gift, this bag is sure to turn heads and spark conversation. So grab your hook, pick your favorite yarn, and start crocheting your next favorite accessory today!
Video tutorial:


