Crocheting has long been cherished as both a creative hobby and a practical skill. With the resurgence of handmade crafts and sustainable fashion, crocheting your own accessories—such as bags—has become more popular than ever. Among the many options, crocheting a crossbody bag using polyester cord stands out for its blend of durability, versatility, and modern aesthetic.
In this guide, we will walk you through everything you need to know to create your own stunning and functional crossbody bag using polyester cord.
Why Use Polyester Cord?
Before diving into the crafting process, let’s understand why polyester cord is ideal for a crochet bag:
- Durability: Polyester is strong, resistant to stretching and shrinking, and can withstand daily wear and tear.
- Water Resistance: It repels moisture better than natural fibers like cotton, making it perfect for bags used outdoors.
- Shape Retention: It holds the structure well, so your bag won’t sag or lose form.
- Vibrant Colors: Polyester cord is often available in bright, long-lasting shades that don’t fade easily.
- Easy to Clean: Most polyester cords can be wiped clean or hand-washed without much fuss.
Materials Needed
Here’s a list of what you’ll need to get started:
- Polyester Cord (3-5 mm thickness): Around 100–150 meters depending on the bag size.
- Crochet Hook: Size 6.0 mm to 8.0 mm, depending on cord thickness.
- Stitch Markers: To keep track of rounds and stitches.
- Tapestry Needle: For weaving in ends.
- Scissors
- Magnetic Snap, Zipper, or Button Closure: Optional, for securing the bag.
- Metal or Plastic Bag Strap Hardware: For an adjustable strap.
- Lining Fabric and Sewing Kit: Optional, for a professional interior finish.
Choosing a Design
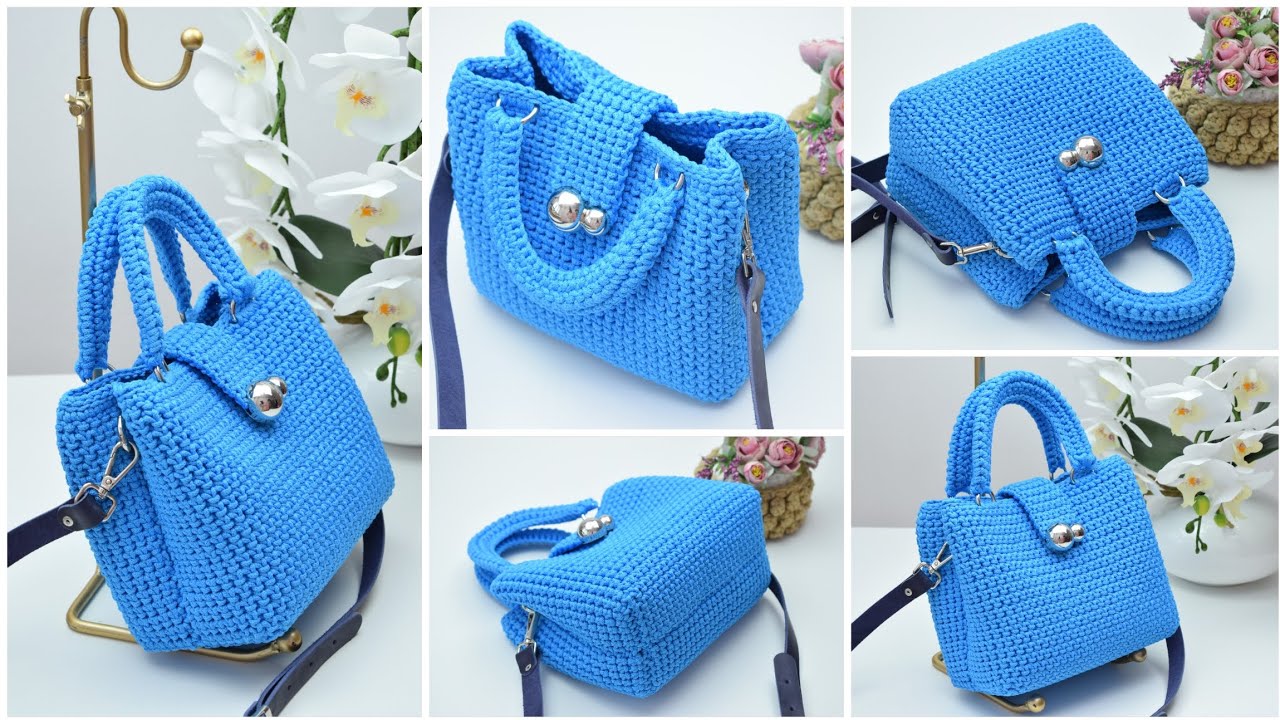
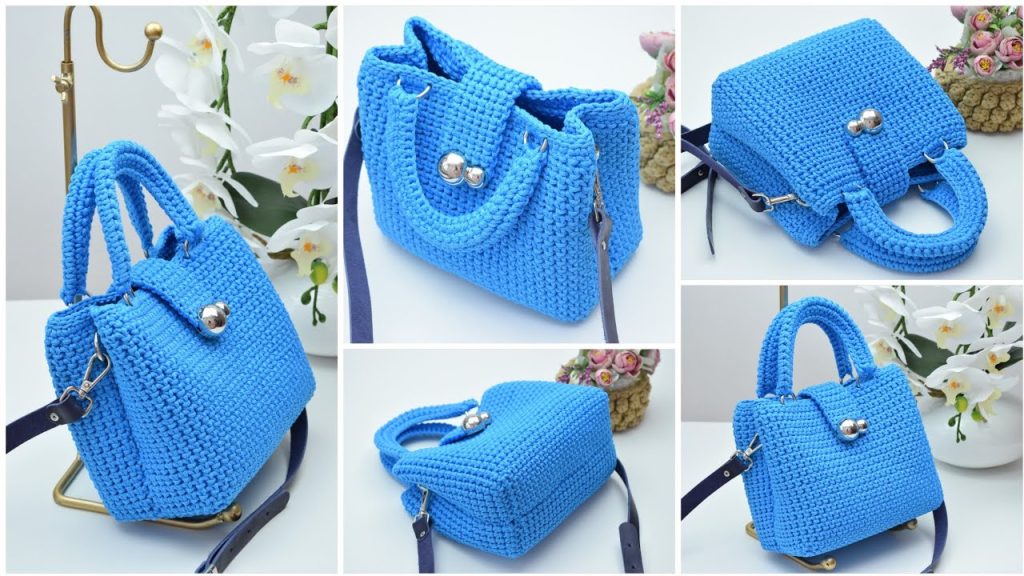
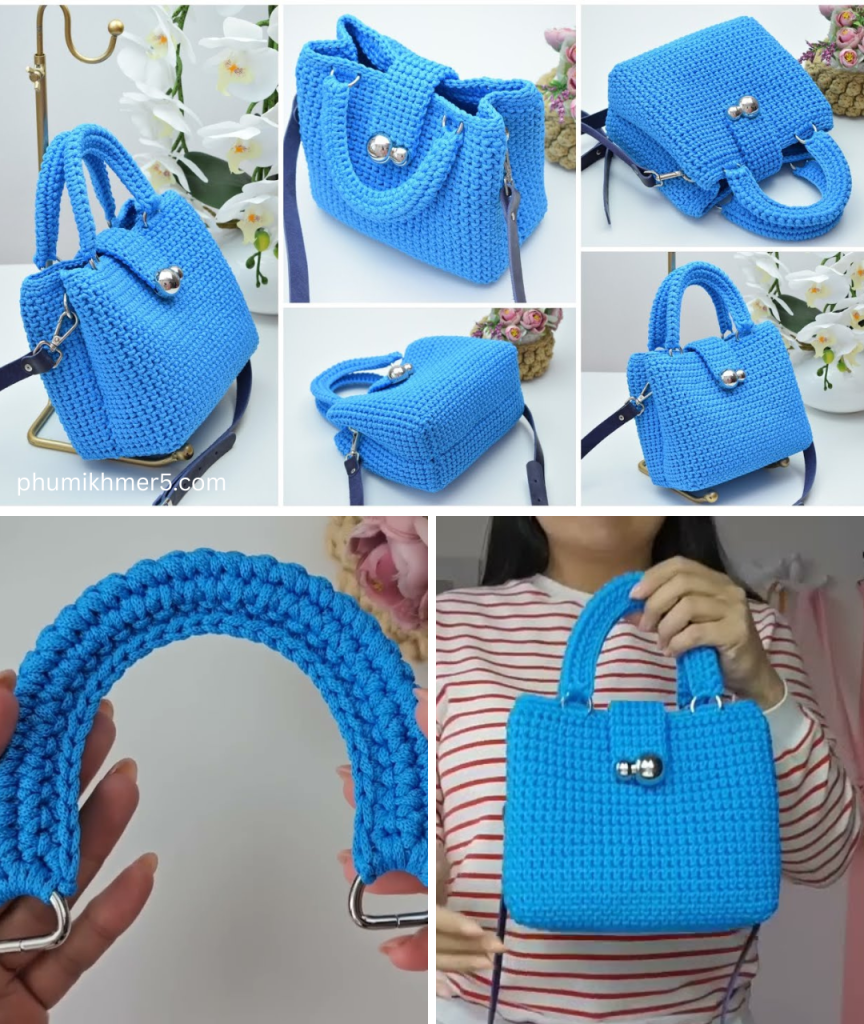
Crossbody bags come in various shapes and sizes—rectangular, circular, oval, or even square. For beginners, a rectangular or square base is easiest to start with. You can also add personalization such as fringes, color blocks, or textured stitches.

Basic Structure of the Bag
A standard crocheted crossbody bag consists of:
- Base: Rectangular or oval foundation.
- Body: Built by crocheting upward from the base.
- Closure: A flap or a zipper to secure your items.
- Strap: Long enough to go across your body.
Step-by-Step Instructions
Step 1: Crochet the Base
We’ll use a rectangular base for simplicity.
Pattern:
- Foundation Row: Chain 21 (or adjust for desired bag width).
- Round 1:
- SC (Single Crochet) in second chain from hook and in each chain across.
- When you reach the end, work 3 SC into the last chain to curve around the end.
- Continue SC on the opposite side of the chain.
- At the starting end, work 2 more SC into the first stitch to form the opposite curve.
- Join with a slip stitch to the first SC.
- Rounds 2–5:
- Work SC around, increasing at the corners (2 SC in corner stitches) to maintain a smooth oval shape.
- Adjust the number of rounds based on desired base size.
Tip: Use a stitch marker to mark the beginning of each round.
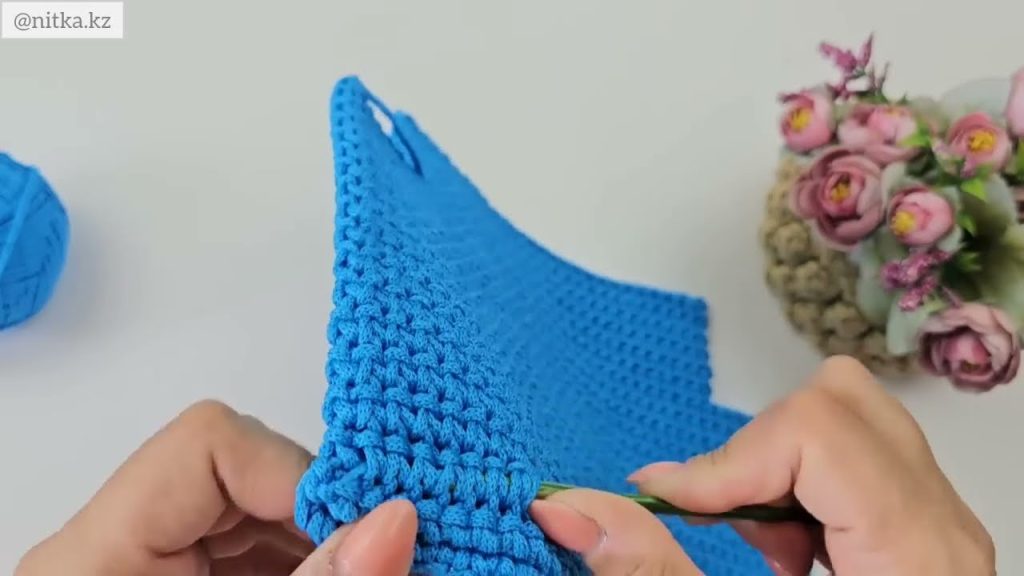
Step 2: Build the Body
Once the base is the desired size, stop increasing and begin building the sides.
- Body Rounds:
- SC in each stitch around without increasing.
- Continue until the bag reaches your desired height (around 6–9 inches is common).
Optional: For a more textured look, alternate rows using:
- Back Loop Only (BLO) SC
- Half Double Crochet (HDC)
- Puff or Bobble Stitches (to create patterns)
Step 3: Create a Flap (Optional)
If you’re adding a flap closure:
- Attach Yarn: Find the center back and count equal stitches on both sides for the flap width.
- Work in Rows: SC or HDC back and forth for 8–10 rows.
- Shape the Flap:
- You can taper the flap by decreasing 1 stitch at each end every other row.
- Finish off and weave in the ends.
Attach a magnetic snap, button, or loop-and-toggle for closure.

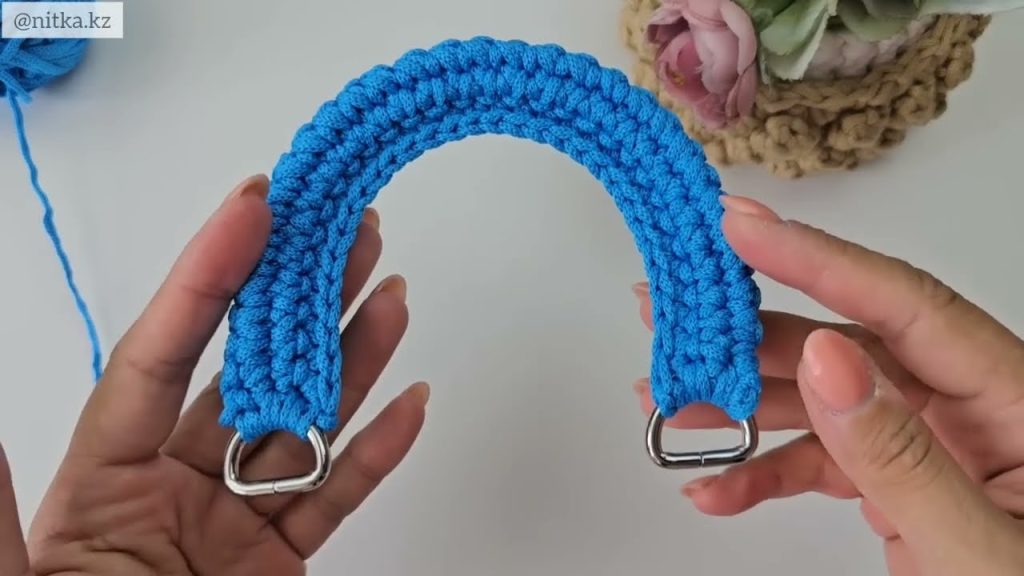
Step 4: Strap Construction
There are several options for making the strap:
- Crocheted Strap:
- Chain to your desired strap length (typically 45–55 inches).
- Work a row or two of SC or HDC for thickness.
- Sew or crochet the ends to the bag’s sides.
- Cord Strap with Hardware:
- Use the same polyester cord, loop it through D-rings or strap clips, and secure with strong knots or stitching.
Adjustable Option: Attach a slide adjuster if you want a strap that can be lengthened or shortened.
Step 5: Finishing Touches
- Weave in all ends securely using a tapestry needle.
- Block the bag by stuffing it and gently steaming (optional, but helps shape).
- Add a fabric lining to protect the interior and add professionalism:
- Cut fabric slightly larger than the bag interior.
- Fold and sew the seams.
- Hand-sew or machine-stitch it into the bag.
Design Ideas & Variations
- Color Blocking: Use different cord colors for the base, body, and strap.
- Textured Stitches: Incorporate puff, shell, or waffle stitches for a unique surface.
- Tassels & Fringe: Add at the flap or bottom edge for a boho look.
- Embroidery or Beads: For extra flair, embellish with thread or beads.
- Mini Crossbody Bags: Great for carrying phones or keys—just reduce the size accordingly.
Care and Maintenance
Polyester cord is quite low-maintenance, but here are some tips:
- Cleaning: Spot clean with a damp cloth. If heavily soiled, hand-wash gently with mild soap and air dry.
- Storage: Store flat or hanging to maintain shape.
- Avoid Heat: Do not iron directly; use low heat if blocking is needed.
Conclusion
Crocheting a crossbody bag from polyester cord is both a practical and creative endeavor. Whether you’re a beginner or an experienced crocheter, this project allows you to explore functionality, structure, and style all in one piece. With endless customization options and the durability of polyester cord, your handmade bag will be as unique as it is long-lasting.
So gather your materials, pick your colors, and enjoy the satisfying process of creating a bag that’s entirely your own!
Video tutorial:


