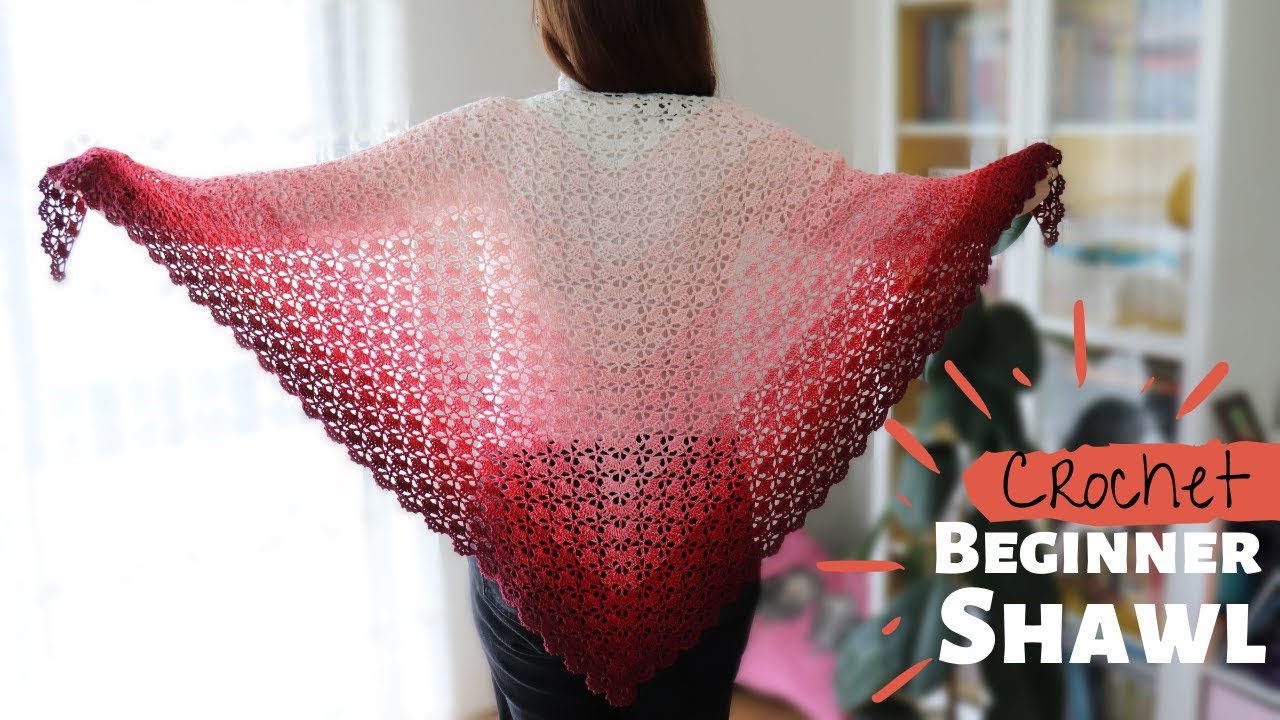
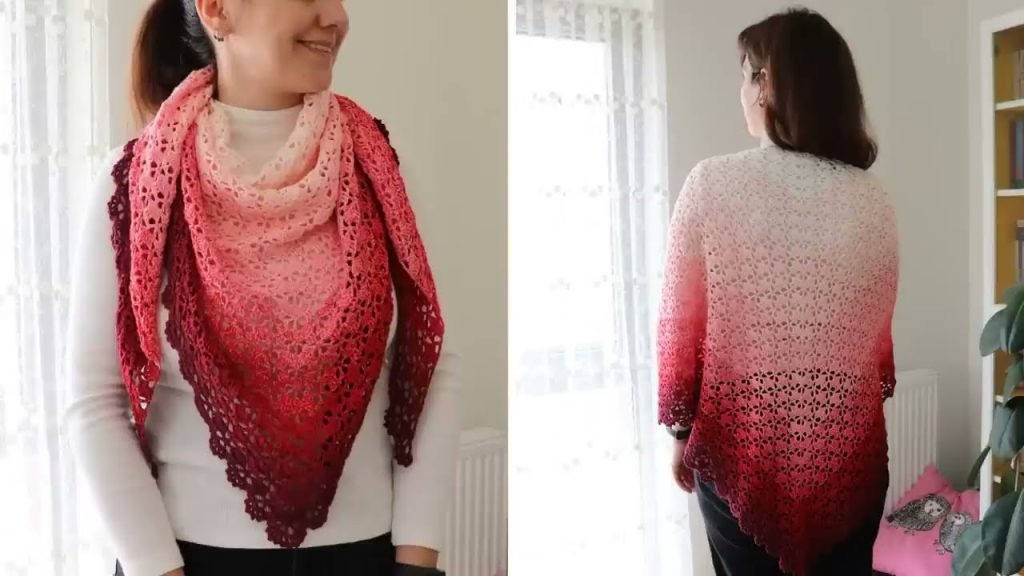
A shawl is a timeless and elegant accessory that adds a touch of sophistication and warmth to any outfit. The beauty of a crocheted shawl lies in its versatility and the way it drapes with a delicate, handcrafted touch. This tutorial will guide you through creating the “Twilight Whisper” Shawl, a design that is both incredibly simple for beginners and stunningly beautiful in its finished form.
This shawl is worked in a top-down, triangular shape, growing with each row to create a gracefully expanding piece. It uses a combination of basic stitches and a rhythmic, meditative pattern that makes it a perfect project for relaxing evenings. The resulting shawl is lightweight yet cozy, with a beautiful drape that makes it perfect for wrapping up on a cool evening or wearing as a stylish statement piece.

Why Crochet the Twilight Whisper Shawl?
- Perfect for Beginners: The simple, repetitive two-row pattern is easy to memorize, allowing you to quickly get into a comfortable rhythm.
- Fast to Grow: The top-down construction means the shawl gets wider with each row, providing a great sense of progress.
- Versatile & Elegant: The finished piece can be styled in multiple ways and looks beautiful in any setting.
- Customizable Size: You can easily make the shawl as large or as small as you desire by simply continuing the pattern.
- Great for Showcase Yarns: This simple stitch pattern allows a beautiful, hand-dyed, or variegated yarn to be the star of the show.
1. Planning Your Shawl: Size & Materials
- Finished Size: The size is completely customizable. A good starting point for a versatile, wearable shawl is approximately 50-60 inches (127-152 cm) wide and 25-30 inches (63-76 cm) long at the center point. You will continue crocheting until you reach your desired dimensions.
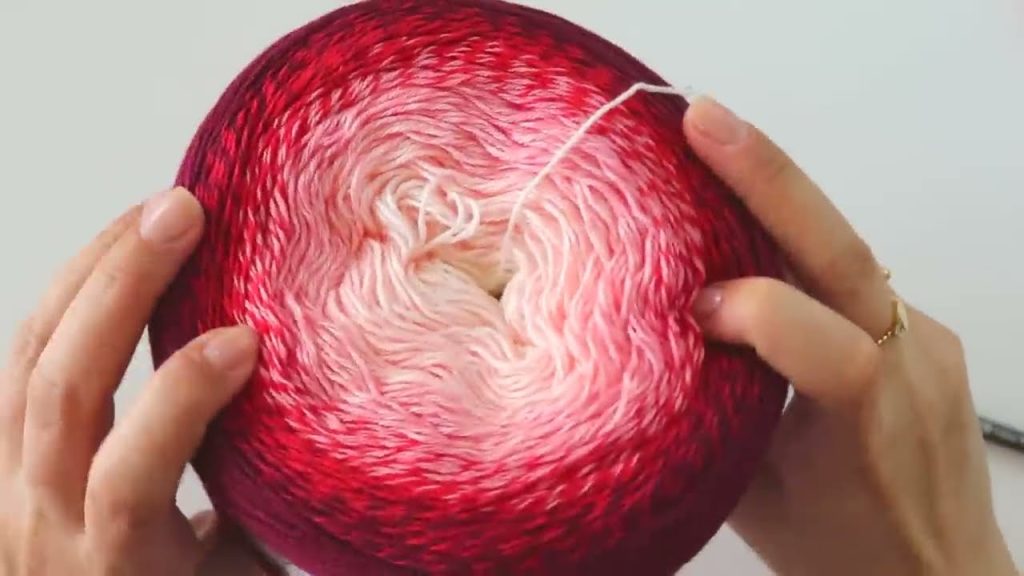
- Yarn Choice: The drape of your finished shawl is heavily dependent on the yarn you choose.
- Fiber: Look for a yarn with good drape, such as Merino Wool, Alpaca, a silk or bamboo blend, or a high-quality acrylic.
- Weight: A lightweight yarn is recommended to prevent the shawl from becoming too heavy. Fingering (#1), Sport (#2), or DK (#3) weight yarns are ideal. This tutorial uses a DK Weight (#3) yarn.
- Color: The pattern looks stunning in solid colors, but a subtly variegated or speckled yarn can also create a beautiful, dynamic effect.
- Quantity: For a shawl of the recommended size, you will need approximately 400-600 yards (365-550 meters) of yarn.
2. Materials You’ll Need
- Yarn: Your chosen quantity of DK Weight (#3) yarn.
- Crochet Hook: 4.0 mm (G-6 US) or a size that gives you a lovely, loose drape with your yarn. A looser gauge is better for a shawl than a tight one.
- Scissors: For cutting yarn.
- Yarn Needle (Tapestry Needle): For weaving in ends.
- Stitch Markers (Optional): To mark the center and ends for easier counting.
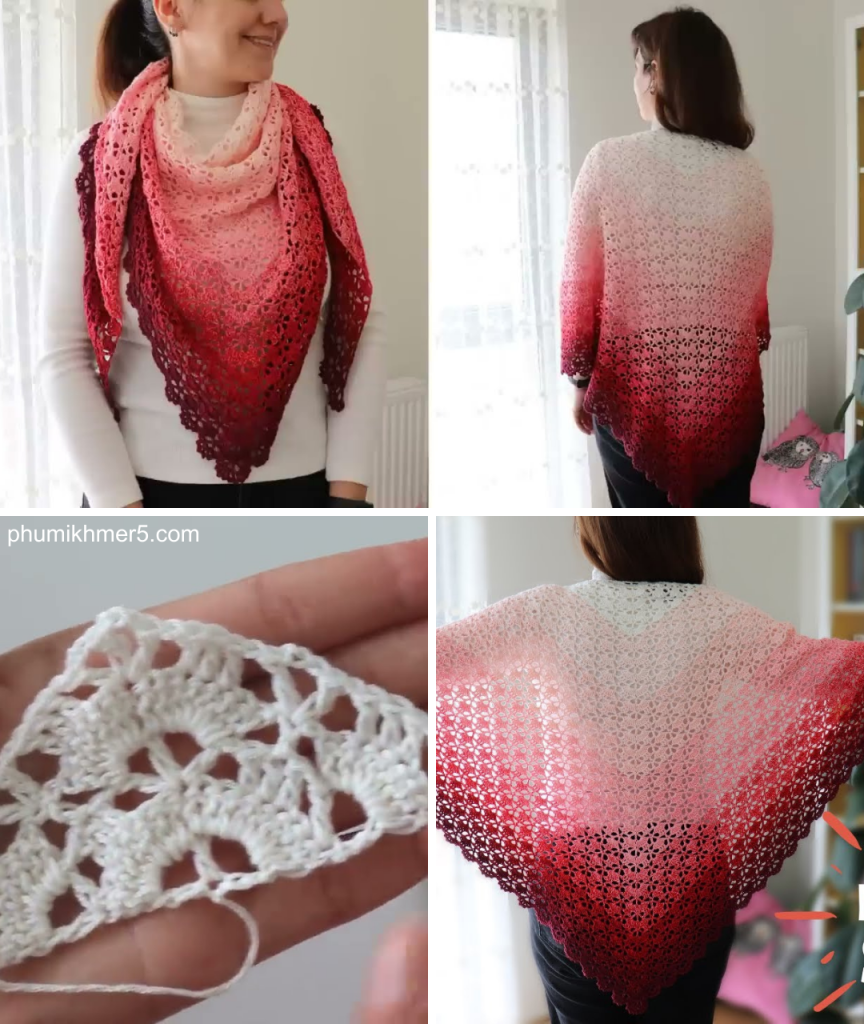
3. Essential Crochet Stitches & Techniques
- Slip Knot
- Chain (ch)
- Slip Stitch (sl st): For joining and neatening edges.
- Double Crochet (dc)
- Triple Crochet (tr): Yarn over twice, insert hook, yarn over, pull up a loop (4 loops on hook), [yarn over, pull through 2 loops] 3 times.
- Chain Space (ch-sp): The space created by a chain in the previous row.
4. Let’s Crochet the Twilight Whisper Shawl!
This shawl is worked from the top center out.
Pattern Notes:
- Ch 3 at the start of a row counts as a dc.
- The shawl will be shaped with increases at the beginning, end, and center of each row.
Step 1: Foundation (The Center Triangle)
- Start with a Magic Ring. (Alternatively, ch 4, sl st to first ch to form a ring.)
- Ch 3 (counts as 1 dc), 3 dc into the ring. Ch 3, 4 dc into the ring.
- Pull the ring tight to close.
- [8 dc, 1 ch-3 space]
- The ch-3 space is your center point and will be the anchor for your increases.
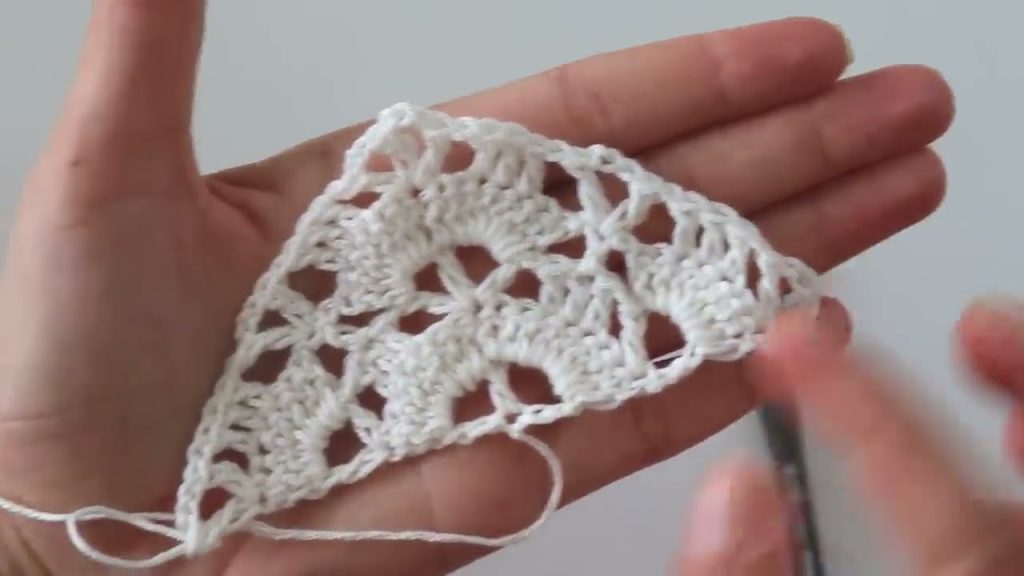
Step 2: Row 1 (The First Increase Row)
- Ch 3 (counts as 1 dc), turn your work.
- Work a V-stitch (dc, ch 1, dc) into the very first stitch (the top of the ch 3 from the previous row).
- Dc in each of the next 3 dc.
- Work a Shell Stitch (3 dc, ch 3, 3 dc) into the center ch-3 space.
- Dc in each of the next 3 dc.
- Work a V-stitch (dc, ch 1, dc) into the last stitch.
- You should now have a distinct V-shape.
Step 3: The Repeating Pattern Rows
The shawl is created by repeating two simple rows.
Row 2 (The V-Stitch Row):
- Ch 3 (counts as 1 dc), turn.
- Dc in the very first stitch.
- Ch 1, skip next st, dc in next st. Repeat from * to * across the side of the shawl, until you reach the center Shell Stitch.
- In the center ch-3 space, work a Shell Stitch (3 dc, ch 3, 3 dc).
- Ch 1, skip next st, dc in next st. Repeat from * to * across the second side of the shawl, until you reach the last stitch.
- Work 2 dc into the last stitch.
- This row creates the classic lacy look with alternating dc and ch spaces.
Row 3 (The Double Crochet Row):
- Ch 3 (counts as 1 dc), turn.
- Dc in the very first stitch.
- Dc in each ch-1 space and in each dc across the side of the shawl, until you reach the center Shell Stitch.
- In the center ch-3 space, work a Shell Stitch (3 dc, ch 3, 3 dc).
- Dc in each ch-1 space and in each dc across the second side of the shawl, until you reach the last stitch.
- Work 2 dc into the last stitch.
- This row adds the solid foundation and texture.
Step 4: Continue Repeating the Pattern
- Repeat Row 2 and Row 3 alternately.
- You will always have a V-Stitch row followed by a DC row.
- Continue this pattern until your shawl reaches your desired size. The shawl will continue to grow, getting wider and longer with each pair of rows.
Step 5: Finishing & Blocking
- Once you are happy with the size of your shawl, finish your last row and fasten off, leaving a 6-inch (15 cm) tail.
- Weave in all ends securely using your yarn needle.
- Blocking is essential! Blocking will open up the lace, even out your stitches, and give your shawl a beautiful, professional drape.
- Wet Blocking: Gently wash your shawl in cool water with a little wool wash. Squeeze out excess water (do not wring or twist!). Lay the shawl flat on a towel or blocking mats and gently stretch it to its final dimensions, using pins to hold it in place. Allow it to air dry completely.
- Steam Blocking: For acrylic yarns, lay the shawl flat on a padded surface. Hover a steam iron (do not touch the yarn!) over the fabric, allowing the steam to penetrate the fibers and relax them. Gently pat and shape the shawl with your hands.

Tips for a Perfect Shawl
- Stitch Markers: Place a stitch marker in the center ch-3 space and the first/last stitch of each row to help you stay on track.
- Count Your Stitches: Occasionally counting the stitches on each side will ensure your shawl remains symmetrical.
- Try on as you Go: Drape the shawl over your shoulders periodically to see if the size and length are what you’re looking for.
Enjoy creating your elegant “Twilight Whisper” shawl. Its simple grace and handmade charm are sure to make it a go-to accessory for any occasion.
Video tutorial:


