
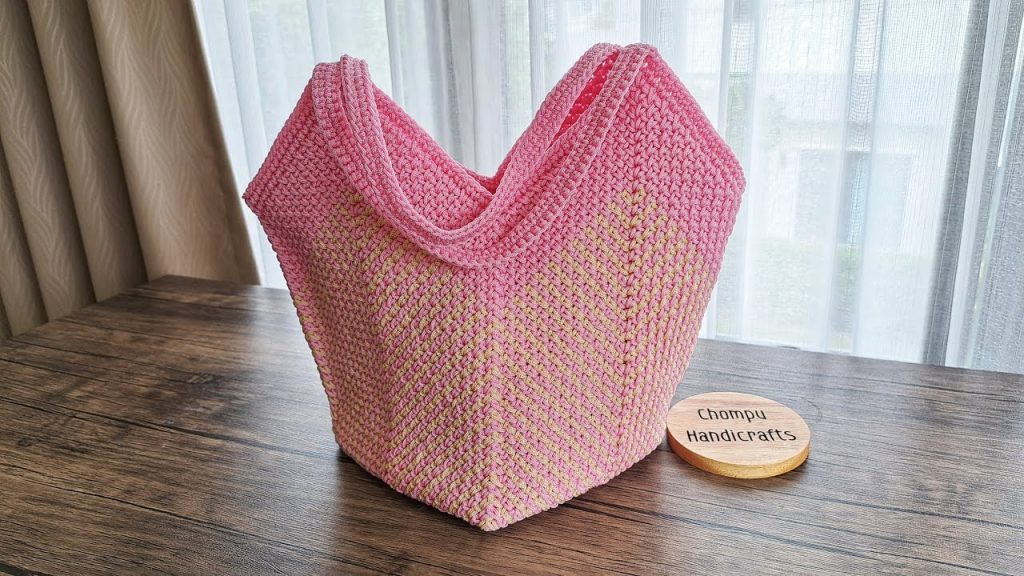
The granny square is a timeless classic, and a bag made from these iconic motifs is a perfect blend of vintage charm and modern style. The “Twilight Blooms” Two-Toned Granny Square Bag is a fantastic project for any crocheter, featuring a simple, beginner-friendly design that is both stylish and incredibly functional. This detailed tutorial will guide you through creating a sturdy, two-toned handbag that is a fantastic way to use up your scrap yarn and express your unique style.
This project is an excellent choice for a beginner looking to create a beautiful, practical accessory or for an experienced crocheter wanting a fast and fun project. The bag is made from individual granny squares that are then joined together, which makes it a great project for on-the-go crocheting.
Why Crochet the Twilight Blooms Bag?
- Iconic & Versatile: The granny square is a classic motif that never goes out of style, and the finished bag is a perfect accessory for any casual outfit.
- Two-Toned Design: Using two colors creates a modern and stylish look that makes the bag pop.
- Skill Building: You’ll master the art of crocheting granny squares and learn how to join them to create a three-dimensional shape.
- Customizable: Easily change the size, colors, and number of squares to create a bag that is a perfect fit for you.
- Great for Scrap Yarn: This project is a fantastic way to use up small amounts of leftover yarn from other projects.
1. Planning Your Bag: Size & Materials
- Finished Size: The pattern is designed for a versatile handbag, approximately 10 inches (25 cm) tall (excluding handles) and 10 inches (25 cm) wide. You can easily adjust the size by changing your hook size or the number of granny squares.
- Yarn Choice: Choose a yarn that is durable and holds its shape well.
- Fiber: A sturdy, medium-weight yarn like Worsted Weight (#4) in Acrylic or Cotton is a great choice.
- Color: You will need two contrasting colors. One for the center of the squares and one for the outer rounds.
- Quantity: You will need approximately 200-300 yards (180-275 meters) of yarn in total. The exact amount will depend on the size of your squares and the number you need.
2. Materials You’ll Need
- Yarn: Your chosen quantity of Worsted Weight (#4) yarn in two colors.
- Crochet Hook: 4.0 mm (G-6 US) or a size that gives you a dense but flexible fabric with your yarn.
- Scissors: For cutting yarn.
- Yarn Needle (Tapestry Needle): For weaving in ends and seaming.
- Stitch Markers (Optional): To mark corners.
3. Essential Crochet Stitches & Techniques
- Slip Knot
- Chain (ch)
- Slip Stitch (sl st): For joining and neatening.
- Double Crochet (dc)
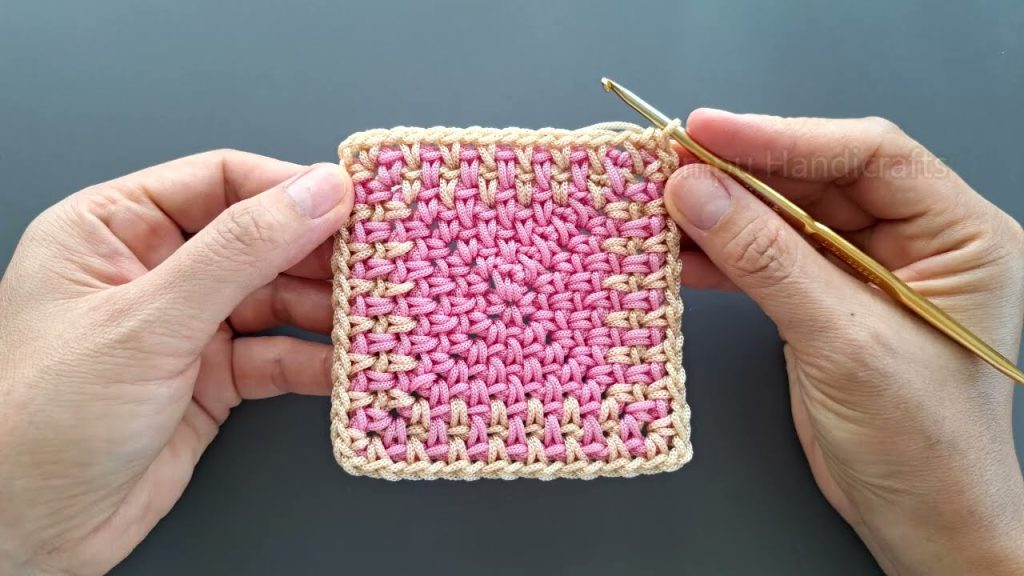
- Granny Cluster: A group of 3 dc stitches worked into the same space.
- Working in the Round: The granny squares are worked in rounds.
- Joining Squares: The process of seaming the squares together.
4. Let’s Crochet the Twilight Blooms Bag!
The bag is made from a series of individual granny squares that are joined together to form the front, back, and handles.
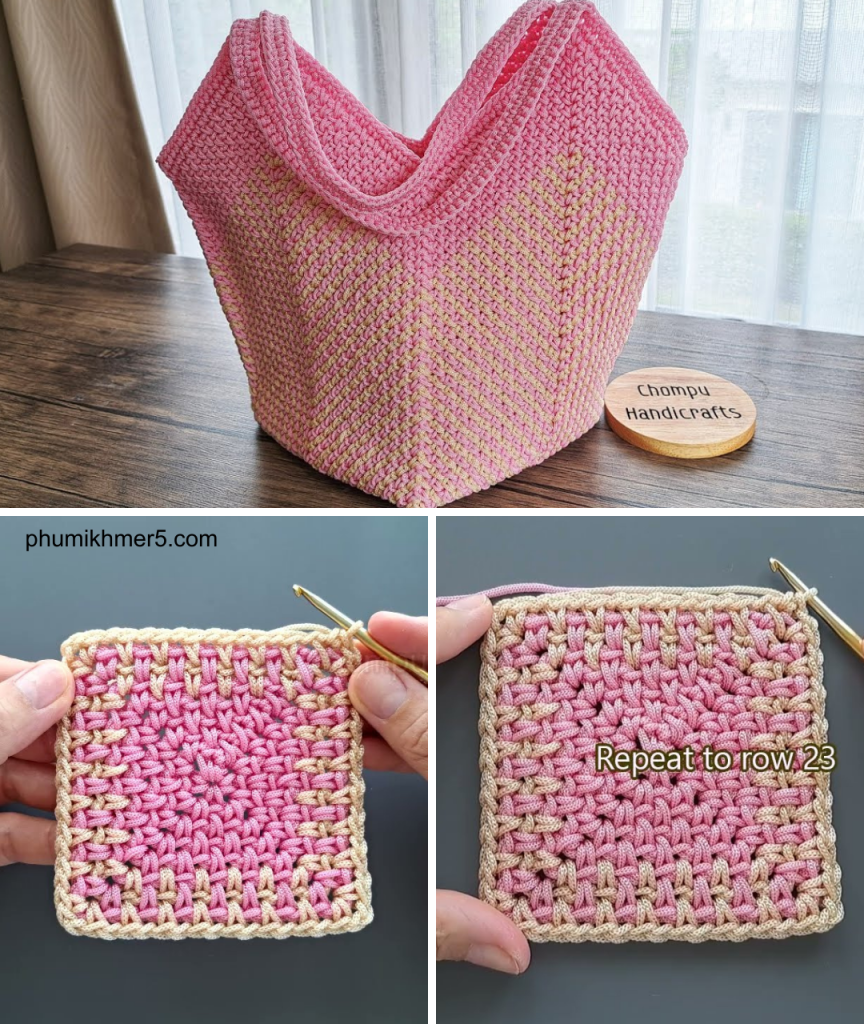
Part 1: The Granny Squares
You will need a total of 2 large granny squares for the front and back of the bag.
- Start with a Magic Ring (or Ch 4, sl st to first ch to form a ring) with Color A.
- Round 1: Ch 3 (counts as 1 dc). Work 2 dc into the ring. Ch 2, work 3 dc into the ring. Repeat from * to * two more times. Ch 2, join with a sl st to the top of the beginning Ch 3.
- [4 groups of 3 dc]
- Round 2: Sl st into the next two stitches and into the first ch-2 space. Ch 3 (counts as 1 dc), work 2 dc into the same ch-2 space. Ch 2, work a Granny Cluster (3 dc) into the next ch-2 space. Repeat from * to * two more times. Ch 2, join with a sl st to the top of the beginning Ch 3.
- Round 3: Change to Color B. Sl st into the next two stitches and into the first ch-2 space. Ch 3 (counts as 1 dc), work 2 dc into the same ch-2 space. Ch 1, work a Granny Cluster into the next space. Ch 2, work a Granny Cluster into the next corner space. Repeat from * to * two more times. Ch 1, work a Granny Cluster into the last space, Ch 2, join with a sl st to the top of the beginning Ch 3.
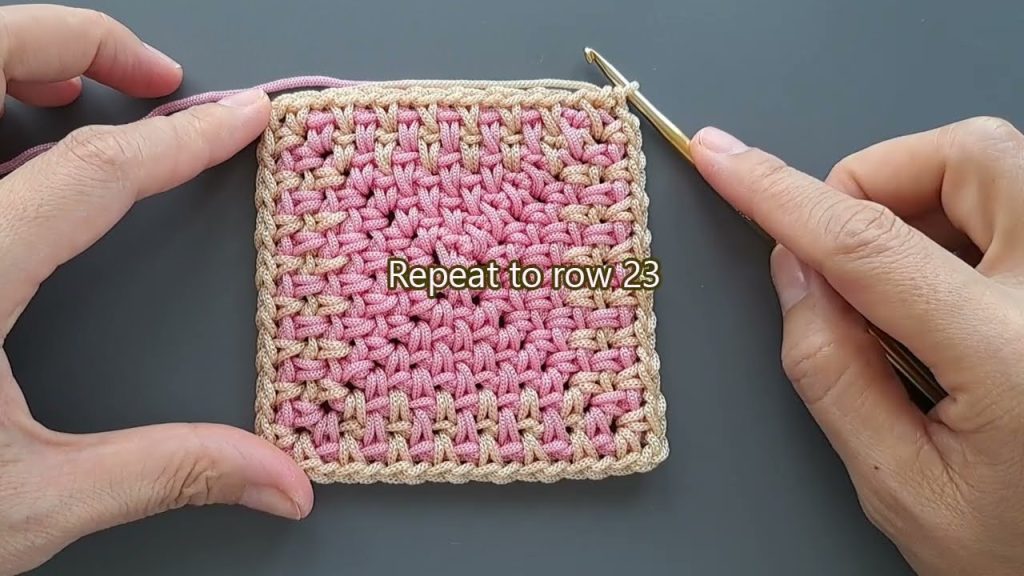
- Repeat Round 3 until your squares are approximately 10 x 10 inches (25 x 25 cm).
- Make sure both your squares are the same size!
- Fasten off and weave in all ends.

Part 2: Joining the Squares and Handles
- Lay Out: Lay out your two large squares with wrong sides together.
- Seam: Use the whip stitch or a slip stitch join to seam the three sides together, leaving the top open.
- Create Handles: Ch 40 (or your desired length for the handle) with Color B. Sc in the 2nd ch from hook and in each ch across. Fasten off, leaving a long tail for sewing. Repeat for the second handle.
- Attach Handles: Position the handles evenly on the top edge of the bag. Using your yarn needle and the long tail, securely sew the handles to the bag.
Part 3: The Bottom
- Join Yarn: Rejoin Color B to the bottom of the bag.
- Round 1: Ch 2 (does not count as a stitch). Hdc in each stitch around the bottom of the bag. Join with a sl st to the first hdc.
- Round 2: Ch 2. Hdc in each stitch around. Join with a sl st.
- Fasten off and weave in all ends.
Enjoy your beautiful, handmade “Twilight Blooms” Two-Toned Granny Square Bag. It’s a labor of love that is a perfect addition to your accessories!
Video tutorial:


