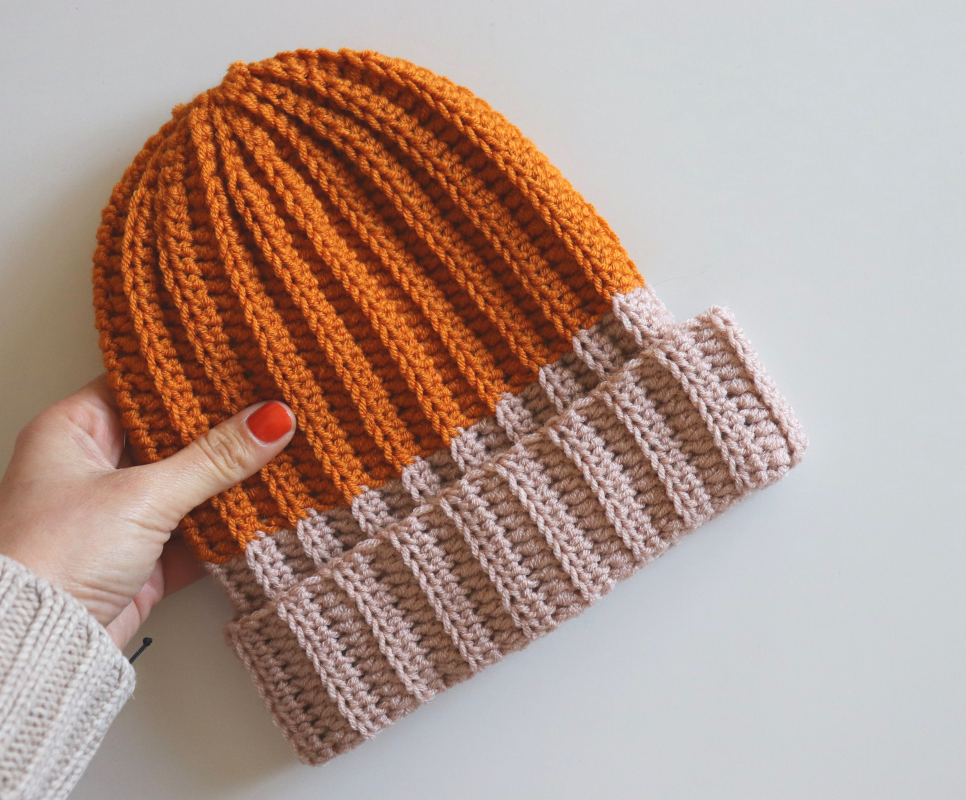
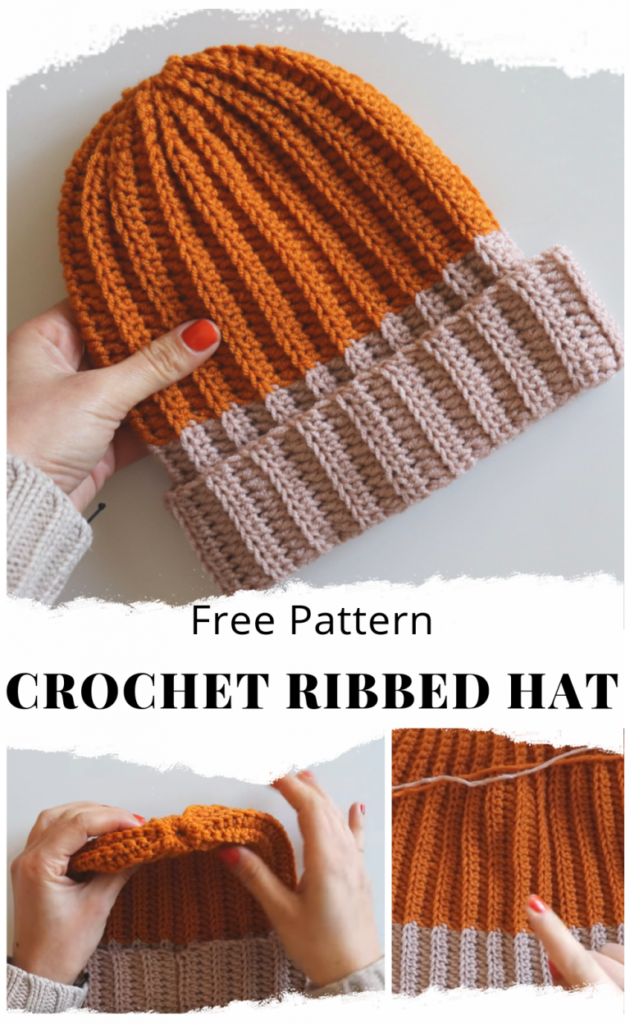
A beautifully textured, ribbed crochet hat is a fantastic accessory for any season. The “Urban Explorer” Ribbed Crochet Hat is a simple yet elegant project that showcases a classic stitch, creating a stretchy and stylish beanie that is perfect for both men and women. The repetitive ribbing is created by working in the back loop only, which not only gives the hat its signature look but also provides a comfortable, snug fit.
This detailed tutorial will guide you through creating this gorgeous hat, from the bottom-up brim to the clean, finished crown. It’s an excellent project for any crocheter looking to create a durable and fashionable accessory with a touch of handmade charm.
Why Crochet the Urban Explorer Hat?
- Stunning Texture: The ribbed stitch creates a classic, elegant texture that looks sophisticated and professional.
- Stretchy & Comfortable: The dense fabric created by the stitch makes the hat stretchy and provides a comfortable, snug fit.
- Beginner-Friendly: Uses only basic stitches, making it accessible for crocheters of all skill levels.
- Versatile & Timeless: The design is classic and can be used for everything from a casual everyday hat to a stylish winter accessory.
- Customizable: Easily adjust the size, add a pom-pom, or change the color to make it your own.
1. Planning Your Hat: Size & Materials
- Finished Size: The pattern is designed for a versatile one-size-fits-most adult head (approx. 22-23 inches / 56-58 cm). You can easily adjust the size by changing your hook size or the number of rows.
- Yarn Choice: Choose a yarn that is durable and has good stitch definition.
- Fiber: A smooth, worsted weight Acrylic, Wool, or a sturdy Cotton is recommended. The stretch in wool and acrylic makes for a very comfortable hat.
- Weight: Worsted Weight (#4) is ideal for this project, as it provides a good balance of durability and drape.
- Color: A single, solid color will best highlight the ribbed texture of the pattern.
- Quantity: You will need approximately 150-200 yards (137-183 meters) of worsted weight yarn.
2. Materials You’ll Need
- Yarn: One or two skeins of Worsted Weight (#4) yarn.
- Crochet Hook: 5.0 mm (H-8 US) or a hook size that gives you a dense but flexible fabric with your yarn.
- Scissors: For cutting yarn.
- Yarn Needle (Tapestry Needle): For weaving in ends.
- Stitch Markers (Optional): To mark the beginning of rounds.
3. Essential Crochet Stitches & Techniques
- Slip Knot
- Chain (ch)
- Slip Stitch (sl st): For joining and neatening.
- Half Double Crochet (hdc)
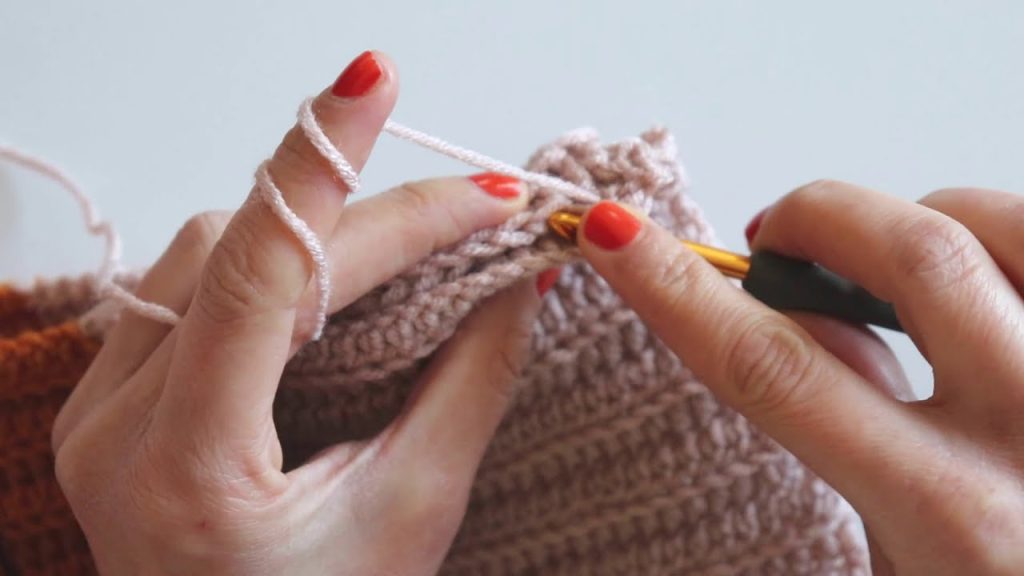
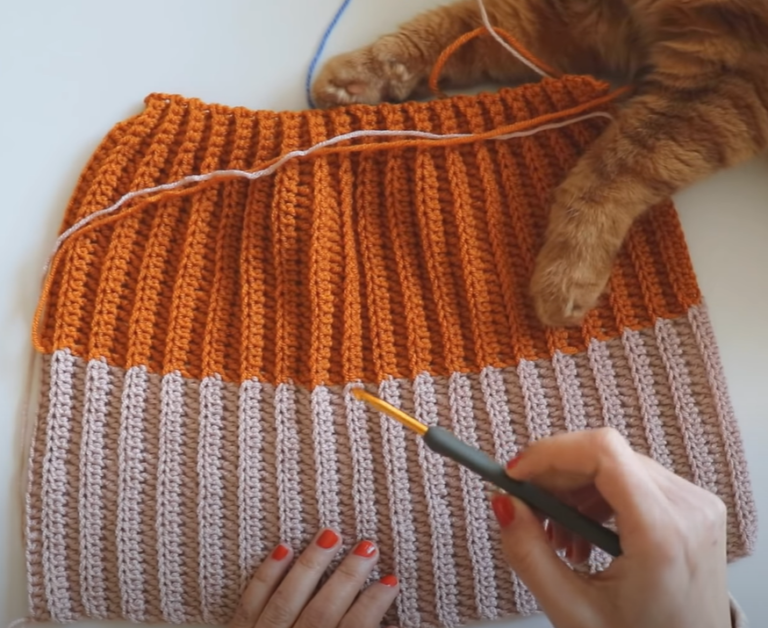
- Working in Back Loop Only (BLO): This is the key technique for creating the ribbed effect. You will insert your hook into only the back loop of the stitch, leaving the front loop unworked.
- Working in Rows and Seaming: The hat is made as a flat rectangle and then seamed together.
4. Let’s Crochet the Urban Explorer Hat!
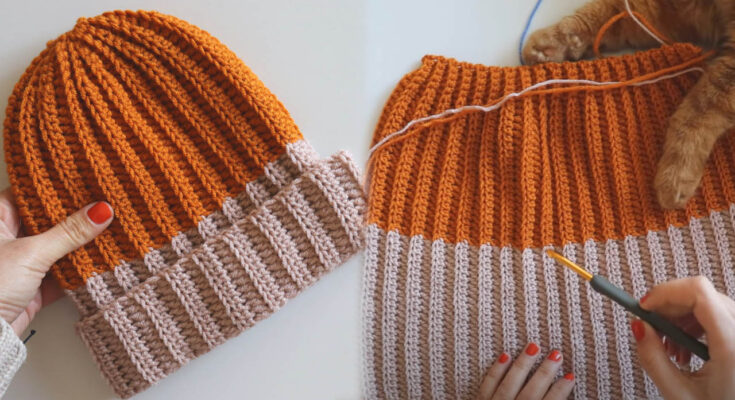
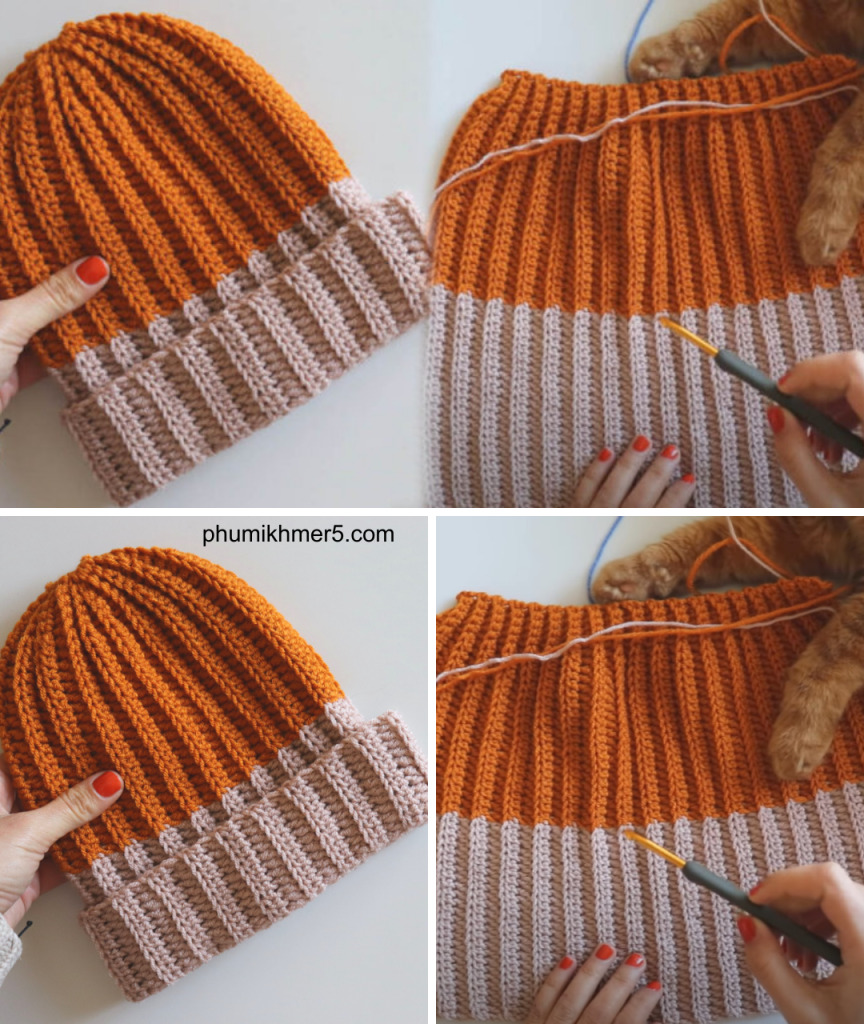
The hat is worked as a flat rectangle and then seamed into a tube. The top is then gathered to form the crown.
Part 1: The Hat Body (Worked in Rows)
This creates the main, ribbed section of the hat.
- Foundation Chain: Ch 60 (or a chain length that reaches the desired circumference of your head).
- Row 1: Hdc in the 2nd ch from hook. Hdc in each of the next 58 chs. Ch 1, turn.
- Row 2 (Ribbing): Hdc in the back loop only (BLO) of each stitch across. Ch 1, turn.
- Repeat Row 2: Continue working this row until the piece measures approximately 10 inches (25 cm) tall.
- The piece should be a long, ribbed rectangle. The length of the rectangle will be the circumference of your head, and the width of the rectangle will be the height of your hat.
Part 2: Seaming & Shaping the Crown
This step turns the flat rectangle into a hat.
- Seaming: Fold the rectangle in half, with the right sides facing each other. Use a sl st or a whip stitch to seam the two long edges together.
- Gather the Crown:
- With your yarn needle and a long tail of yarn, weave the needle in and out of the top stitches of the hat.
- Once you have woven the needle through all the top stitches, pull the yarn tightly to close the hole.
- Weave in the tail to secure the gathered crown.
Part 3: The Brim (Optional)
This step adds a bit of extra warmth and style to the hat.
- Rejoin Yarn: Rejoin your yarn to the bottom of the hat.
- Round 1: Ch 1 (does not count as a stitch). Sc in each stitch around the bottom of the hat. Join with a sl st to the first sc.
- Round 2: Ch 1. Sc in each stitch around. Join with a sl st.
- Fasten off and weave in all ends.
Enjoy your beautiful and unique “Urban Explorer” Ribbed Crochet Hat. Its elegant texture and timeless design are sure to be a go-to accessory for any occasion!
Video tutorial:


