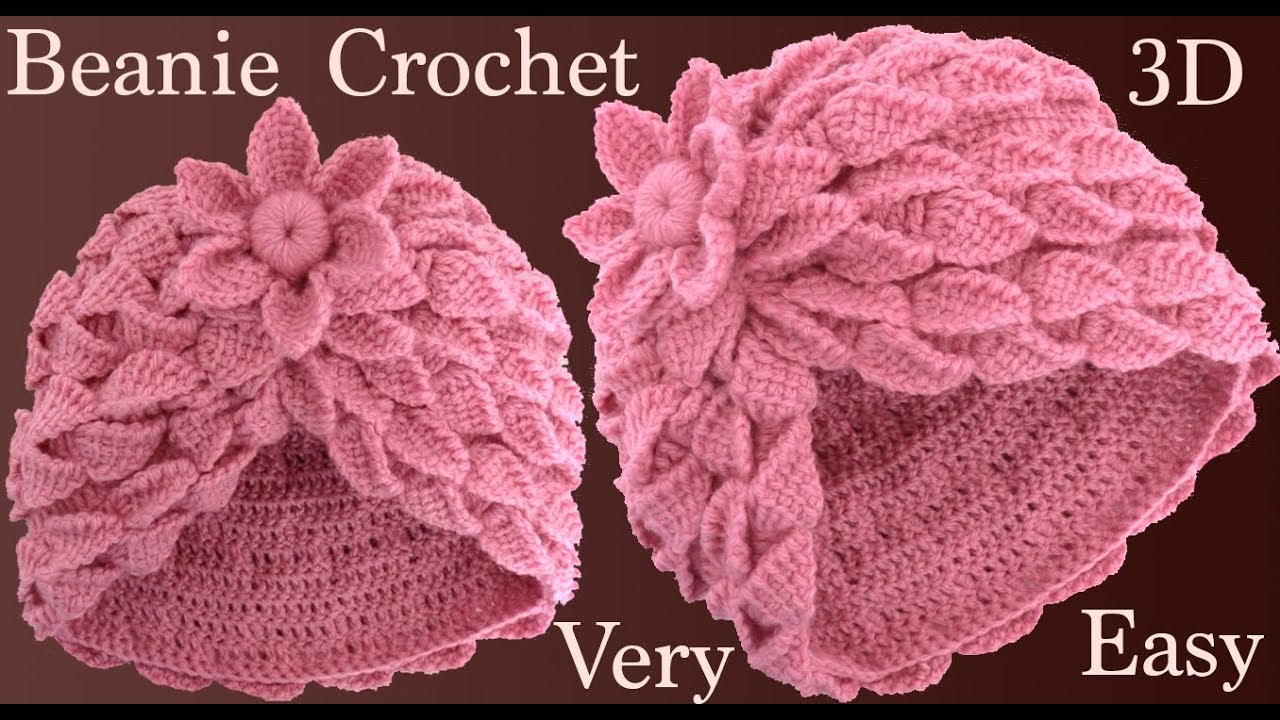
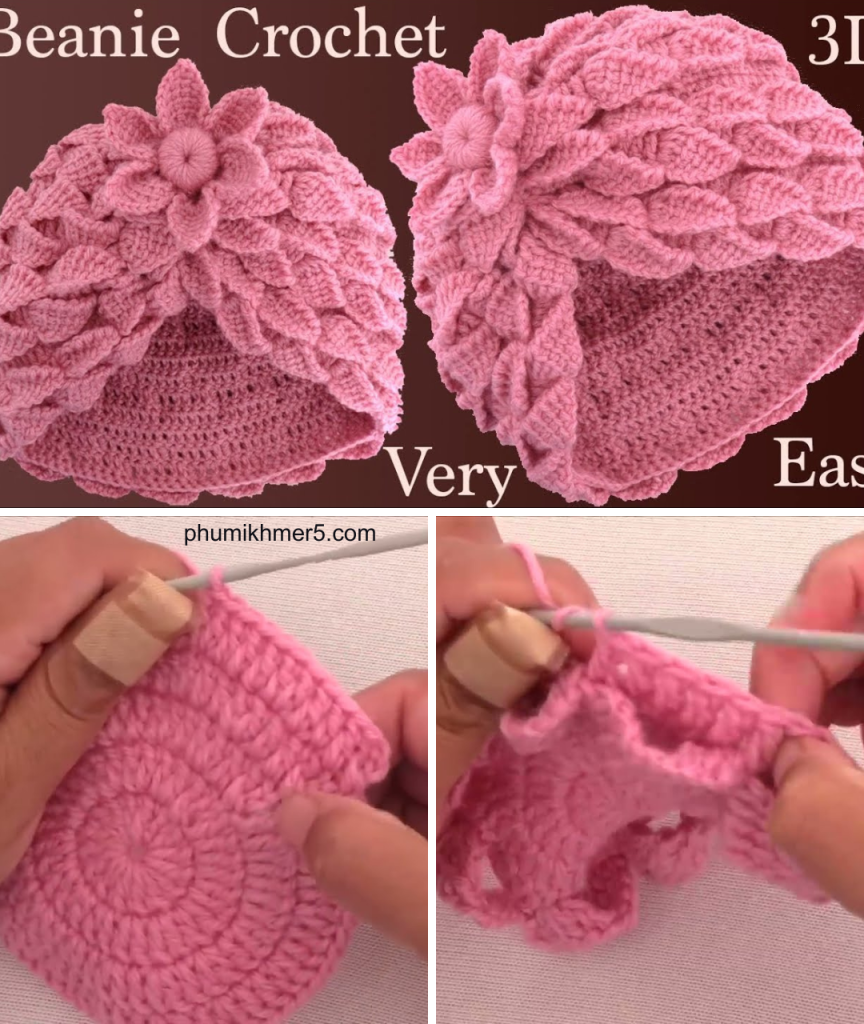
Crocheting a beanie is a satisfying project, and incorporating a beautiful textured stitch like the 3D leaf stitch takes it to the next level. This stitch creates a stunning raised leaf pattern that adds depth, dimension, and a touch of nature-inspired elegance to your handmade hat.
Whether you’re making a cozy gift or crafting for yourself, this guide will walk you through every step — from selecting the right yarn and tools to mastering the 3D leaf stitch and assembling your beanie.
🧶 Materials You’ll Need:
Before we dive into the pattern, gather the following supplies:
- Yarn: Worsted weight (category 4) or DK weight yarn works best for texture.
- Cotton yarn gives a firm structure.
- Acrylic or wool blends offer warmth and flexibility.
- Crochet Hook: Size H/5.0 mm (adjust according to your yarn).
- Stitch Markers: Helpful for keeping track of your rounds.
- Yarn Needle: For weaving in ends.
- Scissors
- Measuring Tape
🧵 Abbreviations (US Terms):
- ch – chain
- sl st – slip stitch
- sc – single crochet
- dc – double crochet
- tr – treble crochet
- fpdc – front post double crochet
- st(s) – stitch(es)
- rep – repeat
- 3D Leaf Stitch – Explained in detail below
🍃 What is the 3D Leaf Stitch?
The 3D Leaf Stitch is a textured stitch that mimics overlapping leaves. It’s made by working clusters of treble crochets around previous stitches to build out raised leaf shapes.
This stitch adds a sculptural, botanical element and works beautifully in beanies, scarves, or even cardigans.
🧑🏫 Skill Level:
Intermediate — This beanie combines simple stitches (like dc and tr) but involves post stitches and working around previous rows for the 3D effect. Familiarity with basic crochet rounds and texture stitches is helpful.
✨ Finished Dimensions:
- Adult Medium: Fits 21–23″ (53–58 cm) head circumference
- Length: Approx. 8″ (20 cm) from crown to brim (adjustable)
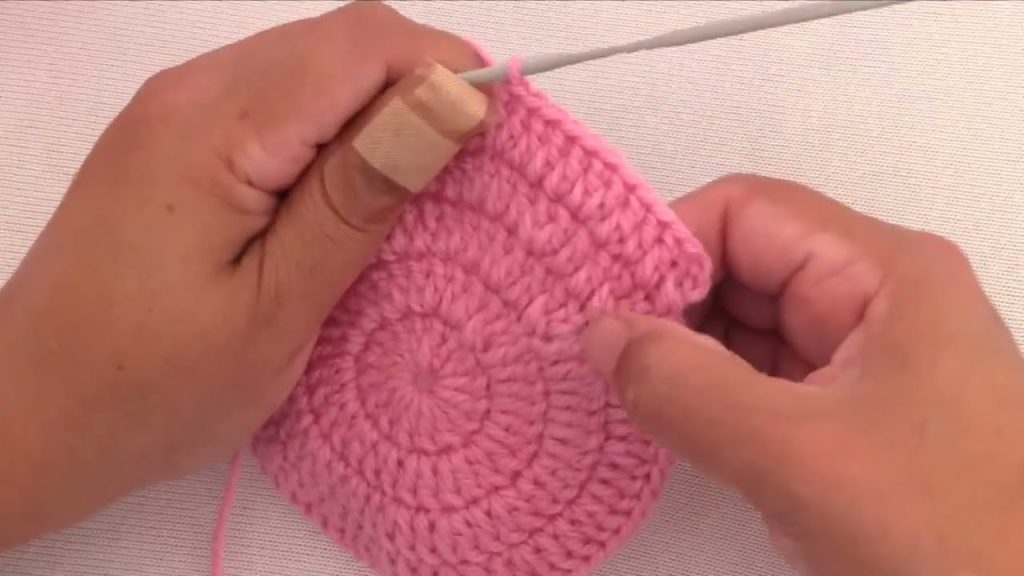
🪡 Part 1: CROCHET THE CROWN OF THE BEANIE
Start by working in the round to form the top of the beanie.
🔁 Crown Pattern (in Rounds):
Round 1:
Make a magic ring, ch 2 (counts as dc), work 11 dc into the ring. Join with a sl st to top of ch-2. (12 sts)
Round 2:
Ch 2, 2 dc in each st around. Join. (24 sts)
Round 3:
Ch 2, 1 dc in next st, 2 dc in next st, rep around. Join. (36 sts)
Round 4:
Ch 2, 1 dc in next 2 sts, 2 dc in next, rep around. Join. (48 sts)
Round 5:
Ch 2, 1 dc in next 3 sts, 2 dc in next, rep around. Join. (60 sts)
➡️ Stop increasing here for an adult size. You can make additional increase rounds if needed for a larger size.
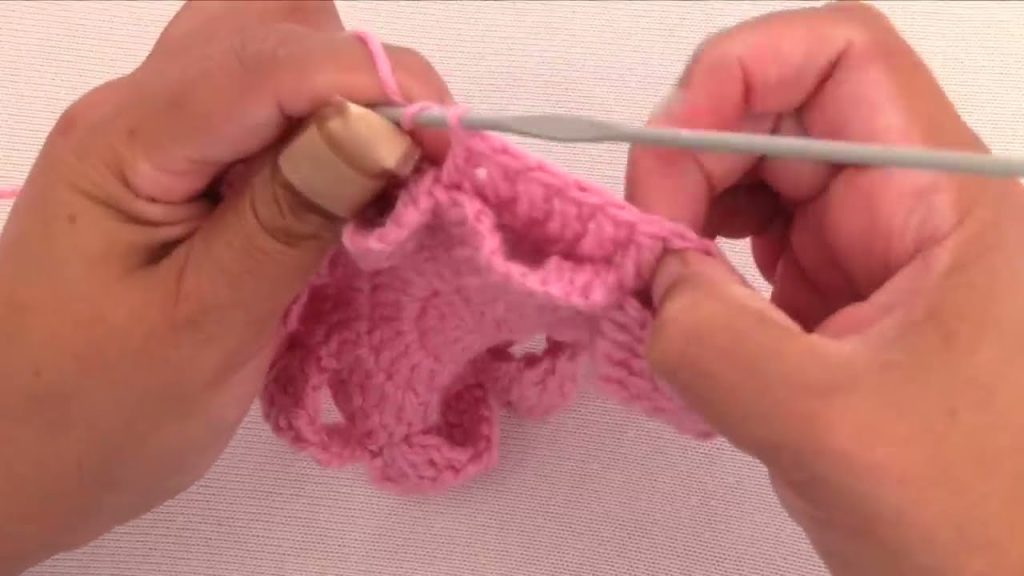
🌿 Part 2: BEGIN THE 3D LEAF STITCH SECTION
Once the crown is wide enough, begin adding your 3D leaf stitch to the body of the beanie.
🌱 How to Crochet the 3D Leaf Stitch:
This is a two-round repeat:
- One round of base stitches (dc)
- One round of leaf clusters worked around those dc
🌿 Leaf Pattern Breakdown:
Leaf Round 1 (Setup):
Ch 2, dc in each st around. Join. (60 sts)
Leaf Round 2 (Leaf Clusters):
Ch 1, skip 2 sts, work the following in the skipped space:
- (Yarn over twice, insert hook around post of the skipped dc from previous round, pull up a loop, [yo, pull through 2] twice) × 3 times to create 3 treble crochet clusters (don’t finish last pull through)
- Yo, pull through all loops on hook (you now have one leaf cluster)
- Ch 2, sl st in next st
➡️ Repeat from * to * around the round.
This forms raised leaf shapes separated by small gaps.
🧶 Continue Pattern:
Repeat the two leaf rounds (1 row of dc, 1 row of 3D leaf clusters) for about 5–6 inches or until desired length before the brim.
Your work should begin to look like a garden of leaves growing outward from the crown. The beanie will begin to take on a gently slouched or fitted shape depending on how many leaf repeats you make.
🧵 Part 3: CROCHET THE BRIM
To finish off your beanie and give it a snug fit, add a brim.
🧢 Ribbed Brim (Using fpdc/bpdc):
Round 1:
Ch 2, fpdc around next st, bpdc around next st, repeat around. Join.
Round 2–4 (or more):
Repeat Round 1 for desired brim depth.
➡️ Tip: If you’re new to front and back post double crochet, just think of “fpdc” as wrapping your stitch around the front of the post of the stitch from the row below, and “bpdc” as wrapping it behind the post.
🪄 Finishing:
- Fasten off and weave in all loose ends with a yarn needle.
- Add a faux fur pom-pom or make your own using leftover yarn.
- Optionally block your hat for an even shape and stitch definition.
👒 Pattern Variations & Tips
- For slouchy style: Add more rounds of the 3D leaf stitch section.
- For fitted style: Begin brim after ~5 inches from crown.
- For a child’s size: Stop crown increases earlier (around 48 sts), and reduce the number of pattern repeats.
- Color changes: Try using a tonal or ombré yarn to enhance the leafy texture.
🧡 Final Thoughts
Crocheting a 3D Leaf Stitch Beanie is a creative and rewarding project that results in a truly unique piece. The raised leaf pattern is eye-catching and ideal for autumn and winter accessories. Once you master the technique, you can incorporate this stitch into other projects like scarves, mittens, and sweaters.
If you’re looking for a relaxing but visually striking crochet experience, this project combines the best of both worlds — simple structure with beautiful texture.
Video tutorial: