
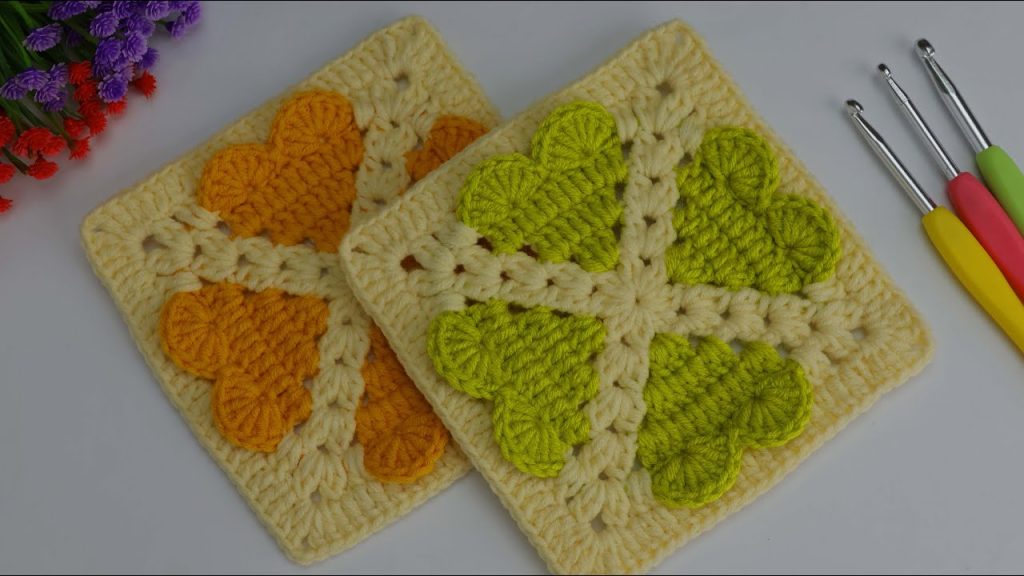
Inspired by the intricate and unique design of the “Unusual Granny Square” tutorial from the video, this pattern transforms that beautiful stitch work into a practical and eye-catching tote bag. The Infinite Heart Granny Square features a dense, textured center that opens up to delicate, heart-like clusters, making it a truly unique piece you’ll cherish forever.
This pattern is for a medium-sized tote bag, perfect for carrying project supplies, groceries, or everyday essentials.
📋 Project Details & Materials
| Item | Detail | Notes |
| Project | Infinite Heart Tote Bag | Uses 2 large granny squares (front/back) + 1 solid side panel. |
| Skill Level | Intermediate | Requires attention to detailed cluster and puff stitch placement. |
| Yarn | Worsted Weight (Category 4) Cotton or Cotton Blend | Choose a yarn with good structure for the bag’s shape. Approx. 400 yards total. |
| Hook | 4.0 mm (G/6) or size needed to achieve a tight gauge. | A smaller hook ensures dense fabric for the bag’s structure. |
| Notions | Stitch markers (essential for corners), Tapestry needle, Scissors. |
Gauge (Measured in Square)
After completing Round 8, the square should measure approximately 8 inches x 8 inches.
📚 Abbreviations (US Crochet Terms)
| Abbreviation | Meaning |
| Ch | Chain |
| St(s) | Stitch(es) |
| SC | Single Crochet |
| DC | Double Crochet |
| Tr | Treble Crochet |
| Sl St | Slip Stitch |
| Sp | Space |
| Sk | Skip |
| Beg | Beginning |
✨ Special Stitches
| Stitch Name | Abbreviation | Instruction |
| Corner Shell | Corner | (2 DC, Ch 2, 2 DC) into the designated corner space. |
| 3-DC Cluster | 3DC Cl | 3 Double Crochet stitches worked into the same space. |
| Puff Stitch (PS) | PS | [Yarn over, insert hook into designated St/Sp, pull up a loop] 3 times (7 loops on hook). Yarn over, pull through all 7 loops on hook. Ch 1 to secure. |
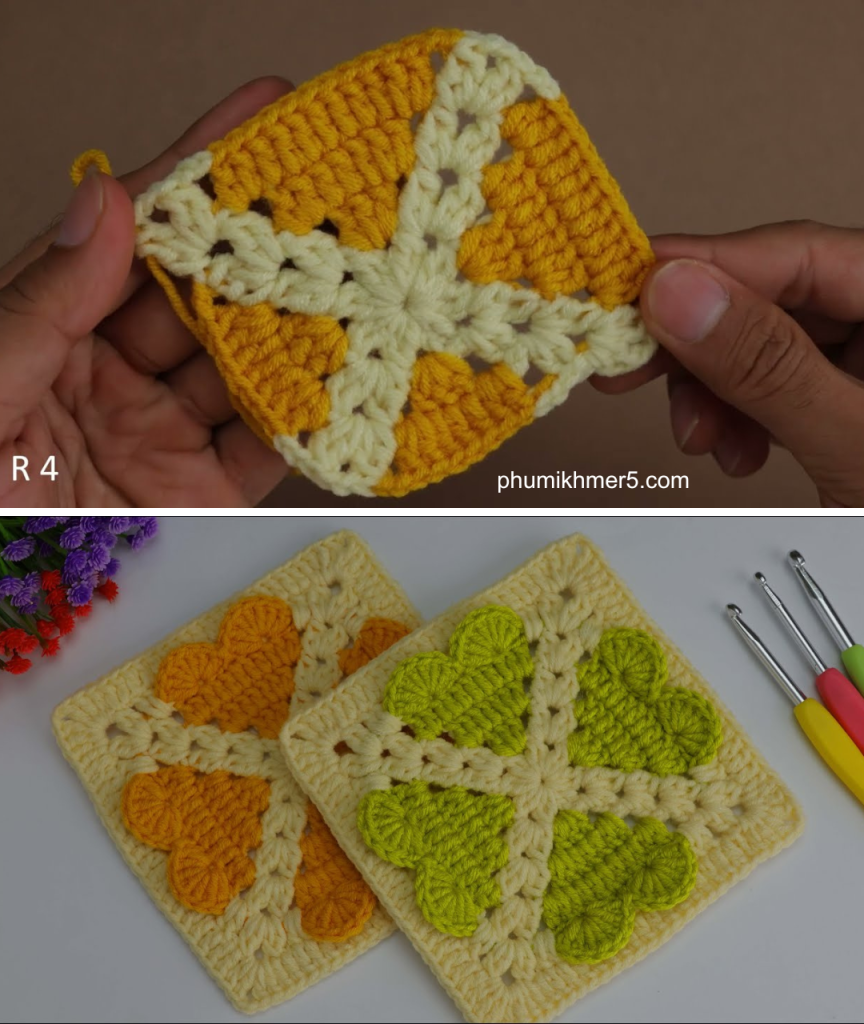
Part 1: The Infinite Heart Granny Square (Make 2)
This square is worked in the round, starting from the center.
Foundation Ring: Ch 4, Sl St into the first Ch to form a ring.
Round 1: Ch 3 (counts as 1st DC), 11 DC into the ring. Sl St to the top of the Beg Ch 3 to join. (12 DC)
Round 2 (Puff Round): Ch 1 (does not count as St), PS in the same St, Ch 1. *Sk 1 DC, PS in the next DC, Ch 1. Rep from * around. Sl St to the top of the Beg PS to join. (6 PS)
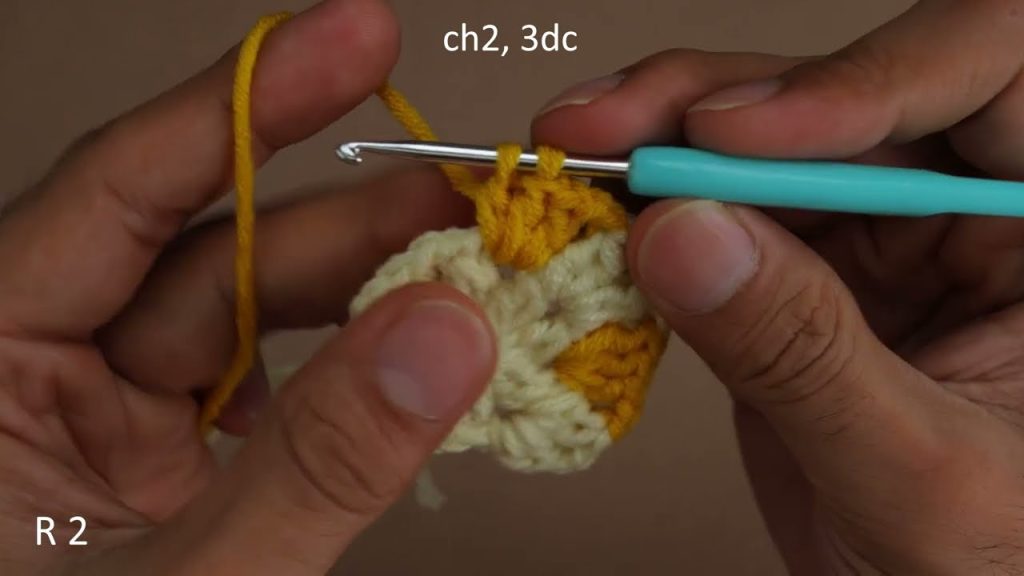
Round 3 (First Corner Set-up): Sl St into the first Ch-1 Sp. Ch 3 (counts as 1st DC), 2 DC into the same Sp. *Ch 2, Corner (2 DC, Ch 2, 2 DC) in the next Ch-1 Sp. Ch 2, 3 DC Cl in the next Ch-1 Sp. Rep from * three more times, replacing the last 3 DC Cl with a Sl St to the top of the Beg Ch 3. (4 Corners, 4 3DC Cls)
- Note: Place your stitch markers in the Ch-2 corner spaces.
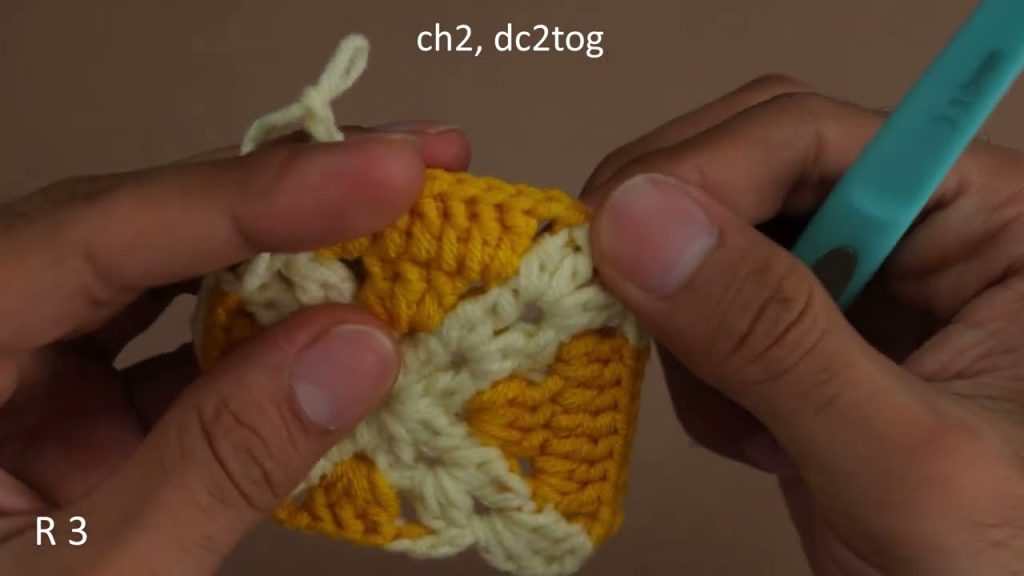
Round 4 (Corner Expansion): Sl St to the next Ch-2 Sp. Ch 3, 2 DC into the same Sp. *[Ch 1, 3 DC Cl in the next Ch-2 Sp] twice, Ch 1, Corner in the next corner Ch-2 Sp. Rep from * around, ending with Sl St to the top of the Beg Ch 3.
Round 5 (Lace Detail): Sl St to the next Ch-1 Sp. Ch 1, SC in the same Sp. *Ch 3, Sk 3 DC, SC in the next Ch-1 Sp. Ch 3, Sk 3 DC, SC in the corner Ch-2 Sp. Ch 3, Sk 3 DC, SC in the next Ch-1 Sp. Rep from * around. In the corners, work (SC, Ch 3, SC) in the Ch-2 corner Sp. Sl St to the Beg SC to join.
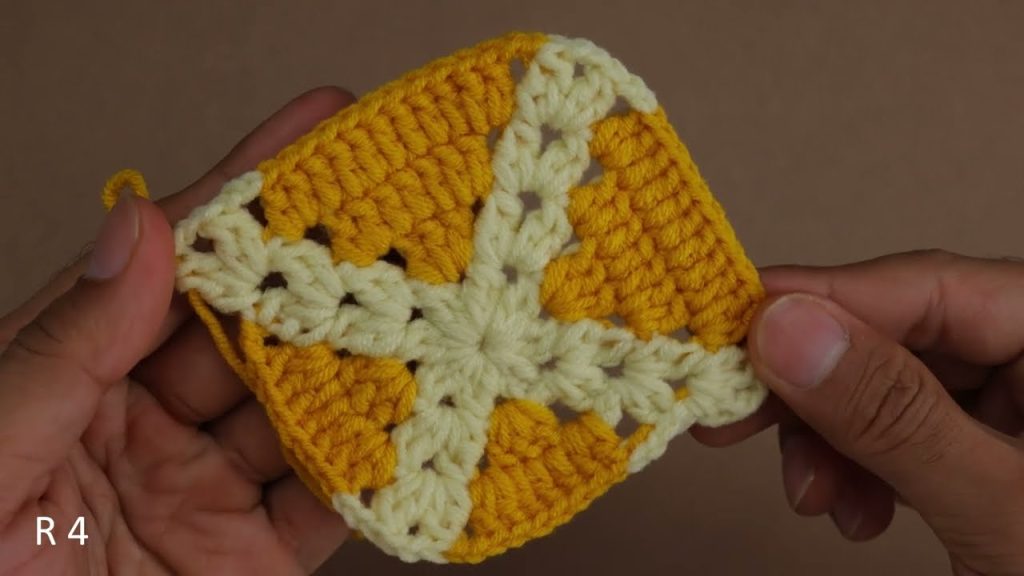
Round 6 (Heart Cluster Row): Sl St into the first Ch-3 Sp. Ch 3, 2 DC into the same Sp. *[3 DC Cl in the next Ch-3 Sp] twice. Corner (2 DC, Ch 2, 2 DC) in the next corner Ch-3 Sp. Rep from * around. Sl St to the top of the Beg Ch 3 to join.
Round 7 (Solid Row): Ch 3 (counts as 1st DC), DC in each DC and Ch-3 Sp around. Work (2 DC, Ch 2, 2 DC) in each corner Ch-2 Sp. Sl St to the top of the Beg Ch 3.
Round 8 (Final Border): Ch 1, SC in the same St and in each DC around. Work (SC, Ch 1, SC) in each corner Ch-2 Sp. Sl St to the Beg SC.
Finishing Square: Fasten off and weave in ends. Block the two squares to ensure they are the same size and lay flat.
Part 2: The Base & Side Panel (Solid Construction)
The bag needs a sturdy rectangular panel for the bottom and sides to give it structure.
Base/Side Panel
Measurements: The panel length must match the perimeter of the granny square minus the top opening.
- Square width = 8 inches.
- Total Side Length Needed = 8 inches (side 1) + 8 inches (bottom) + 8 inches (side 2) = 24 inches.
Start: Ch 10 (or to desired depth, approx. 4 inches).
Row 1: SC in the 2nd Ch from hook and in each Ch across. Ch 1, turn. (9 SC)
Row 2 (Back Loop Only Ribbing): SC in the Back Loop Only (BLO) in each St across. Ch 1, turn. (9 SC)
Repeat Row 2 until the piece measures 24 inches long. This creates a tight, slightly stretchy ribbed fabric ideal for the bag’s body.
Finishing Panel: Fasten off, leaving a long tail (approx. 40 inches) for seaming.
Part 3: Assembly and Finishing
Step 1: Seaming the Body
Use the long tail from the base panel and the tapestry needle to assemble the bag. Use a whipstitch or mattress stitch for a strong, invisible seam.
- Lay Flat: Align the long edge of the Base/Side Panel with the edges of one Granny Square.
- Seam: Starting at a corner of the square, seam the entire perimeter of the square to the Base/Side Panel (3 sides: side, bottom, side). You should have a 1-inch overlap/excess on the Base Panel side.
- Repeat: Seam the remaining 3 sides of the second Granny Square to the free edge of the Base/Side Panel.
- Close Side: Seam the remaining short sides of the Base/Side Panel together to form the continuous loop of the bag’s body.
Step 2: Creating the Handles (Optional: Use two methods)
A. Firm Ribbed Handles (Matching the Base)
- Ribbing: Ch 10 (or to desired width). SC BLO for 40-50 inches (or desired length).
- Seam: Sl St the two short ends together to form a loop.
- Attach: Pin the strap loop to the inside of the bag opening, centering it over the 4 corner stitches of the granny square. Sew securely with a tapestry needle.
B. Simple Chain Straps (Easy & Quick)
- Placement: Rejoin yarn at the top-left corner of the bag opening.
- Chain: Ch 100 (or to desired strap length).
- Attach: Sl St the chain to the top-right corner of the same square.
- Reinforce: Sl St back across the entire chain to reinforce the strap. Fasten off.
- Repeat on the second square.

Step 3: Final Edging
To provide a clean, finished look and help the top hold its shape, add a final border.
- Rejoin yarn anywhere along the top edge of the bag.
- Round 1: Ch 1, SC evenly around the entire top opening (including the handles, if using option B). Work 3 SC in each corner point. Sl St to the Beg SC.
- Round 2: Ch 1, SC in the BLO in each St around. Sl St to the Beg SC.
Finishing: Fasten off and weave in any remaining ends. Give your Infinite Heart Tote Bag a final shaping and enjoy your new, custom-made accessory!
Video tutorial:


