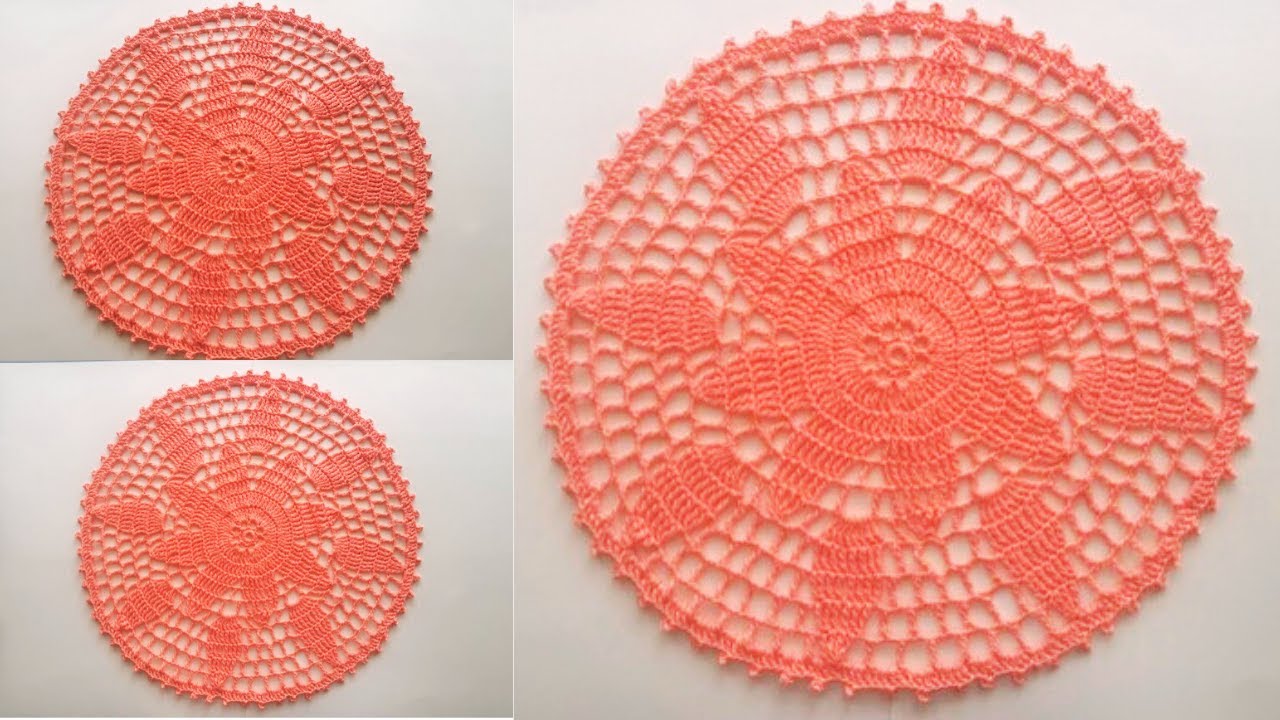
A large flower doily is more than just a decorative accent; it’s a work of art that showcases the beauty of crochet. Imagine a stunning floral motif expanding outwards into an intricate lace pattern, gracing your dining table or bringing a touch of handmade elegance to any surface. This detailed tutorial will guide you through creating such a centerpiece, perfect for adding a touch of romance and sophistication to your home decor.

Why Crochet a Large Flower Doily?
- Stunning Centerpiece: Its size and intricate design make it a focal point.
- Skill Builder: You’ll practice various stitch combinations, shaping, and working in the round.
- Customizable: Easily adapt the size and color to fit your decor.
- Rewarding Project: The beauty of the finished piece makes the effort worthwhile.
1. Planning Your Large Flower Doily
The final look and size of your doily will depend significantly on your yarn and hook choice.
- Yarn Choice:
- Fiber: 100% cotton yarn is highly recommended for doilies. It holds its shape beautifully when blocked, drapes well, and is durable for decorative use. Mercerized cotton often has a lovely sheen.
- Weight:
- Lace (0) or Fingering (1) weight “crochet thread”: This is traditional for delicate, intricate doilies. The finished piece will be very fine and elegant. (Approx. 18-24 inches / 45-60 cm diameter for a large doily).
- Sport (2) or DK (3) weight cotton: If you prefer a more substantial doily that works up a bit faster, these weights are excellent. The finished doily will be larger and bolder. (Approx. 24-30+ inches / 60-75+ cm diameter).
- Color: Classic white or cream highlights the stitch work. Pastels, vibrant colors, or even variegated yarns can create unique effects.
- Hook Size: Choose a hook size appropriate for your chosen yarn weight.
- For Lace/Fingering yarn: 1.5 mm – 2.5 mm
- For Sport/DK yarn: 3.0 mm – 4.0 mm
- Always check your yarn label for recommended hook size and make a small swatch if unsure.
- Desired Size: This pattern will create a substantial doily, growing with each round. The final size will depend on your yarn/hook and how many repeats of the border you choose to make.
2. Materials You’ll Need
- Yarn: Approximately 500-800 yards (450-730 meters) of cotton yarn in your chosen weight (Lace, Fingering, Sport, or DK). It’s always better to have extra!
- Crochet Hook: A size appropriate for your chosen yarn (e.g., 2.0 mm (B/1 US) for fingering weight thread, or 3.5 mm (E-4 US) for DK cotton).
- Scissors: For cutting yarn.
- Yarn Needle (Tapestry Needle): For weaving in ends.
- Stitch Markers (Optional): Useful for marking the beginning of rounds or complex sections.
- Blocking Supplies (Essential for Doilies):
- Blocking mats or a thick, waterproof surface (e.g., cork board, foam board)
- Plenty of rust-proof pins (T-pins work great)
- Spray bottle with water or a basin for wet blocking
3. Crochet Abbreviations Used in This Tutorial
- ch: chain
- sl st: slip stitch
- sc: single crochet
- hdc: half double crochet
- dc: double crochet
- tr: treble crochet (also called triple crochet)
- dtr: double treble crochet
- sk: skip
- sp: space
- st(s): stitch(es)
- Rnd: Round
- (): repeat instructions in parentheses the specified number of times.
- []: total stitch count for the round.
- Picot: Ch 3, sl st into the 3rd ch from hook.
4. Let’s Crochet the Large Flower Doily!
This pattern starts with a central flower, then expands outwards with a series of increasing and decorative rounds.
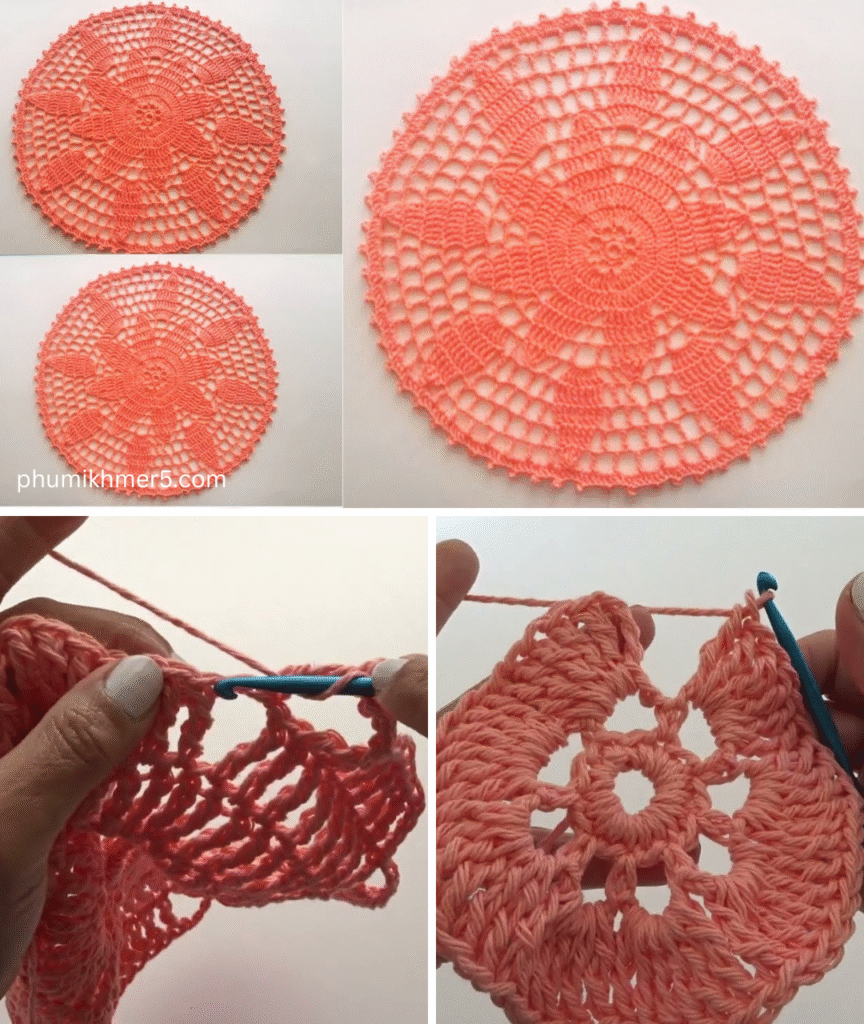
Center Flower:
- Start: Make a magic ring.
- Rnd 1: Ch 3 (counts as first dc). Work 11 dc into the ring. Join with a sl st to the top of the beginning ch 3. Pull magic ring tail to close tightly. [12 dc]
- Rnd 2: Ch 1 (does not count as st). Sc in same st. (Ch 3, sc in next dc) 11 times. Ch 3, join with sl st to first sc. [12 sc, 12 ch-3 sps]
- Rnd 3: Sl st into first ch-3 sp. Ch 3 (counts as first dc). (2 dc, ch 2, 3 dc) into same ch-3 sp (this forms your first “petal”). (3 dc, ch 2, 3 dc) into each remaining ch-3 sp around. Join with a sl st to the top of the beginning ch 3. [12 petals]
- Rnd 4: Sl st into the first ch-2 sp. Ch 3 (counts as first dc). (2 dc, ch 2, 3 dc) into same ch-2 sp. Ch 1. (3 dc, ch 2, 3 dc) into next ch-2 sp, ch 1 repeat around. Join with a sl st to the top of the beginning ch 3. [12 petals, 12 ch-1 sps]
- Rnd 5: Sl st into the first ch-2 sp. Ch 4 (counts as first tr). (2 tr, ch 2, 3 tr) into same ch-2 sp. Ch 2. (3 tr, ch 2, 3 tr) into next ch-2 sp, ch 2 repeat around. Join with a sl st to the top of the beginning ch 4. [12 petal sections, 12 ch-2 sps]

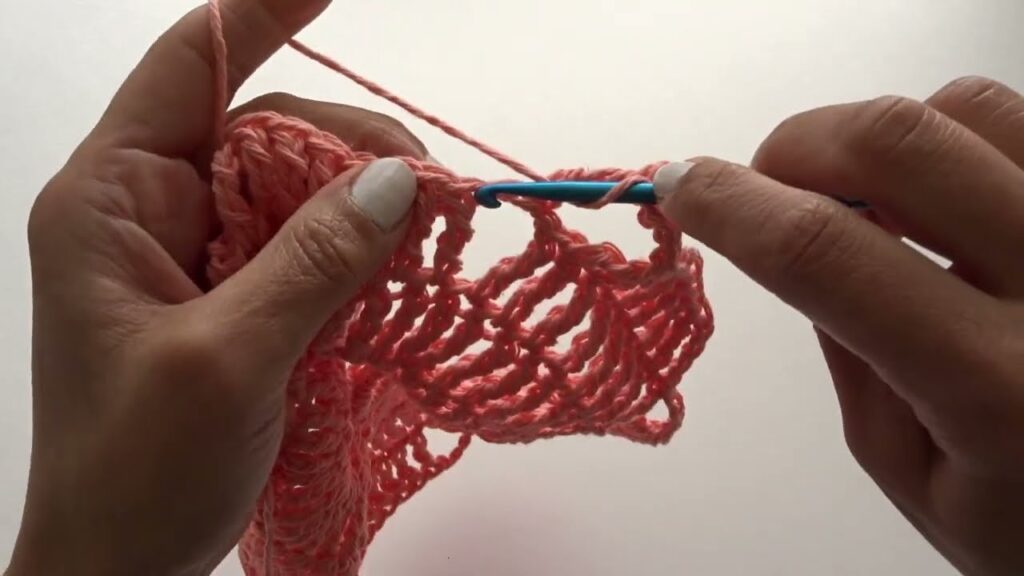
Expanding the Lace (Simple Lace Rounds):
- Rnd 6: Sl st into the first ch-2 sp. Ch 3 (counts as first dc). (2 dc, ch 2, 3 dc) into same ch-2 sp. Ch 3. (3 dc, ch 2, 3 dc) into next ch-2 sp, ch 3 repeat around. Join with a sl st to the top of the beginning ch 3. [12 petal sections, 12 ch-3 sps]
- Rnd 7: Sl st into the first ch-2 sp. Ch 3 (counts as first dc). (2 dc, ch 2, 3 dc) into same ch-2 sp. Ch 4. (3 dc, ch 2, 3 dc) into next ch-2 sp, ch 4 repeat around. Join with a sl st to the top of the beginning ch 3. [12 petal sections, 12 ch-4 sps]
- Rnd 8: Sl st into the first ch-2 sp. Ch 3 (counts as first dc). (2 dc, ch 2, 3 dc) into same ch-2 sp. Ch 5. (3 dc, ch 2, 3 dc) into next ch-2 sp, ch 5 repeat around. Join with a sl st to the top of the beginning ch 3. [12 petal sections, 12 ch-5 sps]
You can continue this expansion, increasing the number of chains between petal sections by 1 each round (Ch 6 in Rnd 9, Ch 7 in Rnd 10, etc.) until your doily reaches a substantial size for its center. For a “large” doily, you might do this for 3-5 more rounds.

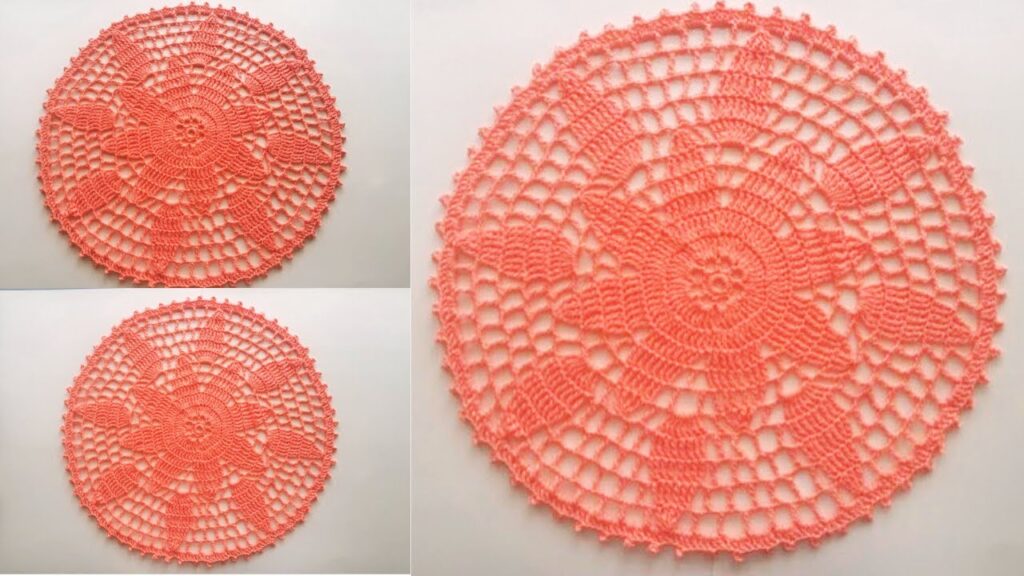
Decorative Border (Optional but Recommended):
Once you have your desired central size, you can add a more decorative border. Here’s a simple, pretty edge:
- Rnd A (Transition): Sl st into the first ch-sp. Ch 1 (does not count as st). Sc in same ch-sp. Ch 5. (Sc in next ch-sp, Ch 5) repeat around. Join with sl st to first sc. [12 sc, 12 ch-5 sps]
- Rnd B: Sl st into first ch-5 sp. Ch 3 (counts as first dc). (2 dc, Ch 3, 3 dc) into same ch-5 sp. (3 dc, Ch 3, 3 dc) into next ch-5 sp repeat around. Join with sl st to top of beginning ch 3. [12 shell groups]
- Rnd C: Sl st into first Ch-3 sp. Ch 1 (does not count as st). (Sc, Ch 3, Picot, Ch 3, Sc) into same ch-3 sp. Sk next 3 dc. (Sc, Ch 3, Picot, Ch 3, Sc) into next ch-3 sp. Sk next 3 dc. repeat around. Join with sl st to first sc.
- This creates a scallop-like effect with picots at the peaks.
Final Touches:
- Fasten off, leaving a tail for weaving.
- Weave in All Ends: Use your yarn needle to carefully weave in all loose yarn tails. This is crucial for a clean, professional finish on doilies.
5. Blocking Your Large Flower Doily (Essential!)
Blocking is the absolute key to making your doily look its best. It opens up the lace, straightens edges, and defines the intricate patterns.
- Prepare: Find a clean, flat, waterproof surface suitable for pinning (blocking mats, cork board, or even a thick stack of towels on a table). Gather your rust-proof pins and a spray bottle of water.
- Wet the Doily: Gently submerge your doily in lukewarm water (a tiny bit of mild soap is optional). Let it soak for 15-20 minutes.
- Remove Excess Water: Carefully lift the doily from the water, supporting its weight. Gently squeeze out the excess water without twisting or wringing. Roll it in a clean towel and press firmly to absorb more water.
- Pin it Out: Lay the damp doily flat on your blocking surface. Carefully stretch and shape it, starting from the center and working outwards. Pin each “petal” point and each “scallop” point of the border, making sure it’s symmetrical and the lace is open. Pin generously to hold the shape firmly.
- Dry Completely: Allow the doily to air dry completely. This can take 24-48 hours depending on humidity and yarn weight. Do not remove the pins until the doily is bone dry and stiff.
6. Care for Your Crocheted Doily
- Hand Wash: Most cotton doilies should be hand washed in cool water with a mild detergent.
- Reshape & Dry Flat: Gently press out excess water, reshape to original dimensions, and lay flat to dry. Re-pinning for blocking after washing is recommended to maintain shape.
- Avoid Bleach: Do not use bleach unless specifically instructed by the yarn label.
Congratulations! You’ve created a beautiful and impressive large flower doily. It’s a testament to your crochet skills and will undoubtedly become a cherished part of your home decor. Enjoy!
Video tutorial:


