
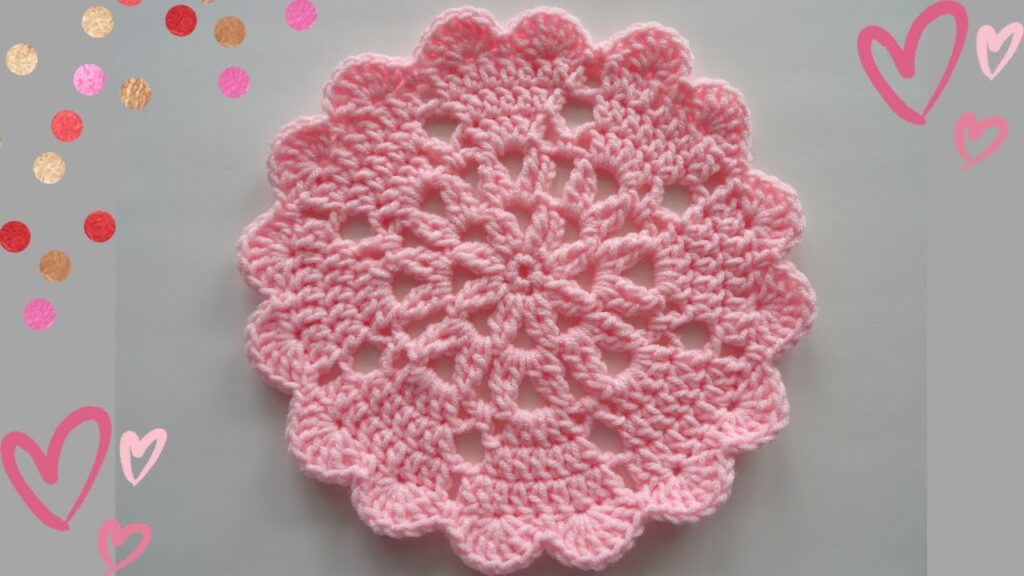
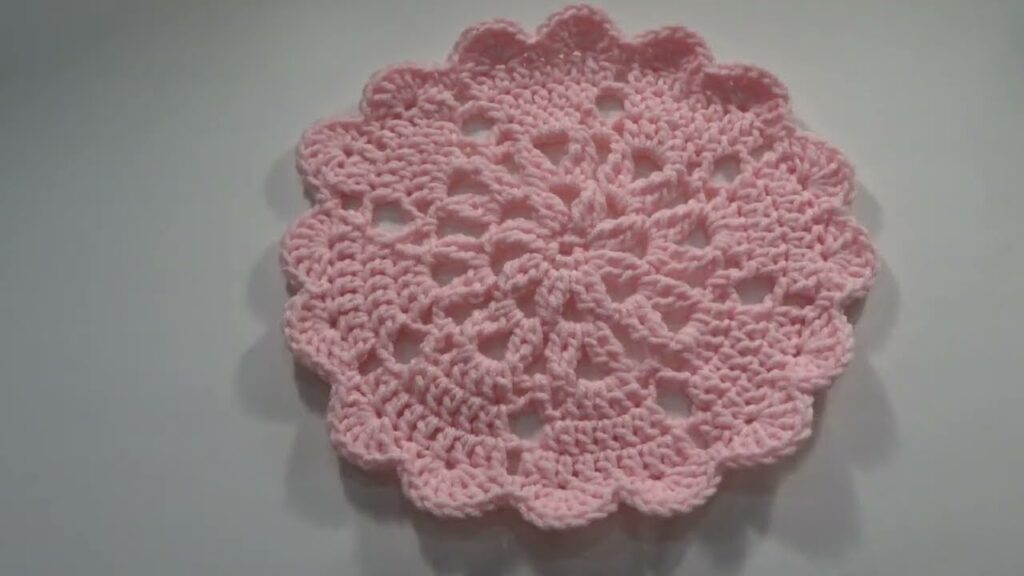
Doilies, with their intricate-looking lace patterns, might seem intimidating to a beginner, but many designs are surprisingly simple! A heart-shaped doily is a perfect project to introduce you to working in the round, reading simple patterns, and creating a beautiful decorative item for your home. It makes a lovely coaster, a centerpiece for a small table, or a thoughtful handmade gift.
This tutorial will guide you step-by-step through crocheting an easy heart doily, focusing on clear instructions for those new to the craft.
Why an Easy Heart Doily is Great for Beginners
- Small Project: Works up quickly, providing a satisfying sense of accomplishment.
- Working in the Round: Excellent practice for this fundamental crochet technique.
- Simple Shaping: Introduces basic increases and techniques to create a distinct shape without complex stitches.
- Decorative Result: Creates a beautiful, functional item you can proudly display or gift.
- Uses Basic Stitches: Relies on stitches you likely already know or can easily learn.
1. Planning Your Heart Doily
- Yarn Choice:
- Weight: Lace (0), Fingering (1), or Sport (2) weight cotton yarn is traditional for doilies. These lighter weights create a more delicate, lacy look. However, for a beginner, a DK (Light Worsted / 3) weight cotton might be easier to handle as the stitches are larger and more visible. The finished doily will be slightly larger and less delicate but still beautiful.
- Fiber: 100% cotton is highly recommended. It holds its shape well, blocks beautifully, and is washable.
- Color: White or off-white are classic, but pastel pink, red, or any color that matches your decor would be lovely!
- Hook Size: Choose a hook size appropriate for your yarn weight.
- For Lace/Fingering yarn: 1.5 mm – 2.5 mm
- For Sport/DK yarn: 3.0 mm – 4.0 mm
- Always check your yarn label for recommended hook size and make a small swatch if unsure.
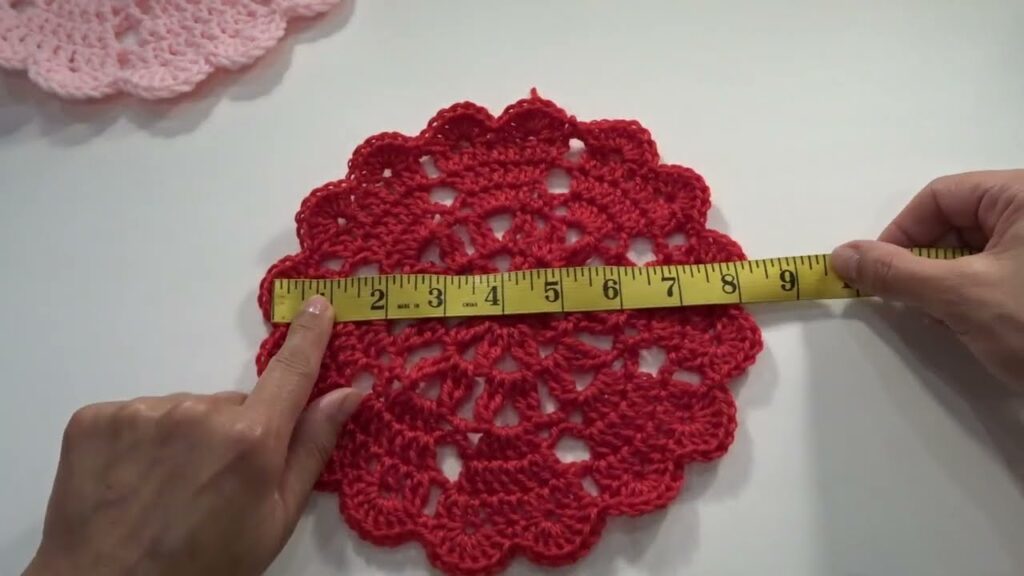
- Desired Size: This pattern will make a small-to-medium doily, typically 6-8 inches (15-20 cm) in diameter, depending on your yarn/hook choice and tension.

2. Materials You’ll Need
- Yarn: Approximately 50-100 yards (45-90 meters) of cotton yarn (Lace, Fingering, Sport, or DK weight). One standard skein or ball should be more than enough.
- Crochet Hook: A size appropriate for your chosen yarn (e.g., 3.5 mm (E-4 US) for DK cotton, or a smaller size for thinner doily thread).
- Scissors: For cutting yarn.
- Yarn Needle (Tapestry Needle): For weaving in ends.
- Stitch Marker (Optional): Useful for marking the beginning of rounds, especially for beginners.
- Blocking Supplies (Highly Recommended for Doilies):
- Blocking mats or a thick towel
- Rust-proof pins
- Spray bottle with water or a basin for wet blocking
3. Crochet Abbreviations Used in This Tutorial
- ch: chain
- sl st: slip stitch
- sc: single crochet
- hdc: half double crochet
- dc: double crochet
- tr: treble crochet (also called triple crochet)
- sk: skip
- sp: space
- st(s): stitch(es)
- Rnd: Round
- (): repeat instructions in parentheses the specified number of times.
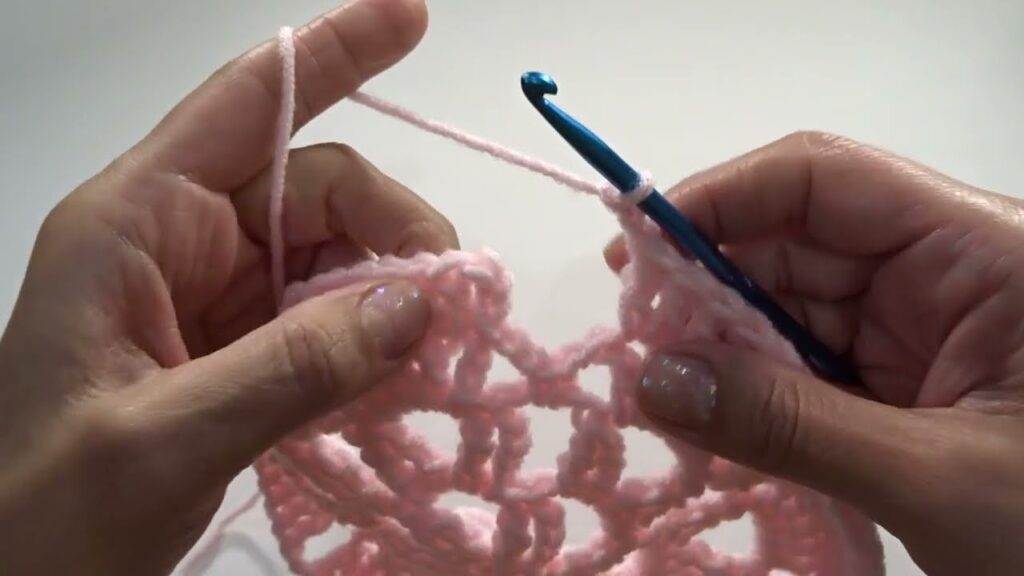
4. Let’s Crochet the Heart Doily! (Step-by-Step)
This pattern starts with a central ring and builds outwards, then splits to form the two “lobes” of the heart, and finally joins them to create the point.
Initial Ring:
- Start: Make a magic ring (or ch 4 and sl st to first ch to form a ring).
- Magic Ring Tutorial (if new): Search “crochet magic ring tutorial” on YouTube for a visual guide. It creates a tighter center hole.
- Ch 4 Ring: Simpler for beginners.
- Rnd 1: Ch 2 (does not count as a stitch). Work 12 dc into the ring. Join with a sl st to the first dc (not the ch 2). (12 dc)
- If using a magic ring, pull the tail to close the hole tightly.
Building the First Half of the Heart (Lobe 1):
We will now work in rows for a portion of the doily, which will form one side of the heart.
- Row 1: Ch 2 (counts as first dc). Dc in the same st. 2 dc in the next 5 sts. (You should now be at the 6th dc from Rnd 1). (12 dc)
- Essentially, you’re working 2 dc into each of the first 6 dc from Rnd 1.
- Row 2: Ch 2 (counts as first dc), turn. Dc in the same st. (Dc in next st, 2 dc in next st) 5 times. Dc in last st. (18 dc)
- Row 3: Ch 2 (counts as first dc), turn. Dc in the same st. (Dc in next 2 sts, 2 dc in next st) 5 times. Dc in last st. (24 dc)
- Row 4: Ch 2 (counts as first dc), turn. Dc in the same st. (Dc in next 3 sts, 2 dc in next st) 5 times. Dc in last st. (30 dc)
- Fasten off.
Building the Second Half of the Heart (Lobe 2):
- Join Yarn: Skip the next 6 dc from Rnd 1 (this creates the center dip of the heart). Join your yarn with a sl st to the 7th dc from Rnd 1.
- Row 1: Ch 2 (counts as first dc). Dc in the same st. 2 dc in the next 5 sts. (12 dc)
- You should have used the remaining 6 dc from Rnd 1.
- Row 2: Ch 2 (counts as first dc), turn. Dc in the same st. (Dc in next st, 2 dc in next st) 5 times. Dc in last st. (18 dc)
- Row 3: Ch 2 (counts as first dc), turn. Dc in the same st. (Dc in next 2 sts, 2 dc in next st) 5 times. Dc in last st. (24 dc)
- Row 4: Ch 2 (counts as first dc), turn. Dc in the same st. (Dc in next 3 sts, 2 dc in next st) 5 times. Dc in last st. (30 dc)
- DO NOT fasten off. You will now join the two lobes and continue working around the entire heart.
Joining the Lobes & Forming the Point:
- Joining Row: Ch 1 (does not count as a stitch), turn. Sc in the first 30 dc of the current Lobe 2. Ch 1. Skip the 6 unworked dc in the center of Rnd 1 (the space between the two lobes). Sc into the 1st dc of Lobe 1 (the one where you fastened off after Row 4). Sc in the next 29 dc of Lobe 1. (60 sc and 1 ch-1 space)
- This connects the two halves and creates the top curve of the heart. The ch-1 forms the dip.
- Rnd 2 (Border): Ch 1 (does not count as a stitch). Sc in each of the first 30 sc along Lobe 1.
- At the Point: (Sc, hdc, dc, tr, dc, hdc, sc) all in the next sc (this is the single sc stitch where the lobes were joined). This creates the sharp bottom point of the heart.
- Sc in each of the next 29 sc along Lobe 2.
- At the Top Dip: Sc in the last sc before the ch-1 space. (Sc, ch 1, sc) in the ch-1 space. Sc in the first sc on the other side of the ch-1 space.
- Join with a sl st to the first sc of the round.
- Optional: If you want a more pronounced lace edge, you can add a final round of (sc, ch 3, sc) in every 3rd stitch around, or similar simple lace pattern.
- Fasten off, leaving a tail for weaving.
5. Finishing Your Heart Doily
- Weave in Ends: Using your yarn needle, carefully weave in all loose yarn tails. For doilies, neat weaving is essential as the openwork design can make tails more visible.
- Blocking (Highly Recommended!): This step transforms your doily, evening out stitches, opening up the lace, and defining the heart shape beautifully.
- Wet Blocking:
- Gently submerge your doily in lukewarm water (with a tiny bit of mild soap if desired) for about 15-20 minutes.
- Carefully remove it, gently squeezing out excess water without twisting or wringing. Roll it in a clean towel and press firmly to absorb more water.
- Lay the damp doily flat on a blocking mat or a thick, clean towel.
- Carefully stretch and shape the doily, pinning the outer edges of the heart (especially the top curves and the bottom point) to define the shape. Ensure symmetry.
- Allow it to air dry completely, which can take 24-48 hours. Do not move it until it’s bone dry.
- Wet Blocking:
6. Care for Your Doily
- Hand Wash: Most cotton doilies should be hand washed in cool water with a mild detergent.
- Reshape & Dry Flat: Gently press out excess water, reshape, and lay flat to dry to maintain its form.
- Ironing (Optional): Once dry, you can lightly steam or iron (on a low cotton setting, with a pressing cloth) for a very crisp finish, but careful blocking usually suffices.
Congratulations! You’ve just crocheted a beautiful heart doily. This project is a wonderful way to practice your skills and create charming handmade decor. Enjoy your lovely new creation!
Video tutorial:


