There’s nothing quite like slipping into a pair of warm, handmade slippers after a long day. And the best part? Crocheting your own cozy footwear is surprisingly simple, even for absolute beginners! This detailed tutorial will walk you through creating a basic, comfortable pair of slippers that are quick to make, requiring only fundamental crochet stitches. Get ready to treat your feet (or a loved one’s!) to some delightful, handcrafted comfort.
Why These Slippers Are Perfect for Beginners
- Simple Shape: We’ll be working mostly flat, creating a basic foot shape that’s easy to construct and seam. No complex shaping or tricky decreases.
- Basic Stitches Only: Relies entirely on single crochet (SC) and slip stitch (SL ST), building your confidence with these foundational techniques.
- Quick to Work Up: Because of their simplicity and basic stitches, you can often complete a pair in just a few hours.
- Customizable: Easily adjustable for different foot sizes and yarn weights once you understand the basic concept.
- Instant Gratification: You’ll have a tangible, wearable item at the end, providing a wonderful sense of accomplishment.
1. Planning Your Slippers: Get Ready for Cozy!
A little planning ensures your slippers are just right.
- Sizing:
- This pattern is written for an Adult Medium (Women’s US 7-9 / Men’s US 6-8).
- To adjust for other sizes: You’ll primarily adjust your starting chain length and the number of rows you crochet. The “Gauge Swatch” section below will be crucial for precise sizing.
- Tip: Measure the length of the foot you are making the slippers for, from heel to longest toe.
- Yarn Choice:
- Fiber:
- Acrylic (Worsted Weight): Highly recommended for beginners! It’s affordable, widely available in many colors, durable, machine washable, and forgiving to work with. It provides good warmth.
- Wool/Wool Blends (Worsted Weight): Also excellent for warmth and coziness. Look for “superwash” wool if you want machine washability. Non-superwash wool can be warm but requires hand-washing to prevent felting.
- Cotton: Less common for slippers as it’s not as warm or stretchy, but can be used if preferred.
- Weight: Worsted weight (Aran / 4-ply) is ideal. It works up quickly and creates a nice, dense fabric for slippers.
- Quantity: You’ll typically need 150-200 yards (137-183 meters) per slipper, so 300-400 yards (275-365 meters) for a pair. It’s always best to have a bit extra!
- Fiber:
- Desired Thickness/Warmth: A bulkier yarn (like Chunky/Bulky weight) with a larger hook will make very thick, warm slippers, but they might be less pliable. This pattern uses worsted weight for a good balance.
2. Materials You’ll Need
- Yarn: Approximately 300-400 yards (275-365 meters) of worsted weight acrylic or wool blend yarn. (Pick a color you love!)
- Crochet Hook: 5.0 mm (H-8 US). Adjust if necessary to achieve your gauge.
- Scissors: For cutting yarn.
- Yarn Needle (Tapestry Needle): A large, blunt-tipped needle for weaving in ends and seaming.
- Stitch Marker (Optional but Recommended): Useful for marking the first stitch of a row or the center point.
3. Essential Crochet Stitches (Review for Beginners)
Ensure you’re comfortable with these fundamental stitches:
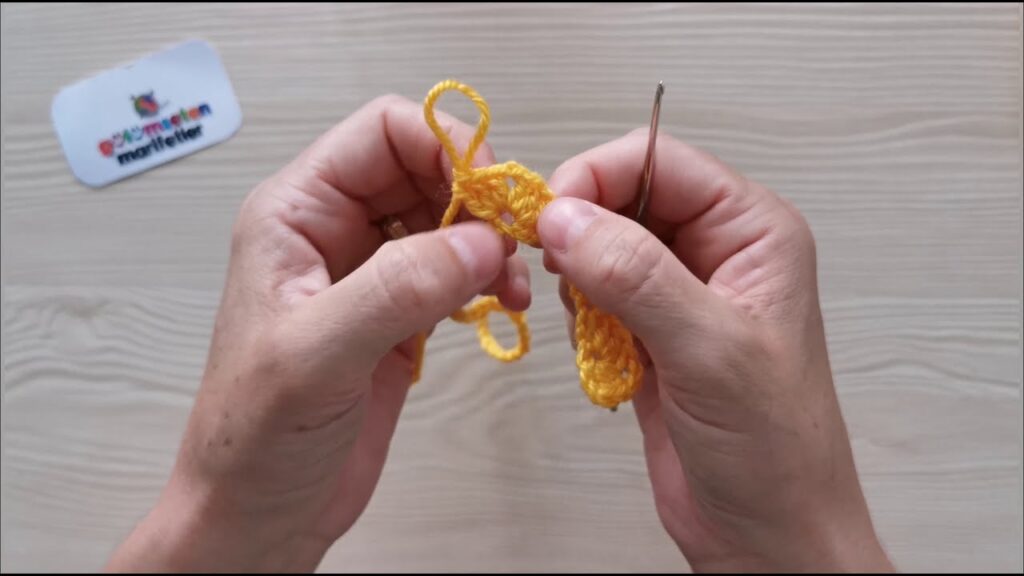
- Slip Knot: The first step to start your crochet chain.
- Chain (ch): The foundation row of your project.
- Single Crochet (sc): The tightest and most common basic stitch. Creates a dense fabric, perfect for sturdy slippers.
- To make a SC: Insert hook into stitch, yarn over (YO), pull up a loop (2 loops on hook), YO, pull through both loops on hook.
- Slip Stitch (sl st): Used for joining pieces or finishing edges.
- To make a SL ST: Insert hook into stitch, YO, pull through the stitch and the loop on your hook (1 loop on hook).
- Turning Chain (ch 1 for SC): At the end of a row of SC, you’ll chain 1 before turning your work. This chain does NOT count as a stitch in SC rows, so you’ll always work into the first actual SC of the previous row.
4. Gauge Swatch: Your Key to the Right Fit (Don’t Skip This!)
Your gauge swatch is a small sample that tells you how many stitches and rows you get per inch/cm with your chosen yarn and hook. It’s critical for ensuring your slippers fit.
- Chain 12.
- Row 1: SC in the 2nd chain from the hook, and in each chain across. (11 SC)
- Row 2: Ch 1, turn. SC in the first SC, and in each SC across. (11 SC)
- Repeat Row 2 until your swatch measures at least 4 inches (10 cm) tall.
- Measure: Lay your swatch flat. Using a ruler, count how many single crochet stitches you have in 4 inches (10 cm) horizontally, and how many rows you have in 4 inches (10 cm) vertically.
- Adult Medium Target Gauge: You should aim for approximately 15-16 SC stitches in 4 inches (10 cm) and 16-18 rows in 4 inches (10 cm).
- Adjust:
- If you have more stitches/rows per 4 inches, your tension is too tight. Go up a hook size (e.g., to 5.5 mm).
- If you have fewer stitches/rows per 4 inches, your tension is too loose. Go down a hook size (e.g., to 4.5 mm).
- Remake your swatch until you match the gauge or get close. A slightly denser fabric is good for slippers.
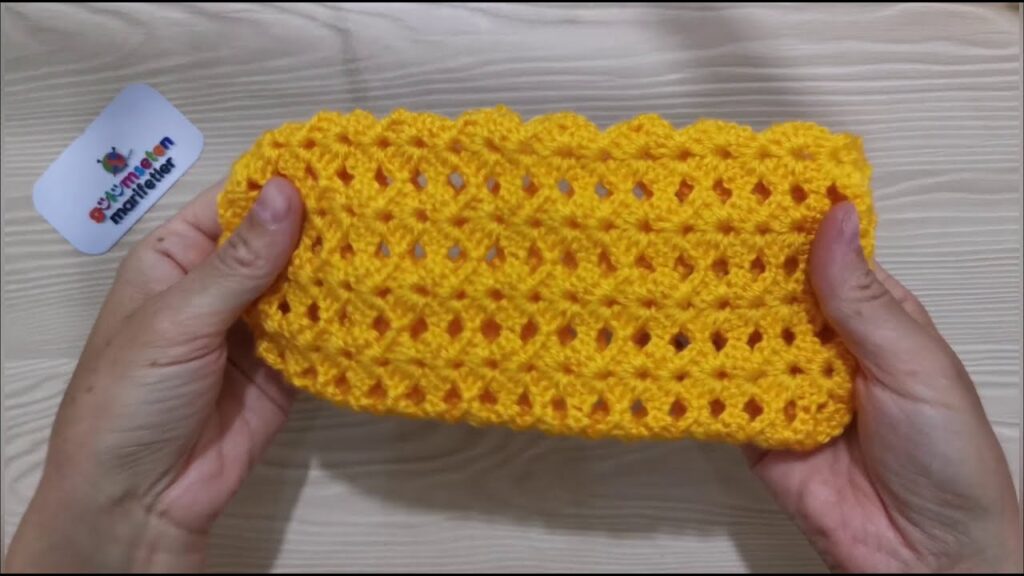
5. Let’s Crochet the Slippers! (Making One Slipper)
We’ll make a long rectangle, then fold and seam it to form the slipper shape.
Slipper Dimensions (Adult Medium):
- This pattern will create a rectangle approximately 4.5 – 5 inches (11.5 – 12.5 cm) wide and 9.5 – 10 inches (24 – 25.5 cm) long.
- Starting Chain: Make a slip knot. Chain 19.
- (To adjust width: For a wider slipper, add more chains in multiples of 2. For a narrower slipper, subtract chains in multiples of 2.)
- Row 1: SC in the 2nd chain from the hook, and in each chain across. (18 SC)
- You now have your first row of single crochet. Use a stitch marker in the last stitch of this row if you’re worried about missing it on subsequent rows.
- Row 2: Ch 1, turn your work. SC in the first SC (the one your turning chain came from), and in each SC across. (18 SC)
- Always make sure you work into the very last stitch of the previous row to keep your edges straight. It can sometimes be hidden.
- Repeat Row 2: Continue repeating Row 2 until your piece measures approximately 9.5 – 10 inches (24 – 25.5 cm) from the beginning.
- For different foot lengths: Lay your rectangle against the foot you’re making it for. It should be just slightly shorter than the foot’s total length (the fabric will stretch slightly).
- Count your rows to maintain consistency between slippers. For an Adult Medium, this might be around 38-40 rows, but your gauge will determine the exact number.
- Fasten Off: Once your rectangle is the desired length, cut your yarn, leaving a very long tail (at least 24-30 inches / 60-75 cm) for seaming. Yarn over your hook and pull the tail completely through the last loop to secure it.
You have now completed one slipper’s main body! Repeat steps 1-5 to create an identical second slipper.
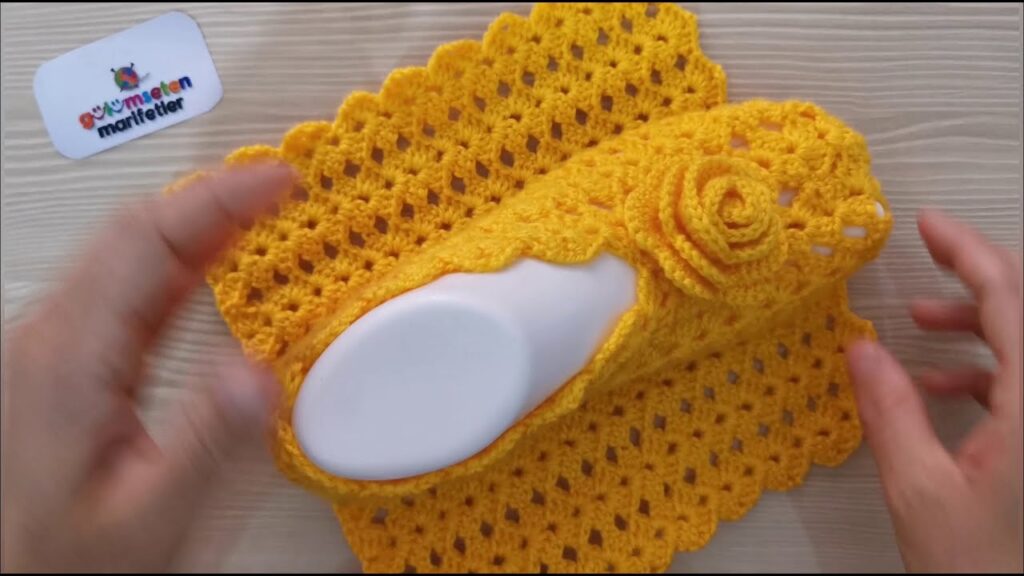
6. Assembling Your Slippers: Transforming a Rectangle into Footwear!
This is where the magic happens. We’ll fold and seam the rectangle to form the slipper shape.
- Prepare for Seaming: Lay your crocheted rectangle flat. You’ll fold it in half lengthwise, so the long edges meet.
- Seam the Top (Toe):
- Thread your long yarn tail onto your yarn needle.
- Fold one end of the rectangle in half so the shorter ends meet. This will form the top/toe of your slipper.
- Using your yarn needle, whip stitch or mattress stitch across the top edge (the short end) to close it. Go through both layers of fabric. Secure tightly. Weave in this tail and cut.
- You’ve now created a small “pouch” for the front of the foot.
- Seam the Heel:
- Now, fold the rectangle lengthwise again. You’ll notice one side is the sewn toe, and the other side is still open.
- Identify the heel end. This is the end opposite the sewn toe.
- Using the remaining long tail from the Fasten Off step (or join new yarn if your tail is too short), use your yarn needle to whip stitch or mattress stitch the short heel edge closed, going through both layers of fabric. Secure tightly.
- Seam the Sides (Sole & Instep):
- You now have a “tube” with a closed toe and a closed heel. The remaining open edges will form the sole of the slipper and the opening for your foot.
- Starting from the center bottom of the sole, whip stitch or mattress stitch the long raw edges together, working from the heel seam towards the toe seam.
- Stop seaming when you are about 2.5 – 3 inches (6.5 – 7.5 cm) from the toe seam (this creates the foot opening/instep).
- Try the slipper on at this point to ensure the opening is comfortable for your foot. Adjust by seaming more or less if needed.
- Secure your yarn, weave in the tail, and trim any excess.

Your first slipper is complete! Repeat steps 1-4 for the second slipper.
7. Finishing Touches & Care
- Weave in All Ends: Double-check that all loose yarn tails are securely woven into the fabric. This prevents unraveling and creates a neat finish.
- Try Them On: Slip them on and enjoy the cozy comfort!
- Add Non-Slip Grips (Optional): If you have slippery floors, you might want to add some non-slip grips to the soles.
- Puffy Fabric Paint/Glue: Apply dots or a pattern of puffy fabric paint or fabric glue to the soles. Let dry completely according to product instructions.
- Suede/Leather Patches: Cut out oval shapes from suede or leather scraps and hand-sew them to the soles.
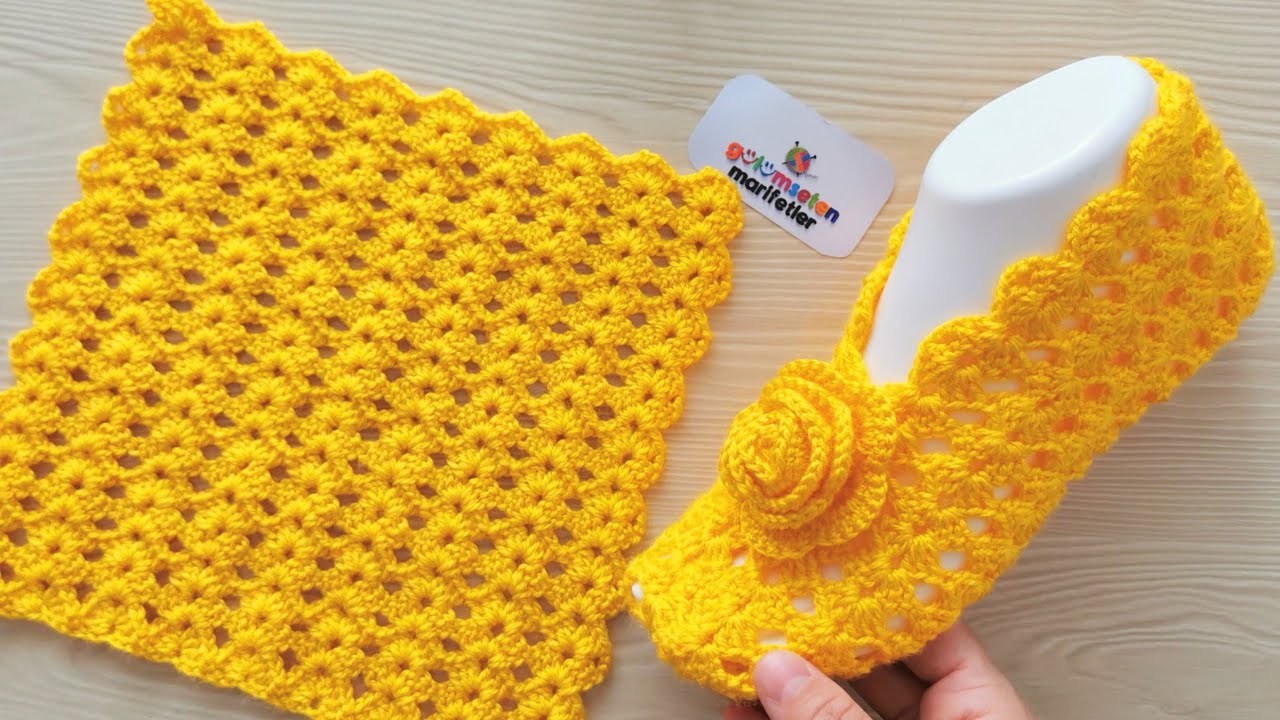
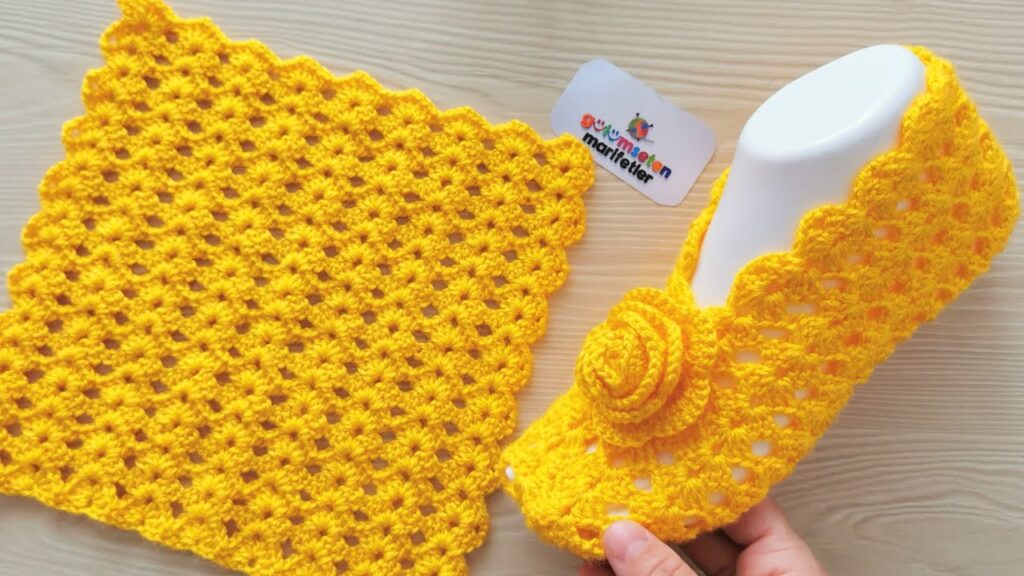
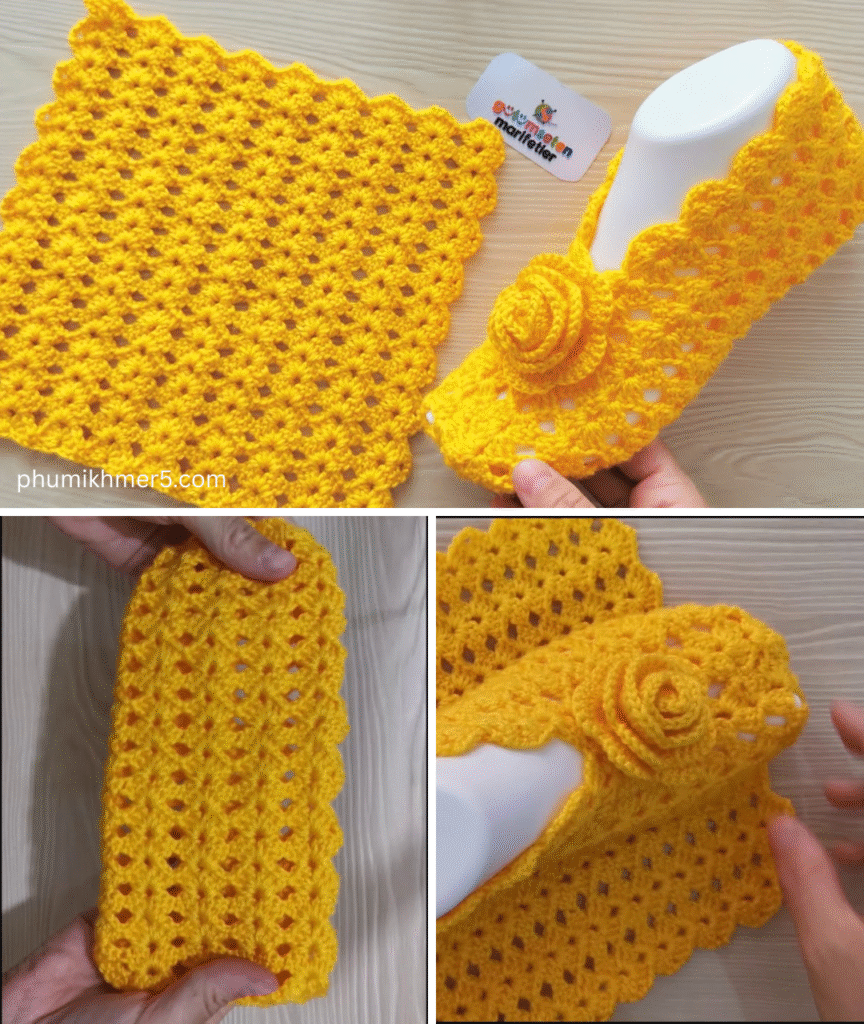
- Embellish (Optional): Add a small crocheted flower, a pom-pom, a simple embroidered design, or a decorative button to the top of the slipper for a personal touch.
- Care: Always refer to your yarn label for specific care instructions. Most acrylic slippers can be machine washed on a gentle cycle and tumble dried on low. For wool, hand washing and laying flat to dry is usually recommended.
Congratulations! You’ve successfully crocheted a pair of super easy and wonderfully comfortable slippers. This is a fantastic achievement for any beginner, and you now have a cozy, handmade item to enjoy or to gift to someone special! Happy crocheting!
Video tutorial:


