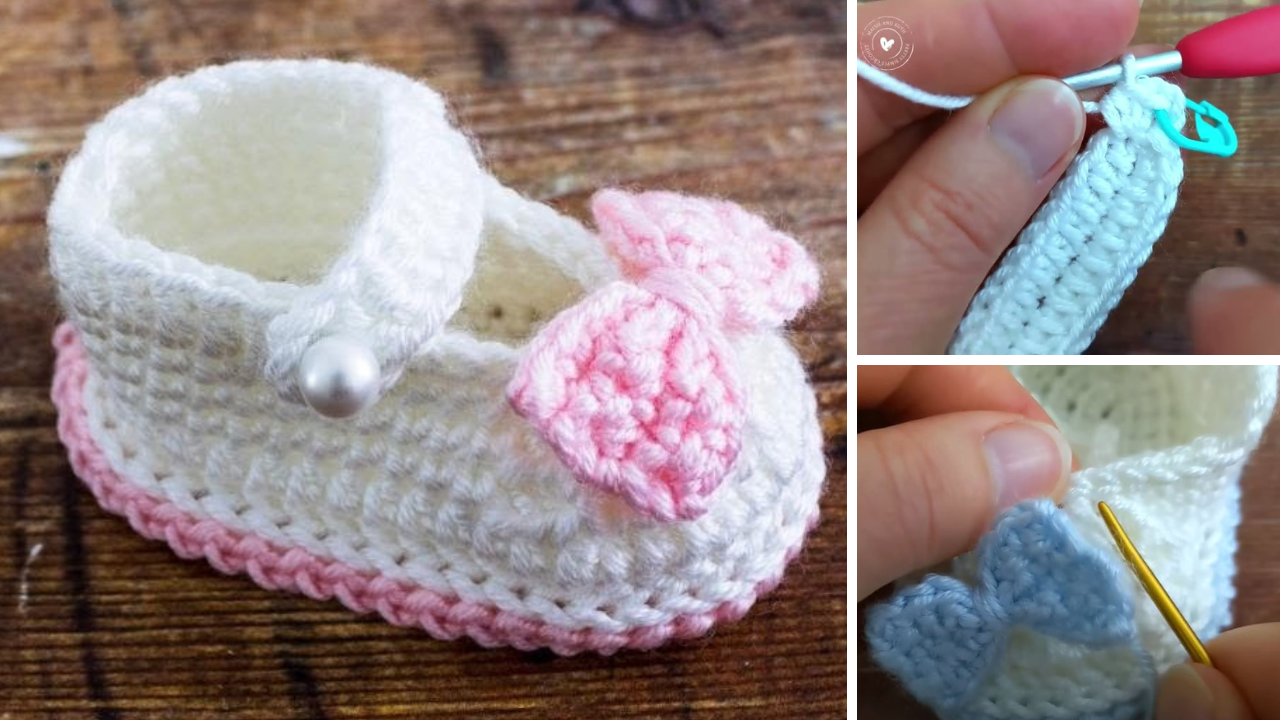
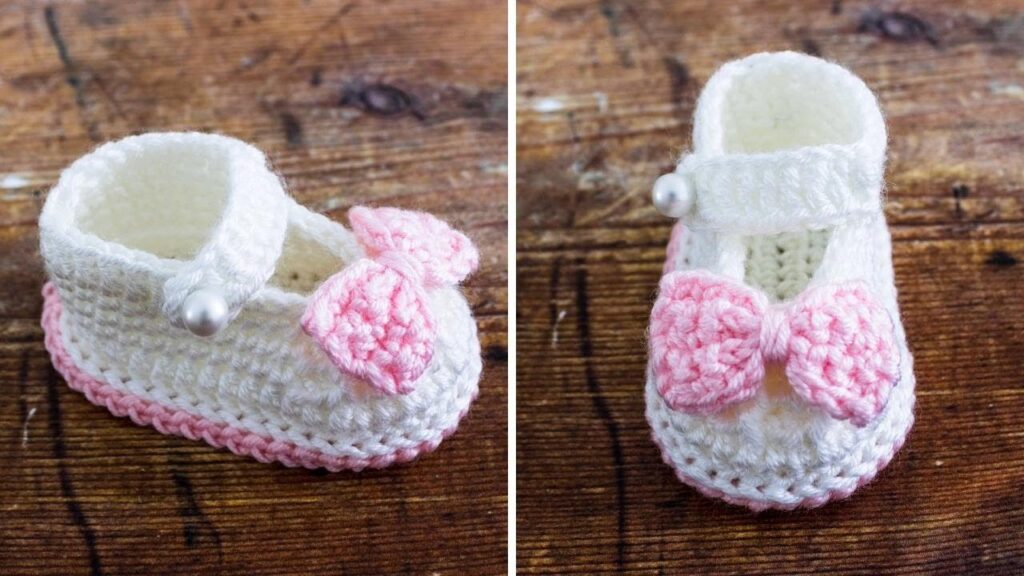
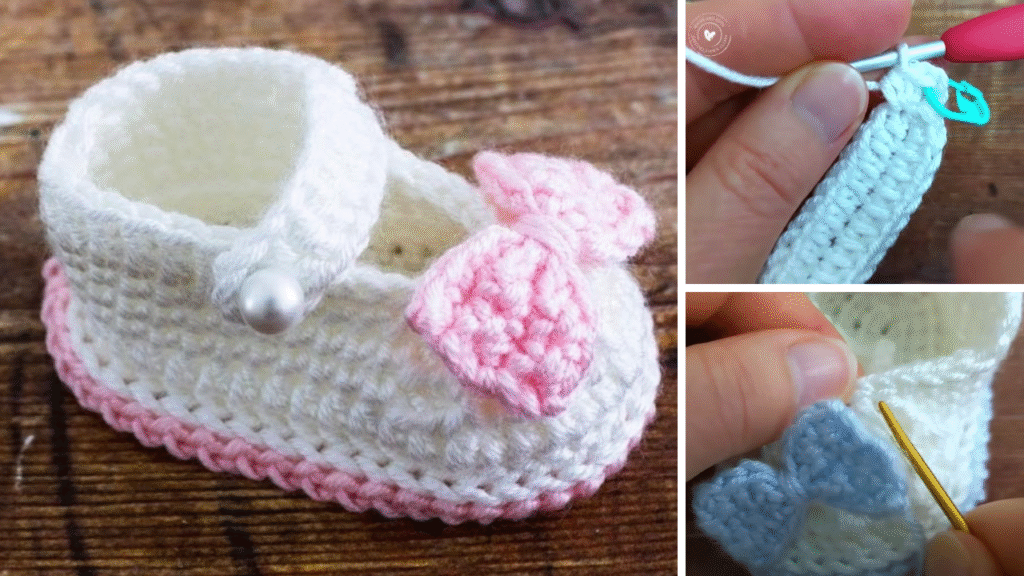
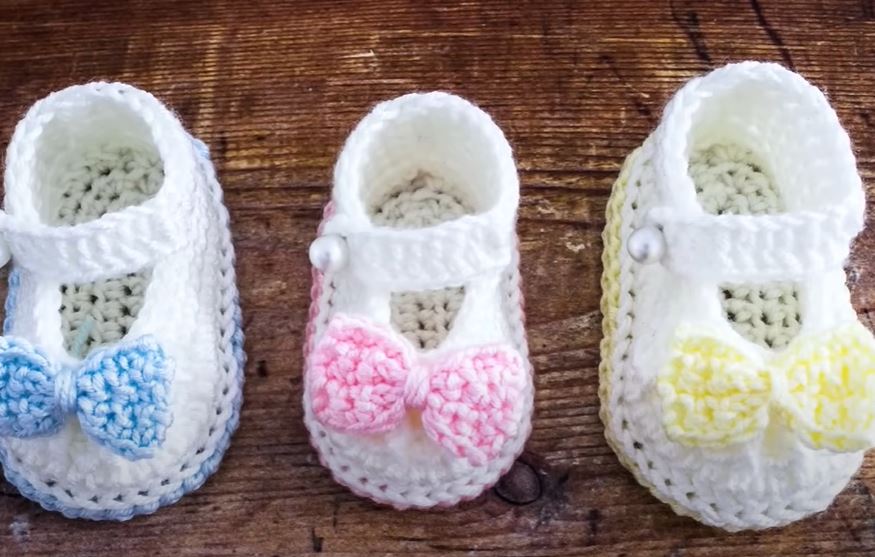
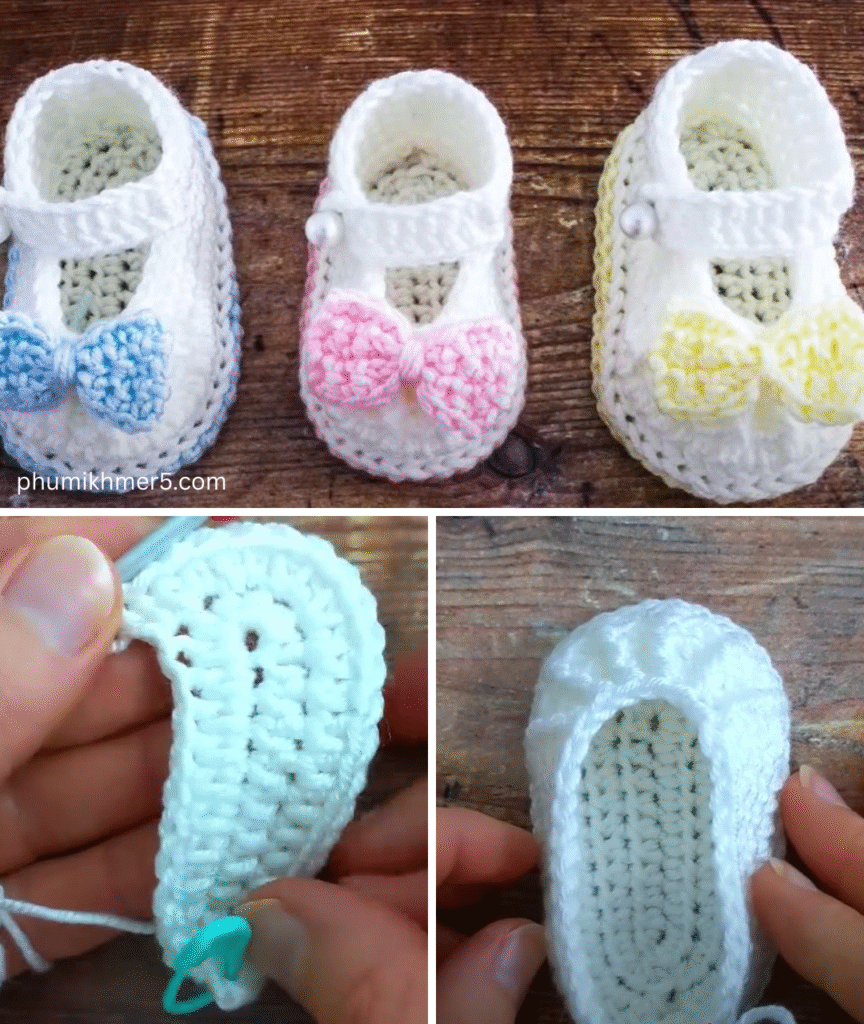
There’s something incredibly sweet and heartwarming about tiny handmade baby booties. They’re quick to make, use minimal yarn, and are the perfect project for beginners looking to create something truly adorable and useful. This detailed, step-by-step tutorial will guide you through crocheting a pair of simple baby booties, perfect for a newborn or a little older, focusing on clear instructions to ensure your success!
Why These Booties Are Perfect for Beginners
- Small Project: Booties work up quickly, providing instant gratification and boosting your confidence.
- Basic Stitches: We’ll primarily use fundamental stitches you likely already know or can easily learn.
- Minimal Shaping: The shaping is simple and intuitive, making it easy to follow along.
- Great for Gifts: Handmade booties are always cherished by new parents!
- Portable: Easy to take with you and crochet on the go.
1. Planning Your Baby Booties
A little planning goes a long way to ensure your booties fit just right.
- Size: This pattern is designed for 0-3 months (Newborn/Small Infant), with a finished sole length of approximately 3.5 – 3.75 inches (9-9.5 cm).
- To adjust size: You’ll modify your starting chain and/or use a different hook size. For larger sizes, add more chains to the initial foundation (in multiples of 2, usually), and potentially more rounds to the sole. For smaller, use a smaller hook.
- Yarn Choice:
- Fiber: Opt for soft, baby-friendly yarn. Acrylic, superwash merino wool, or cotton blends are excellent choices. Look for labels that say “baby yarn” as they’re often extra soft and machine washable.
- Weight: DK (Light Worsted / #3) or Worsted Weight (#4) yarn works well. DK will create a daintier bootie, while Worsted will be cozier and work up slightly faster. This tutorial uses DK weight for a nice balance.
- Quantity: You’ll only need about 50-70 yards (45-65 meters) per pair, so a single small skein is usually plenty!
- Color: Classic pastels, white, or gender-neutral shades are always popular. Feel free to choose any color you love!
2. Materials You’ll Need
- Yarn: Approximately 50-70 yards (45-65 meters) of DK (Light Worsted / #3) weight baby yarn.
- Crochet Hook: 3.5 mm (E-4 US). (Or the size needed to obtain your gauge.)
- Scissors: For cutting yarn.
- Yarn Needle (Tapestry Needle): A blunt-tipped needle for weaving in ends.
- Stitch Markers (Optional but Recommended): At least 2, for marking beginning of rounds or specific stitches.
3. Essential Crochet Stitches (Review for Beginners)
Make sure you’re comfortable with these fundamental stitches:
- Slip Knot: The starting knot for your chain.
- Chain (ch): The foundation row of your project.
- Slip Stitch (sl st): Used for joining rounds or moving stitches without adding height.
- To make a SL ST: Insert hook into stitch, yarn over (YO), pull through the stitch and the loop on your hook (1 loop on hook).
- Single Crochet (sc): Creates a short, dense stitch.
- To make a SC: Insert hook into stitch, YO, pull up a loop (2 loops on hook), YO, pull through both loops on hook.
- Half Double Crochet (hdc): A stitch taller than sc but shorter than dc.
- To make a HDC: YO, insert hook into stitch, YO, pull up a loop (3 loops on hook), YO, pull through all 3 loops on hook.
- Double Crochet (dc): A taller, looser stitch.
- To make a DC: YO, insert hook into stitch, YO, pull up a loop (3 loops on hook), YO, pull through 2 loops, YO, pull through last 2 loops.
- Increase (inc): Working more than one stitch into the same stitch to add stitches (e.g., 2 sc in next st = sc inc).
- Decrease (sc2tog or hdc2tog): Working two stitches together to reduce the stitch count.
- To make a sc2tog (single crochet 2 together): Insert hook into first st, YO, pull up a loop (2 loops on hook). Insert hook into next st, YO, pull up a loop (3 loops on hook). YO, pull through all 3 loops on hook.
- To make a hdc2tog (half double crochet 2 together): YO, insert hook into first st, YO, pull up a loop (3 loops on hook). YO, insert hook into next st, YO, pull up a loop (4 loops on hook). YO, pull through all 4 loops on hook.
4. Let’s Crochet Your Baby Booties! (Step-by-Step)
We’ll start by creating the sole of the bootie, then build up the sides and top.
Part 1: The Bootie Sole
The sole is worked in oval rounds, increasing at the ends to create the foot shape.
- Foundation Chain: Ch 10.
- This is the length of the sole. For larger booties, increase this number (e.g., Ch 12 for 3-6 months, Ch 14 for 6-12 months).
- Rnd 1 (Working around the chain):
- Close-up: Work into the back bumps of the chain for a neater edge (optional, but recommended). Otherwise, work into the top loop of the chain.
- 2 hdc in the 2nd ch from the hook. (This is your first increase for the heel end).
- Hdc in the next 7 chs.
- 5 hdc in the last ch. (This is your increase for the toe end, pivoting around).
- Now, you’ll work along the other side of the foundation chain. Hdc in the next 7 chs (working into the unworked loop of each chain).
- 3 hdc in the very last ch (the same one where you worked your initial 2 hdc).
- Join with a sl st to the top of the first hdc. [24 hdc]
- Place a stitch marker in the first hdc of the round to help you keep track.
- Rnd 2: Ch 2 (does NOT count as a st).
- 2 hdc in the same st (the first st of the round).
- 2 hdc in the next st. (2 increases at the heel end).
- Hdc in the next 7 sts.
- 2 hdc in the next 5 sts. (5 increases at the toe end).
- Hdc in the next 7 sts.
- 2 hdc in the next 2 sts. (2 increases at the heel end).
- Join with a sl st to the top of the first hdc. [33 hdc]
- Rnd 3: Ch 2 (does NOT count as a st).
- Hdc in the same st.
- 2 hdc in the next st, hdc in next st. (Pattern of increases for the heel curve).
- Hdc in the next 7 sts.
- (Hdc in next st, 2 hdc in next st) 5 times. (Pattern of increases for the toe curve).
- Hdc in the next 7 sts.
- Hdc in the next st, 2 hdc in next st.
- Join with a sl st to the top of the first hdc. [41 hdc]
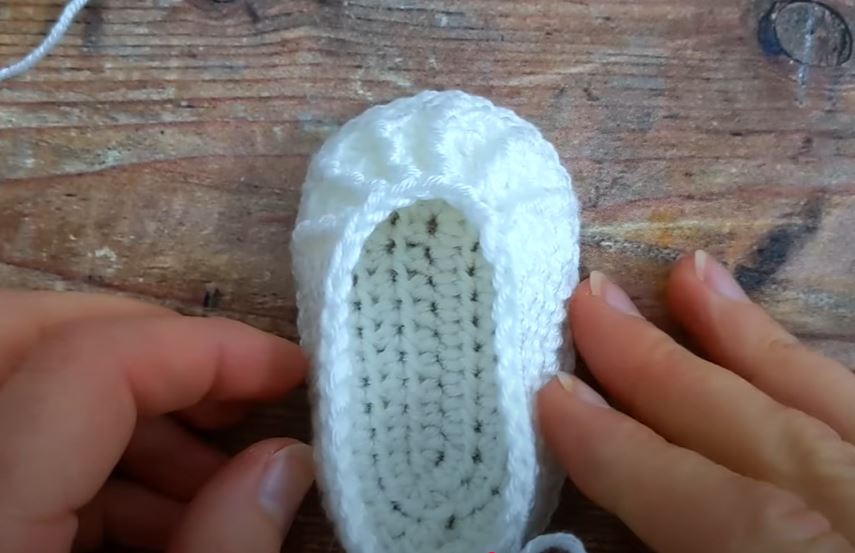
- Your sole should now be a nice oval shape. It should measure about 3.5 – 3.75 inches (9-9.5 cm) long.
Part 2: Building the Sides (The Body of the Bootie)
Now we’ll stop increasing and create the vertical sides.
- Rnd 4 (First Wall Round): Ch 1 (does NOT count as a st).
- Close-up: Work this entire round in sc in the back loop only (BLO) of each stitch around. This creates a neat ridge that defines the sole from the bootie’s side.
- Sc in BLO of each of the 41 sts around. Join with a sl st to the first sc. [41 sc]
- Rnd 5: Ch 1 (does NOT count as a st). Sc in each sc around. Join with a sl st to the first sc. [41 sc]
- Rnd 6: Ch 1 (does NOT count as a st). Sc in each sc around. Join with a sl st to the first sc. [41 sc]
Part 3: Shaping the Top (Toe and Ankle)
This section creates the curve over the toes and the opening for the ankle.
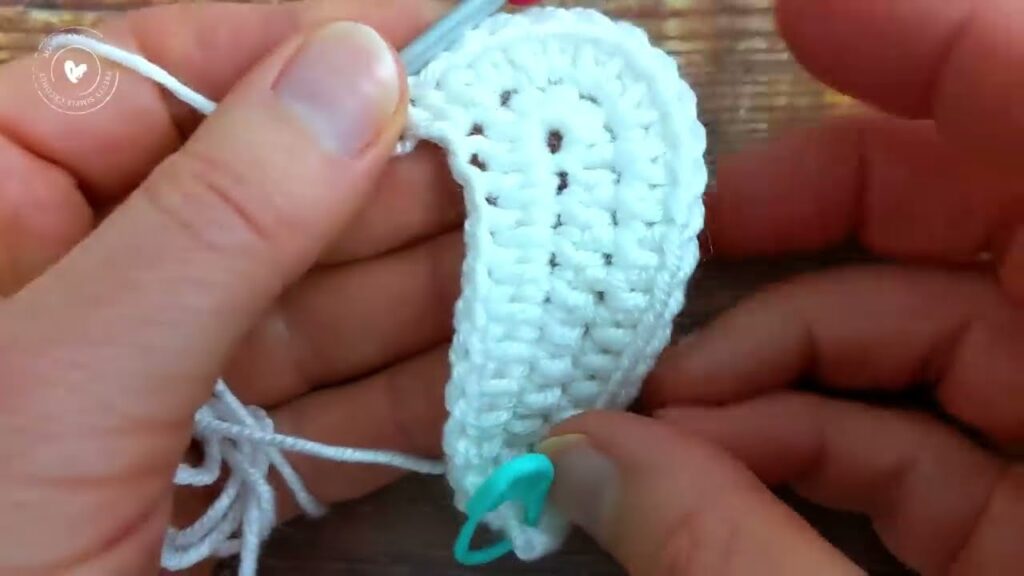
- Rnd 7 (Toe Shaping): Ch 1 (does NOT count as a st).
- Sc in the first 12 sts. (This covers the heel and side).
- Close-up: Now we’ll start decreasing for the toe. Hdc2tog over the next 2 sts. Repeat hdc2tog 8 more times (total of 9 hdc2tog decreases).
- Sc in the remaining 12 sts.
- Join with a sl st to the first sc. [32 sts]
- The front of your bootie should be curving in now.
- Rnd 8 (Ankle Opening): Ch 1 (does NOT count as a st).
- Sc in the first 12 sts. (Still covering heel and side).
- Close-up: Now we’ll decrease more sharply for the toe point. Sc2tog over the next 2 sts. Repeat sc2tog 4 more times (total of 5 sc2tog decreases).
- Sc in the remaining 11 sts.
- Join with a sl st to the first sc. [27 sts]
- Your bootie should now clearly have a defined foot and an opening for the ankle.
Part 4: Finishing the Ankle Cuff
This adds a neat, finished edge to the top of the bootie.
- Rnd 9 (Cuff): Ch 2 (counts as first dc).
- Dc in each of the 27 sts around.
- Join with a sl st to the top of the beginning ch 2. [27 dc]
- Fasten Off, leaving a 6-inch (15 cm) tail.
5. Assembling & Final Touches
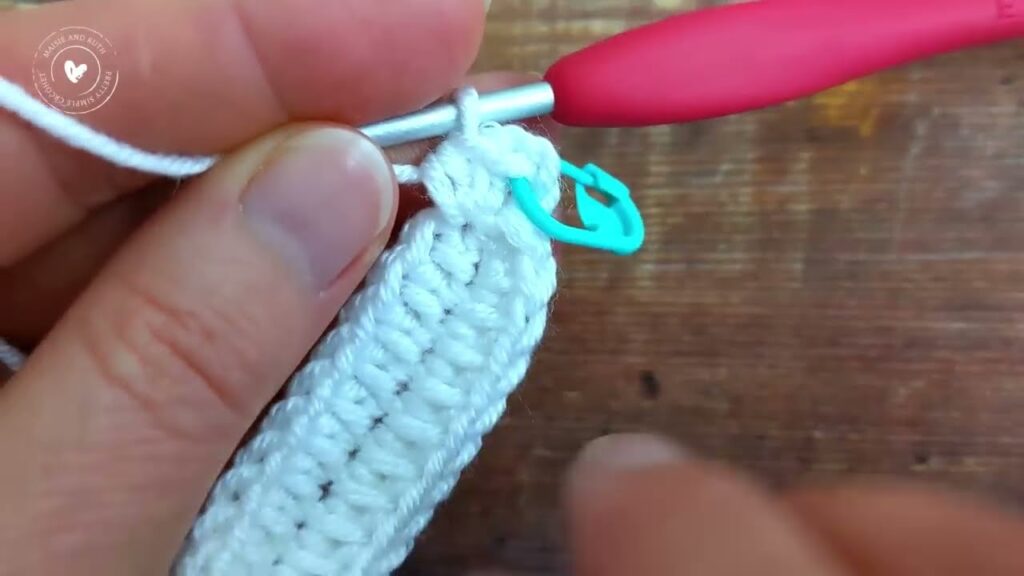
- Weave in Ends: Use your yarn needle to neatly weave in all loose yarn tails. For baby items, make sure they are very secure and won’t unravel easily.
- Repeat for Second Bootie: Follow all steps exactly to create an identical second bootie.
- Add Ribbon/Drawstring (Optional but Cute!):
- Cut a piece of coordinating ribbon (about 18-20 inches / 45-50 cm) or crochet a simple chain (Ch 50-60).
- Weave the ribbon/chain through the DC stitches of Rnd 9 (the cuff), going over one DC and under the next, all the way around.
- Tie a bow at the front. This not only looks adorable but also helps to keep the booties on baby’s feet!
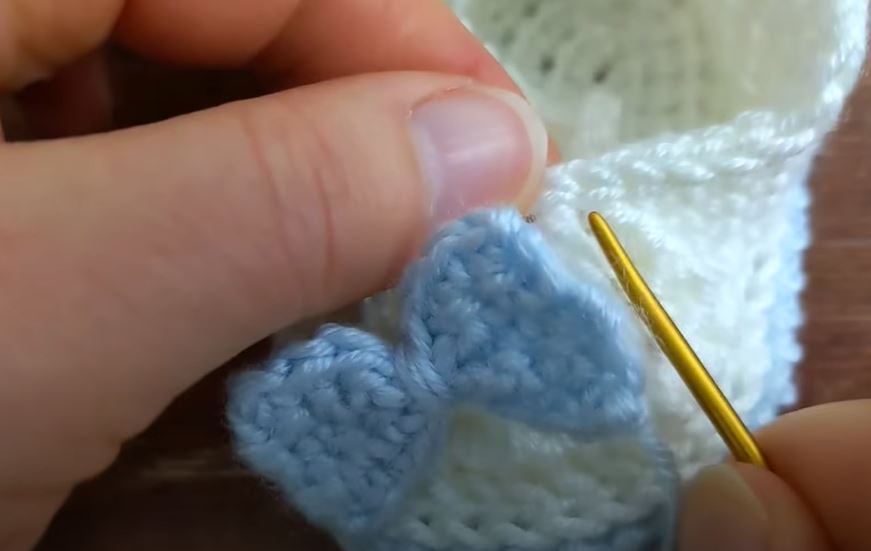
- Add a Tiny Bow/Button (Optional Embellishment): You can sew a tiny satin bow or a decorative button (securely!) to the front top of the bootie.
6. Care for Your Crocheted Baby Booties
Always refer to your yarn label for specific care instructions. For most baby-friendly yarns:
- Machine Washable: Usually machine wash on a gentle cycle in cool water. Place them in a mesh laundry bag to prevent snagging.
- Drying: Tumble dry on low heat or, ideally, lay flat to air dry to help maintain their shape.
- Avoid Bleach: Do not use bleach unless specifically instructed by the yarn label.
Congratulations! You’ve just crocheted a beautiful pair of super easy baby booties. They’re soft, cozy, and filled with your love – the perfect handmade gift for any precious little one!
Video tutorial:


