Crochet is a charming and rewarding craft that allows you to create beautiful handmade clothing for babies and toddlers. Among the most popular items for little girls is a crochet frock—a delicate, stylish dress perfect for special occasions or everyday wear. The best part? You don’t need to be an expert to create a gorgeous frock. With a few basic stitches and a simple pattern, you can make a very easy and beautiful crochet frock, even as a beginner.
This guide will walk you through the entire process—from materials and stitch basics to assembly and decoration.
🧶 Why Crochet a Frock?
- Handmade charm: Every stitch is full of love and care.
- Customizable: Choose your own colors, size, and design details.
- Light and comfortable: Ideal for babies and toddlers, especially in warmer weather.
- Beginner-friendly: You only need to know a few basic stitches to get started.
🧵 Materials You’ll Need
- Yarn: Choose soft, lightweight yarn such as cotton or baby acrylic (size 3 or DK/light worsted).
- Hook: 3.5 mm to 4.5 mm (depending on your yarn).
- Tapestry needle: For weaving in ends.
- Scissors
- Stitch markers (optional but helpful for keeping track of rounds).
- Buttons or ribbons: For closures or decoration.
✨ Basic Stitches You’ll Use
If you’re new to crochet, practice these stitches first:
- Chain (ch)
- Slip Stitch (sl st)
- Single Crochet (sc)
- Double Crochet (dc)
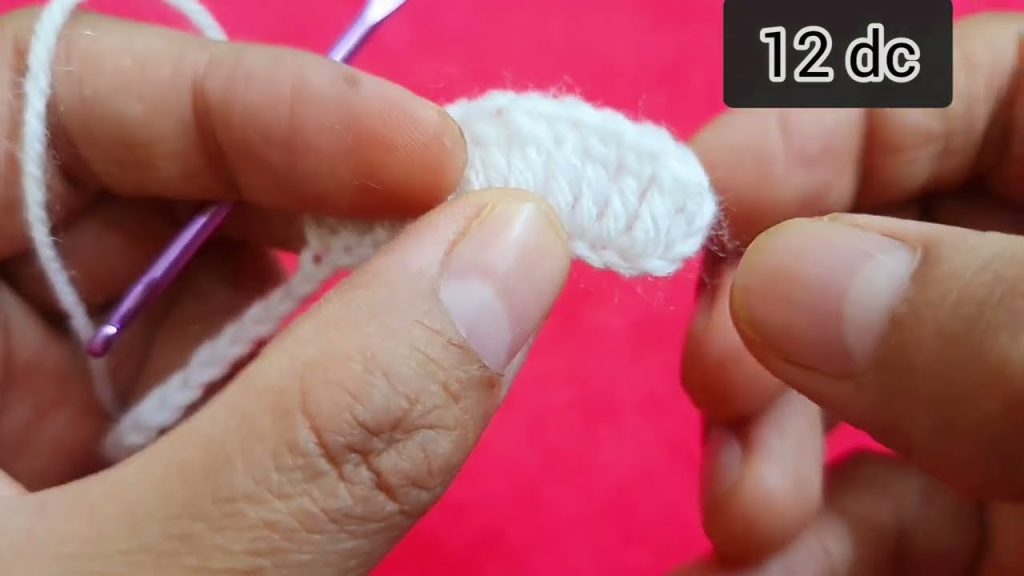
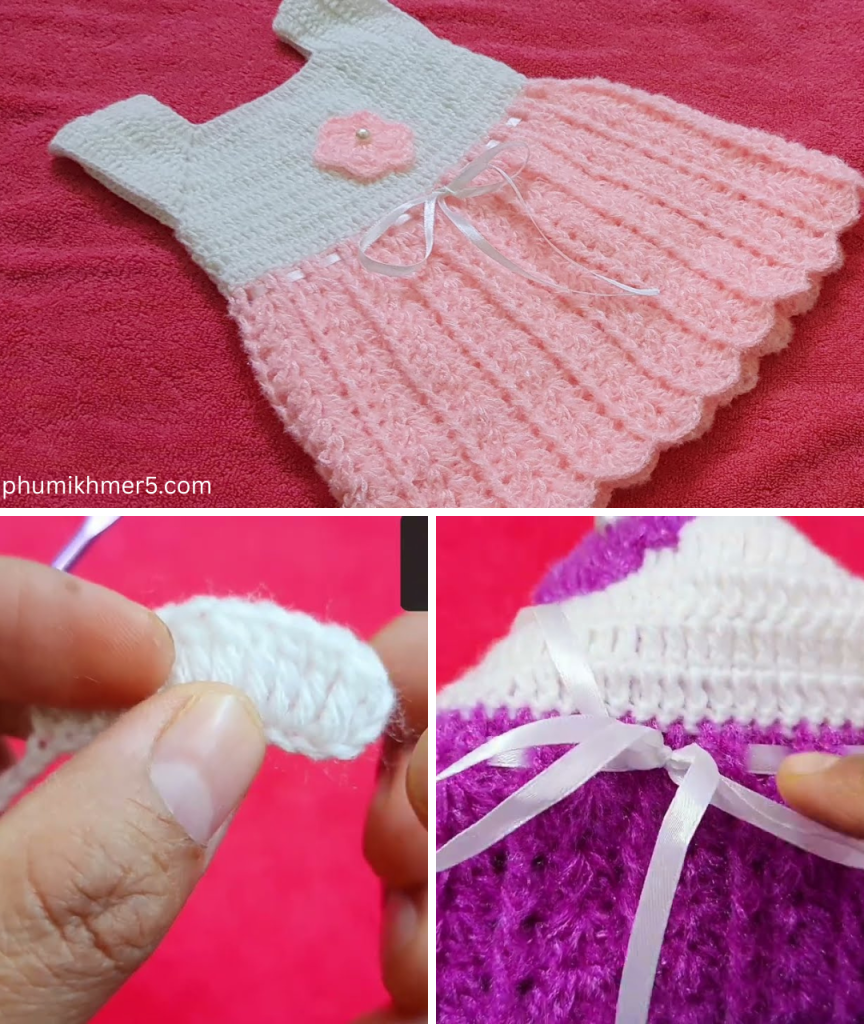
- Shell Stitch (5 dc in one stitch) — This gives the frock a pretty, scalloped texture.

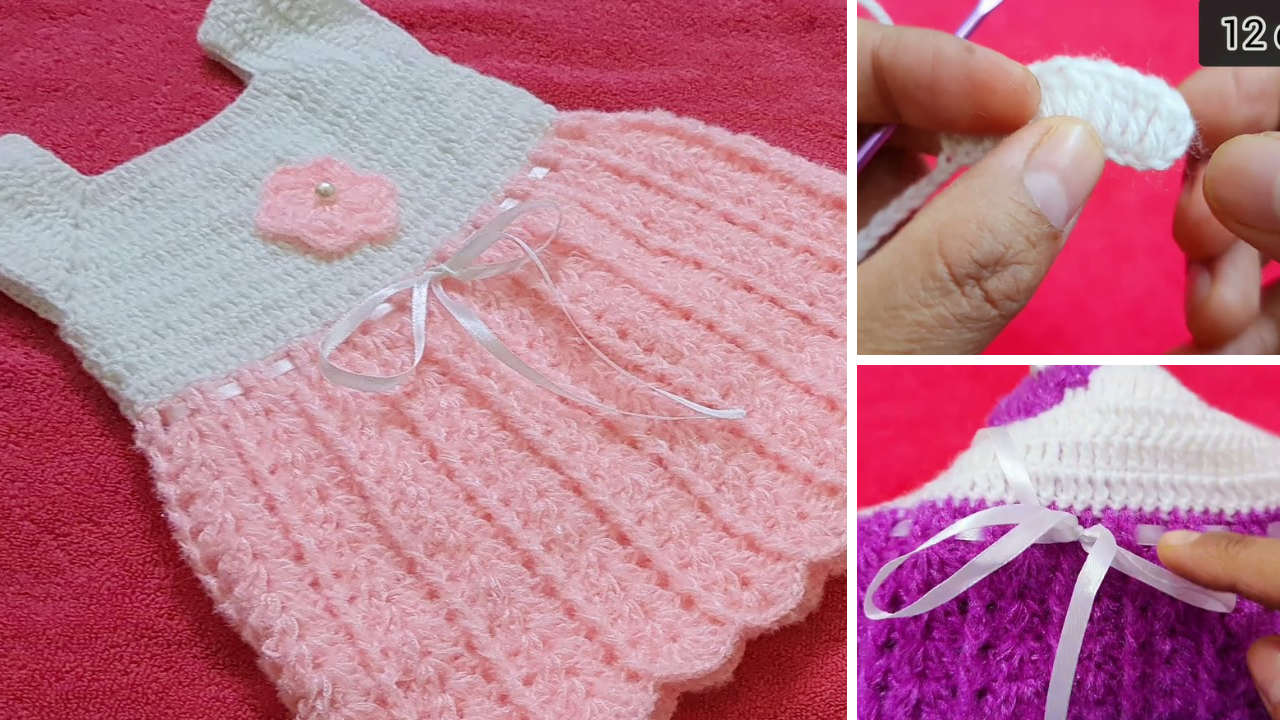
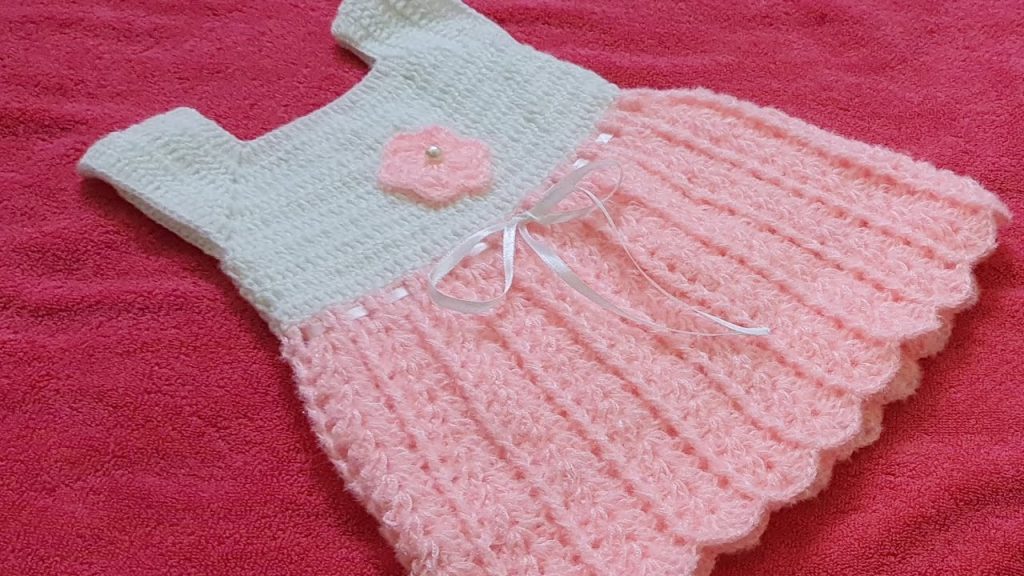
👗 Simple Crochet Frock Pattern (Size: 6 months–2 years)
Note: This is a top-down frock worked in one piece, no sewing needed.
Step 1: Yoke (Top Part)
- Start with a chain:
Ch 60 (adjust in multiples of 10 for different sizes). - Row 1:
Dc in 4th ch from hook and in each stitch across. (You’ll have 58 dc) - Row 2–6:
Ch 2, turn. Increase evenly to shape the yoke. Add 8 dc every round, especially at the corners. Place stitch markers at every 15 dc to track corners for increases.
After about 6 rows, you’ll have a rounded yoke that fits around the baby’s shoulders.

Step 2: Divide for Body
- Fold your work and identify front, back, and sleeves.
- Join underarms by skipping stitches for sleeves and connecting front and back with chains (usually 5–10 ch under each arm).
- Now you have a tube — the beginning of the skirt section!
Step 3: Skirt Body
- Begin working in rounds.
- Round 1–3:
Dc in each stitch around. - From Round 4 Onwards:
Switch to shell stitch (5 dc in one stitch, skip 2, sc in next, skip 2, repeat). - Continue shell pattern for about 15–20 rounds or until desired length is reached.
Step 4: Finishing Touches
- Hemline: Add a row of picot edging or another row of shell stitch.
- Sleeves (Optional): You can add a short ruffle using shell stitch around the armholes.
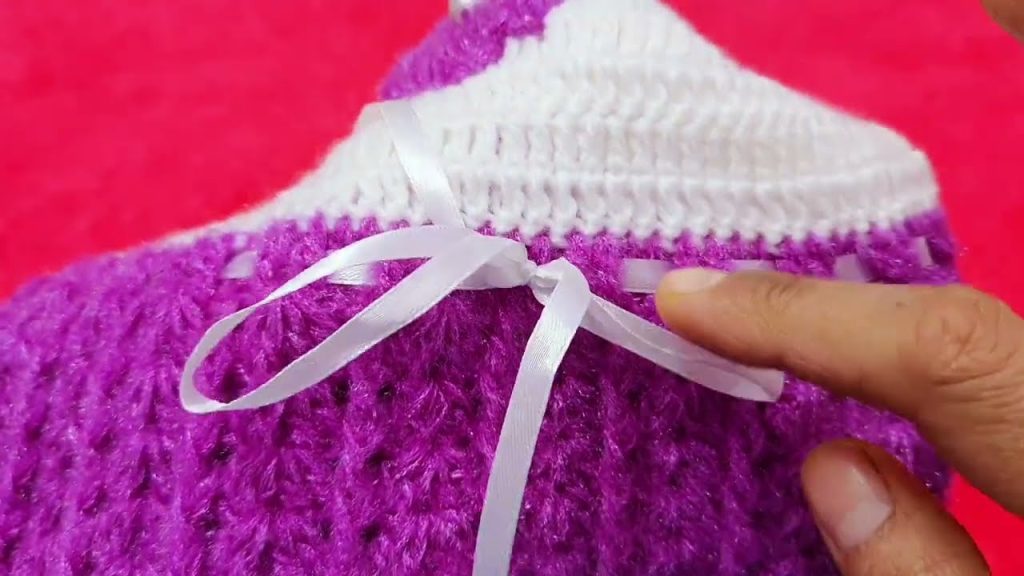
- Back Opening: Leave a small slit at the back neckline and add a button and loop for closure.
- Decorations: Sew on tiny crochet flowers, bows, or pearls. Weave a satin ribbon at the waist for an elegant touch.
🌸 Tips for Beginners
- Use light-colored yarn so you can see your stitches clearly.
- Don’t stress over perfection — crochet is very forgiving!
- Watch tutorial videos if you get stuck. Visuals can be a great help.
- Test the fit if possible, or measure a frock your child already wears.
🎨 Color and Style Variations
- Summer Frock: Use cotton yarn and shorter length with cap sleeves.
- Party Frock: Use shiny yarn and add decorative edging and ribbons.
- Layered Look: Alternate shell stitch with rows of dc for a textured pattern.
🧼 Care Instructions
- Hand wash gently or use a mesh bag in a delicate machine cycle.
- Lay flat to dry to maintain shape.
- Store with lavender or cedar to prevent moths.
❤️ Conclusion
Making a beautiful crochet frock doesn’t have to be complicated. With just a few stitches and a bit of creativity, you can craft a charming dress that’s sure to draw compliments and become a treasured piece in any child’s wardrobe. Whether you’re crocheting for your own little one or as a heartfelt gift, the process is as rewarding as the final result.
Would you like a printable PDF version of this pattern or a video tutorial recommendation to go with it? I’d be happy to help further!
Video tutorial:


