Creating a handmade crochet topi (hat or cap) for a baby boy is a beautiful way to combine comfort, warmth, and creativity. Whether you’re making it for your own child, as a gift, or for charity, a crocheted baby hat is a cherished item that’s both functional and sentimental.
This detailed tutorial will guide you through each step to make a perfectly sized topi for a 6 to 12 months old baby boy — approximately 17″ to 18″ in head circumference.
🧶 Project Overview
- Style: Classic beanie/topi (customizable with earflaps, pom-poms, or embellishments)
- Size: Fits 6–12 months old (head circumference ~17–18 inches)
- Construction: Worked in the round from top to bottom
- Difficulty Level: Beginner to Intermediate
- Estimated Time: 1.5 to 3 hours
- Pattern Type: Crochet in the round (spiral or joined rounds)
🧵 Materials Needed
- Yarn:
- Worsted weight yarn (category #4)
- Soft, baby-safe yarn like:
- Bernat Softee Baby
- Red Heart Soft Baby Steps
- Paintbox Simply Aran
- Yardage: 100–150 yards (enough for a hat and maybe extras like a pom-pom)
- Crochet Hook:
- 5.0 mm (H-8) or 5.5 mm hook (depending on your tension)
- Other Supplies:
- Yarn needle
- Stitch marker (optional but helpful)
- Scissors
- Measuring tape
- Pom-pom maker (optional)
📏 Sizing Guide
For a 6–12 month old baby:
- Head circumference: 17–18 inches (43–46 cm)
- Hat height: 6.5–7 inches (16.5–18 cm)
Always check your gauge or measure as you go for best results.
📚 Stitches & Abbreviations (US Terms)
- ch – chain
- sc – single crochet
- hdc – half double crochet
- dc – double crochet
- sl st – slip stitch
- st(s) – stitch(es)
- inc – increase (2 sts in one st)
- blo – back loop only (optional ribbing effect)
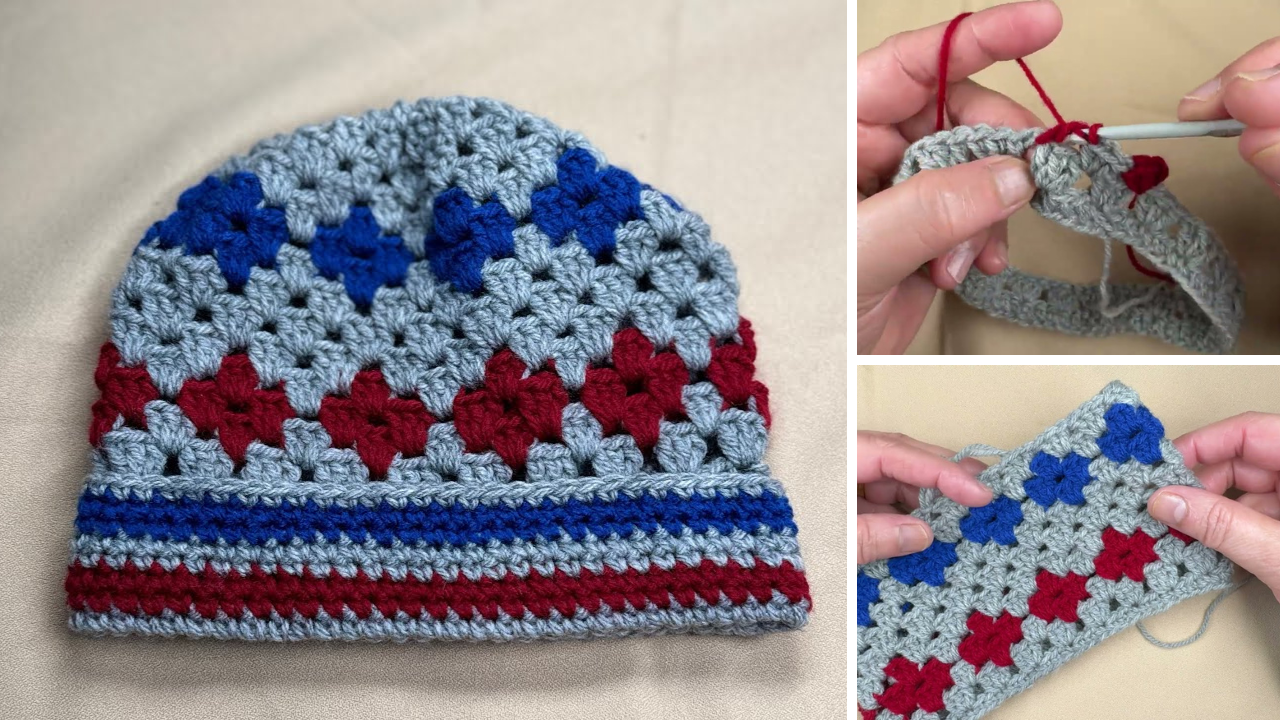
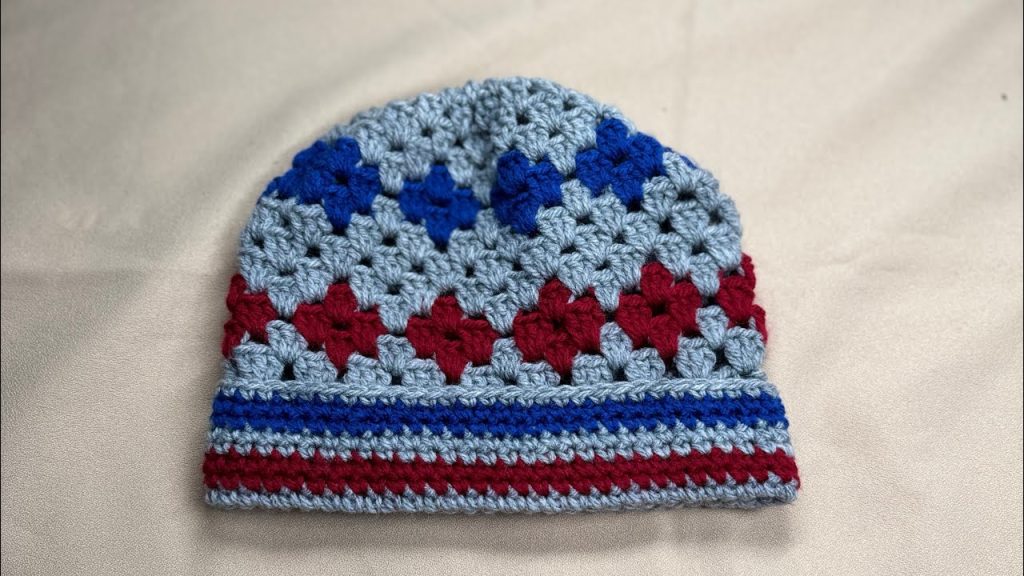
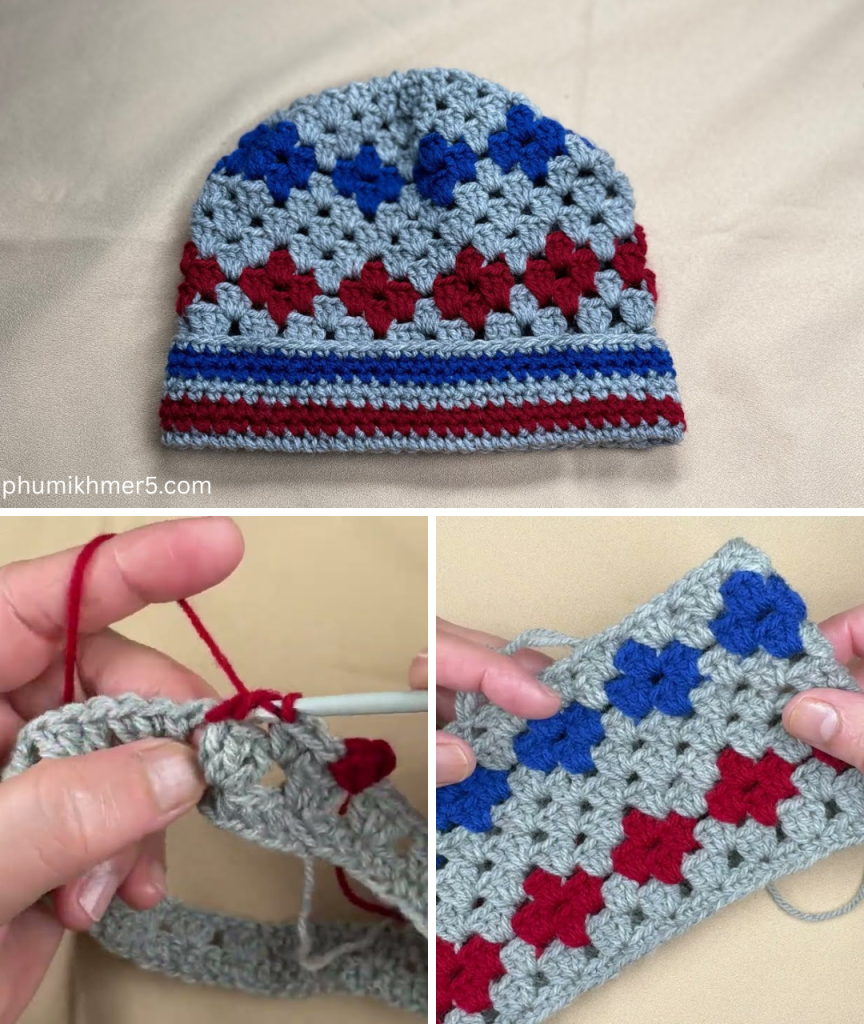
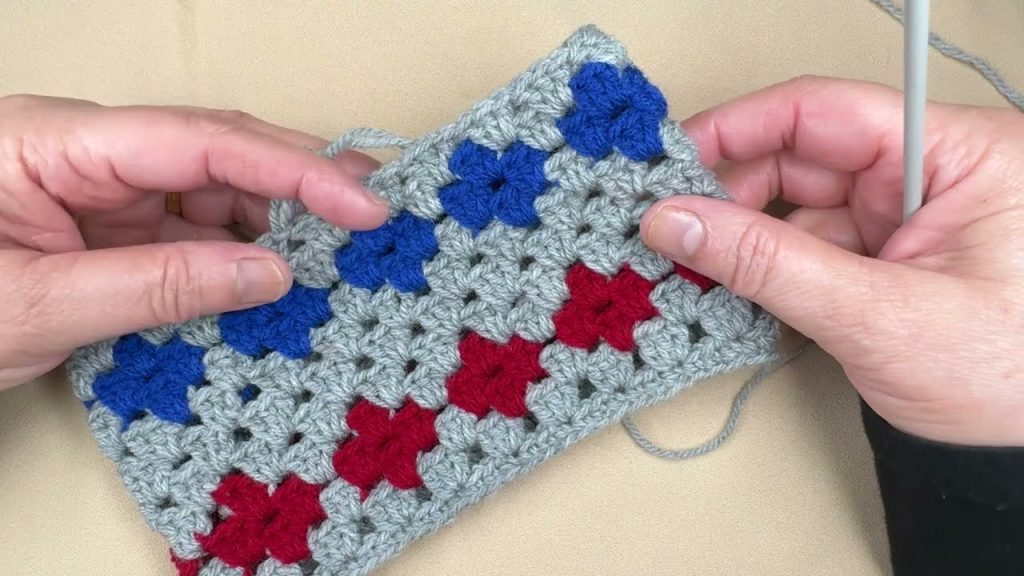
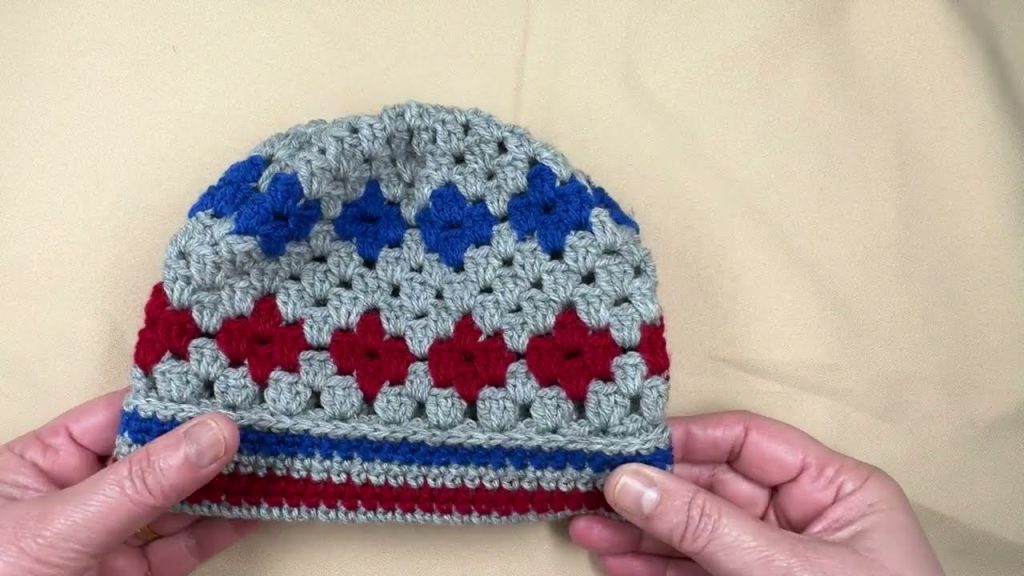
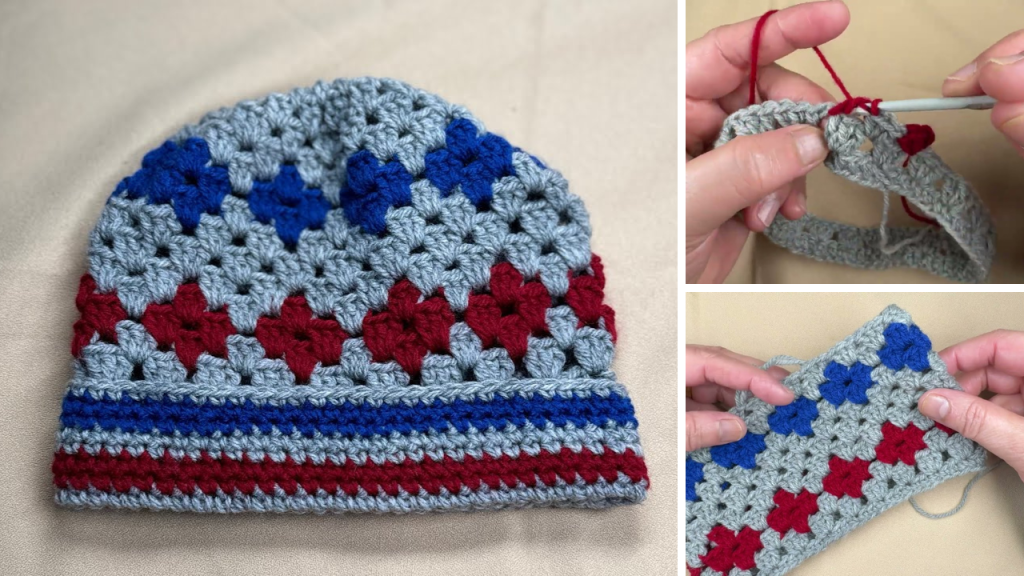
🧢 Crochet Topi Pattern – Step-by-Step
We’ll be making a classic round beanie shape, working from the top (crown) down to the brim.
✅ Step 1: Create the Magic Ring (or Foundation Circle)
Round 1:
Make a magic ring (or ch 4 and sl st to form a ring).
Ch 2 (counts as hdc), work 10 hdc into the ring.
Join with sl st to top of first hdc. (10 hdc)
✅ Step 2: Begin Crown Increases
We’ll increase evenly in each round to expand the crown.
Round 2:
Ch 2, 2 hdc in each st around. Join. (20 hdc)
Round 3:
Ch 2, hdc in next st, 2 hdc in next. Repeat around. Join. (30 hdc)
Round 4:
Ch 2, hdc in next 2 sts, 2 hdc in next. Repeat. Join. (40 hdc)
Round 5:
Ch 2, hdc in next 3 sts, 2 hdc in next. Repeat. Join. (50 hdc)
Round 6:
Ch 2, hdc in next 4 sts, 2 hdc in next. Repeat. Join. (60 hdc)
🔁 Check Your Diameter:
At this stage, your crown should measure about 5.5 to 6 inches in diameter. This fits an 18-inch head circumference comfortably.
If it’s smaller, do another increase round:
- Round 7: hdc in next 5 sts, 2 hdc in next (70 hdc)
✅ Step 3: Work the Body of the Hat (No Increases)
Round 7–14 (or until hat measures 6.5–7” tall):
Ch 2, hdc in each st around. Join.
👉 Optional: Work in back loops only (hdc blo) to give a subtle ribbed texture to the body.
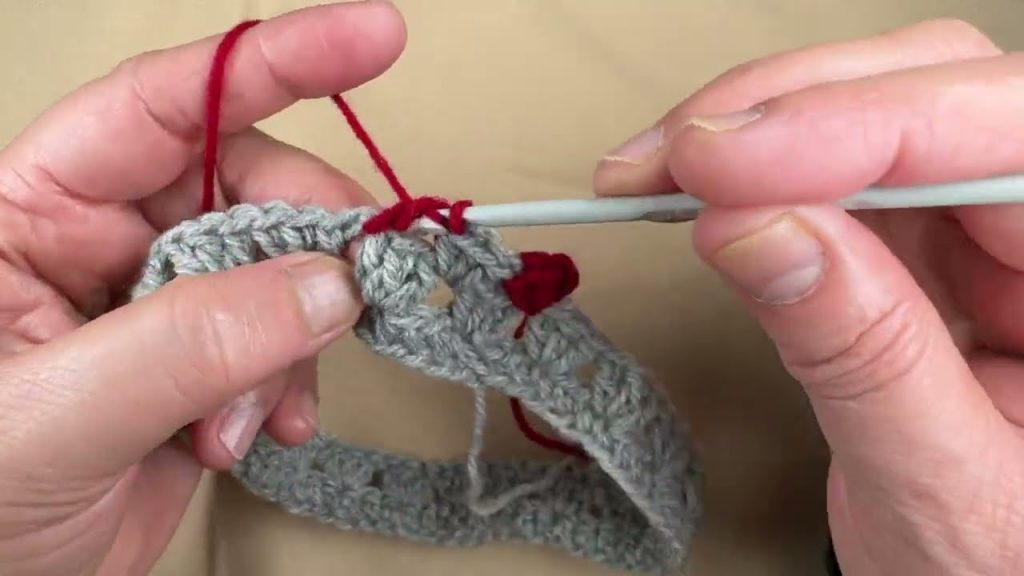
✅ Step 4: Add a Ribbed Brim (Optional But Stylish!)
To add a textured ribbed brim:
Round 15–17:
- Switch to sc blo (single crochet in back loops only) around the hat. This adds stretch and a neat finish.
Or,
Alternative:
Work fpdc/bpdc ribbing:
- Front post dc, back post dc alternating all around for 2 rounds for a stretchier, knit-like brim.
🧸 Optional Add-Ons & Customizations
🎀 1. Add a Pom-Pom
- Use matching or contrast yarn
- Sew securely at the top
🐻 2. Add Ears
Bear Ears Example:
- Make 2 small circles:
- Round 1: 6 sc in magic ring
- Round 2: 2 sc in each st (12 sts)
- Round 3: sc around, fasten off
- Sew on sides of hat
👂 3. Add Earflaps
Earflap Instructions:
- Count 10–12 sts from one side and reattach yarn.
- Row 1: Hdc 8 sts
- Row 2: Hdc2tog at beginning and end (6 sts)
- Row 3: Repeat decrease until 1 st remains
- Repeat on opposite side
Add braided ties or cords if desired.
🧼 Care Instructions
- Hand wash or machine wash cold on gentle cycle
- Lay flat to dry to maintain shape
- Avoid ironing
📝 Helpful Tips
- Use stitch markers to track beginning of each round
- Try the hat on a baby doll or use a head size chart to verify fit
- Always check gauge if you’re substituting yarn
- Keep tension consistent for a professional look
🎁 Perfect Gift Idea!
This crochet topi is perfect for:
- Baby showers
- First birthdays
- Winter essentials
- Cultural events or photoshoots
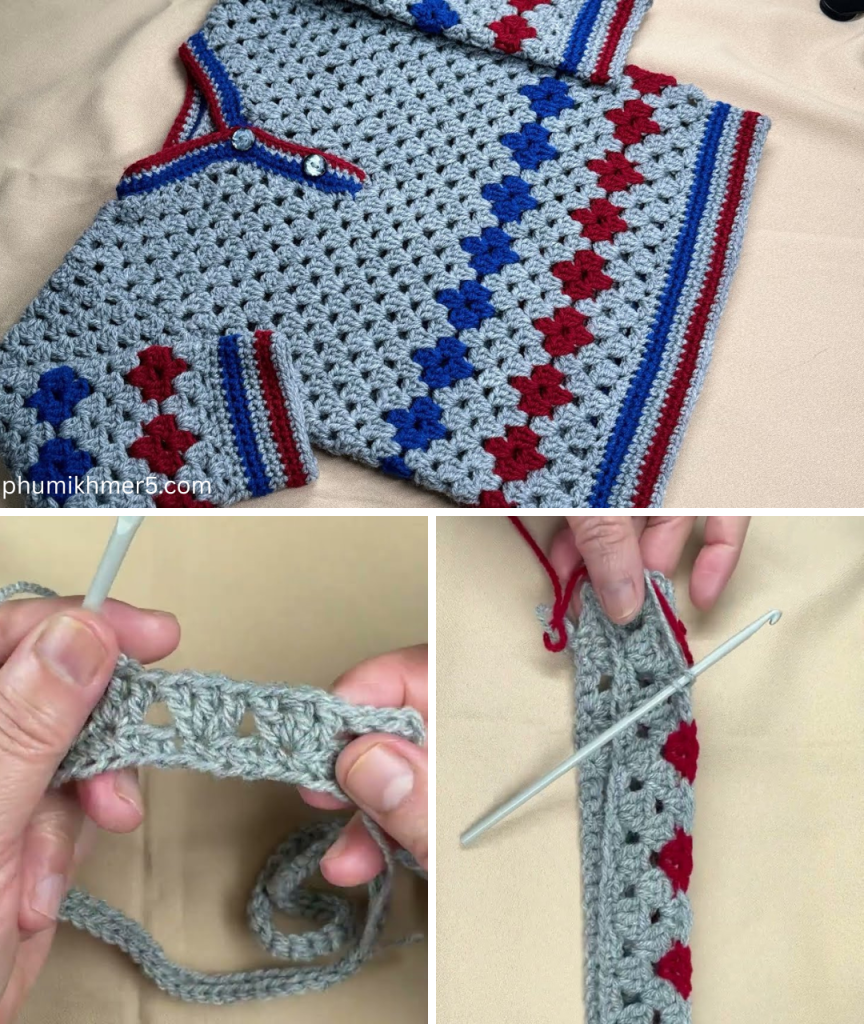
Make it in traditional colors or go for fun bright tones and customize it with initials, motifs, or stripes.
❤️ Conclusion
Crocheting a topi (hat or cap) for a 6–12-month-old baby boy is a thoughtful and practical project that’s as fun to make as it is to gift. With basic stitches and some customization, you can create a piece that reflects warmth, tradition, and your own creative style.
Whether you prefer a classic beanie look or want to jazz it up with pom-poms, earflaps, or character-inspired designs, the possibilities are endless.
Start with this simple pattern, then let your creativity flourish. You’ll soon be making a whole collection of topis for every outfit and season!
Video tutorial:


