Crochet offers endless opportunities to blend function with fashion, and one of the most beloved and practical projects you can make is a pair of warm, cozy slippers. Among the many creative techniques in crochet, the “pistachio stitch” (also known in some communities as the puff popcorn stitch) adds a delightful 3D texture, making slippers not only functional but also visually stunning.
In this detailed guide, we’ll walk you through everything you need to know to create your very own Crochet Slippers with Pistachios — from materials and sizing to pattern instructions and creative variations. Whether you’re a beginner looking for a rewarding challenge or an experienced crocheter eager to try a new texture, this project is for you.
🥜 What Are “Pistachios” in Crochet?
The term “pistachios” in crochet typically refers to a decorative stitch that creates a raised, nut-like bump on the fabric — similar in shape to an opened pistachio shell. It’s often created using variations of the puff stitch, popcorn stitch, or cluster stitch.
These stitches give a pillowy, luxurious feel and are often used to add flair to otherwise simple patterns. When incorporated into slippers, they provide extra texture and warmth.
🧵 Materials You Will Need
To make a pair of crochet slippers with pistachios, gather the following supplies:
- Yarn: Medium weight (worsted/Aran) yarn is ideal. Choose soft, durable fibers like acrylic blends or wool.
- Crochet hook: Size 4.5 mm to 5.5 mm (US 7–I/9), depending on your yarn choice.
- Stitch marker: To mark rounds or sections.
- Yarn needle: For weaving in ends.
- Scissors
- Optional: Non-slip fabric or hot glue for soles, buttons, or ribbons for decoration.
📏 Sizing & Fit
You can easily adjust the size of these slippers by:
- Changing the hook size
- Using thicker or thinner yarn
- Adding or removing rounds and rows in the foot and sole sections
Here is a basic size chart for adult feet:
| US Size | Foot Length (inches/cm) |
|---|---|
| 5–6 | 8.5 in / 21.5 cm |
| 7–8 | 9.5 in / 24 cm |
| 9–10 | 10.25 in / 26 cm |
| 11–12 | 11 in / 28 cm |

📚 Stitches & Abbreviations Used
Before you start, familiarize yourself with these basic crochet terms (US terminology):
- ch – chain
- sl st – slip stitch
- sc – single crochet
- dc – double crochet
- ps – pistachio stitch (variation of puff/popcorn)
- inc – increase (2 sc in the same stitch)
- dec – decrease (sc two stitches together)
🔸 Pistachio Stitch (Puff Version):
Yarn over, insert hook into stitch, pull up a loop. Repeat 3 more times (total of 9 loops on hook), yarn over and pull through all loops. Chain 1 to close. That’s one pistachio stitch.
You can modify the height and number of loops for desired puffiness.
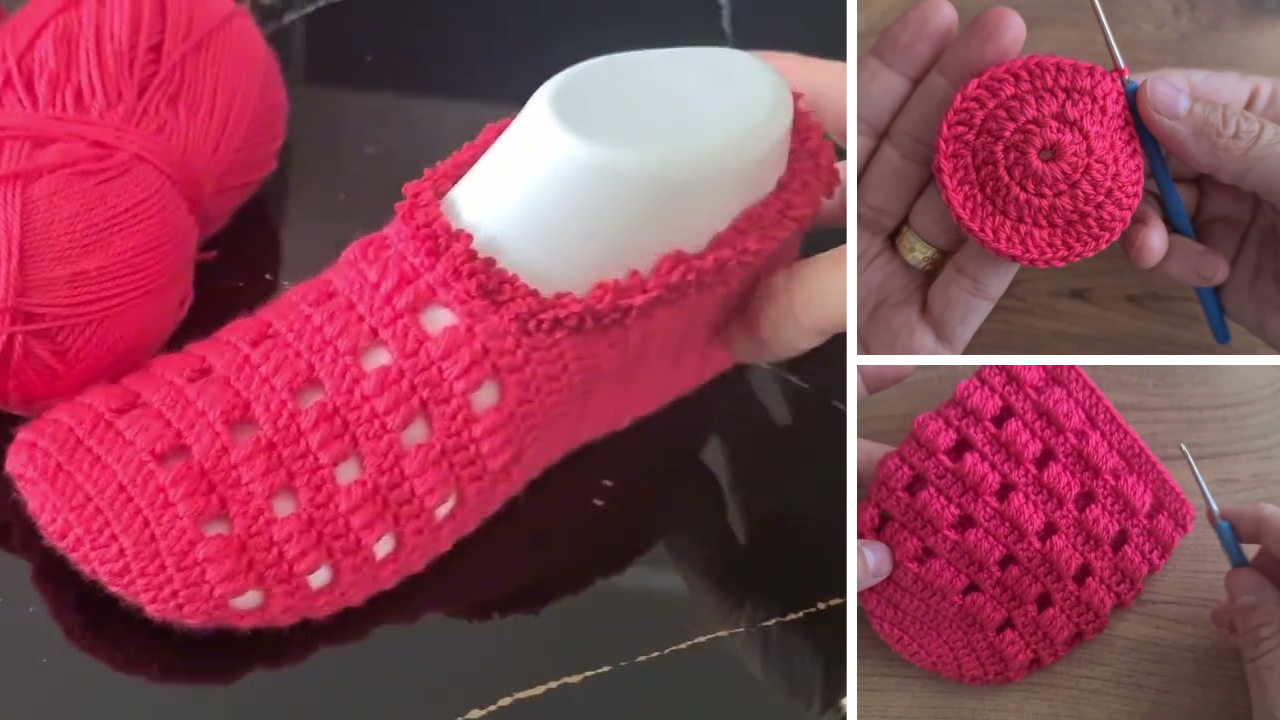
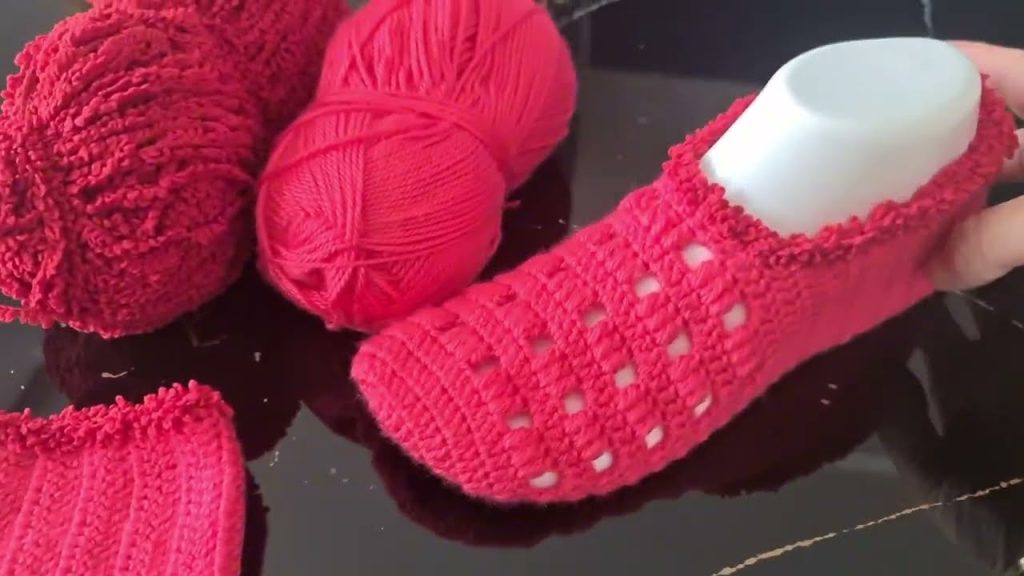
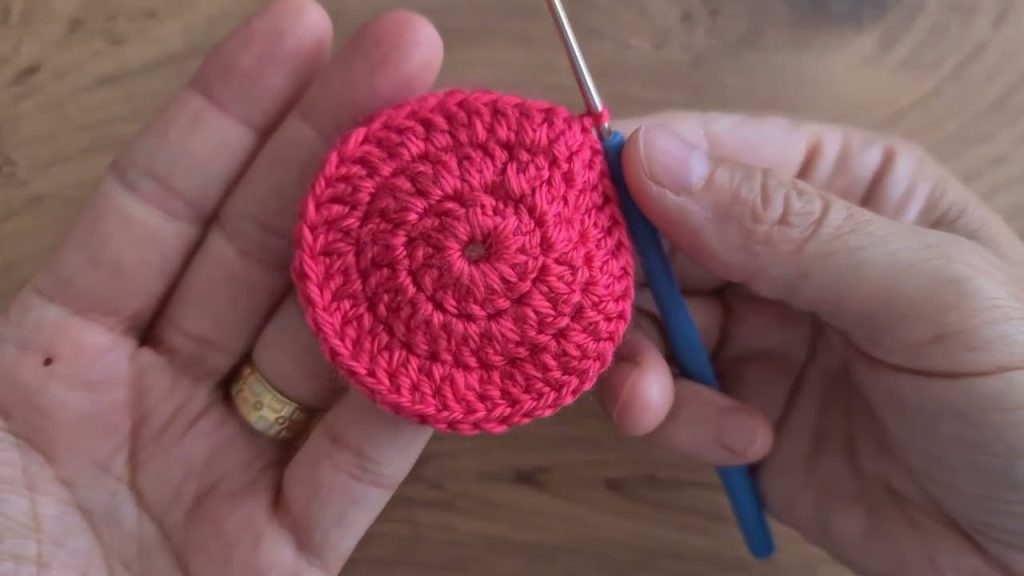
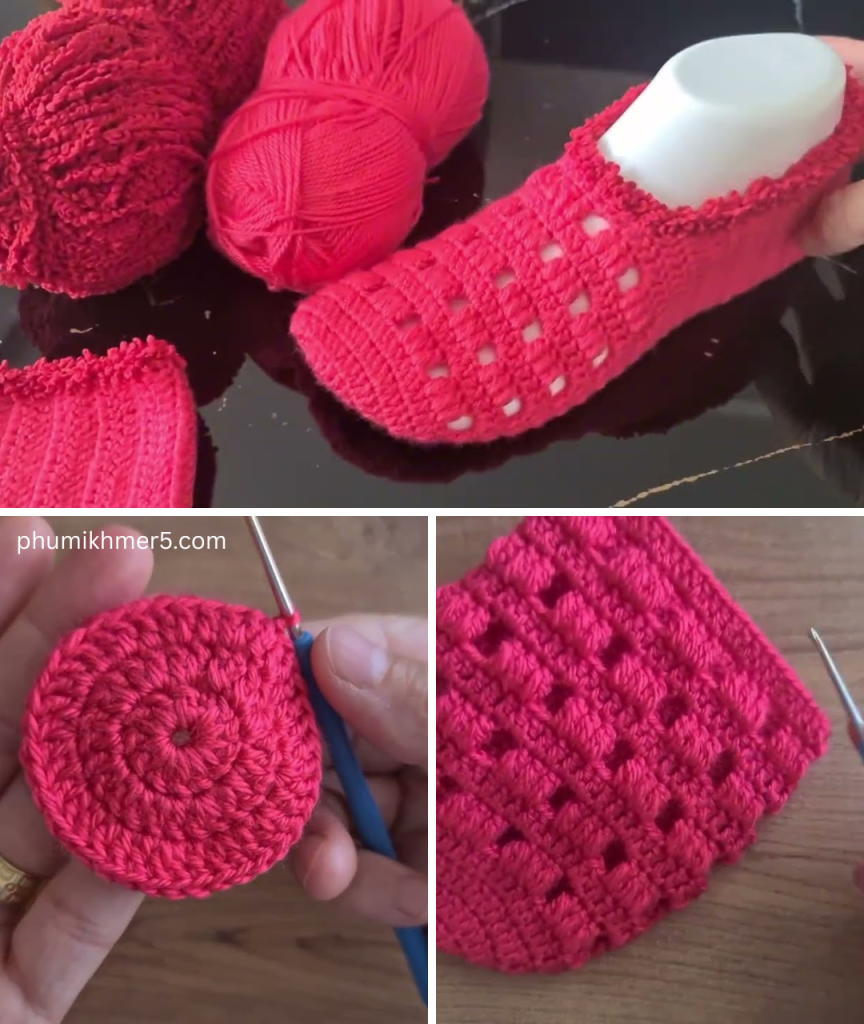
🧶 Crochet Slippers with Pistachios Pattern
✂️ Size: Adult Medium (Women’s US 7–8)
Adjust foundation and length as needed for other sizes.
🦶 Sole & Toe Section
1. Begin with a magic ring.
Ch 2 (does not count as dc). Work 10 dc into the ring. Join with sl st to first dc. (10 sts)
2. Round 2: Ch 2, 2 dc in each stitch around. Join. (20 sts)
3. Round 3: Ch 2, (1 dc, 2 dc in next st) around. Join. (30 sts)
4. Round 4: Work evenly in dc. Join. (30 sts)
5. Round 5: Begin Pistachio Pattern – 1 pistachio stitch in first st, skip 1, sc in next around. Adjust spacing so pistachios sit evenly around the front half of the sole.
This textured area forms the toe cap of the slipper.
🧦 Body of the Slipper
6. Rows 6–10 (Worked back and forth):
From the midpoint of the toe section, work single crochets in rows to form the top of the slipper:
- Ch 1, turn. Sc across 20–24 stitches (depending on width).
- Next row: Work alternating pistachio stitches and sc as desired.
- Continue alternating sc rows and pistachio rows for 5 total rows.
7. Heel Shaping:
Continue working in rows:
- Rows 11–13: Sc across, decreasing 1 stitch at each end.
- Row 14: Fold heel section in half, sc sides together to close heel.
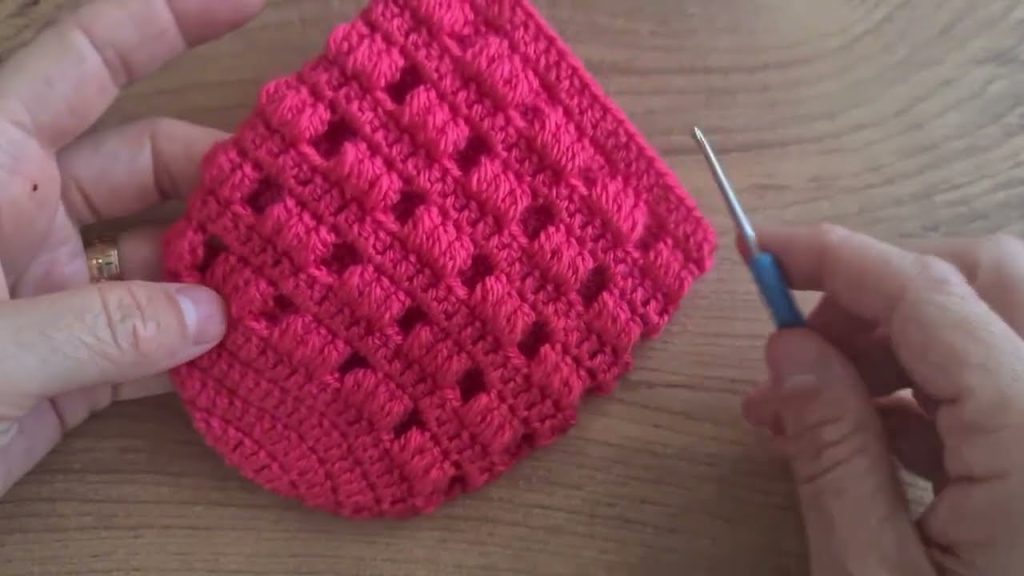
🧤 Cuff (Optional):
After completing the heel, turn the slipper and join yarn at the ankle opening.
Round 1: Sc evenly around the ankle opening.
Round 2–5: Work pistachio stitch pattern around for a decorative cuff.
Fasten off and weave in ends.
✨ Finishing Touches
- Weave in all yarn ends securely with a yarn needle.
- For non-slip soles, attach pre-cut suede patches or apply hot glue in dots or lines under the sole.
- Add a decorative bow, button, or crocheted flower on top of the toe cap or cuff.
- Optional: Line with fleece or felt for extra warmth.
🎨 Creative Variations
There are many ways to customize your pistachio slippers:
🎨 Color Play
Use a contrasting yarn color for the pistachio stitches to make them pop visually.
💮 Mix in Floral Patterns
Add flower motifs on top or alternate pistachio stitches with puff flowers for a garden-inspired design.
🧵 Use Velvet or Chenille Yarn
For a luxurious finish, try soft velvet yarns. Pistachio stitches look extra plush with this yarn type.
🧷 Adjustable Heel Strap
Add a buttoned or tied strap across the heel or instep to make the slippers more secure.
💧 Care & Maintenance
Most worsted-weight yarns are machine washable, but always check your yarn label. For best results:
- Hand wash in cold water
- Lay flat to dry
- Avoid ironing or high heat
🎁 Gifting Ideas
These crochet slippers make fantastic gifts for:
- Birthdays
- Mother’s Day
- Christmas
- Bridal party gifts
- Cozy care packages
Pair them with a crocheted headband, scarf, or matching beanie for a complete handmade set.
🧣 Final Thoughts
Crocheting slippers with pistachios is a wonderful way to blend style and comfort in one cozy project. The rich, textured stitch makes each slipper feel plush, while also providing warmth and visual appeal. Once you master the pistachio stitch, you’ll likely find yourself incorporating it into many other items — from hats and scarves to bags and blankets.
Whether you’re crocheting for yourself or as a heartfelt handmade gift, these slippers offer creativity, charm, and coziness with every stitch.
Video tutorial:


