
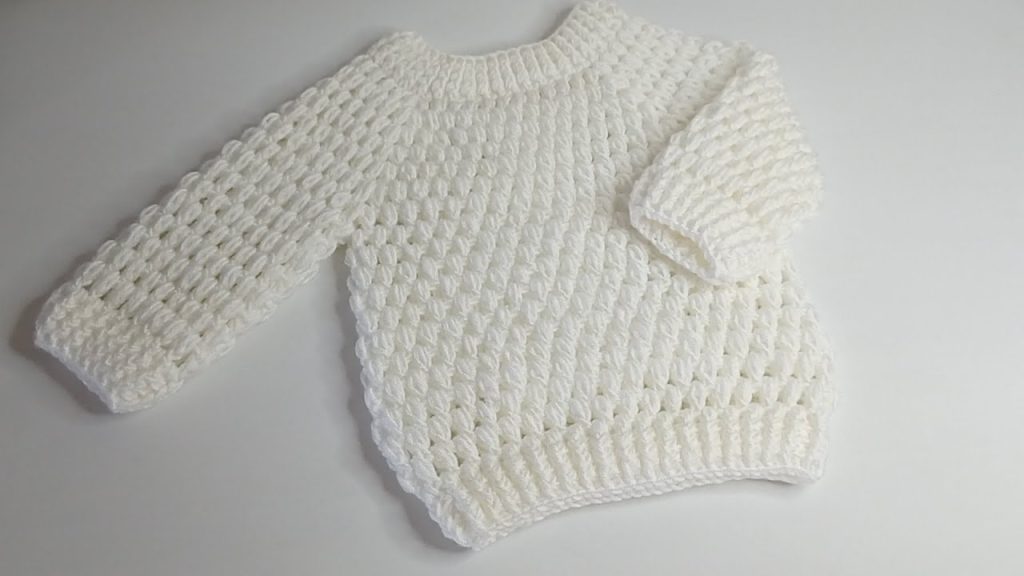
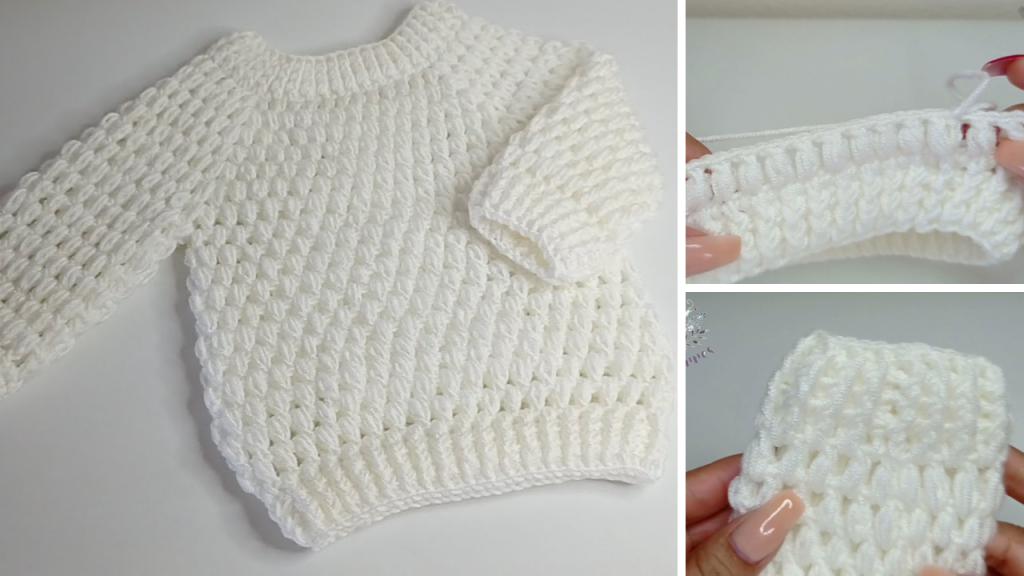
If you’ve been looking for a cozy handmade gift for a newborn, a crocheted puffer coat or sweater is a perfect project. It’s warm, cute, and surprisingly easy—even for beginners! With just basic crochet skills, some yarn, and a hook, you can create a stylish and snug garment perfect for chilly days.
This step-by-step guide is designed for beginner to intermediate crocheters and covers everything from choosing the right materials to assembly and finishing.
🧵 Materials You’ll Need
Before you begin, gather the following supplies:
Yarn:
- Bulky or chunky weight yarn (Category 5 or 6)
- Acrylic or wool blends are best for warmth and softness.
- Approx. 300–400 grams depending on the size of the coat and type of yarn.
- Choose soft, baby-safe yarn (hypoallergenic and washable).
Hook:
- Crochet hook size 6.0mm to 8.0mm (J-10 to L-11), depending on yarn thickness.
Notions:
- Yarn needle (for weaving in ends)
- Scissors
- Stitch markers
- Buttons or zipper (optional)
- Measuring tape
📏 Sizing and Gauge (0 to 3 Months)
Getting the right size is essential for a good fit.
Finished Measurements:
- Chest circumference: 16–18 inches (40–45 cm)
- Length (shoulder to hem): ~10 inches (25 cm)
- Sleeve length: ~5–6 inches (12–15 cm)
Gauge:
- 10 stitches and 10 rows = 4″ (10 cm) in half double crochet (HDC)
Always make a small gauge swatch to test and adjust your hook size if needed.
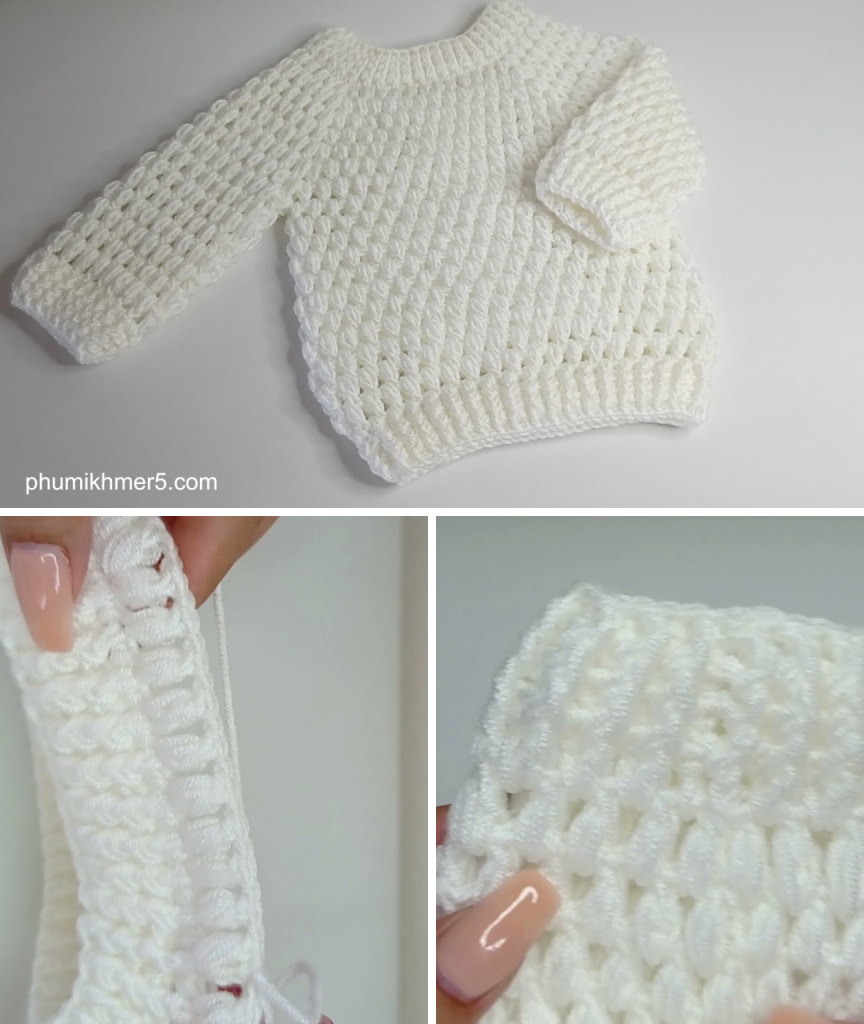
🪡 Basic Stitches Used
You don’t need any fancy stitches for this coat—just the basics:
- Chain (ch)
- Slip stitch (sl st)
- Single crochet (sc)
- Half double crochet (hdc)
- Double crochet (dc)
- Back loop only (BLO) for ribbing
Optional:
- Puff stitch (for texture if you want that “puffer” look)
- Front and back post double crochet (for added texture on cuffs or borders)
🧥 Step-by-Step Instructions: Crocheted Puffer Coat (0–3 Months)
🔹 STEP 1: Make the Back Panel
Foundation Chain: Ch 36 (adjust for your gauge to measure approx. 9–10” wide)
Row 1: Hdc in 2nd ch from hook and across. (35 hdc)
Row 2–20: Ch 1, turn. Hdc in each stitch across. (Adjust rows to reach ~10″ height)
Fasten off and weave in the ends.
🔹 STEP 2: Make the Front Panels (2)
Left Panel:
Ch 18.
Row 1: Hdc in 2nd ch from hook and across. (17 hdc)
Row 2–20: Ch 1, turn. Hdc across. (Make sure the panel matches the back in height.)
Repeat the same for the Right Panel.
Leave a 2-inch gap from the top to create neck shaping in the final rows, or leave straight for a boxier fit.
🔹 STEP 3: Join Shoulders
Lay the back panel flat. Position the front panels on top, right sides together. Seam the shoulders (top rows) with whip stitch or sl st across 5 stitches on each side.
🔹 STEP 4: Make the Sleeves
Ch 18 for sleeve base.
Row 1: Hdc in 2nd ch from hook and across. (17 hdc)
Row 2–16: Ch 1, turn. Hdc across.
Add a few increases (2–3 stitches evenly spaced) every 4 rows to widen sleeve slightly.
Fold the sleeve in half lengthwise and seam the edge to form a tube.
Make 2 sleeves.
🔹 STEP 5: Attach the Sleeves
Position sleeves inside armholes. Use stitch markers to secure. Sew or sl st the sleeve edges to the body.
Make sure the seams are on the underside of the arm.
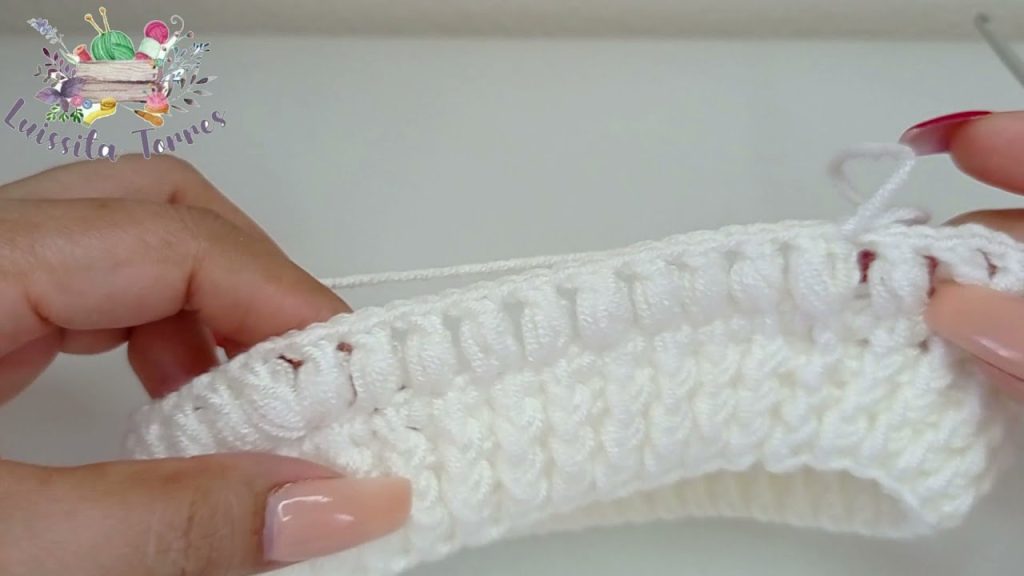
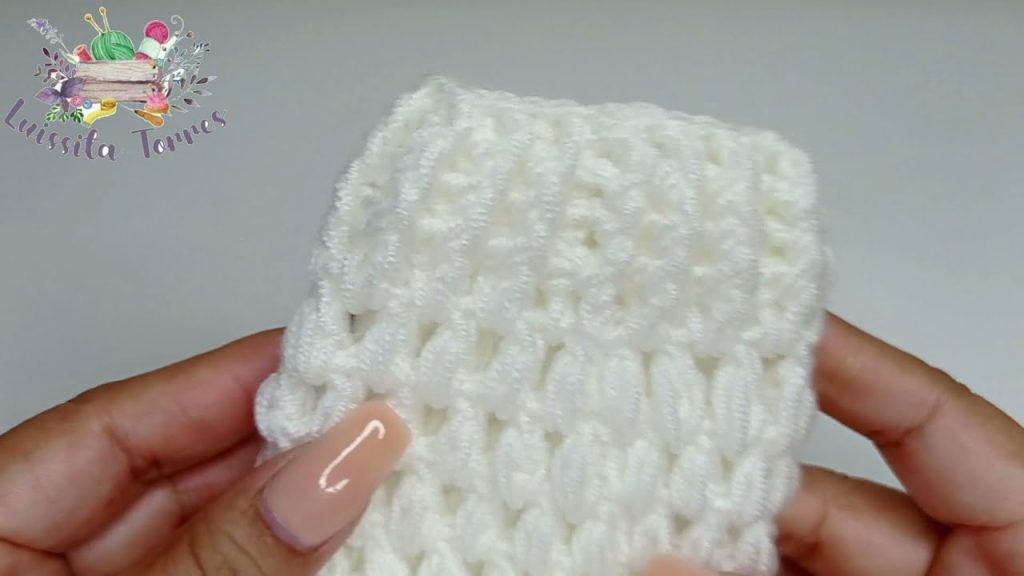
🔹 STEP 6: Add Ribbing (Cuffs, Bottom, Collar)
You can add ribbing around the edges to give that “puffer coat” look.
Ribbing for Bottom Hem and Cuffs:
- Ch 6.
- Row 1: Sc in 2nd ch from hook and across. (5 sc)
- Row 2: Ch 1, turn, sc BLO across.
- Repeat until it fits around wrist or waist.
- Attach with sl st or sewing.
Ribbing for Collar:
- Attach yarn at the neck edge.
- Ch 6, and work sc BLO across back and forth.
- Sew ribbing to neckline.
🔹 STEP 7: (Optional) Add Puff Stitch Rows for “Puffer” Texture
If you want that quilted puffer look:
- After completing the body panels, work horizontal rows of puff stitch every 3–4 rows.
- Example: In Row 5, work: puff stitch, ch 1, skip 1 stitch across the row.
Puff Stitch (simple):
- Yarn over, insert hook, pull up a loop (repeat 3 times), then yarn over and pull through all loops on hook.
🔹 STEP 8: Closure – Buttons or Zipper
Buttons:
- Space buttons evenly on one front panel.
- Create button loops (ch 5 or sc rows) on opposite side.
Zipper:
- Choose a baby-safe plastic zipper.
- Hand-sew carefully along the inner edges of the front panels.
🔹 STEP 9: Finishing Touches
- Weave in all ends securely.
- Block the sweater if needed (light steam for acrylic, wet block for natural fibers).
- Add decorative elements (ears on hood, animal patches, or embroidery).

🎀 Optional: Add a Hood
Foundation Chain: Ch 36
Work in hdc rows for about 5–6 inches in height.
Fold rectangle and sew back seam to form a hood.
Attach to neckline.
🧼 Care Instructions
Use baby-safe yarn that is machine-washable and dryable. Always include care instructions if giving this as a gift.
🧸 Tips for Success
- Use stitch markers to keep track of rows and increases.
- Try color blocking or stripes for fun designs.
- Test stretch and comfort—baby clothes should not be too tight.
- Work in good lighting to avoid mistakes with dark yarn.
📦 Perfect Gift Idea!
Pair your crocheted baby coat with a matching beanie or booties for a complete winter gift set. It’s a heartfelt, handmade keepsake any new parent will appreciate!
Final Thoughts
Making a crocheted puffer coat or sweater for a 0 to 3-month-old baby is not only fun and rewarding, but also beginner-friendly. With basic stitches and a little time, you can create a cozy, stylish, and warm piece for a little one to wear during the colder months. Whether it’s for your baby or as a gift, this project is sure to bring joy!
Video tutorial:


