Crochet bucket hats are one of the trendiest and most functional accessories today — and the best part? They’re quick, beginner-friendly projects that you can whip up in just a few hours. Whether you’re looking for a casual beach hat, a bold fashion statement, or a gift for a friend, this quick & easy crochet bucket hat tutorial will guide you from start to finish.
Let’s grab our hooks and get started!
🧶 What You’ll Need
| Material | Details |
|---|---|
| Yarn | Worsted weight (Category 4) cotton or acrylic |
| Hook | 5.0 mm (H-8) crochet hook |
| Scissors | Basic yarn-cutting scissors |
| Stitch Marker | (Optional) Helps mark the start of rounds |
| Yarn Needle | For weaving in ends |
| Measuring Tape | To check sizing if needed |
💡 Best yarn for summer: 100% cotton yarn for breathability.
💡 Best yarn for warmth: Acrylic or wool blend for colder months.
🧵 Crochet Stitches & Terms (US Terminology)
- ch – chain
- sc – single crochet
- hdc – half double crochet
- sl st – slip stitch
- inc – increase (2 hdc in one stitch)
- st(s) – stitch(es)
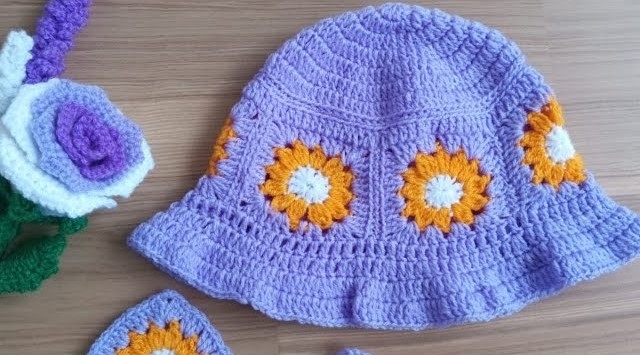
🎯 Finished Size
This tutorial makes an average adult-size bucket hat (~21–23” head circumference). To adjust size, you can stop increasing rounds earlier or add more rows in the body.
🪡 Pattern Overview
The hat is made in three sections:
- Crown (top circle)
- Body (straight sides)
- Brim (slightly flared)
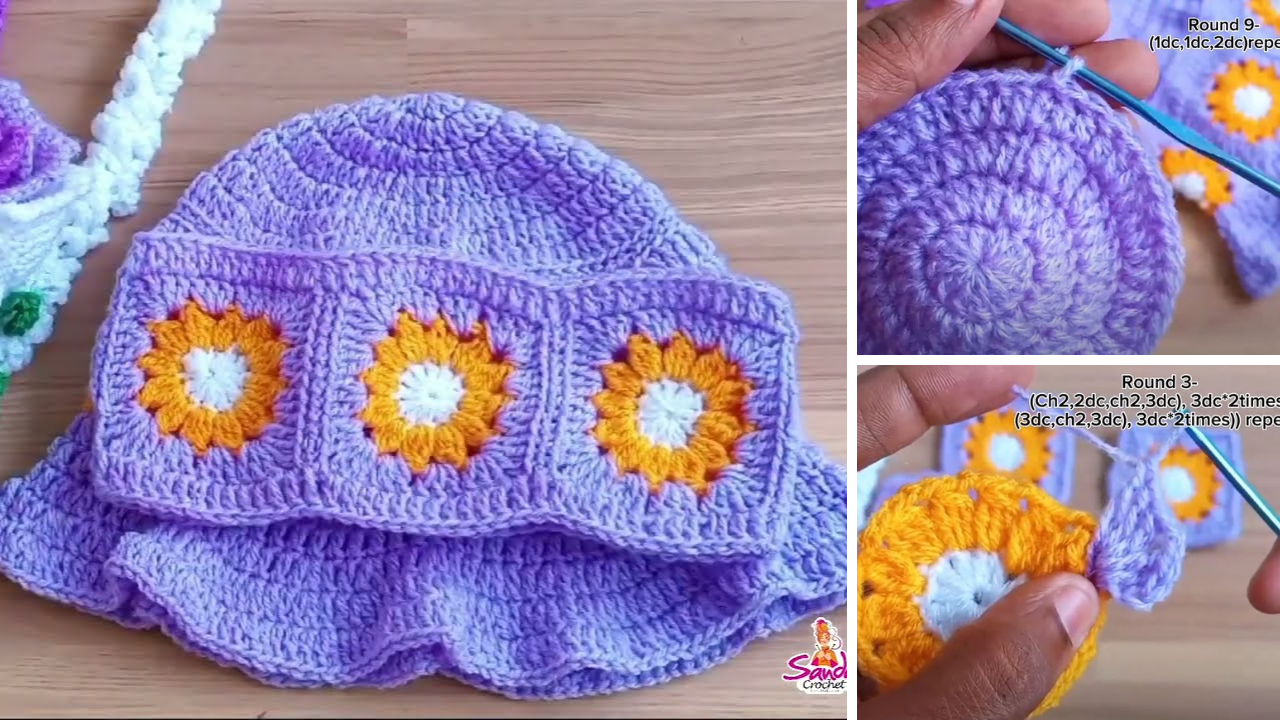
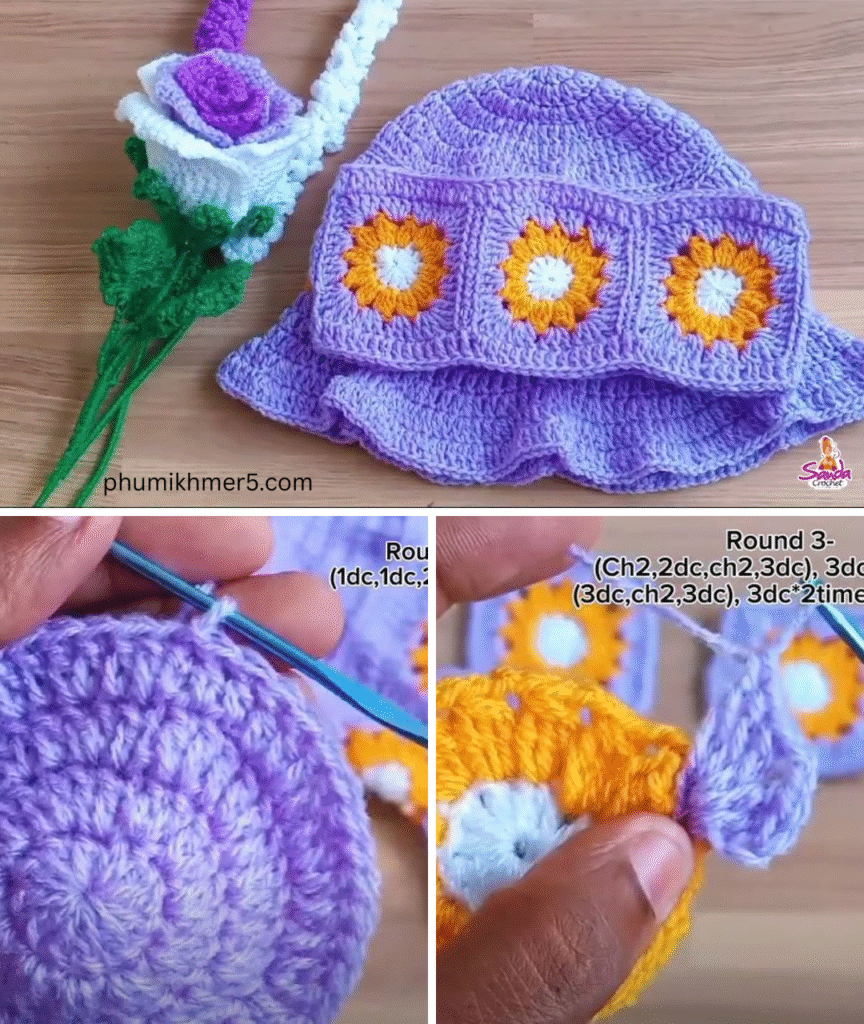
👒 Crochet Bucket Hat Pattern – Step-by-Step
🌀 Step 1: Crown (Top Circle)
Round 1:
Start with a magic ring, ch 1, and make 6 hdc into the ring.
Join with a sl st to first hdc. (6 sts)
Round 2:
Ch 1, inc in each st around (2 hdc in each). (12 sts)
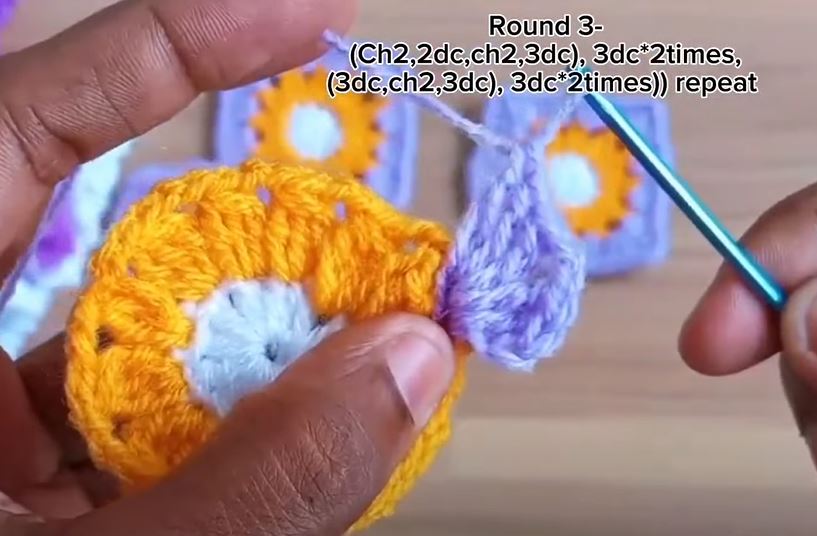
Round 3:
Ch 1, (hdc in next st, inc) repeat around. (18 sts)
Round 4:
Ch 1, (hdc in next 2 sts, inc) repeat around. (24 sts)
Round 5:
Ch 1, (hdc in next 3 sts, inc) repeat around. (30 sts)
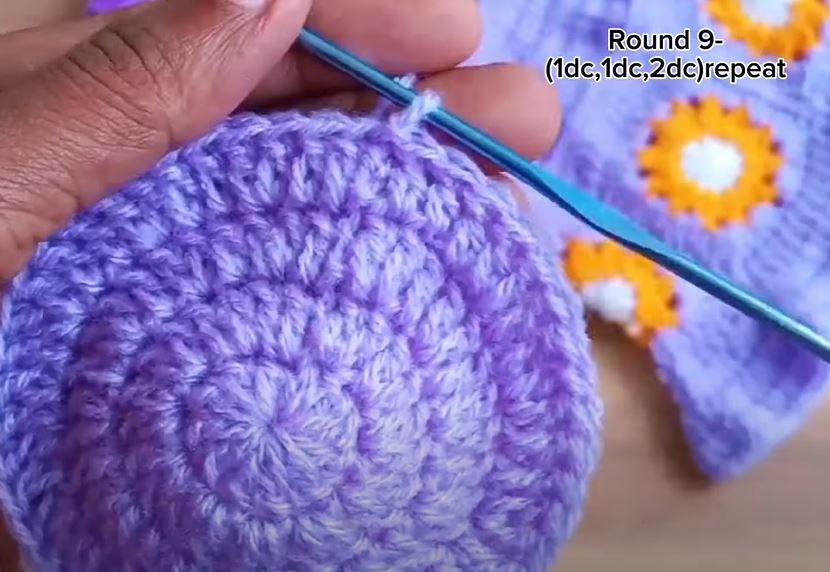
Continue increasing in this pattern until the circle measures about 6.5 inches (16.5 cm) in diameter, usually around Round 9 or 10. You’ll reach about 60–65 sts, depending on your tension.

🧢 Step 2: Body (Sides of the Hat)
Next Round (after increases):
Ch 1, hdc in BLO (back loops only) in each st around. Join. (This creates a clean edge.)
Next 6–8 Rounds:
Ch 1, hdc in each stitch around. Join with sl st.
🧠 Fit check: Try the hat on. If it covers the top and sides of your head comfortably, you’re ready to move on.
👑 Step 3: Brim
Round 1 (Start Increasing):
Ch 1, (hdc in next 4 sts, inc) repeat around. Join.
→ Adds a gentle flare to start shaping the brim.
Round 2:
Ch 1, hdc in each st around. Join.
Round 3 (Optional increase):
Ch 1, (hdc in next 5 sts, inc) repeat around. Join.
Final Rounds:
Ch 1, sc in each st around for 1–2 rows to give the brim a clean finish. Fasten off and weave in all ends.
🪄 Want a wider brim? Add more increase rounds and continue until desired length.
🎨 Customization Ideas
- Color blocking: Change yarn color after the crown or halfway down the body.
- Stripes: Alternate colors every 2 rows.
- Add a string: Crochet a chain cord and thread it around the brim as a tie.
- Texture play: Try hdc in BLO for the body for subtle ridges.
🧼 Care Tips
- Cotton yarn: Hand-wash or machine wash on gentle. Lay flat to dry.
- Acrylic yarn: Machine washable; retains shape well but may stretch with heat.
Video tutorial:
✅ Final Thoughts
Crochet bucket hats are fast, functional, and fashion-forward. In just a few hours, you can create a custom hat that fits your personal style — and once you make one, you’ll want to make them in every color.
Whether you’re sunbathing, strolling downtown, or adding a handmade touch to your outfit, your crochet bucket hat will be your new favorite accessory!


