
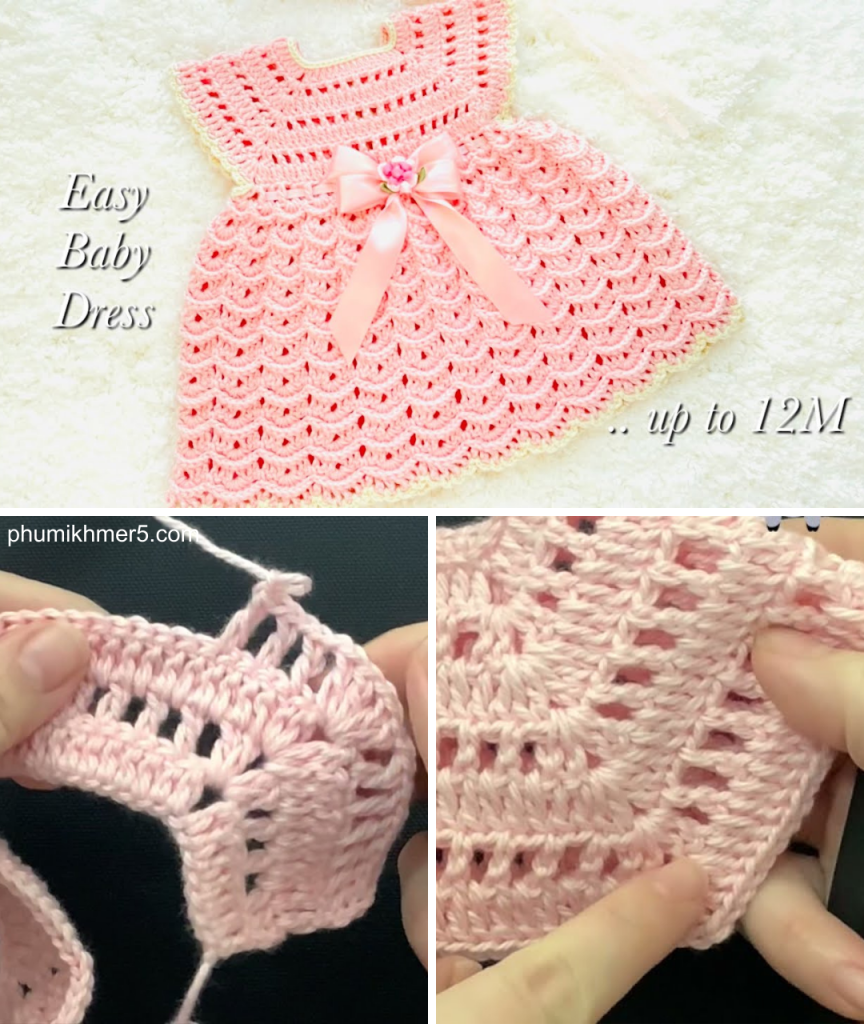
Hello, fellow makers! Are you looking to create a truly beautiful and unique dress and a matching headband for a special little girl? I’m excited to share this detailed pattern for the Sunset Frock, a classic top-down dress that’s perfect for newborns to 3 months, with instructions on how to adjust the size for up to 9-12 months. This pattern features a simple yoke, a lovely skirt with a repeating “shell” and “front post double crochet” pattern, and a sweet matching headband.
The pattern is designed to be a great project for all skill levels. We’ll start with a classic top-down yoke, separate the armholes, and then build the skirt with a fun, textured pattern that creates a beautiful drape and flow. The final decorative borders on the hem, neckline, and sleeves give it a polished, professional look. Let’s grab our hooks and yarn and get ready to create something beautiful!
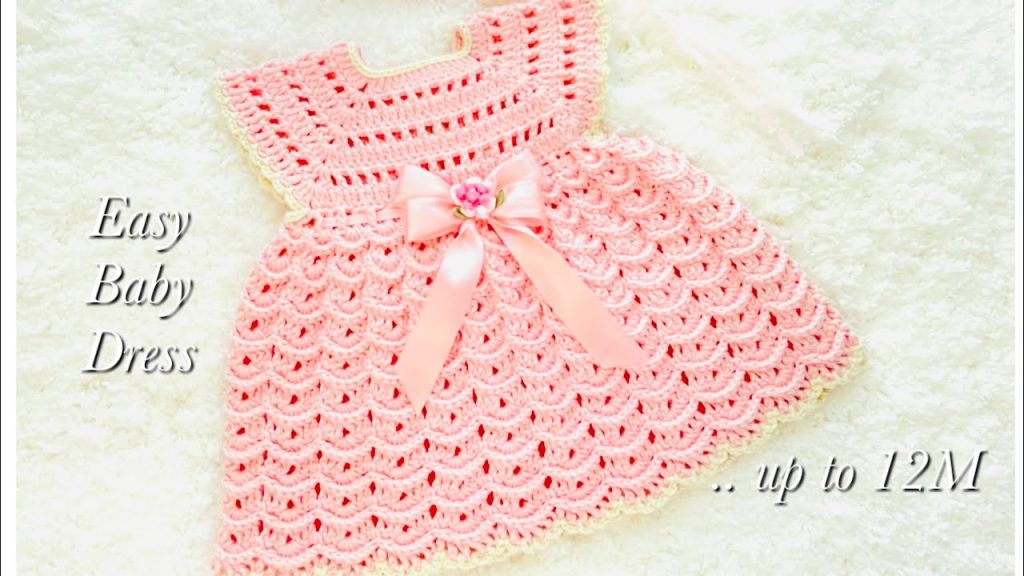
Why You’ll Love Crocheting This Frock:
- Stunning Design: The combination of the classic yoke and the textured skirt creates a beautiful, elegant look.
- Versatile: The pattern can be easily adjusted for different sizes, from newborns to 12 months.
- Skill-Building: You’ll practice a variety of stitches, including basic double crochets, shell stitches, and front post double crochets.
- Perfect for Gifting: A handmade baby dress and headband set is a thoughtful and cherished gift that will be treasured for years to come.
What You’ll Need:
- Yarn: DK or light worsted weight (Number 3) cotton yarn.
- Crochet Hook: A 3.00mm crochet hook.
- Yarn Needle (Tapestry Needle): For weaving in all those ends.
- Scissors:
- Small Button: For the neckline closure.
Essential Crochet Abbreviations:
- ch: chain
- sl st: slip stitch
- sc: single crochet
- dc: double crochet
- FPdc: front post double crochet
- st(s): stitch(es)
- sk: skip
- V-st: V-stitch (
dc, ch 1, dc) - shell: shell stitch (
4 dcin a single space) - fan: fan stitch (
2 dc, ch 1, 2 dc) - FO: fasten off
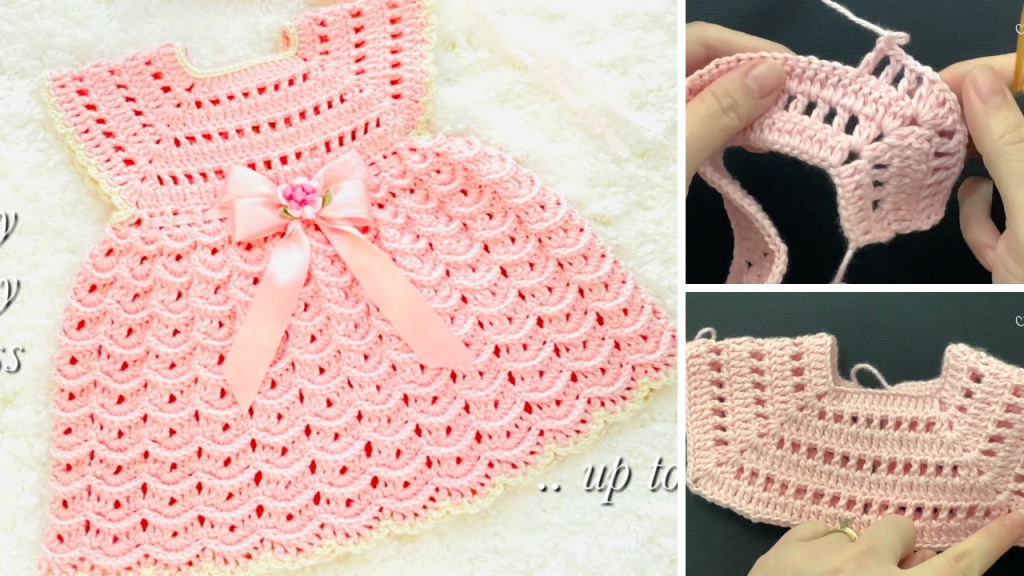
The Pattern: The Sunset Frock (0-3 months)
This dress is worked from the top down, starting with the yoke.
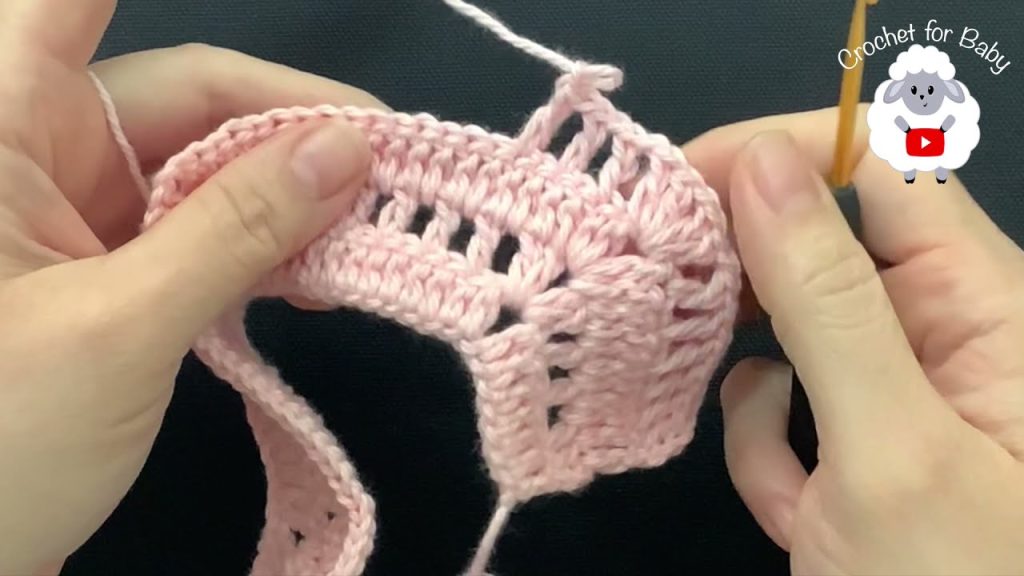
Part 1: The Yoke
- Foundation Chain:
Ch 57. - Row 1:
Dcin the 4thchfrom the hook.Dcin the next 6ch.Ch 2.Dcin the next 13ch.Ch 2.Dcin the next 15ch.Ch 2.Dcin the next 13ch.Ch 2.Dcin the last 7ch. (Total: 55 dc, 4 ch-2 spaces) - Row 2 (Fan Stitches):
Ch 3(counts as a st), turn.Dcin eachst, and work afanin each of the fourch 2corner spaces. - Row 3 (V-Stitches):
Ch 2(does not count as a st), turn.Dcin the firstst,ch 1,sk 1 st. Repeat this pattern across, and work afanin each of the fourch 2corner spaces. - Rows 4-7: Alternate between a “fan stitch” row and a “V-stitch” row, always working the
fanin thech 2corner spaces.
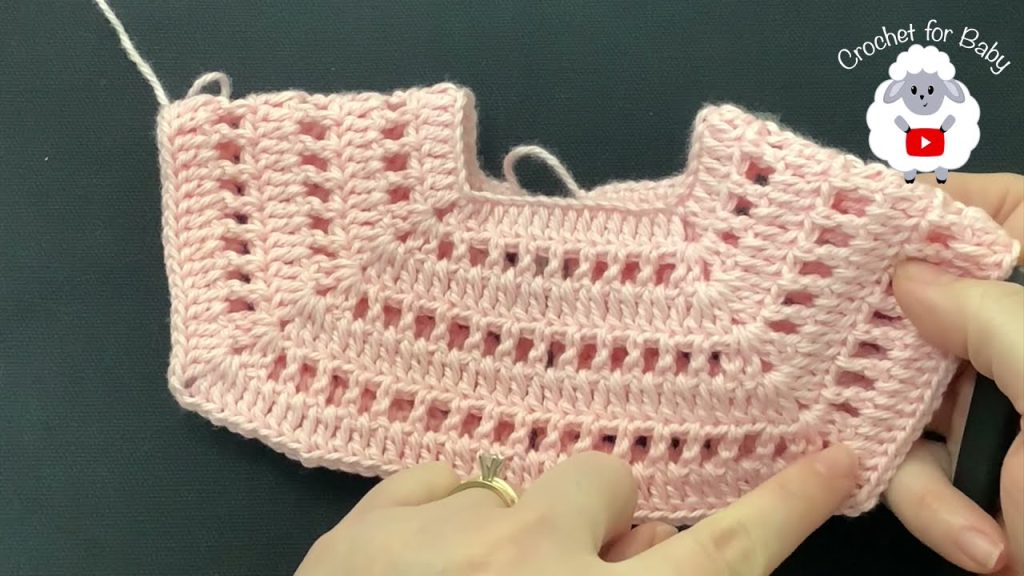
Part 2: Separating for Armholes
- After completing Row 7, join the round with a
sl stto the firstdc. Ch 2(does not count as a st).V-stin the first space. Continue theV-stpattern until the first cornerch 2space.- In the first corner, make a
V-st.Ch 4for the underarm space.Skthe sleeve stitches andV-stin the next cornerch 2space. - Continue the
V-stpattern across the back and repeat the sleeve separation for the second armhole. - Join the round with a
sl stto the firstV-st.
Part 3: The Skirt
- The skirt is worked in rounds using a repeating two-row pattern.
- Row 1 (Shells):
Ch 2.Scandch 1in the next space.Shellin the next space. Repeat(sc, ch 1, shell)around the skirt. - Row 2 (FPdc):
Ch 2, turn.FPdcaround each of the stitches in the shells from the previous row. - Repeat these two rows for a total of 20 pattern rows, or until the skirt reaches your desired length.
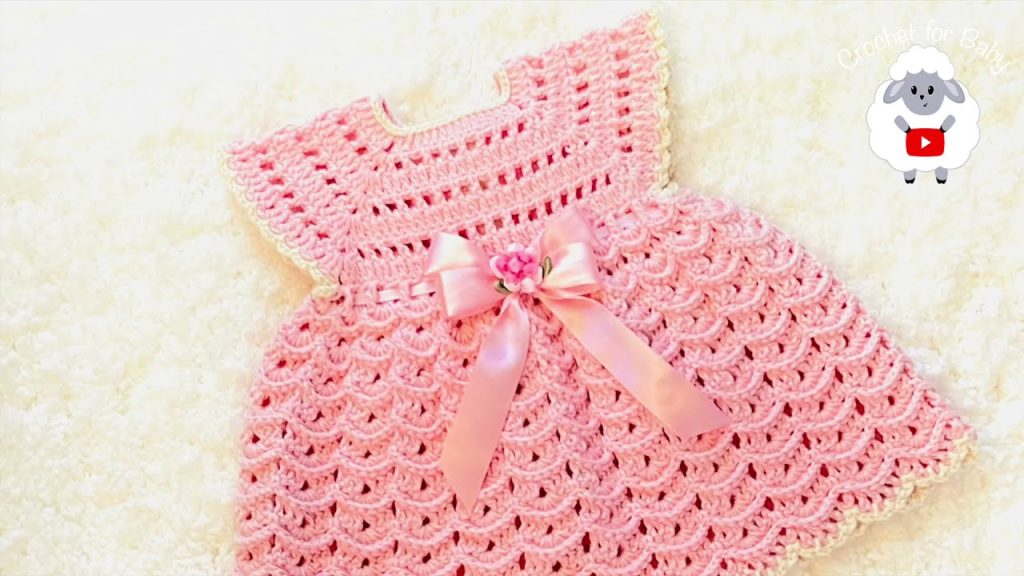
Part 4: Final Edging & Headband
- Bottom Edging: Join a contrasting yarn color.
Ch 3,sl stin the same stitch.Sl stin the next stitch. Repeat this pattern around the entire bottom edge. - Sleeves:
Ch 4,sl stin the same stitch.Sl stin the next 2 stitches. Repeat this pattern around the armholes. - Neckline: Work a row of
sl stalong the neckline.Ch 2to create a buttonhole at the top edge. - Headband:
- Start:
Ch 58. - Row 1:
Dcin the 4thchfrom the hook and in eachchacross. - Row 2:
Ch 1, turn.Scin eachstacross. - Border: Add a border of
(ch 3, sl st, sk 1 sc)around the entire headband. - FO and sew the short ends together to form a ring.
- Start:
Congratulations, you’ve created a beautiful and unique Sunset Frock! This will be a special and cherished piece for any little girl. Happy hooking!
Video tutorial:


