
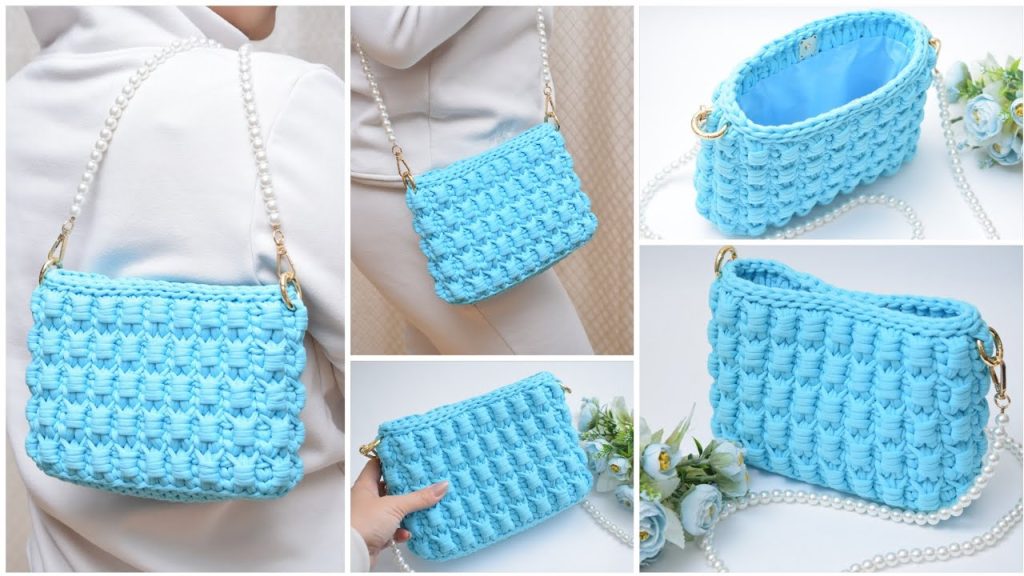
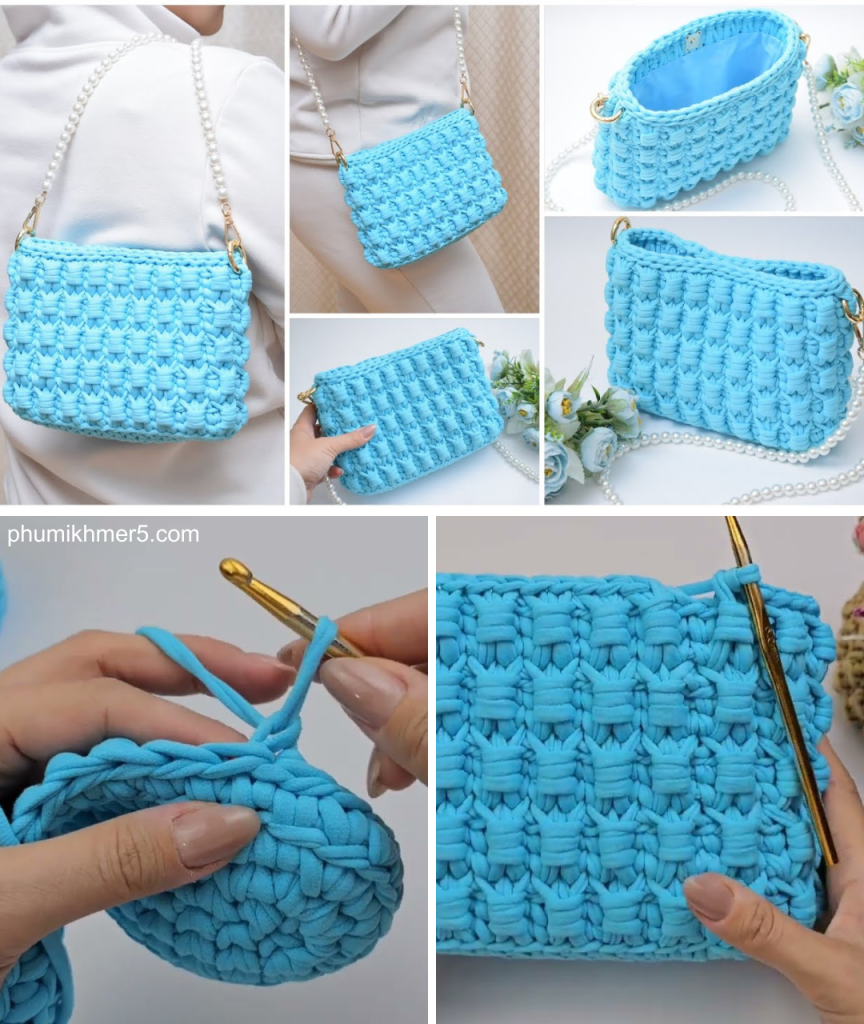
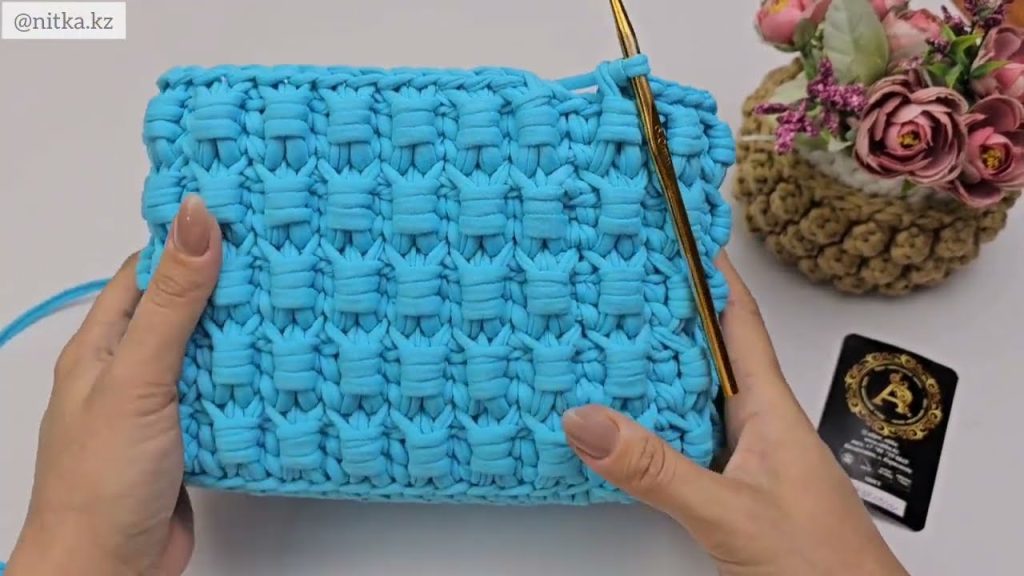
There’s nothing quite as satisfying as a handbag that is both stylish and sturdy, and a crocheted bag made from T-shirt yarn delivers on both fronts. T-shirt yarn, or “zpagetti,” is a recycled fabric yarn that creates a thick, resilient, and beautifully structured fabric, perfect for a handbag that holds its shape. This tutorial will guide you through creating the “Lunar Glow” Crochet Half-Moon Handbag, a unique and elegant accessory with a subtle, textured stitch and a sleek, modern design.
This project is a fantastic way to elevate your crochet skills and create a stunning piece that looks store-bought but is made with your own two hands. The half-moon shape is on-trend, and the dense, rhythmic stitch pattern is a joy to create.
Why Crochet the Lunar Glow Handbag?
- Unique Shape: The half-moon design is a refreshing change from traditional rectangular bags.
- Sturdy & Durable: T-shirt yarn creates a strong fabric that won’t stretch out and will hold its shape beautifully.
- Luxurious Look: The thick, solid fabric and sleek design give the bag a high-end, boutique feel.
- Skill Building: Practice working in rows to create a flat base, working in the round to shape the body, and creating a decorative, textured stitch.
- Quick Project: Due to the thickness of the yarn and a large hook, this bag works up surprisingly fast.
1. Planning Your Handbag: Size & Materials
- Finished Size: This pattern will create a handbag that is approximately 10 inches (25 cm) wide at its base and 7 inches (18 cm) tall. You can easily adjust the size by changing your starting chain and the number of rounds.
- Yarn Choice:T-shirt yarn is the star of this project. It is often sold in skeins or rolls and is known for its chunky, recycled nature.
- Weight: This yarn is typically classified as Super Bulky (#6).
- Color: A single, solid color will best highlight the texture of the stitch pattern.
- Quantity: You will need approximately 1 skein (250-300 grams) of T-shirt yarn.
2. Materials You’ll Need
- Yarn: One skein of T-shirt yarn (Super Bulky #6).
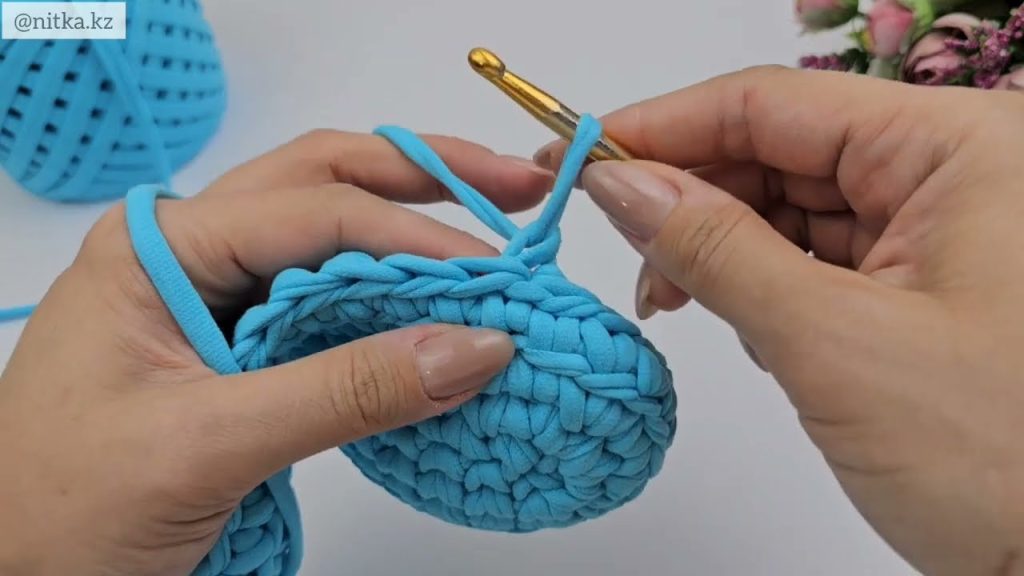
- Crochet Hook: A large hook is necessary for this yarn. A 10.0 mm (N/P-15 US) or 12.0 mm (O-17 US) hook is recommended.
- Scissors: For cutting yarn.
- Yarn Needle (Tapestry Needle): A large-eyed, blunt-tipped needle for weaving in ends.
- Magnetic Snap Closure or Zipper: For securing the bag.
- Chain Strap: A pre-made metal chain or a long strap made from T-shirt yarn.
- Stitch Markers (Optional): To mark the beginning of rounds.
3. Essential Crochet Stitches & Techniques
- Slip Knot
- Chain (ch)
- Slip Stitch (sl st): For joining and neatening.
- Single Crochet (sc)
- Half Double Crochet (hdc)
- Crab Stitch (Reverse Single Crochet): This is a decorative stitch for the final border. It’s worked by making single crochet stitches from left to right (for right-handed crocheters), in reverse.
- Working in Rows and in the Round: The base is worked in rows to create a flat oval, and the body of the bag is worked in the round.
4. Let’s Crochet the Lunar Glow Handbag!
We’ll start with the base, then work up the body, and finish with a decorative border and strap.
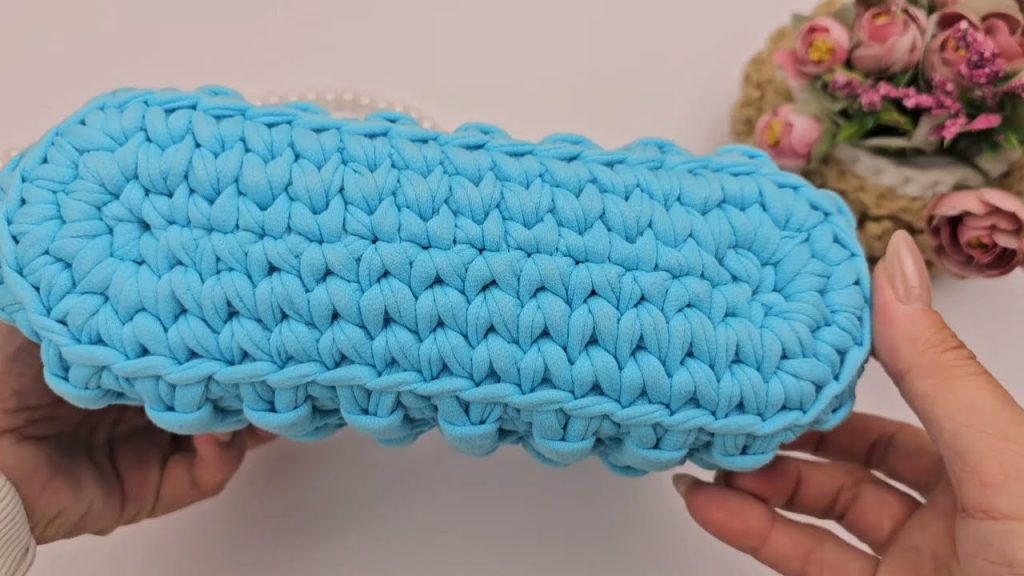
Part 1: The Base (Worked in Oval Rows)
This forms the flat, sturdy bottom of your bag.
- Foundation Chain: Ch 21. (Or your desired width in an odd number).
- Row 1: Sc in the 2nd ch from hook. Sc in each of the next 18 chs. Work 3 sc in the last ch (this will be the corner). Now, working on the opposite side of the foundation chain, sc in each of the next 19 stitches. Work 2 sc in the last stitch. Join with a sl st to the first sc of the row.
- [44 stitches]
- Row 2: Ch 1 (does not count as a stitch). Work 2 hdc in the first stitch. Hdc in each of the next 19 stitches. Work 2 hdc in each of the next 3 stitches (the corner). Hdc in each of the next 19 stitches. Work 2 hdc in each of the last 2 stitches. Join with a sl st to the first hdc of the row.
- [50 stitches]
- The base should now be a nice, flat oval shape.
Part 2: The Body (Worked in the Round)
This is where you’ll create the height and shape of the bag. The pattern will create a beautiful, textured ribbing.
- Round 1: Ch 1 (does not count as a stitch). Sc in the back loop only (BLO) of each stitch around. Join with a sl st to the first sc.
- Working in the BLO will create a defined ridge, marking the transition from the base to the body of the bag.
- Round 2: Ch 2 (counts as 1 hdc). Hdc in the first stitch. Ch 1, skip next st, hdc in next st. Repeat from * to * around. Join with a sl st to the top of the beginning Ch 2.
- This round creates the lacy, textured stitch pattern.
- Round 3: Ch 1 (does not count as a stitch). Sc in each stitch and each ch-1 space around. Join with a sl st to the first sc.
- This round closes up the lace and creates a solid foundation for the next textured row.
- Repeat Rounds 2 and 3: Continue alternating these two rounds until the bag reaches your desired height (for this pattern, about 5-6 rounds total for the body).
- Round 7 (Finishing Round): Ch 1 (does not count as a stitch). Sc in each stitch around. Join with a sl st to the first sc.
- This creates a neat top edge before the final border.
- Fasten off, leaving a tail to weave in.
Part 3: The Flap and Finishing Touches
This part adds the closure and strap.
- Creating the Flap:
- With the bag’s main seam facing away from you, rejoin the yarn to the center back top edge.
- Row 1: Ch 1 (does not count as a stitch). Sc in the first 15 stitches. Turn.
- Row 2: Ch 1, sc in each sc across. Turn.
- Repeat Row 2 for about 4-5 rows to create the length of the flap.
- Row 6 (Shaping): Ch 1, sc2tog, sc in each stitch until 2 stitches remain, sc2tog.
- Repeat the decrease row until you have only a few stitches left. Fasten off.
- Decorative Border (Optional):
- Rejoin yarn to the front opening edge.
- Work a Crab Stitch (reverse single crochet) evenly around the entire front opening of the bag and the flap. This creates a beautifully neat, rope-like edge.
- Join and fasten off.
- Weave in All Ends: Use your yarn needle to carefully weave in any remaining loose yarn tails. Due to the bulk of the yarn, it’s best to weave them in and out of the inside of the fabric to hide them completely.
- Attach Closure: Sew your magnetic snap closure or zipper to the bag and the flap.
- Attach Strap: Attach the pre-made chain strap to the sides of the bag. You can sew a yarn strap to the sides, or simply make a long chain from T-shirt yarn and slip stitch it to the bag.
Tips for a Perfect Handbag
- Go Big: Use a larger hook than you think you need. This will give the bag a beautiful drape and flexibility, rather than a stiff, board-like feel.
- Embrace the Texture: The nature of T-shirt yarn means it may have slight variations in thickness. Embrace this as part of the unique, handmade charm of your bag.
- Stuff for Shaping: To help the bag hold its shape while you’re working and to prepare it for use, you can stuff it with a towel or cushion.
Enjoy your beautiful, sturdy, and unique “Lunar Glow” Crochet Half-Moon Handbag. Its timeless design and handmade charm are sure to turn heads!
Video tutorial:


