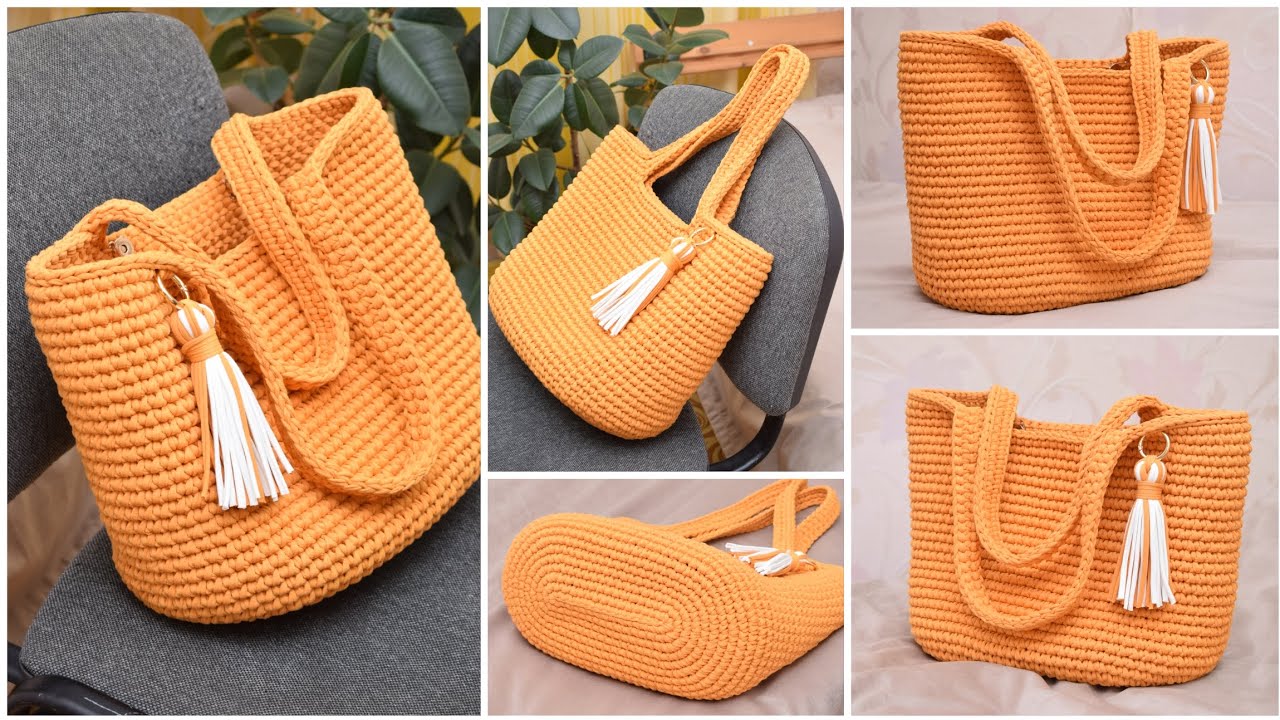
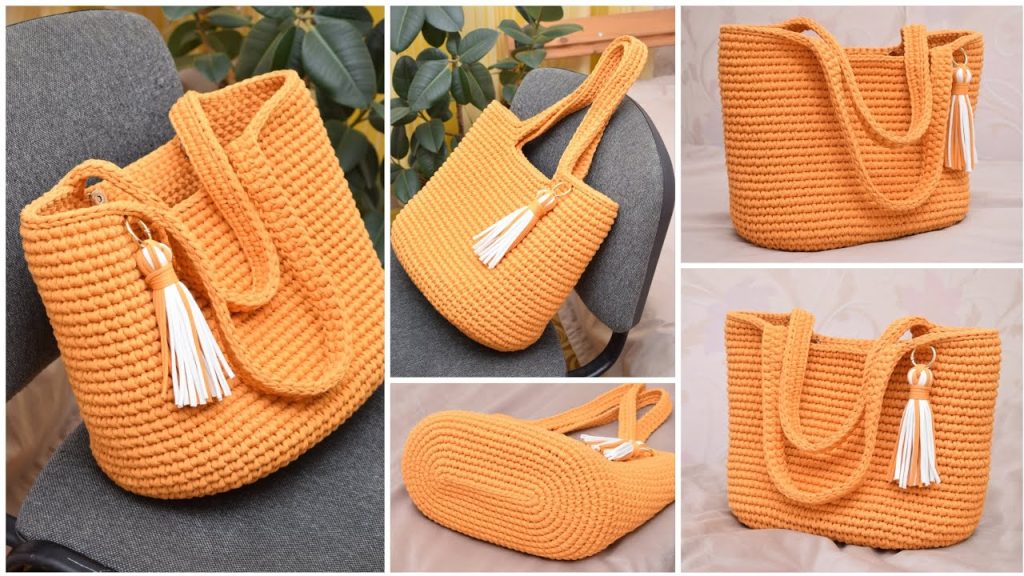
A great tote bag is a true everyday essential, and one that is hand-crocheted is even better! The “Urban Explorer” Oversized Crochet Shopper Bag is a stylish and incredibly practical project that is perfect for a day of errands, a trip to the market, or simply as a chic accessory. This pattern is designed to be large, sturdy, and elegant, using a dense stitch to create a bag that holds its shape and is durable enough for all your needs.
This detailed tutorial will guide you through the process of creating a classic, oversized shopper with a perfectly shaped oval base and a simple, repetitive body that works up quickly. Get ready to crochet a beautiful, functional bag that will be your new favorite companion!
Why Crochet the Urban Explorer Shopper Bag?
- Oversized & Practical: The large size makes it perfect for carrying everything from groceries to a laptop and books.
- Sturdy & Resilient: The chosen yarn and stitch create a solid, durable fabric that won’t stretch or sag.
- Stylish: The sleek design and clean lines give this bag a modern, minimalist look.
- Skill Building: Practice creating a flat oval base, working in the round, and mastering a simple but effective stitch.
- Great Gift: A handmade shopper bag is a thoughtful and incredibly useful gift for anyone.
1. Planning Your Bag: Size & Materials
- Finished Size: The pattern is designed for an oversized shopper, with a base of approximately 14 x 6 inches (35 x 15 cm) and a height of 15 inches (38 cm). You can easily adjust the size by changing your starting chain and the number of rows.
- Yarn Choice: For a sturdy bag, the yarn is the most important factor. T-shirt yarn is the ideal choice due to its thickness, weight, and durability.
- Weight: T-shirt yarn is typically classified as Super Bulky (#6).
- Color: A solid, neutral color (like black, gray, or tan) will give the bag a sophisticated, versatile look.
- Quantity: For a bag of this size, you will need approximately 2 skeins (500-600 grams) of T-shirt yarn.
2. Materials You’ll Need
- Yarn: Two skeins of T-shirt yarn (Super Bulky #6).
- Crochet Hook: A large hook is essential for working with this chunky yarn. A 10.0 mm (N/P-15 US) or 12.0 mm (O-17 US) hook is recommended.
- Scissors: For cutting yarn.
- Yarn Needle (Tapestry Needle): A large-eyed, blunt-tipped needle for weaving in ends.
- Optional: A leather or webbing strap for handles, or you can crochet them yourself.
3. Essential Crochet Stitches & Techniques
- Slip Knot
- Chain (ch)
- Slip Stitch (sl st): For joining and neatening.
- Single Crochet (sc)
- Slip Stitch in Back Loop Only (sl st BLO): A simple stitch that creates a strong, defined ridge.
4. Let’s Crochet the Urban Explorer Shopper Bag!
We’ll start with the oval base, then work the body of the bag in the round, and finish with the handles.
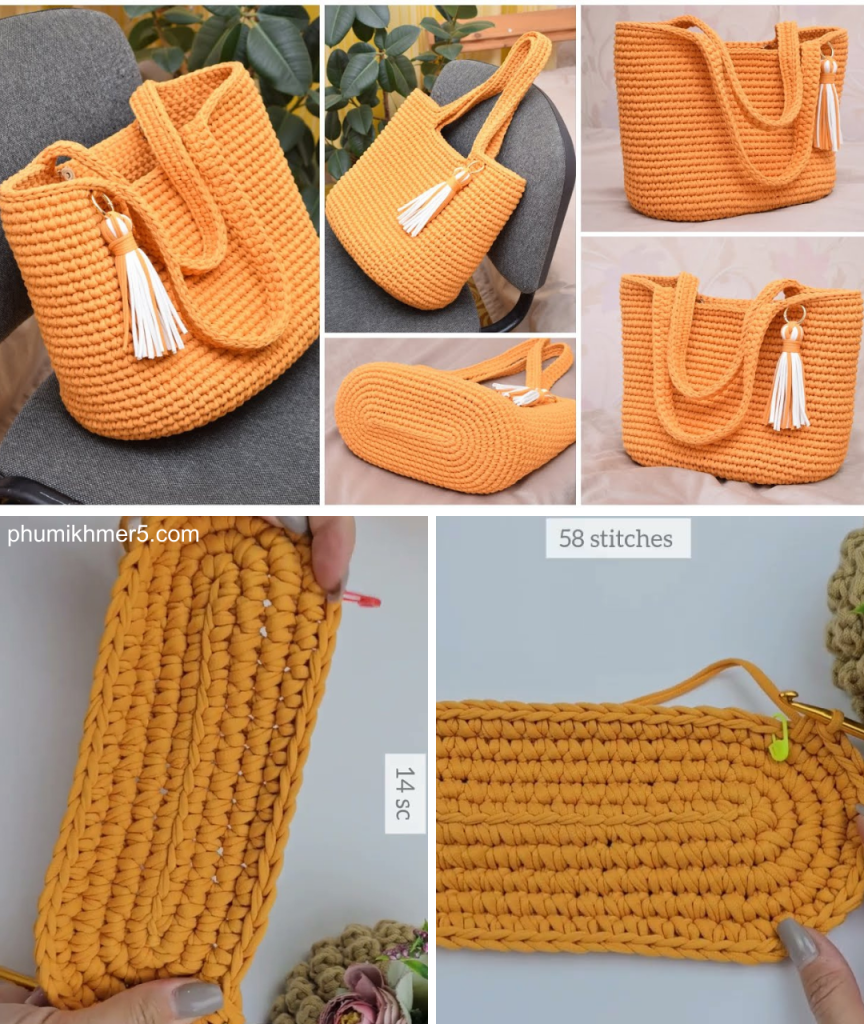
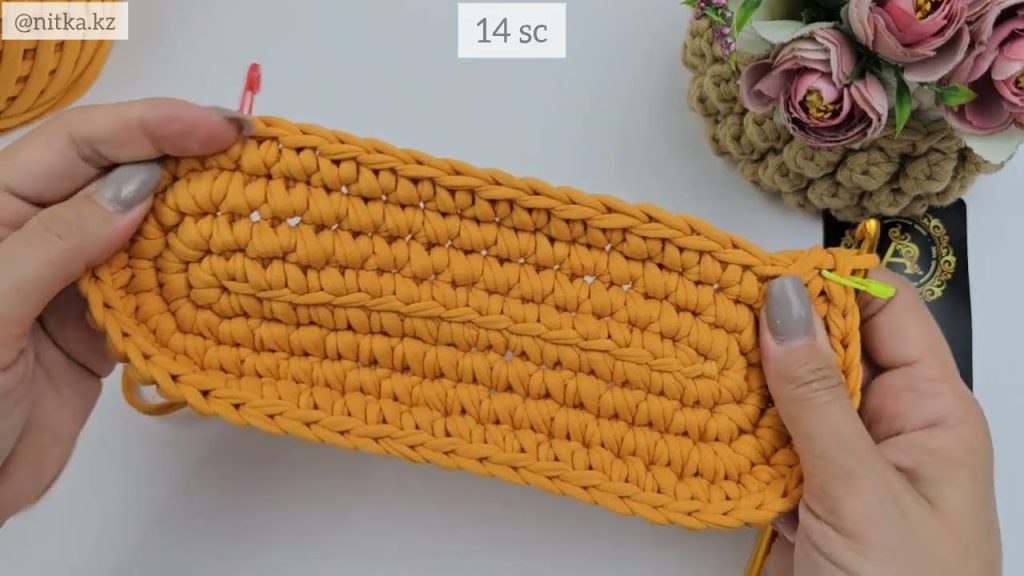
Part 1: The Oval Base (Worked in Rounds)
This creates a flat, sturdy foundation for your bag.
- Foundation Chain: Ch 26. (For a 14-inch base, or your desired length).
- Round 1: Sc in the 2nd ch from hook. Sc in each of the next 23 chs. Work 3 sc in the last ch (this is the corner). Now, working on the opposite side of the foundation chain, sc in each of the next 24 stitches. Work 2 sc in the last stitch. Join with a sl st to the first sc of the round.
- [52 stitches]
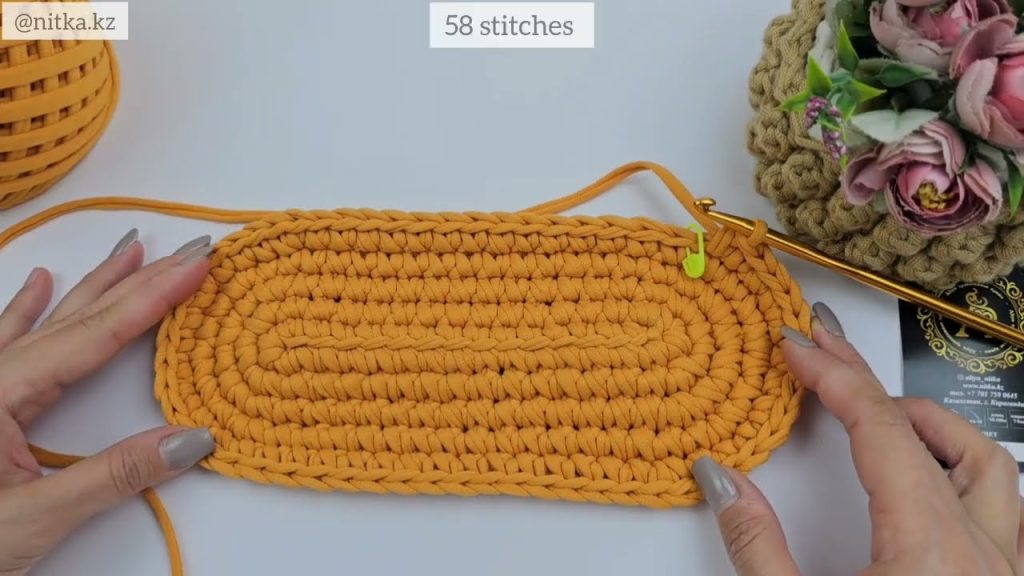
- Round 2: Ch 1 (does not count as a stitch). Work 2 sc in the first stitch. Sc in each of the next 24 stitches. Work 2 sc in each of the next 3 stitches (the corner). Sc in each of the next 24 stitches. Work 2 sc in each of the last 2 stitches. Join with a sl st to the first sc of the round.
- [60 stitches]
- Round 3: Ch 1. Sc in the first stitch. Work 2 sc in the next stitch. Sc in each of the next 25 stitches. Work 2 sc in the next stitch. Sc in the next stitch. Work 2 sc in the next stitch. Sc in the next 26 stitches. Work 2 sc in the next stitch. Sc in the next stitch. Work 2 sc in the last stitch. Join with a sl st to the first sc.
- [66 stitches]
- The base should now be a nice, flat oval. If you want a larger base, continue increasing at the ends of the oval.
Part 2: The Body (Worked in the Round)
This is where the bag gets its height. The stitch pattern is simple but effective.
- Round 1 (Defining the Edge): Ch 1 (does not count as a stitch). Sl st in the back loop only (BLO) of each stitch around. Join with a sl st to the first sl st.
- This round creates a clean, defined ridge that separates the base from the body and helps the bag stand up straight.
- Round 2: Ch 1. Sc in each stitch around. Join with a sl st to the first sc.
- Round 3: Ch 1. Sc in each stitch around. Join with a sl st to the first sc.
- You can work this round in BLO to create a ribbed texture, or in both loops for a solid, smooth fabric.
- Repeat Round 2 and 3: Continue crocheting these rounds until the bag reaches your desired height (for this pattern, about 15-20 rounds).
- Make sure to check the height periodically by holding the bag up. The length is entirely up to you!
Part 3: The Handles
You can either use a pre-made strap or crochet your own.
Option A: Crocheted Handles
- Placement: With the seam of your bag facing away from you, count 10 stitches from the corner on each side and place a stitch marker. The space between the two stitch markers on each side is where your handles will be placed.
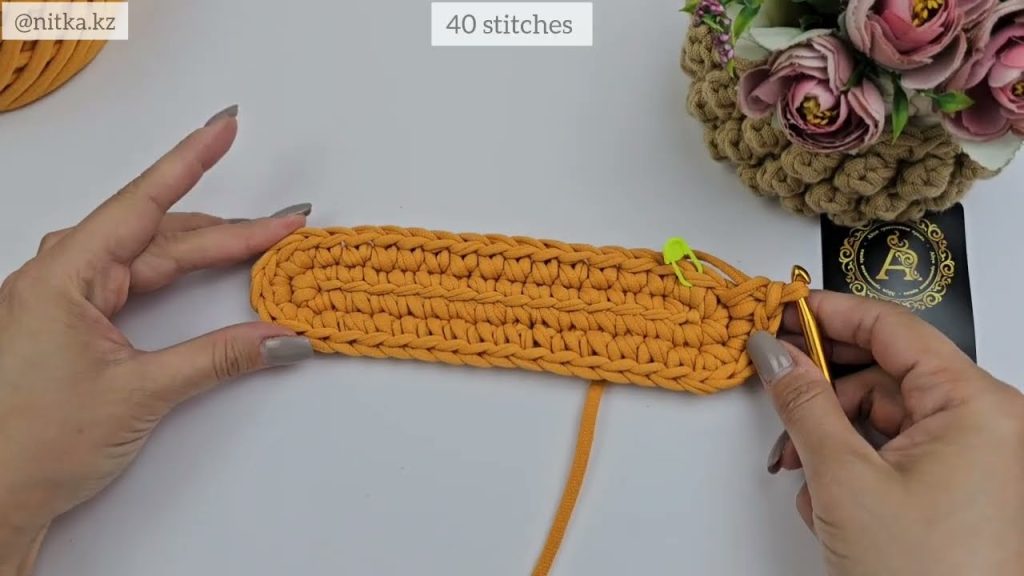
- Row 1 (Handle Start): Ch 1. Sc in each stitch until you reach the first stitch marker.
- Row 2 (Handle Chain): Ch 40 (or your desired length for the handle). Skip all stitches until you reach the next stitch marker. Sc in the next stitch. Continue sc until you reach the next handle placement.
- Repeat for the second handle.
- Row 3 (Finishing): Ch 1. Sc in each stitch of the bag opening, and sc in each of the chain stitches of the handles. Join and fasten off.
- Secure the ends of the handles by stitching them to the inside of the bag.
Option B: Fabric or Leather Handles
- Simply sew your desired handles to the inside of the bag, approximately 4 inches from the top edge, and spaced evenly apart.
Part 4: Finishing Touches
- Weave in All Ends: Use your large yarn needle to carefully weave in any remaining loose yarn tails. Due to the bulk of the yarn, it’s best to weave them in and out of the inside of the fabric to hide them completely.
- Blocking: Because T-shirt yarn is so heavy, your bag will likely hold its shape well. However, you can give it a light steam block to even out the stitches and remove any wrinkles.
Enjoy your beautiful, sturdy, and unique “Urban Explorer” Oversized Crochet Shopper Bag. Its timeless design and handmade charm are sure to make it your favorite go-to accessory!
Video tutorial:


