
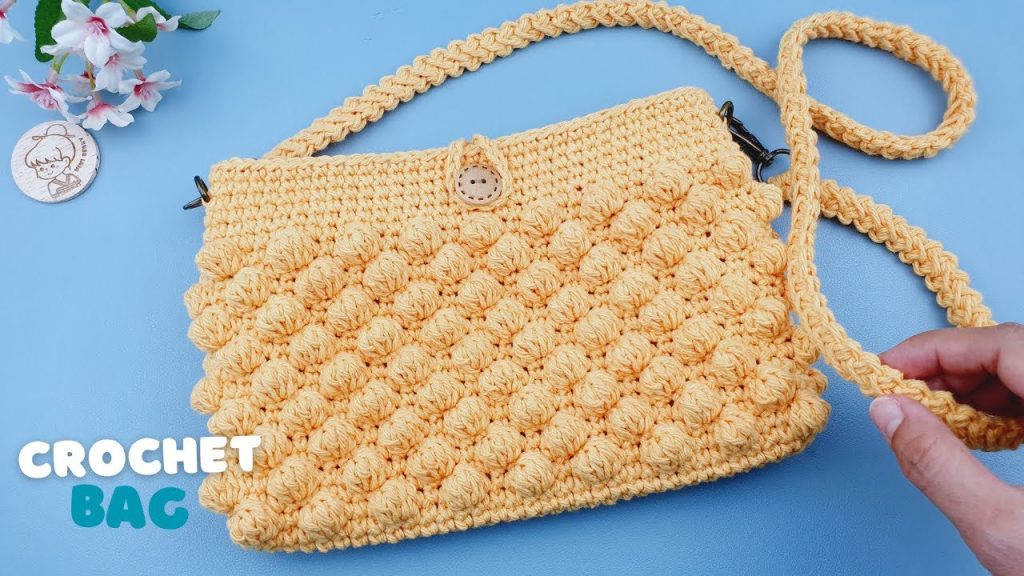
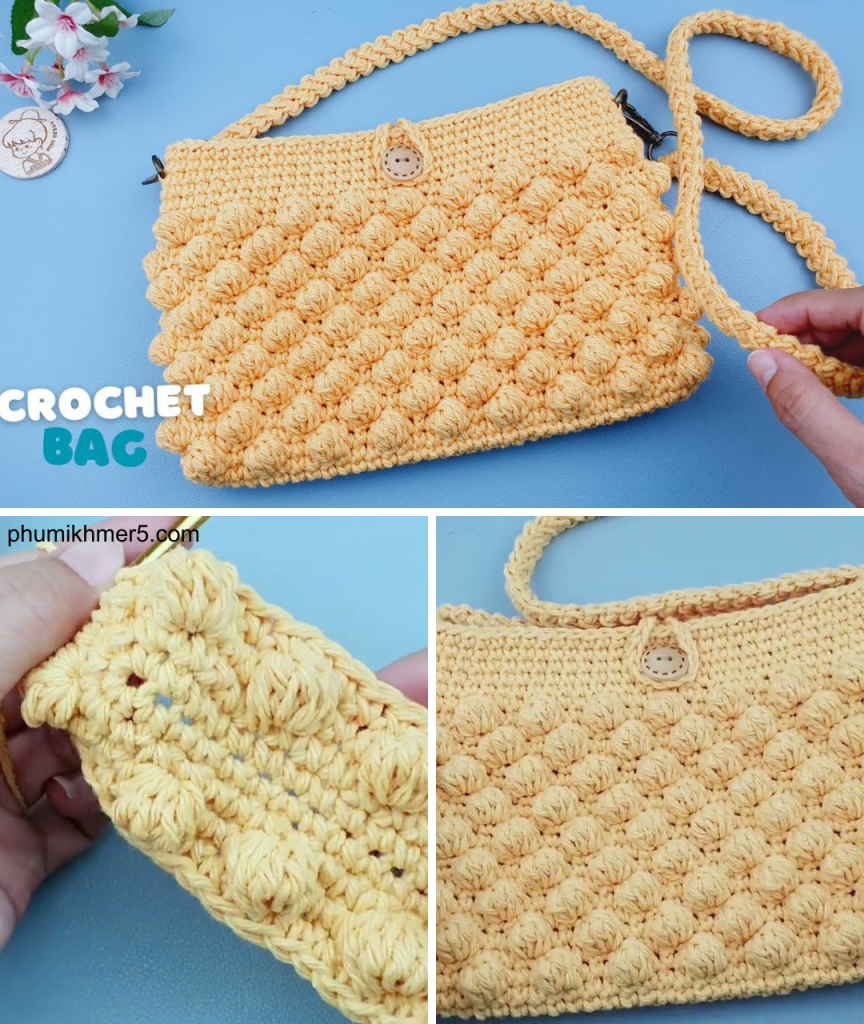
Crocheting your own accessories is not only a relaxing hobby but also a rewarding way to create personalized, functional items. One project that blends both fashion and functionality is the crocheted crossbody bag, and when paired with the bobble stitch, it gains texture and character that makes it truly stand out.
In this guide, we’ll take a deep dive into how to crochet a crossbody bag using the bobble stitch, ideal for intermediate beginners and seasoned crocheters alike. Whether you’re making it for yourself, as a gift, or to sell, this bag will quickly become a favorite project.
What is the Bobble Stitch?
The bobble stitch creates a raised, 3D texture that adds a bumpy and playful look to your fabric. It is achieved by working several partial double crochets (US terms) into one stitch and closing them together, which makes them “pop” out from the surface of the project.
When used across a large area, such as a bag, the bobble stitch can produce a plush, almost quilted effect — perfect for making bold textures on accessories.
Materials You’ll Need
Before diving into the project, gather the following supplies:
Yarn
- Weight: Worsted weight (category 4) cotton or cotton-blend yarn
- Amount: About 250–300 yards
- Cotton yarn is preferred for structure and durability.
Hook
- Size: 5.0 mm (H-8) crochet hook
- Use a size appropriate for your yarn that gives a tight stitch to ensure the bag holds its shape.
Notions
- Yarn needle for weaving in ends
- Scissors
- Stitch markers (optional)
- Lining fabric and sewing needle/thread (optional but recommended)
- Magnetic snap or zipper (optional)
- Leather strap or crocheted strap (your choice)
- D-rings or metal hardware for attaching straps (optional)
Gauge (optional but helpful)
- 4″ x 4″ = 16 stitches x 14 rows in bobble stitch pattern
- Gauge is less critical for this project, but tighter stitches help the bag hold its shape better.
Understanding the Bobble Stitch
Before we start the bag, let’s practice the bobble stitch. This pattern uses the 5 double crochet bobble.
Bobble Stitch (US Terms)
- Yarn over, insert hook into stitch, yarn over, pull up a loop (3 loops on hook)
- Yarn over, pull through two loops (2 loops left on hook)
- Repeat steps 1–2 four more times in the same stitch (you’ll have 6 loops on the hook)
- Yarn over, pull through all 6 loops on the hook
- Chain 1 to close the bobble
Pro tip: Work on the wrong side so bobbles pop to the right side (outer side of the bag).
Crochet Crossbody Bag Pattern (Bobble Stitch)
Let’s start with the main body of the bag, worked flat and then seamed. We’ll then add the strap and optional finishing touches.
Step 1: Base of the Bag
We’ll start with a foundation chain for the width of the bag.
- Chain 36
- Row 1 (RS): SC in 2nd chain from hook and across (35 stitches). Ch 1, turn.
- Row 2 (WS): SC across (35). Ch 1, turn.
You now have a sturdy single crochet foundation. This is the bottom edge of your bag.

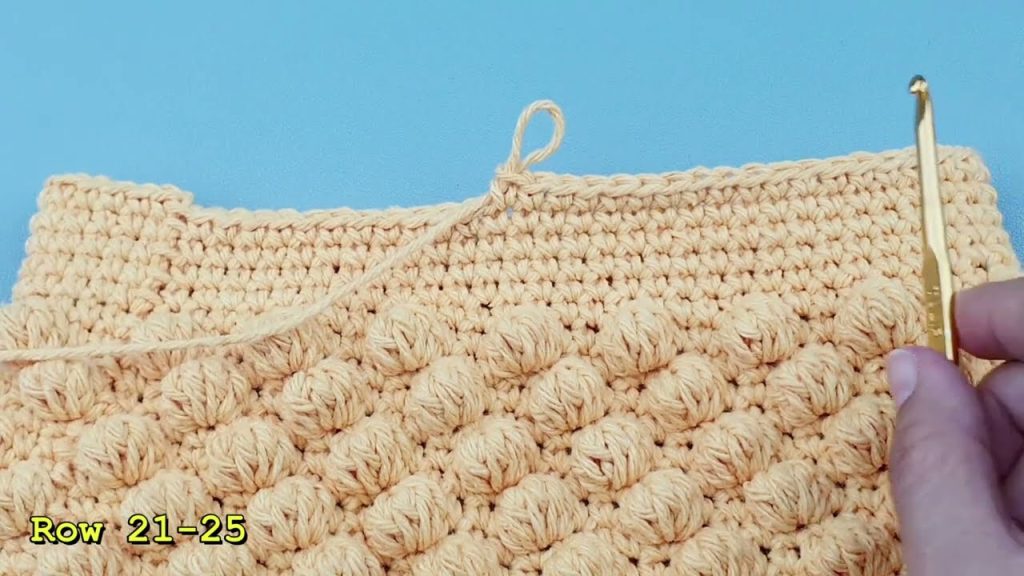
Step 2: Start Bobble Stitch Pattern
- Row 3 (RS): SC in first stitch, Bobble in next stitch. Repeat from * to end. End with a SC. (Alternating SC and Bobbles). Ch 1, turn.
- Row 4 (WS): SC in each stitch across. (This helps reset the row and push the bobbles to the front). Ch 1, turn.
Repeat Rows 3 and 4 until the piece measures approximately 9–10 inches tall.
You should end with a Row 4 (SC row) so that the top of the bag is even.
Step 3: Create the Back Side
Repeat steps from Row 1 to Row 4 to create another panel that is the same size as the front panel (36 chains wide, approx. 9–10 inches tall with bobble pattern).
You now have two panels for the front and back of your bag.
Step 4: Side and Bottom Panel (Optional for Depth)
If you want the bag to have more depth, you can create a side panel.
- Chain 7
- SC in second chain and across (6 SC)
- Ch 1, turn
- Repeat rows until your panel is long enough to go around the two sides and bottom of the bag (about 28–30 inches)
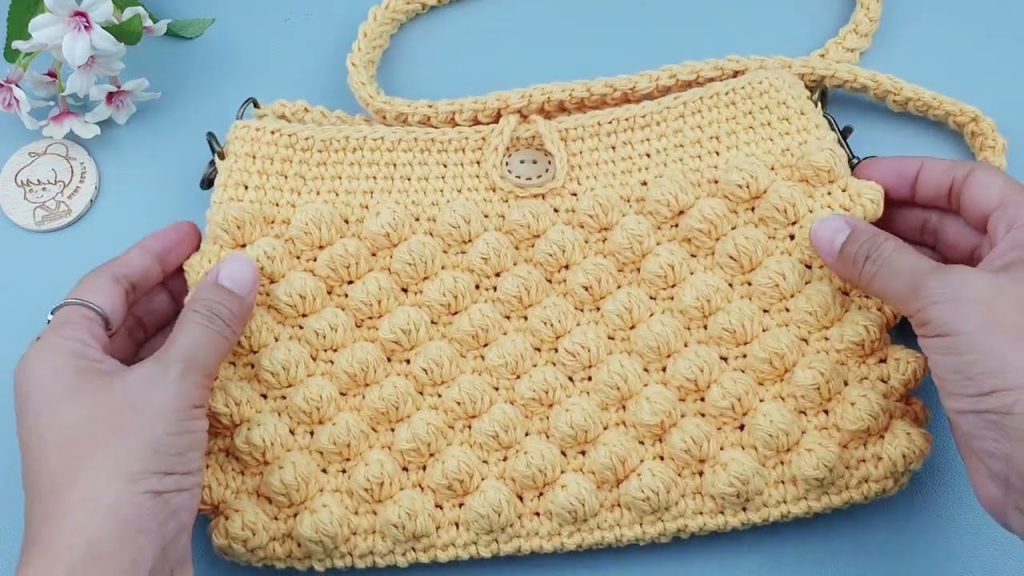
Step 5: Assembly
- Place the front and back panels wrong sides together (bobble side facing out).
- Using SC or whip stitch, sew the bottom and sides of the bag. If using a side/bottom panel, attach it around the edges instead.
- Leave the top open.
Step 6: Add a Strap
Option 1: Crochet Strap
- Chain a length that reaches comfortably across your body (typically 45–50 inches).
- SC in each chain across for width. Work 2–3 rows for thickness.
- Attach securely to the inside edges of the bag using whip stitch or yarn needle.
Option 2: Attach Leather/Pre-Made Strap
- Use D-rings or metal hooks sewn to the bag’s upper corners.
- Attach leather or canvas strap for a polished look.
Step 7: Add Closure (Optional)
- Magnetic Snap: Attach one side of the snap to the inside top center of each panel.
- Zipper: Hand-sew a zipper along the inner top edges for security.
- Button Loop: Add a loop and button for a handmade, rustic touch.
Step 8: Lining the Bag (Optional but Recommended)
To increase durability and prevent stretching, consider lining the bag:
- Cut fabric to the dimensions of your bag plus ½ inch seam allowance.
- Fold and hem edges.
- Hand-stitch or machine-sew the lining to the inside of the bag.
Finishing Touches
- Weave in all ends with a yarn needle.
- Block the bag gently using steam if needed to shape it.
- Add decorative elements like tassels, embroidery, or patches.
Tips for Success
- Keep your bobble tension consistent so all bobbles look even.
- Use stitch markers for row counting if needed.
- Practice the bobble stitch on a swatch before starting the full project.
- Consider using a different color for the strap for contrast.
- Cotton yarn works best — avoid stretchy yarns that distort shape.
Variations
- Mini Crossbody Bag: Chain fewer stitches (e.g., 26) for a smaller bag.
- Two-Tone Bobble Bag: Alternate colors every few rows.
- Diagonal or Zig-Zag Bobble Patterns: Use graph paper or software to chart creative bobble placements.
Final Thoughts
Crocheting a crossbody bag with the bobble stitch is a delightful blend of texture and utility. The playful, raised stitches create a visually striking pattern that turns a simple accessory into a statement piece. With a bit of patience and creativity, you’ll end up with a stylish handmade bag that’s perfect for casual outings, festivals, or gifting.
So grab your yarn, pick your favorite colors, and bobble your way to a beautiful crossbody bag!
Video tutorial:


