A handmade baby dress is one of the sweetest and most cherished gifts you can create. Whether you’re a beginner looking to try a larger project or an experienced crocheter in search of a quick baby garment, a crochet baby dress is a fun and fulfilling piece to make. In this detailed tutorial, we’ll walk you through creating a simple, elegant baby dress—perfect for newborns to 3-month-olds—with room for customization and embellishment.

💖 Why Crochet a Baby Dress?
Crocheted baby dresses are timeless. They’re:
- Adorable and functional: Ideal for photo shoots, special occasions, or everyday wear.
- Customizable: Add ruffles, flowers, bows, or buttons to make it unique.
- Beginner-friendly: This pattern uses simple stitches and a seamless top-down construction.
- Keepsake-worthy: Handmade baby garments are treasured for years.
🧵 Materials You’ll Need
- Yarn: Lightweight (category 3/DK) yarn or soft worsted weight yarn (category 4), depending on desired drape.
- Crochet Hook: 4.0 mm (G) or 4.5 mm (US 7), depending on yarn used.
- Scissors
- Stitch markers (optional, but helpful for tracking rounds)
- Yarn needle: For weaving in ends
- Buttons or ribbons (optional, for closure or decoration)

👶 Size & Measurements
This pattern fits a baby approximately 0–3 months old:
- Chest circumference: ~16 inches (40.5 cm)
- Dress length: ~12 inches (30.5 cm)
You can adjust size by changing hook size or adding more rounds.
🧶 Basic Crochet Stitches Used
This pattern uses basic stitches, perfect for beginners:
- Chain (ch)
- Slip Stitch (sl st)
- Single Crochet (sc)
- Double Crochet (dc)
- Shell Stitch (a set of multiple dc stitches in one stitch/space)
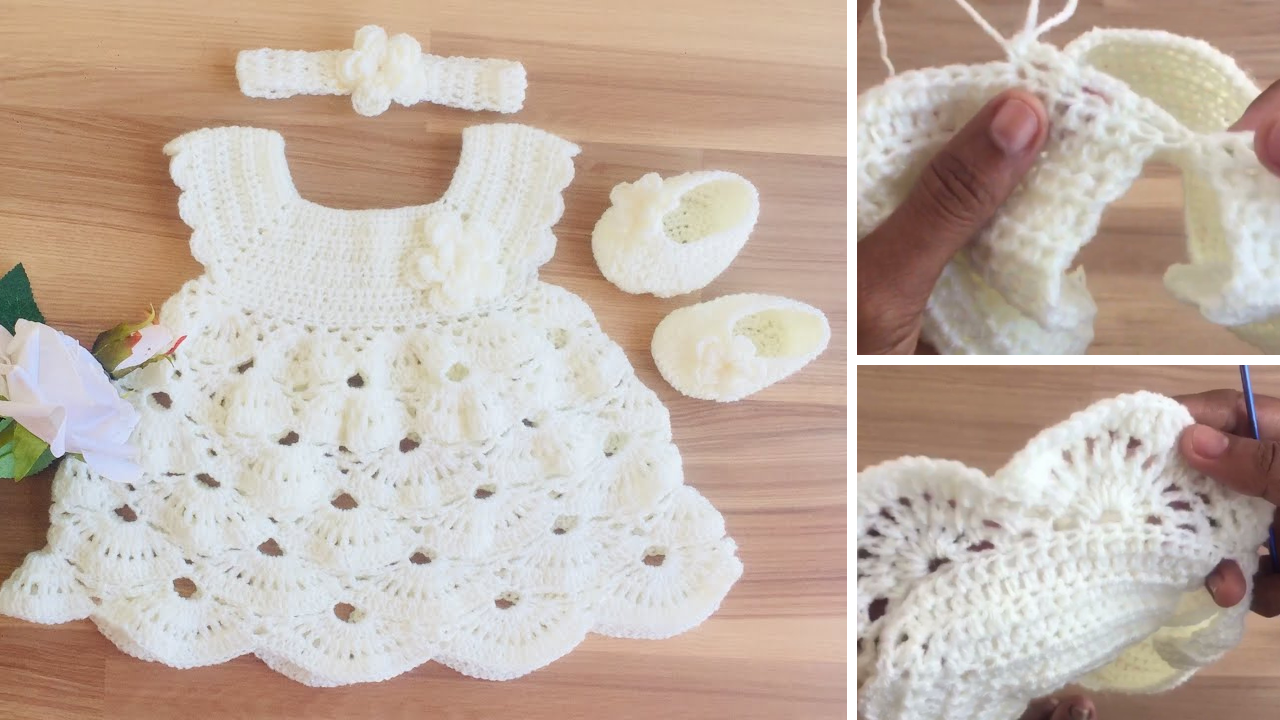
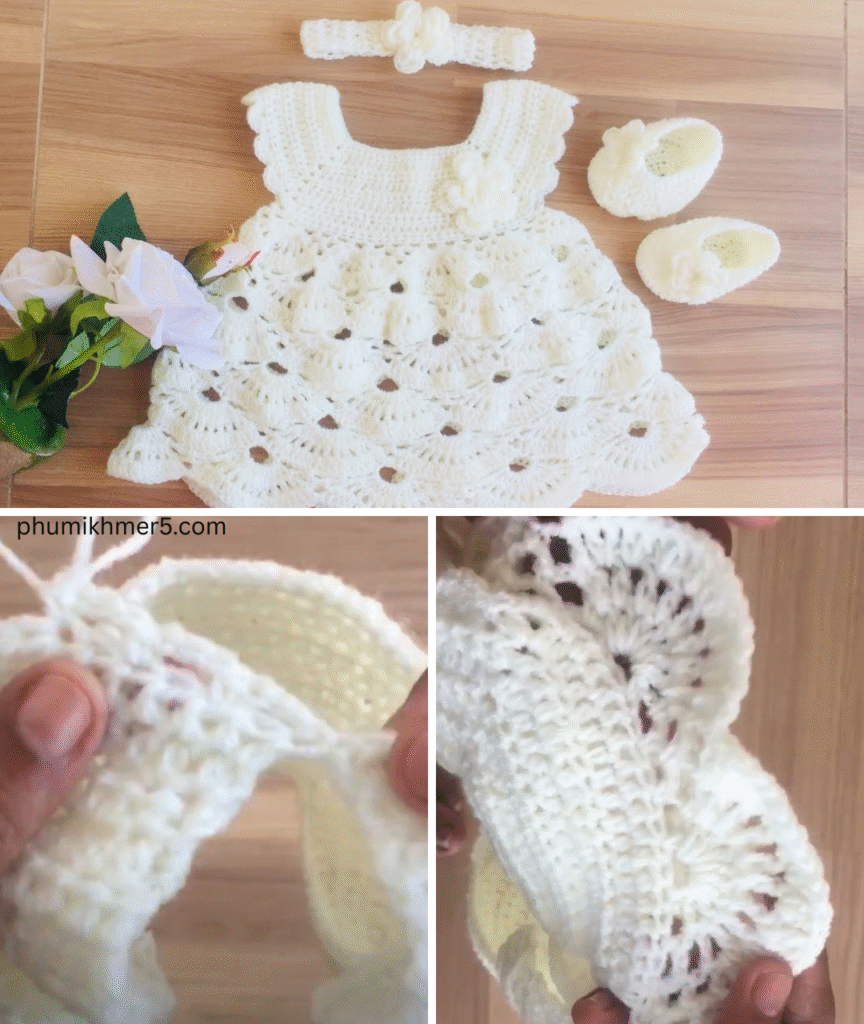
👗 Simple Crochet Baby Dress Pattern (Top-Down)
🧵 Part 1: Yoke (Top of Dress)
Foundation Row:
Ch 54. Join with a sl st to form a circle (be careful not to twist the chain).
(Alternative: Add a button band by working in rows instead of joining; then sew a button at the top.)
Round 1: Ch 3 (counts as dc), dc in each ch around. Join with sl st. (54 dc)
Round 2 (Increase Round):
Ch 3, dc in next 8 sts, 2 dc in next st; repeat around. Join. (60 dc)
Round 3:
Ch 3, dc in next 9 sts, 2 dc in next st; repeat around. Join. (66 dc)
Round 4:
Ch 3, dc in each stitch around. Join. (66 dc)

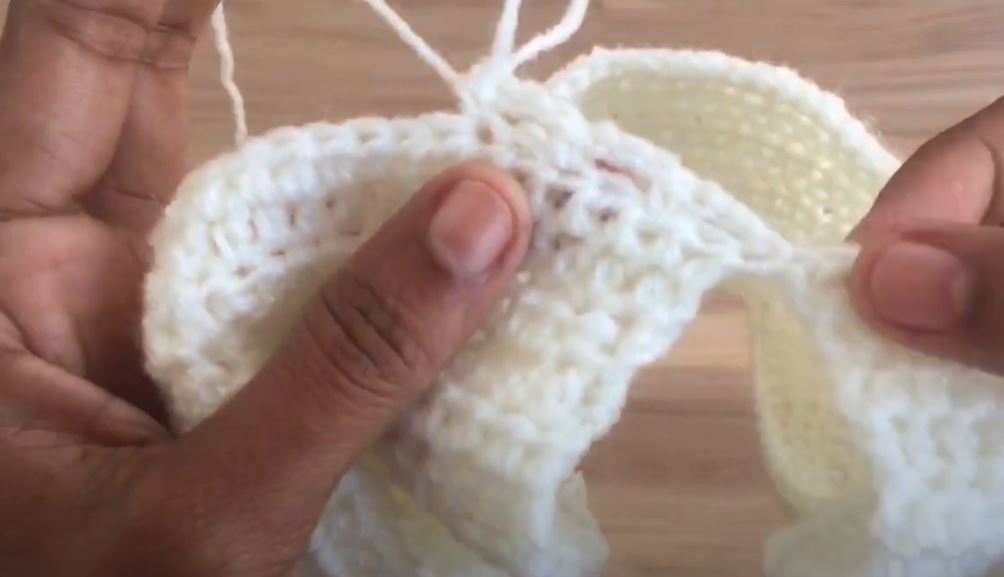
✨ Part 2: Create Armholes
Round 5:
Ch 3, dc in next 9 sts, skip next 12 sts (first armhole), dc in next 24 sts, skip next 12 sts (second armhole), dc in remaining 21 sts. Join. (54 dc for body)
👗 Part 3: Skirt Section
You’ll now work the skirt in the round below the yoke:
Round 6 (Start Skirt):
Ch 3, 2 dc in next st, dc in next st; repeat around. Join. (80 dc)
Round 7:
Ch 3, dc in each st around. Join.
Rounds 8–20 (or desired length):
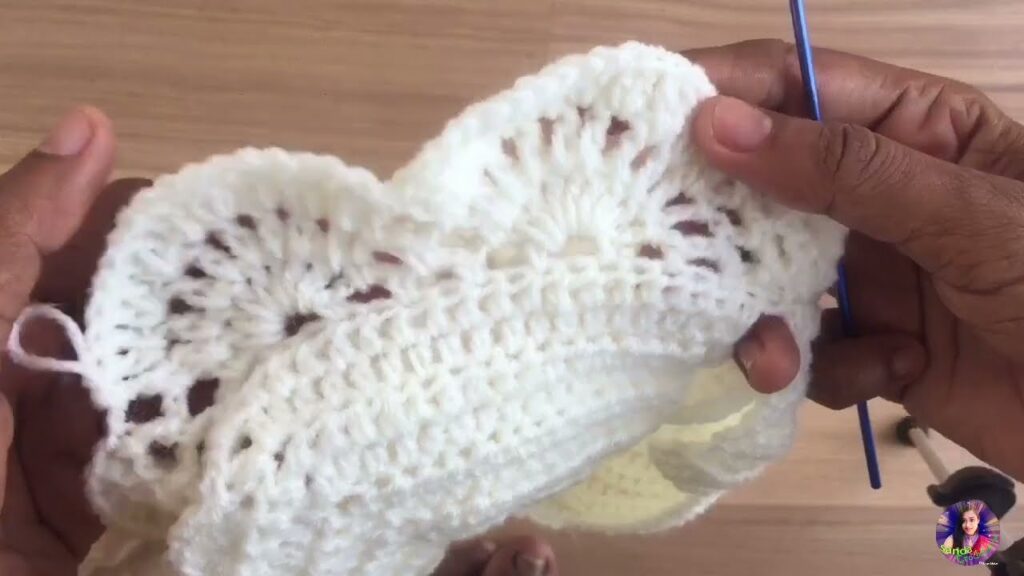
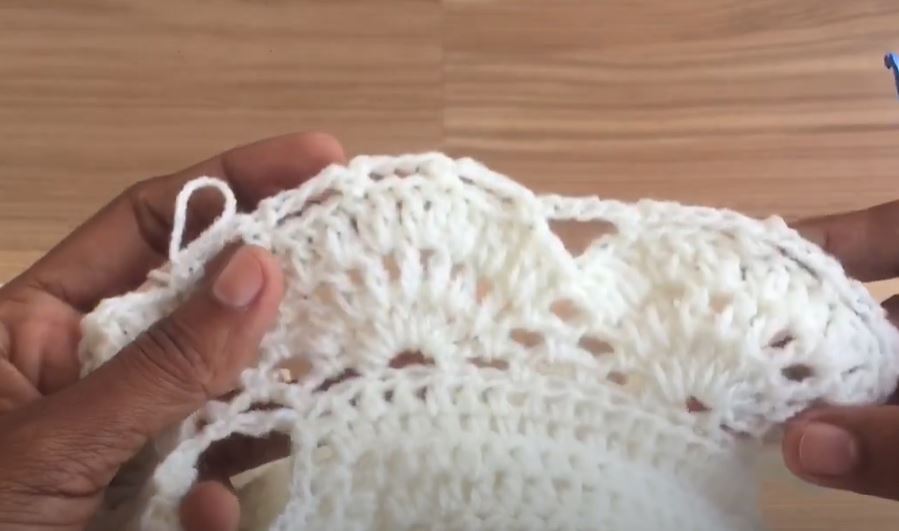
Continue working dc in each stitch around. You can alternate in a shell stitch pattern from Round 10 onward for texture:
Shell Pattern Option:
[Skip 2 sts, 5 dc in next st, skip 2 sts, sc in next] — repeat around.
Final Round (Optional Edging):
Ch 1, sc in each st around OR work a picot edge for a lacy finish:
[sc in next st, ch 3, sl st in 1st ch made, skip 1 st] — repeat.
Fasten off and weave in ends.
🎀 Finishing Touches
- Back Closure: If you didn’t join the foundation chain, sew on a small button at the top of the back opening.
- Add embellishments: Small bows, crocheted flowers, or lace trims.
- Make a matching headband or baby booties to complete the outfit.
💡 Tips & Customization Ideas
- Want a puffier skirt? Increase more in Round 6 and beyond.
- Need a larger size? Add more stitches to the foundation chain in multiples of 6 and increase more rounds before separating for armholes.
- Add sleeves: After separating for the armholes, go back and attach yarn to work a few rounds in each armhole for cap sleeves.
🧼 Care Instructions
Make sure to use machine-washable yarn, especially if gifting. Baby clothes should be soft, breathable, and easy to clean.
🧵 Final Thoughts
A crochet baby dress is more than just yarn—it’s a piece of love, crafted by hand. This easy top-down pattern is a perfect beginner’s project and makes for a beautiful baby shower gift, first birthday outfit, or family photo ensemble. The customization options are endless, and with just a few hours of work, you’ll have something truly special to show for it.
Video tutorial:


