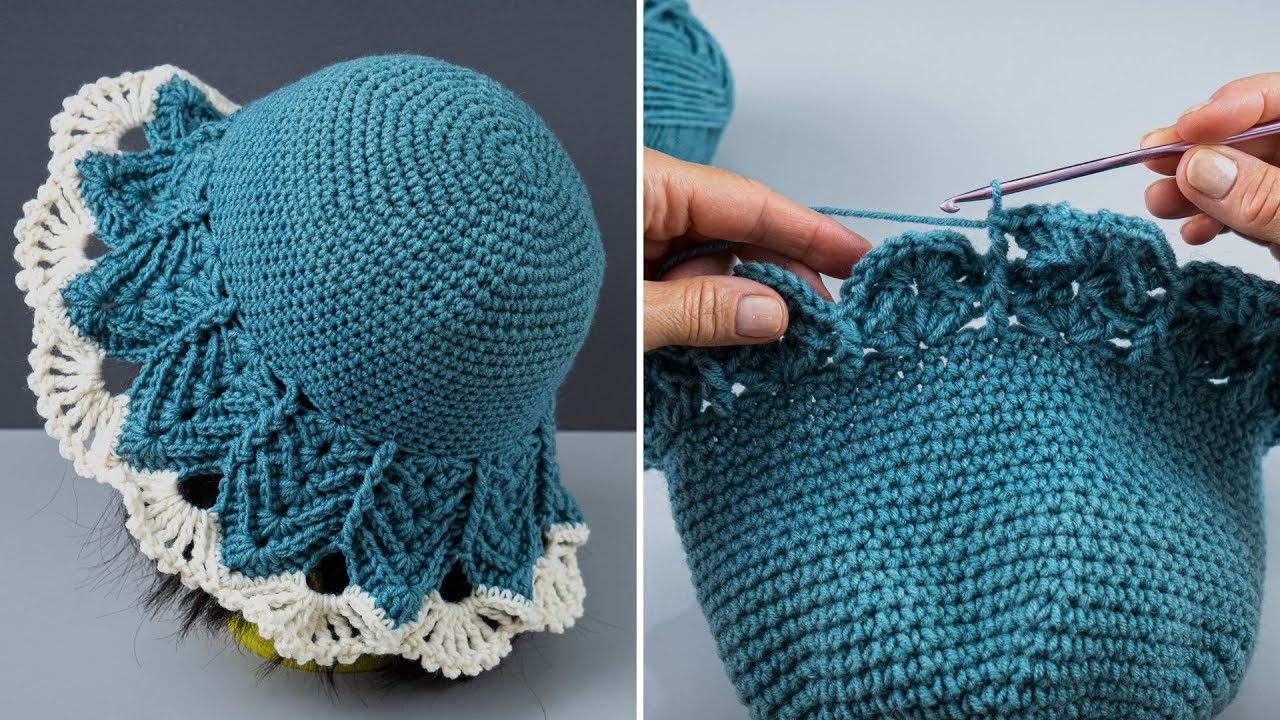
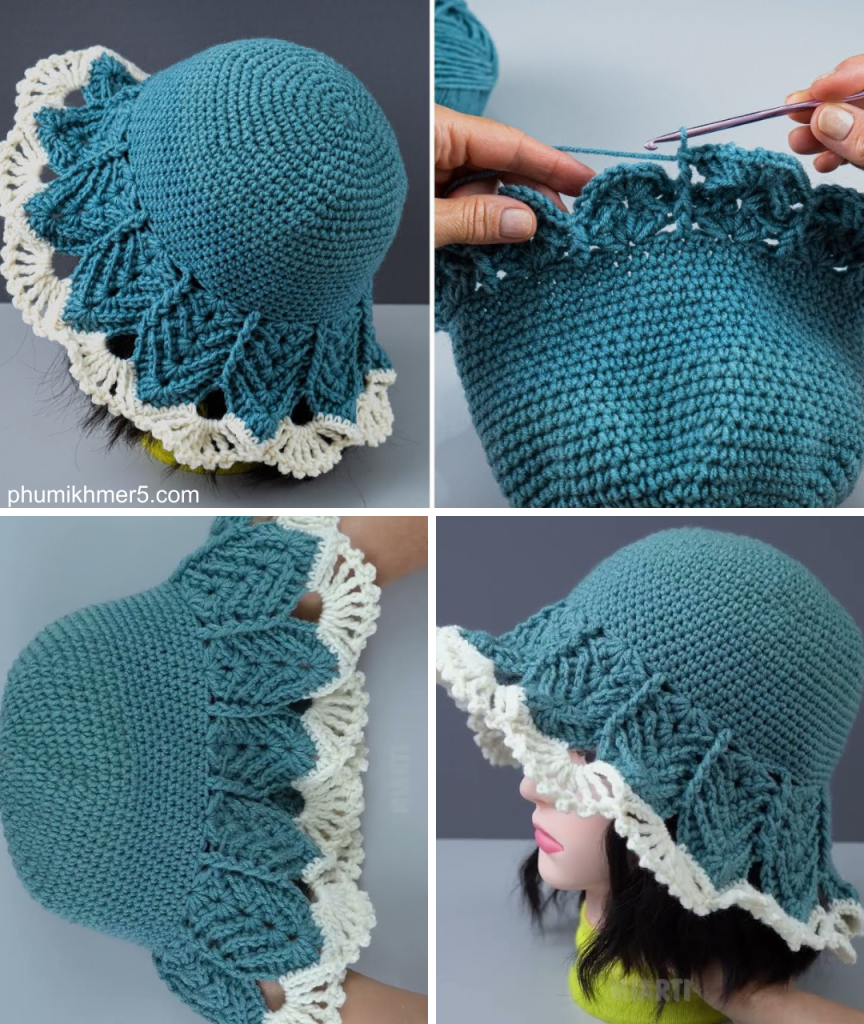
The bucket hat is a fashion staple that has made a major comeback, and a handmade version is the perfect way to add a personal touch to your style. The “Sun-Kissed” Crochet Bucket Hat is a perfect project for any crocheter, featuring a simple, beginner-friendly design that is both stylish and incredibly versatile. This detailed tutorial will guide you through creating a sturdy, stylish, and fun bucket hat that is perfect for sunny days and expressing your unique style.

This project is an excellent choice for a beginner looking to create a beautiful, practical garment or for an experienced crocheter wanting a fast and fun project. The hat is worked from the top down, which makes it a seamless project that is easy to try on as you go.
Why Crochet the Sun-Kissed Bucket Hat?
- Classic & Timeless: The simple design and texture of the stitches create a classic look that never goes out of style.
- Sturdy & Stylish: The combination of stitches creates a fabric that is sturdy enough to hold its shape while still being comfortable.
- Skill Building: You’ll master the art of working in the round and learn how to create a top-down, seamless hat.
- Customizable: Easily change the size, colors, and number of rounds to create a hat that is a perfect fit for you.
- Unique & Fun: A handmade bucket hat is a statement piece that is both fashionable and personal.
1. Planning Your Hat: Size & Materials
- Sizing: The pattern is designed for a versatile one-size-fits-most adult head (approx. 22-23 inches / 56-58 cm). You can easily adjust the size by changing your hook size or the number of increase rounds.
- Yarn Choice: Choose a yarn that is durable and holds its shape well.
- Fiber: A sturdy, medium-weight yarn like Worsted Weight (#4) in Cotton or a Cotton Blend is a great choice.
- Color: A single, solid color will best highlight the stitches, but a variegated yarn could also create a beautiful effect.
- Quantity: You will need approximately 150-200 yards (137-183 meters) of yarn in total.
2. Materials You’ll Need
- Yarn: Your chosen quantity of Worsted Weight (#4) yarn.
- Crochet Hook: 4.0 mm (G-6 US) or a size that gives you a dense but flexible fabric with your yarn.
- Scissors: For cutting yarn.
- Yarn Needle (Tapestry Needle): For weaving in ends.
- Stitch Markers (Optional): To mark the beginning of rounds.
3. Essential Crochet Stitches & Techniques
- Slip Knot
- Chain (ch)
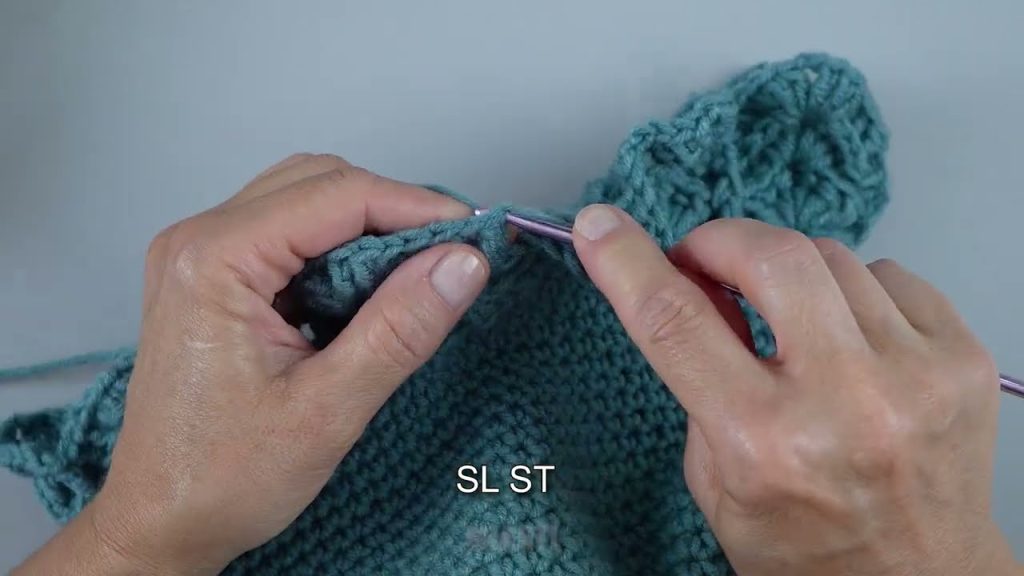
- Slip Stitch (sl st): For joining and neatening.
- Single Crochet (sc)
- Working in the Round: The hat is worked in continuous rounds from the top down.
4. Let’s Crochet the Sun-Kissed Bucket Hat!
The hat is worked from the top down, starting with the crown, then working the body and the brim.
Part 1: The Crown (Worked in Rounds)
This creates the flat, top part of the hat.
- Start with a Magic Ring (or Ch 4, sl st to first ch to form a ring).
- Round 1: Ch 1 (does not count as a stitch). Work 6 sc into the magic ring. Do not join. Work in a continuous spiral.
- Round 2: Work 2 sc in each stitch around.
- [12 sc]
- Round 3:Work 1 sc in the first stitch, 2 sc in the next stitch. Repeat from * to * around.
- [18 sc]
- Round 4:Work 1 sc in the next 2 stitches, 2 sc in the next stitch. Repeat from * to * around.
- [24 sc]
- Round 5:Work 1 sc in the next 3 stitches, 2 sc in the next stitch. Repeat from * to * around.
- [30 sc]
- Continue increasing in this manner until the crown of the hat is large enough to fit the top of your head (approximately 6-7 inches in diameter).
Part 2: The Body (Worked in Rounds)
This is where you’ll create the height of the hat.
- Rounds 1-15: Work 1 sc in each stitch around.
- You are no longer increasing. Continue working rounds of sc until the hat reaches your desired height (for a standard bucket hat, about 4-5 inches / 10-12 cm from the top of the crown).

Part 3: The Brim
This step gives the hat its classic bucket hat shape.
- Round 1 (Increase Round): Work 1 sc in the next 5 stitches, 2 sc in the next stitch. Repeat from * to * around.
- Rounds 2-5: Work 1 sc in each stitch around.
- Round 6 (Increase Round):Work 1 sc in the next 6 stitches, 2 sc in the next stitch. Repeat from * to * around.
- Continue alternating increase rounds and regular sc rounds until the brim reaches your desired length.
- Final Touches: Work a round of slip stitches around the very edge for a clean, finished look. Fasten off and weave in all ends.
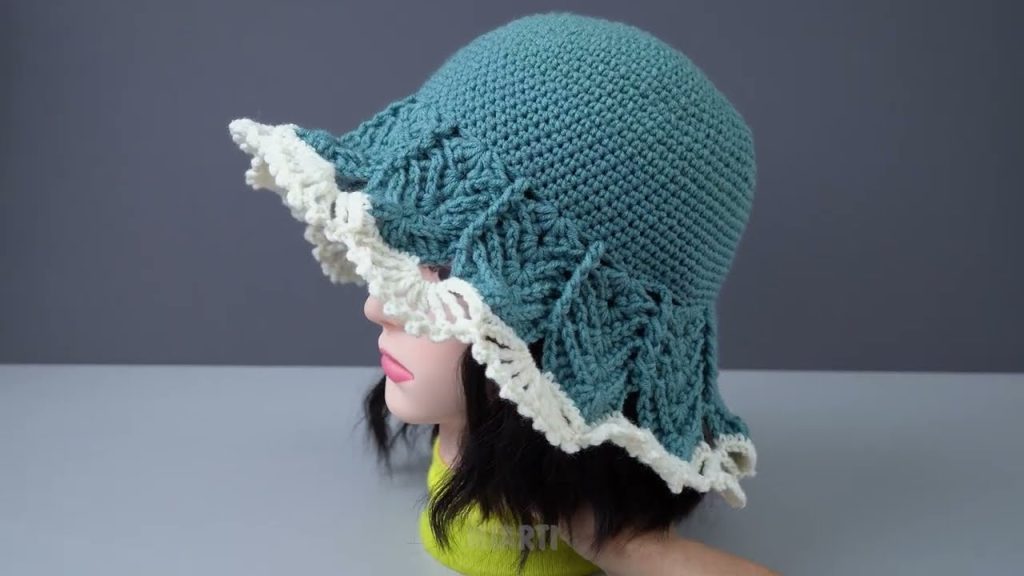
Enjoy your beautiful, handmade “Sun-Kissed” Crochet Bucket Hat. It’s a labor of love that is a perfect addition to your warm-weather wardrobe!
Video tutorial:


