
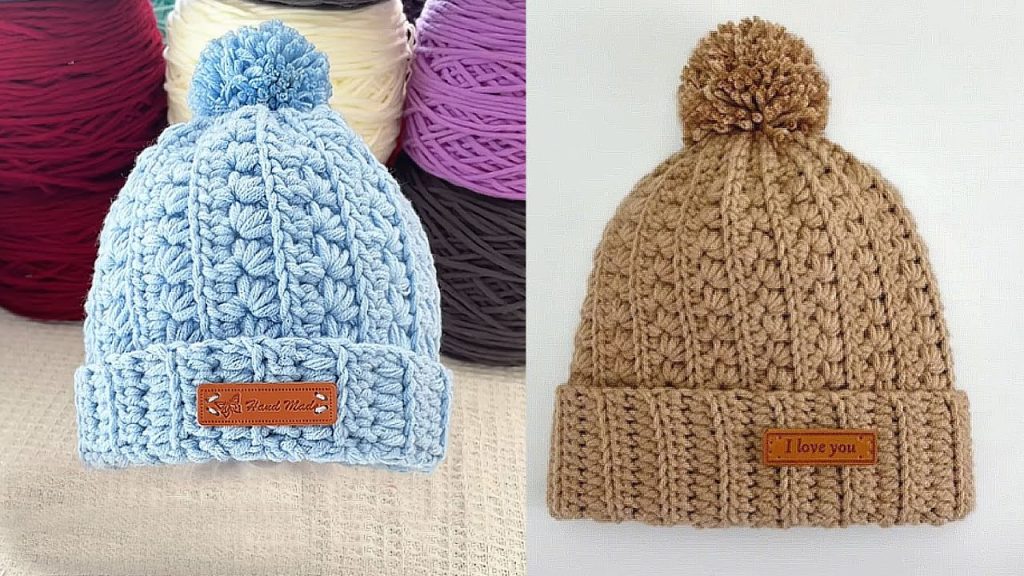
Crochet snowflake hats are a perfect blend of cozy warmth and festive winter charm. Whether you’re crocheting a gift for the holidays, preparing for the chilly season, or simply love snowflake-themed accessories, this Snowflake Crochet Hat Tutorial will guide you step-by-step.
In this in-depth tutorial, we’ll explore how to crochet a snowflake beanie-style hat using basic stitches and simple colorwork. You’ll learn how to work in the round, create color changes for a snowflake motif, and finish your project beautifully—all while having fun!
❄️ Why Crochet a Snowflake Hat?
Snowflake crochet hats are not only stylish but also make for meaningful, handmade winter gifts. Their intricate-looking patterns are often created using simple techniques like tapestry crochet or surface embroidery, which makes them accessible even to adventurous beginners.
Reasons to love this project:
- Great for holiday markets and handmade gifts
- Customizable for kids and adults
- Can be made with a simple two-tone color palette
- Adds a seasonal flair to your winter wardrobe
🧶 Materials & Tools Needed
Yarn:
- Worsted weight (medium #4) yarn
- Main Color (MC): ~150g (for hat base) – e.g., dark blue, navy, gray
- Contrast Color (CC): ~50g (for snowflake) – e.g., white, silver, or light blue
🧵 Tip: Choose a smooth yarn with good stitch definition to make your snowflake pop.
Tools:
- Crochet hook: 5.0 mm (H) or size needed to meet gauge
- Tapestry needle for weaving in ends and embroidery
- Stitch markers (optional but helpful)
- Scissors
- Measuring tape
📏 Finished Dimensions
This pattern is for an Adult Medium (21–23” head circumference), but you can adjust it by changing your hook size, yarn weight, or adding/removing rounds.
🧵 Abbreviations (U.S. Terms)
| Abbreviation | Meaning |
|---|---|
| ch | chain |
| sc | single crochet |
| hdc | half double crochet |
| dc | double crochet |
| sl st | slip stitch |
| st(s) | stitch(es) |
| inc | increase (2 sts in one) |
| dec | decrease |
| MC | main color |
| CC | contrast color |
🔁 Techniques Used
This pattern uses:
- Working in the round (from crown to brim)
- Basic increases
- Colorwork (either tapestry crochet or surface embroidery)
- Optional: Ribbing and pom-pom attachment
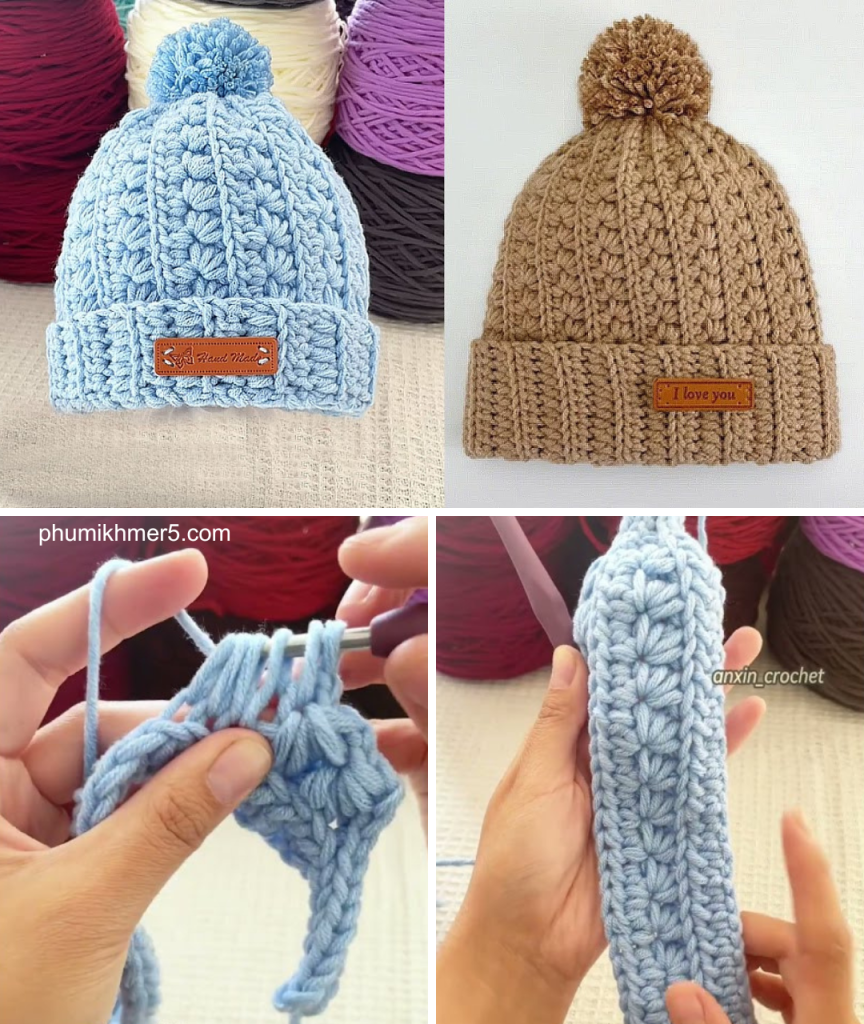
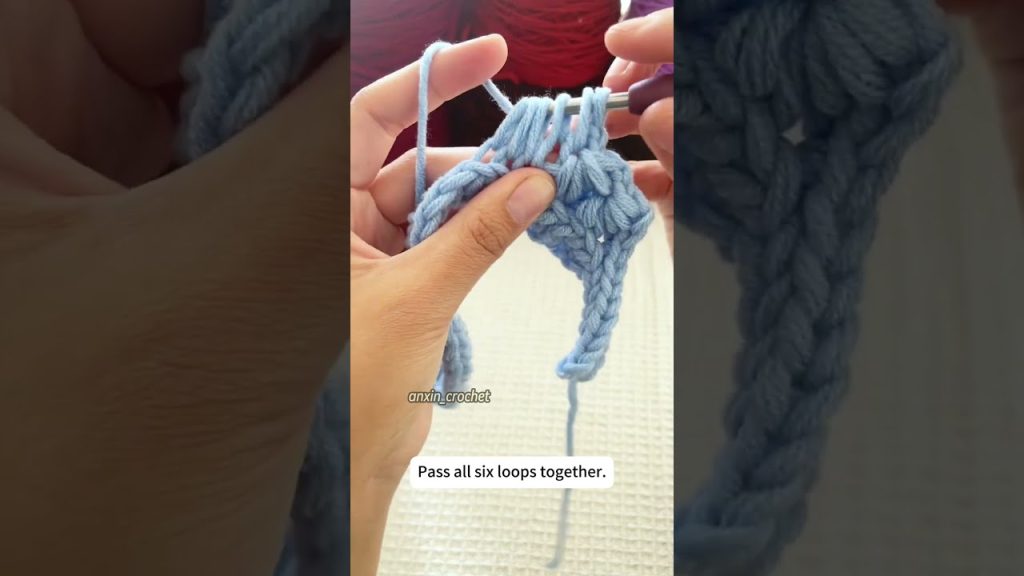
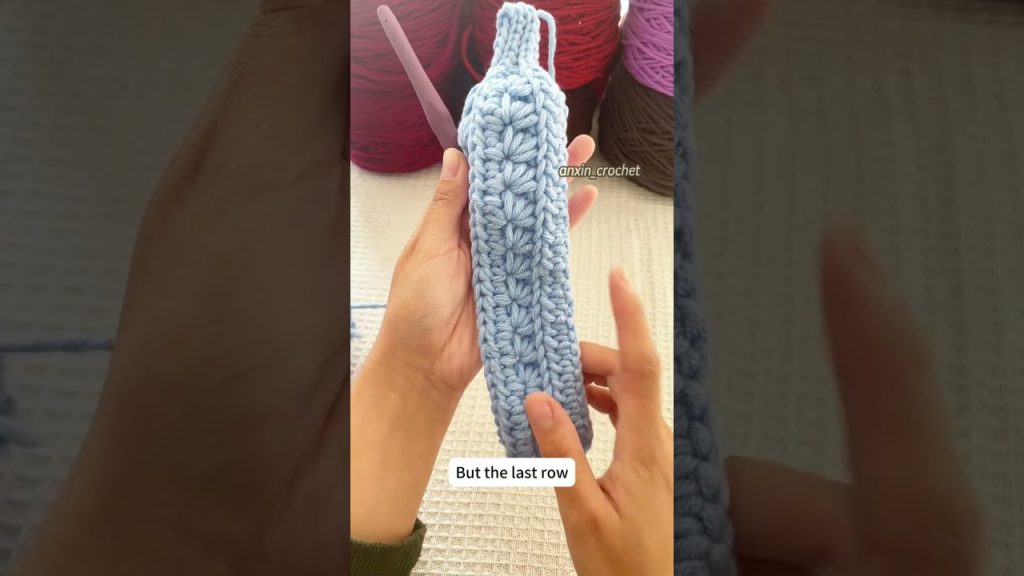
🧢 Step-by-Step Snowflake Crochet Hat Pattern
🔹 PART 1: Crochet the Hat Base (Beanie Style)
This is a classic top-down beanie shape using double crochet stitches.
Rnd 1:
Using MC, make a magic ring, ch 2 (counts as first dc), work 11 dc into ring.
Join with sl st to top of ch-2. (12 dc)
Rnd 2:
Ch 2, 2 dc in each st around. Join. (24 dc)
Rnd 3:
Ch 2, 1 dc in next st, 2 dc in next. Repeat around. Join. (36 dc)
Rnd 4:
Ch 2, 1 dc in next 2 sts, 2 dc in next. Repeat around. Join. (48 dc)
Rnd 5:
Ch 2, 1 dc in next 3 sts, 2 dc in next. Repeat around. Join. (60 dc)
Rnd 6:
Ch 2, 1 dc in next 4 sts, 2 dc in next. Repeat around. Join. (72 dc)
Rnd 7–15:
Ch 2, dc in each stitch around. Join. (72 dc)
🧩 To adjust height, repeat more rounds here for a slouchy fit.
🔹 PART 2: Add the Snowflake Design
You can choose from 2 methods:
❄️ Option A: Tapestry Crochet (Worked Into the Hat)
- Download or draw a simple snowflake graph chart (a grid of squares representing the snowflake shape).
- Starting at round 10 or 11, begin following the chart by carrying your contrast color (CC) along the back and switching colors as indicated.
- Use the split single crochet or tight single crochet for cleaner color changes.
📌 Tapestry crochet tip: Always work over the yarn not in use to hide it and keep your tension even.
❄️ Option B: Surface Embroidery (After the Hat is Complete)
This is easier and more forgiving for beginners!
- Thread your CC yarn onto a tapestry needle.
- Embroider a snowflake motif using backstitch, star stitch, or straight stitches.
- Use a reference pattern or freehand—symmetry is key!
🌟 Want more detail? You can embroider several smaller snowflakes around the hat or just one large one in the center front.

🔹 PART 3: Optional Ribbed Brim
To give your hat a snug fit and polished look:
Rnd 16:
Switch to hdc. Ch 1, hdc in each stitch around. Join. (72 hdc)
Rnds 17–19 (or more for deeper brim):
Repeat hdc round.
🧶 Or work in front post/back post dc for a ribbed effect:
Alternate FPdc and BPdc stitches to create stretch.
🔹 PART 4: Finishing Touches
Pom-Pom (Optional)
Add a faux fur or yarn pom-pom to the top using matching thread or yarn. Secure tightly.
Weave in Ends
Use your yarn needle to hide any loose tails inside the hat.
Block (Optional)
Lightly steam or block the hat to smooth any uneven stitches or colorwork tension.

🎨 Customization Ideas
- Colors: Try icy blue on white, gray on navy, or red on white for a holiday vibe.
- Texture: Use puff stitches for a raised snowflake effect.
- Matching Set: Make a snowflake-themed scarf or mittens to match!
❄️ Snowflake Crochet Hat: Free Chart Example (Text-Based)
Here’s a simplified version of a snowflake chart (11×11 grid) for embroidery or tapestry:
. . . . X . . X . . . .
. . . X . X . X . X . .
. . . . . X X X . . . .
. . . X . X . X . X . .
. . . . X . . X . . . .
X = contrast color stitches
. = main color stitches
You can adjust or expand this chart into a full round.
💡 Tips for Success
- Practice your color changes on a swatch first if you’re new to tapestry crochet.
- Use sharp contrast colors to make the snowflake stand out.
- Keep stitches tight and consistent—this is especially important for colorwork.
- Don’t rush the embroidery – light pencil or chalk marks can help guide you.
🎁 Makes a Great Gift!
Handmade snowflake hats are treasured gifts during the winter holidays. Consider pairing it with:
- A matching scarf
- A mug of hot chocolate
- A handwritten tag with care instructions
🧣 Care Instructions
If made with acrylic or cotton yarn:
- Machine wash cold, gentle cycle
- Lay flat to dry
- Do not bleach or iron
If adding a faux fur pom-pom, remove it before washing (if detachable).

🧶 Final Thoughts
Crocheting a snowflake hat is a joyful and meaningful project, perfect for cold days and cozy nights. With just a few basic stitches and creative flair, you can make a beautiful winter accessory that looks far more complicated than it really is!
Whether you choose to work the snowflake into the hat via tapestry crochet or embroider it afterward, your handmade hat will surely become a treasured item for yourself or someone you care about.
Video tutorial:


