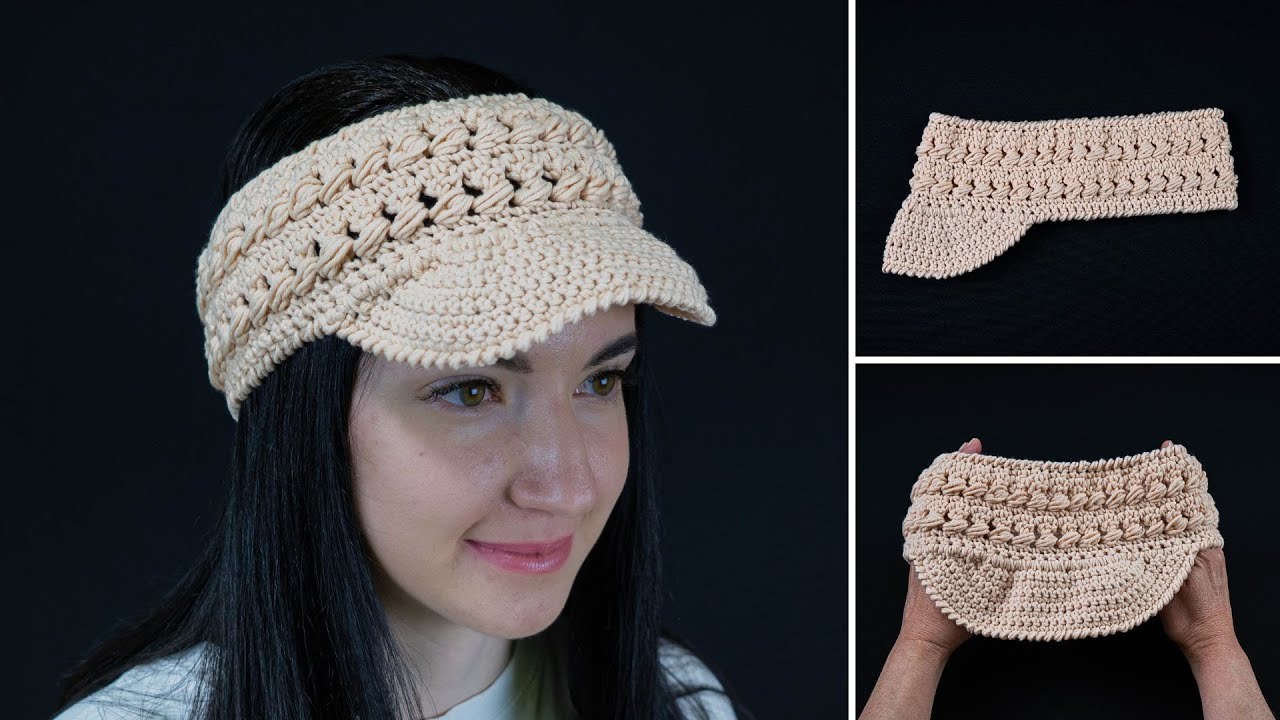
Embrace sunny days with a handmade accessory that’s both stylish and practical! The “Sunny Day” Crochet Headband-Visor is a perfect project for any crocheter, featuring a lovely textured stitch pattern that creates a beautiful and functional piece. This detailed tutorial will guide you through creating a comfortable, chic visor that’s perfect for keeping the sun out of your eyes while adding a touch of handmade flair to your outfit.
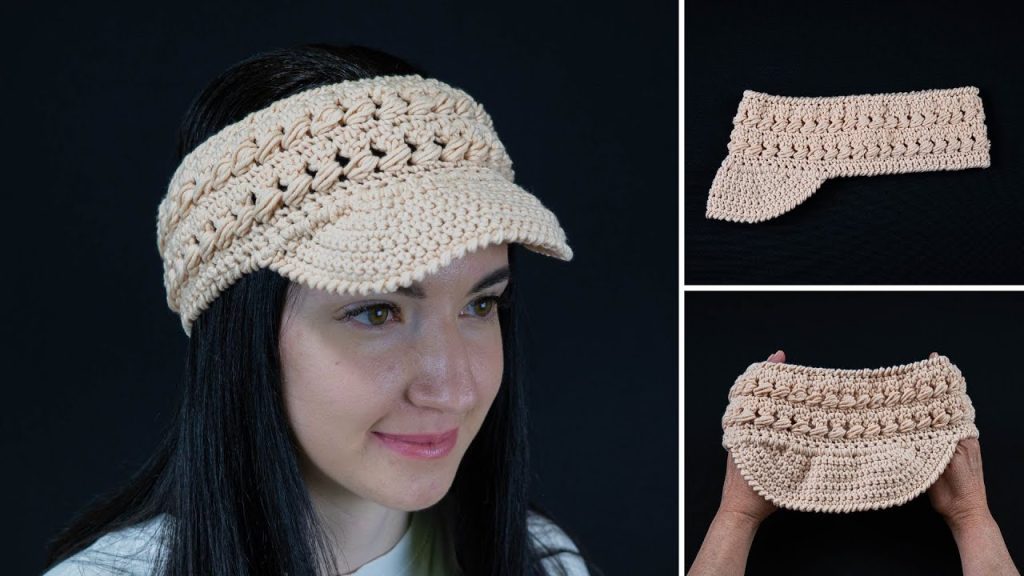
This project is an excellent choice for a confident beginner looking to try new stitches or for an experienced crocheter wanting a fast and fun project. The headband is worked in rows, and the visor brim is then added to complete the look.
Why Crochet the Sunny Day Headband-Visor?
- Stylish & Practical: A chic accessory that protects your eyes from the sun.
- Unique Texture: The stitch pattern creates a beautiful, interesting fabric.
- Skill Building: You’ll learn to create a textured stitch and work flat pieces for assembly.
- Customizable: Easily adjust the size to fit your head circumference perfectly, and choose colors to match your style.
- Quick to Make: A relatively quick project, perfect for last-minute gifts or personal enjoyment.
1. Planning Your Headband-Visor: Size & Materials
- Finished Size: The pattern is designed for a head circumference of 56 cm (approximately 22 inches), which is a standard adult size. You can easily adjust the size by increasing or decreasing the initial chain count.
- Yarn Choice: Choose a yarn that is durable and holds its shape well.
- Fiber: The video specifies 160 meters in 100g, 55% Cotton, 45% Polyacryl. This blend offers breathability and shape retention.
- Weight: This yarn weight is typically a DK (light worsted) or Sport weight. The key is to achieve a fabric that is firm enough for the visor.
- Color: A single, solid color will best highlight the stitches, but you could experiment with color blocking for a bolder look.
- Quantity: You will need 1 clew of yarn (which equates to approximately 160 meters).
2. Materials & Tools You’ll Need
- Yarn: Your chosen quantity of 55% Cotton, 45% Polyacryl yarn (160m in 100g).
- Crochet Hook: 4 mm (G-6 US) or the size that achieves the correct gauge with your yarn.
- Scissors: For cutting yarn.
- Yarn Needle (Tapestry Needle): For weaving in ends and seaming.
- Stitch Markers (Optional): To mark important stitches for increases or alignment.
3. Essential Crochet Stitches & Techniques
- Slip Knot
- Chain (ch)
- Slip Stitch (sl st): For joining and neatening.
- Single Crochet (sc): The base stitch for many rows and the brim.
- Unfinished Double Crochets (UDC) with a Common Top (Puffy Stitch): This creates the textured design of the headband.
- Reverse Single Crochet (Crab Stitch): For a neat, decorative edge.
- Working in Rows: The headband is worked flat.

4. Let’s Crochet the Sunny Day Headband-Visor!
We’ll start with the headband body, then create the textured pattern, and finally add the visor brim.
Pattern Notes:
- Chain counts at the beginning of rows generally do not count as a stitch unless specified.
- The headband is worked flat and then joined.
- The head circumference for this pattern is 56 cm.
Part 1: The Headband Body (Flat Piece)
This creates the main band that goes around your head.
- Foundation Chain: Ch 76. This will be the length of your headband for a 56 cm head circumference.
- Row 1: Work 74 single crochets. Sc in the 2nd ch from hook and in each chain across. Ch 4 (turning chains), turn.
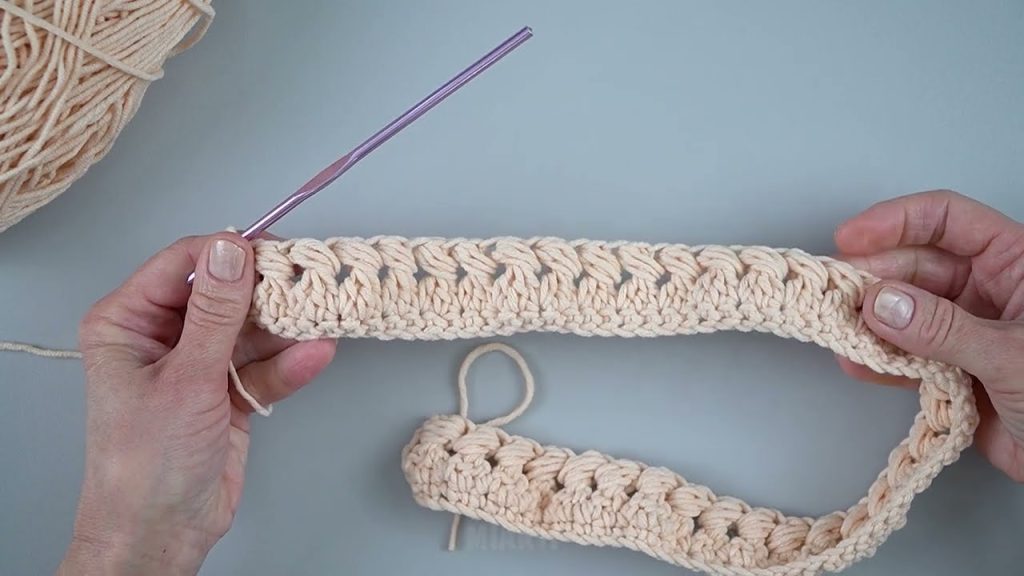
- Row 2 (Textured Stitch): In the 5th stitch from the hook (skipping the turning chain and 1 additional stitch), work a puffy stitch consisting of 3 unfinished double crochets with a common top. Ch 1. Skip 1 stitch. Repeat from * to * until the end of the row. At the end of the row, work a double crochet in 3 turns (tr) in the last stitch. Ch 1, turn.
- Row 3: A turning chain, skip 1 stitch, then work single crochets in the next stitches, working into the top of the puffy stitches and the chain-1 spaces from the previous row. Ensure you have 74 single crochets. Ch 4 (turning chains), turn.
- Repeat Rows 2 and 3: Continue working Row 2 (puffy stitch row) and Row 3 (single crochet row) for 6 more rows, so you have a total of 4 rows of puffy stitches and 4 rows of single crochets. You will see a total of 8 rows completed, ending with a single crochet row.
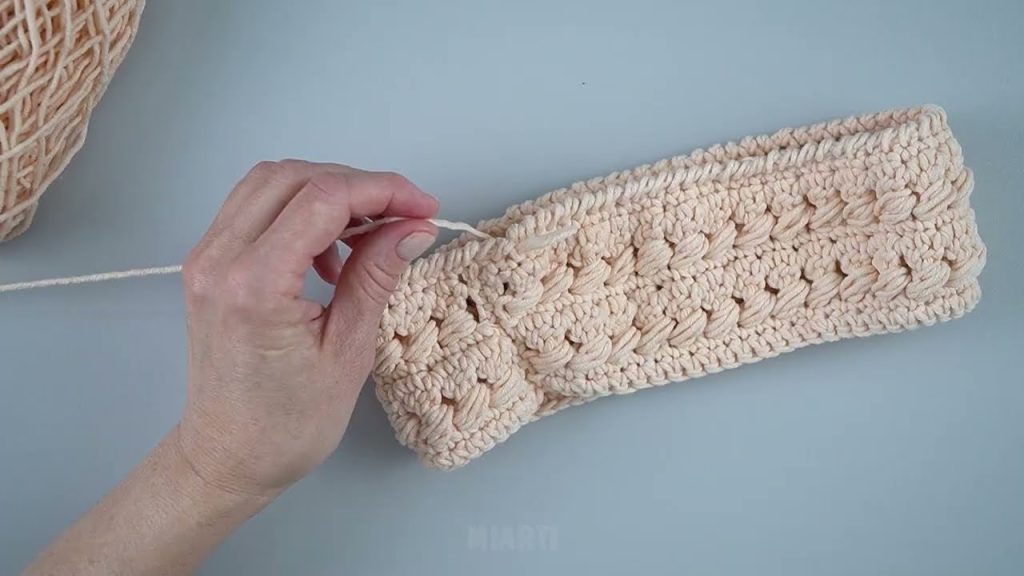
- Joining the Headband: Fold the headband in half, bringing the short ends together. Slip stitch the two ends together to form a loop. Fasten off and weave in ends.
Part 2: Shaping and Adding the Visor Brim
Now we will create the visor portion of the headband.
- Marking for the Visor: Find the middle of the headband and place a stitch marker. From this middle marker, count 5 stitches to the left and place a marker, and 5 stitches to the right and place a marker. This marks the 10 stitches where the brim will be attached.
- Row 1 (Brim Base): Attach yarn to the first marked stitch (the one on the left). Work 2 single crochets in each of the 10 marked stitches. This will give you 20 stitches. Ch 1, turn.
- You are working along the bottom edge of the headband where the brim will be.
- Row 2: Work 22 single crochets. Sc in each stitch, and at the end of the row, work 1 sc into the base of the previous row (the headband itself) plus 2 more sc. Ch 1, turn.
- Row 3: Skip 1 stitch. Work 5 single crochets. Work 2 single crochets out of 1 stitch. Work 13 single crochets. Work 2 single crochets out of 1 stitch, and then work sc stitches according to the pattern until the end of the row. Ch 1, turn.
- Row 4: Work 27 single crochets, and then continue working according to the pattern until the end of the row. Ch 1, turn.
- Row 5: Work 7 single crochets. Work 2 single crochets out of 1 stitch. Work 15 single crochets. Work 2 single crochets out of 1 stitch. Continue working according to the pattern until the end of the row. Ch 1, turn.
- Rows 6-7: Continue increasing as established, following the pattern of the previous rows. Work a row of 33 single crochets, then according to the pattern to the end of the row. For the 7th row, work 9 single crochets, then an increase, then 17 single crochets, an increase, and continue according to the pattern. At the end of the row, make a slip stitch.
- These rows build up the curve of the visor.
- Rows 8-9: Work the 8th and 9th rows according to the pattern without increases. These rows help to finalize the shape of the brim.
- Finishing Edge (Reverse Single Crochet): To create a neat, sturdy edge around the entire brim, work a row of reverse single crochets (also known as the crab stitch). This stitch works backward, creating a rope-like finish.
- Final Touches: Fasten off and weave in any remaining loose ends.
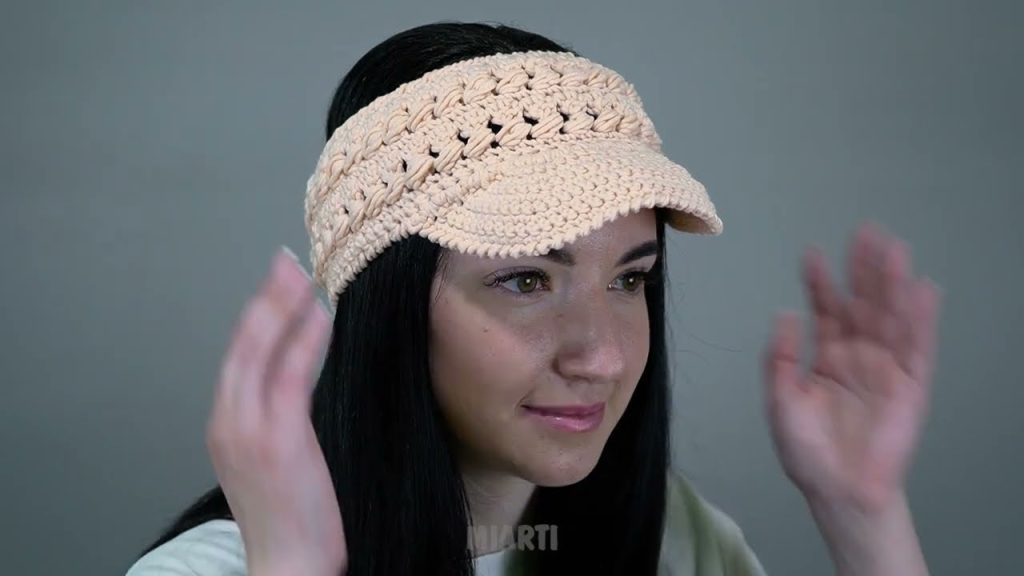
Enjoy your stylish, handmade “Sunny Day” Crochet Headband-Visor! It’s a functional and fashionable accessory ready for your next outdoor adventure.
Video tutorial: