
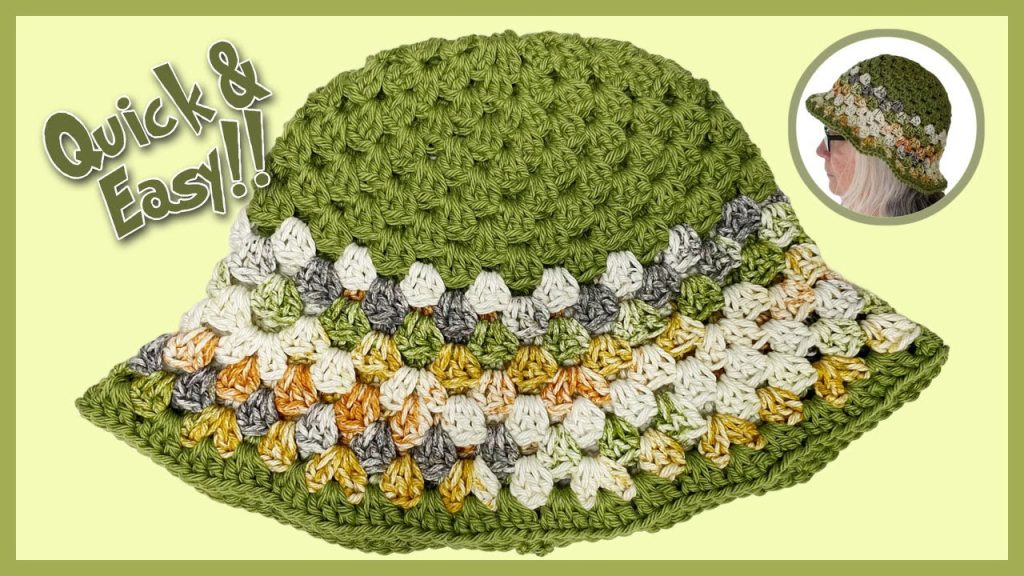
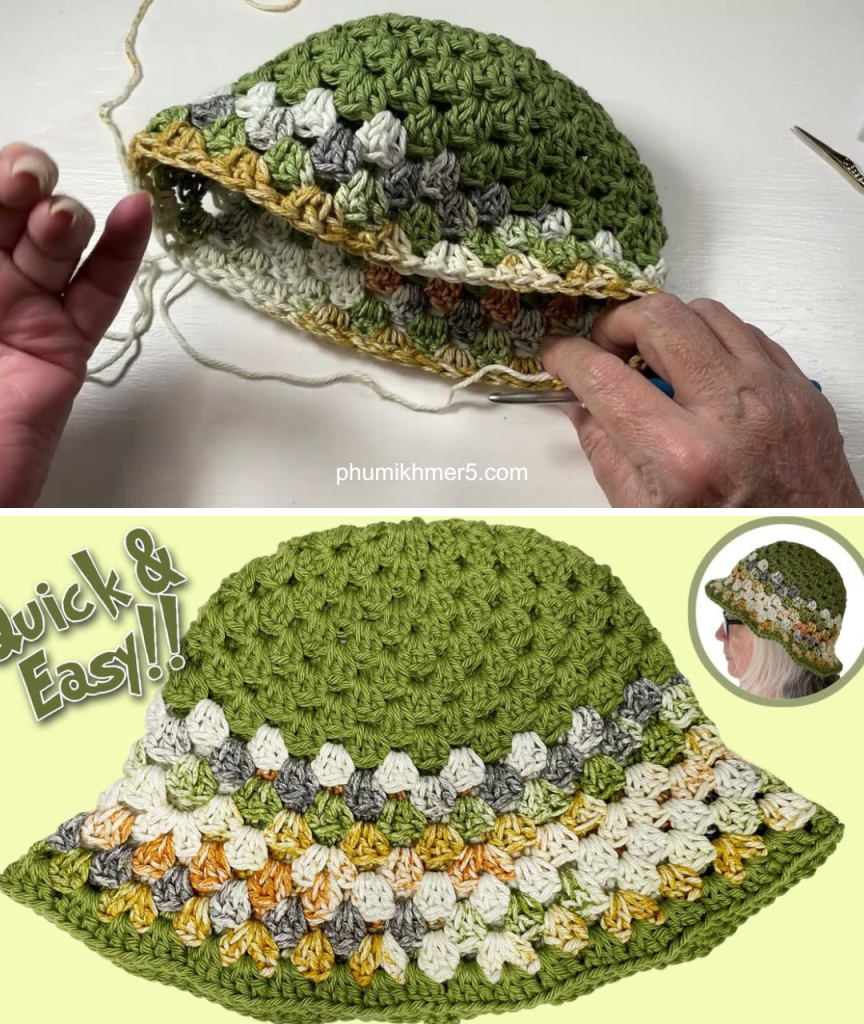
Get ready for summer with this incredibly fast and stylish Granny Cluster Bucket Hat! Inspired by the clear, step-by-step tutorial from Knotting Hook Crochet, this pattern uses the classic granny cluster technique to create a breathable, flexible fabric perfect for warmer weather. This pattern is designed to be easily adjustable and includes optional instructions for color changes to create a bold, variegated look.
📋 Pattern Details & Materials
| Item | Detail | Notes |
| Project | Summer Haze Bucket Hat | Adult Size: 22″ – 24″ circumference |
| Skill Level | Beginner | Uses basic stitches and simple increases. |
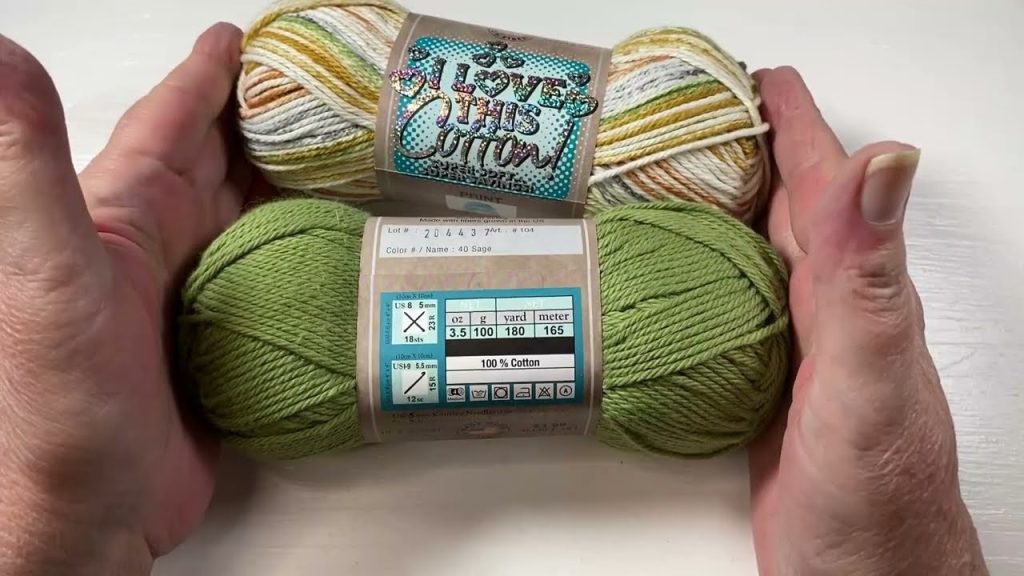
| Yarn | Worsted Weight (Category 4) Cotton Yarn | Cotton is recommended for structure and breathability. Approximately 150-200 yards total. |
| Hook | 5.0 mm (H/8) | Slightly smaller than the yarn recommends for a tighter, firmer crown. |
| Notions | Stitch Marker, Tapestry Needle, Scissors. |
Gauge (Crown Diameter)
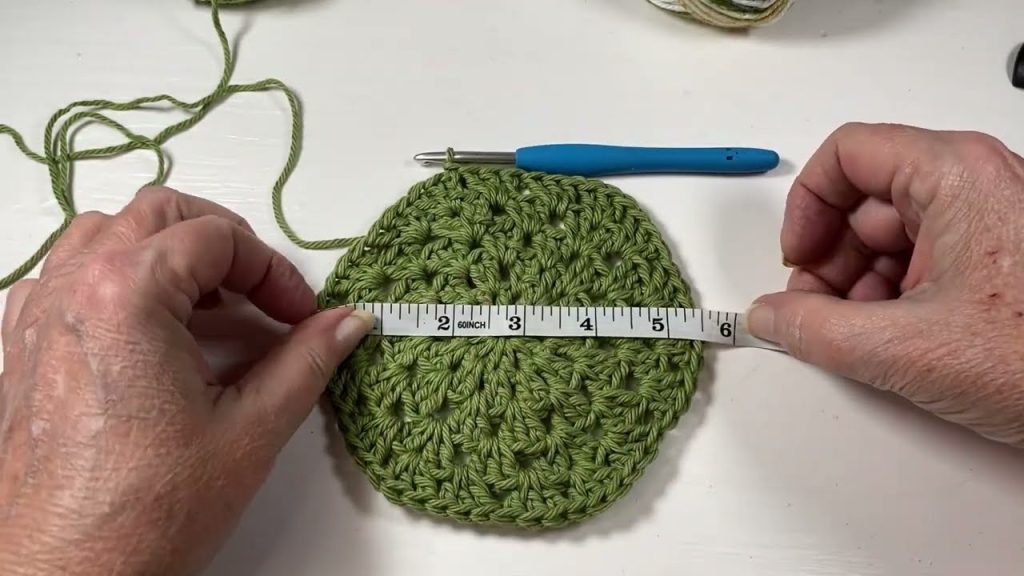
After Round 5, the crown should measure approximately 5.5 to 6.5 inches across, depending on desired fit.
📚 Abbreviations (US Crochet Terms)
| Abbreviation | Meaning |
| Ch | Chain |
| St(s) | Stitch(es) |
| SC | Single Crochet |
| DC | Double Crochet |
| Sl St | Slip Stitch |
| Sk | Skip |
| Sp | Space |
| Cl | Cluster (refers to a group of DC) |
✨ Special Techniques
| Technique | Abbreviation | Instruction |
| Granny Cluster | 3DC Cl | 3 Double Crochet stitches worked into the same space. |
| Working Between Posts | Instead of working into the top V of the stitch, insert the hook between the posts of the previous row’s stitches. | |
| Standing Double Crochet | StDC | Used for joining a new color without a starting chain. (See Part 2 for instructions.) |
Part 1: The Crown (Increasing Section)
The crown is worked in continuous rounds, with increases made to ensure the circle lays flat. The key is working between the posts for the entire hat.
Round 1: Foundation Circle (12 DC)
- Make a slip knot and Ch 4.
- Sl St into the first Ch to form a ring.
- Ch 3 (counts as 1st DC).
- Work 11 DC into the center of the ring.
- Sl St to the top of the starting Ch 3 to join. (12 DC total)
Round 2: Start of Clusters (24 DC)
- Sl St over to the space between the posts of the last and first DC of the previous round.
- Ch 3 (counts as 1st DC), 1 DC into the same space.
- Work 2 DC (a 2DC Cl) into every space between the posts around.
- Sl St to the top of the starting Ch 3 to join. (12 clusters, 24 DC total)
Round 3: Increasing Clusters (3 DC Clusters)
- Sl St over to the space between the 2DC Cl of the previous round.
- Ch 3, 2 DC into the same space. (Forms a 3DC Cl)
- Work 3 DC into every space between the clusters around.
- Sl St to the top of the starting Ch 3 to join. (12 clusters, 36 DC total)
Round 4: Alternating Clusters (3s and 4s)
- Sl St over to the next space between clusters.
- Ch 3, 3 DC into the same space. (Forms a 4DC Cl)
- Work 3 DC (a 3DC Cl) into the next space.
- Work 4 DC (a 4DC Cl) into the next space.
- Repeat the sequence of *(3DC Cl, 4DC Cl)* around.
- Sl St to the top of the starting Ch 3 to join. (6 sets of 3DC and 6 sets of 4DC)
Round 5: Final Crown Increase (3 DC Clusters)
This round prepares the crown to lay flat before the body begins.
- Sl St over to the middle two stitches of the previous round’s 4DC Cl.
- Ch 3, 2 DC into that same space (between the center two posts of the 4DC Cl).
- Work 3 DC into the next space (the space after the 4DC Cl).
- Work 3 DC into the next space (the space before the 4DC Cl).
- Work 3 DC into the middle two stitches of the next 4DC Cl.
- Repeat the sequence of *(3DC Cl, 3DC Cl, 3DC Cl in the middle of the 4DC Cl)* around.
- Sl St to the top of the starting Ch 3 to join.
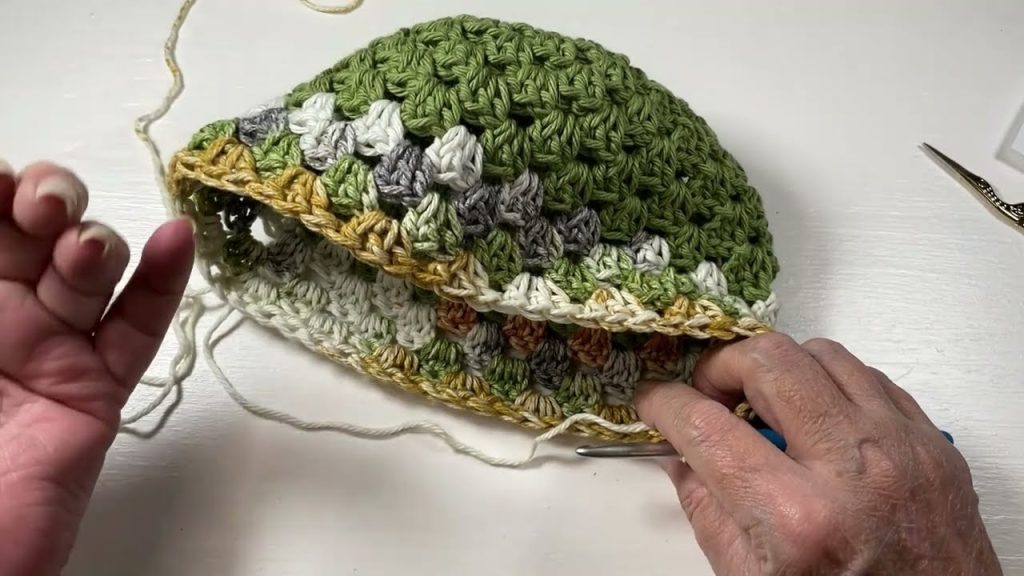
Part 2: The Body (No Increase Section)
The body is worked in straight rounds of 3DC clusters into every space, allowing the crown to drop down and form the bucket shape.
Rounds 6–10 (or desired height):
- Sl St over to the next space between clusters.
- Ch 3, 2 DC into the same space (a 3DC Cl).
- Work 3 DC into every space between the clusters around.
- Sl St to the top of the starting Ch 3 to join.
- Repeat this pattern for 5 rounds, or until the hat reaches the top of your ears/desired point before the brim begins.
Part 3: Brim Section (Increasing Rounds)
The brim requires two rounds of expansion to create the flare.
Optional: Color Change (Rounds 11–14)
(The video shows 4-5 rounds of a new color for the transition.)
- Fasten off current color after Round 10.
- Join new color with a Standing Double Crochet (StDC) in any space.
- (To make a StDC: Make a slip knot, place it on your hook, yarn over, insert hook into the space, complete as a normal DC.)
- Work 3 DC (including the StDC) into every space around, joining with Sl St.
- Repeat for 4 rounds. Fasten off variegated color after the last round.
- Rejoin main color into any space with a StDC.
Brim Round 15: Expansion Round 1
This round alternates between 3DC and 4DC clusters.
- Sl St over to the next space between clusters.
- Ch 3, 3 DC into the same space. (Forms a 4DC Cl)
- Work 3 DC (a 3DC Cl) into the next space.
- Work 4 DC (a 4DC Cl) into the next space.
- Repeat the sequence of *(3DC Cl, 4DC Cl)* around.
- Sl St to the top of the starting Ch 3 to join.
Brim Round 16: Straight Round (Stabilizer)
This round is worked straight with 3DC clusters into every space created by the 3DC and 4DC clusters of the previous round.
- Sl St over to the next space between clusters.
- Ch 3, 2 DC into the same space (a 3DC Cl).
- Work 3 DC into every space between the clusters around.
- Sl St to the top of the starting Ch 3 to join.
Brim Round 17: Expansion Round 2
This round repeats the 4DC, 3DC alternation for more flare.
- Sl St over to the next space between clusters.
- Ch 3, 3 DC into the same space. (Forms a 4DC Cl)
- Work 3 DC (a 3DC Cl) into the next space.
- Work 4 DC (a 4DC Cl) into the next space.
- Repeat the sequence of *(3DC Cl, 4DC Cl)* around.
- Sl St to the top of the starting Ch 3 to join.
Final Finishing Round (Brim Stability)
- Sl St over to the next space between clusters.
- Ch 1 (does not count as St).
- Work Single Crochet (SC) into every single stitch and every space around for a tight, stable final edge.
- Sl St to the first SC to join.
- Fasten off, weave in all ends securely.
Video tutorial:


