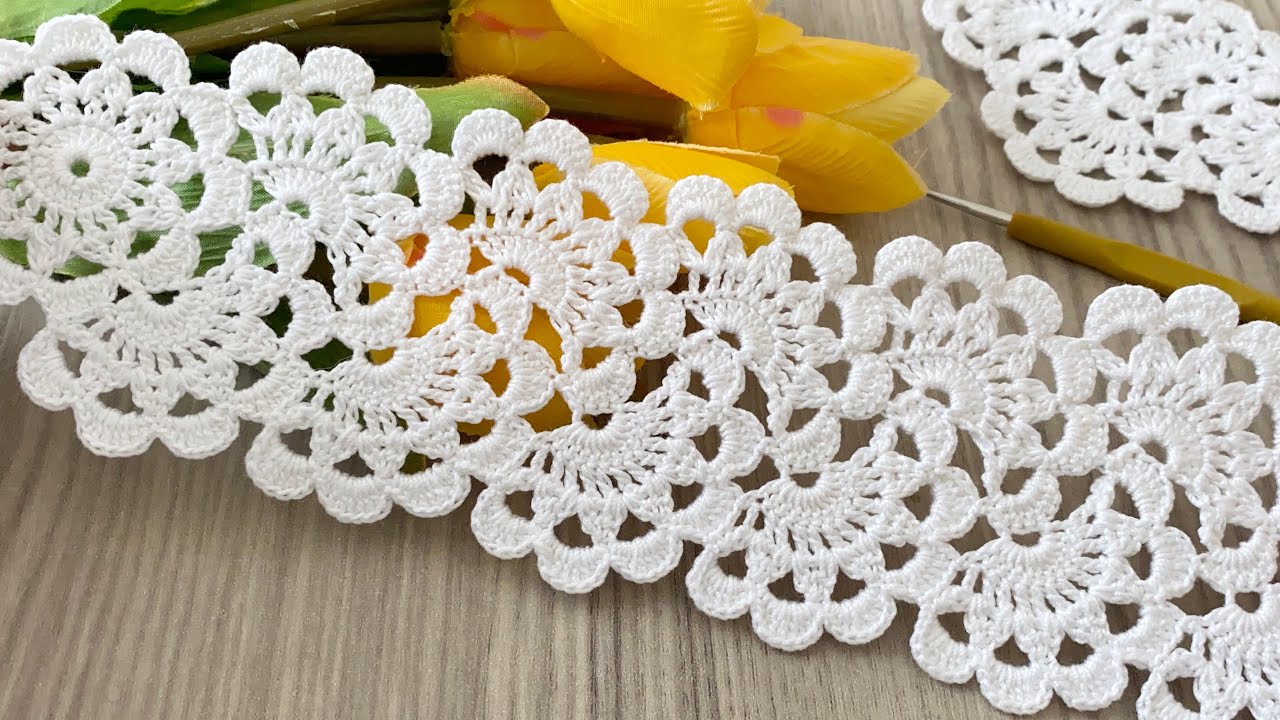
Hello, decorative stitchers and lace lovers! Ready to transform a simple edge on a blanket, shawl, pillowcase, or towel into a stunning piece of art? I’m excited to share the pattern for the Celtic Weave Multi-Layer Lace Border—an intricate, yet surprisingly straightforward design that uses overlapping layers of chain work, shells, and picots to create a beautiful dimensional finish.
Inspired by beautiful multipurpose lace edge tutorials, this pattern is designed to look complex and luxurious while remaining accessible to crocheters comfortable with basic stitches and counting. The final result is a deep, richly textured border that adds vintage elegance to any item.
Grab your finest thread or yarn, and let’s craft a border that looks like it took weeks!

Why You’ll Love Crocheting This Border:
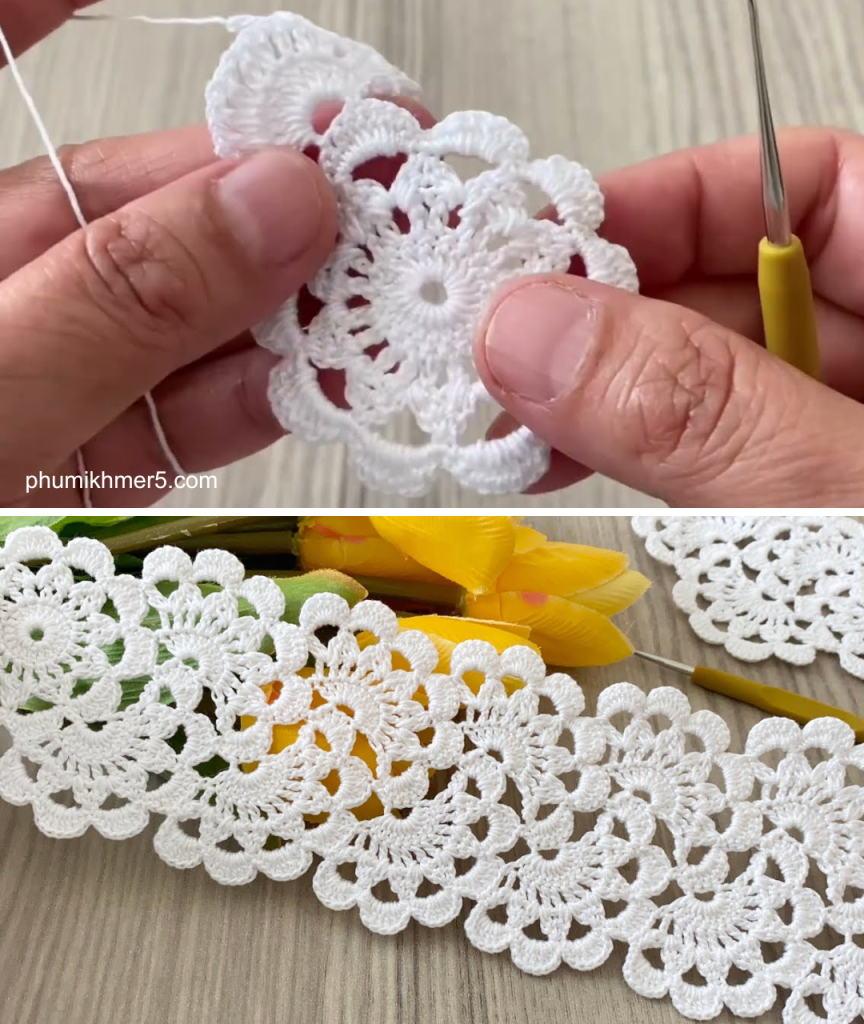
- Dimensional Texture: Uses overlapping chains and clusters to create a rich, multi-layered effect.
- Multipurpose: Perfect finishing touch for tablecloths, towels, blankets, scarves, or clothing cuffs.
- Customizable Depth: Easily adjust the depth by changing the chain counts.
- Sturdy Foundation: Starts with a dense row to ensure the lace holds its shape and keeps a straight edge.
Materials & Notions
- Yarn/Thread: Choose a weight appropriate for your project.
- For Fine Lace (Towels/Linens): Size 10 or 20 Cotton Thread.
- For Blankets/Shawls: Fingering (#1) or DK (#3) weight yarn.
- Hook: Hook size appropriate for your chosen yarn/thread (e.g., 1.5mm for Size 10 thread, 3.5mm for DK yarn).
- Notions: Tapestry Needle, Scissors, Stitch Markers (optional).
Essential Crochet Abbreviations & Terminology
| Abbreviation | Description |
| ch | chain |
| st(s) | stitch(es) |
| sl st | slip stitch |
| sc | single crochet |
| dc | double crochet |
| tr | treble crochet (yarn over 2 times) |
| sk | skip |
| rep | repeat |
| TrCl | Treble Cluster: Work 3 partially completed tr stitches into the same space, then yarn over and pull through all 4 loops on the hook. |
| Picot | Ch 3, sl st into the 1st ch (or into the top of the st you just worked). |
Gauge & Preparation
- Stitch Multiple: This pattern requires a foundation edge with a stitch count that is a multiple of 6 + 1.
- Pre-work: If you are attaching this lace to a straight fabric edge (like a towel or pillowcase), first work a row of SC stitches evenly across the edge to establish the foundation, ensuring your final count meets the multiple of 6 + 1.
The Pattern: Celtic Weave Lace Border
This border is worked over 5 rows, with the last two rows creating the primary lace texture.
Part 1: The Foundation (Prepping the Edge)
Row 1 (SC Foundation):
If you are working into a crochet piece (like a shawl), work 1 row of SC evenly around the edge, ensuring the total stitch count is a multiple of 6 + 1. Join with a sl st to the first SC.

Row 2 (Defining Shells):
Ch 1 (does not count as st). Sc in the first st.
Ch 3, sk 2 sts.- Work a Shell in the next st:
(dc 1, ch 1, dc 1). Ch 3, sk 2 sts.Sc 1in the next st.- Rep from * across the row. You should end with Ch 3, sk 2 sts, and a Shell in the second to last st, followed by Ch 3, sk 2 sts, and a sc in the last st.Join with sl st to the first sc.
Part 2: The Main Lace Weave (Creating Dimension)
Row 3 (Chain Arches):
Sl st into the first Ch-3 space. Ch 5 (counts as tr and ch 1). Tr in the same Ch-3 space.
Ch 3.- Work TrCl in the Ch-1 space of the next Shell
(TrCl 1). Ch 3.- Work V-Stitch in the next Ch-3 space (
tr 1, ch 1, tr 1). - Rep from * across the row.Join with a sl st to the 4th ch of the starting Ch-5.
Row 4 (The Weave Layer):
Sl st into the Ch-1 space of the starting V-Stitch. Ch 1. Sc in the same Ch-1 space.
Ch 5. Sc in the top of the TrCl from the row below.Ch 5. Sc in the Ch-1 space of the next V-Stitch.- Rep from * across the row.Join with a sl st to the first sc.

Part 3: The Picot Edging (Final Decorative Touches)
Row 5 (The Celtic Finish):
Sl st into the first Ch-5 loop. Ch 1. Sc in the same loop.
Ch 3. Sc in the top of the same loop. This creates a small hanging loop.- Work 3 Picots separated by 1 sc into the top of the next sc (the anchor of the TrCl from Row 3):
(sc 1, Picot, sc 1, Picot, sc 1, Picot, sc 1). - In the next Ch-5 loop, work:
(sc 1, Picot, sc 1). - Rep from * across the row. You should end by working the last segment into the last Ch-5 loop.Join with a sl st to the first sc.
Final Fasten Off.

Finishing Your Border
- Weave Ends: Securely weave in all starting and ending tails using a tapestry needle. Do not simply trim them, as lace needs strong anchors.
- Blocking: Blocking is essential for lace to open up the pattern and define the intricate curves.
- Gently wet the entire piece (or the border if attached to fabric).
- Pin the lace border to a foam board or towel, stretching the picots and curves gently to open the chain spaces.
- Allow to dry completely (may take 24–48 hours).
Your beautiful Celtic Weave Multi-Layer Lace Border is now ready to showcase! Enjoy the intricate, timeless elegance it adds to your cherished handmade items.
Video tutorial:


