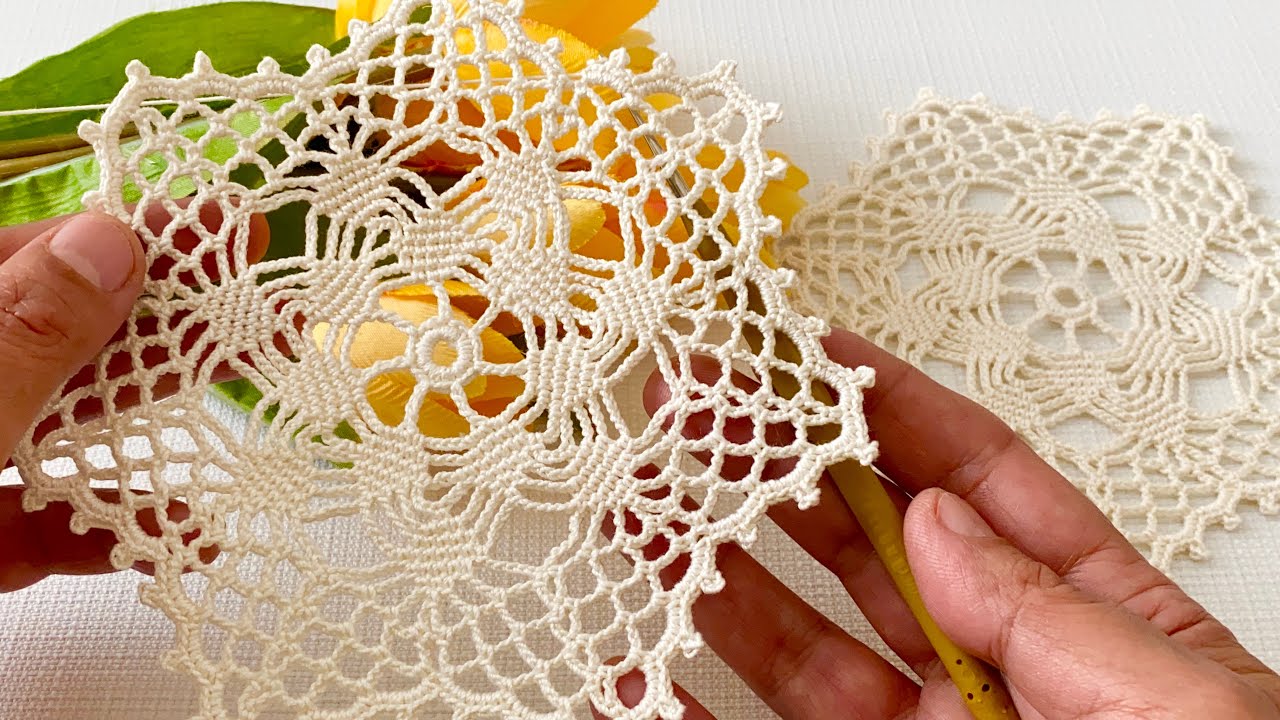
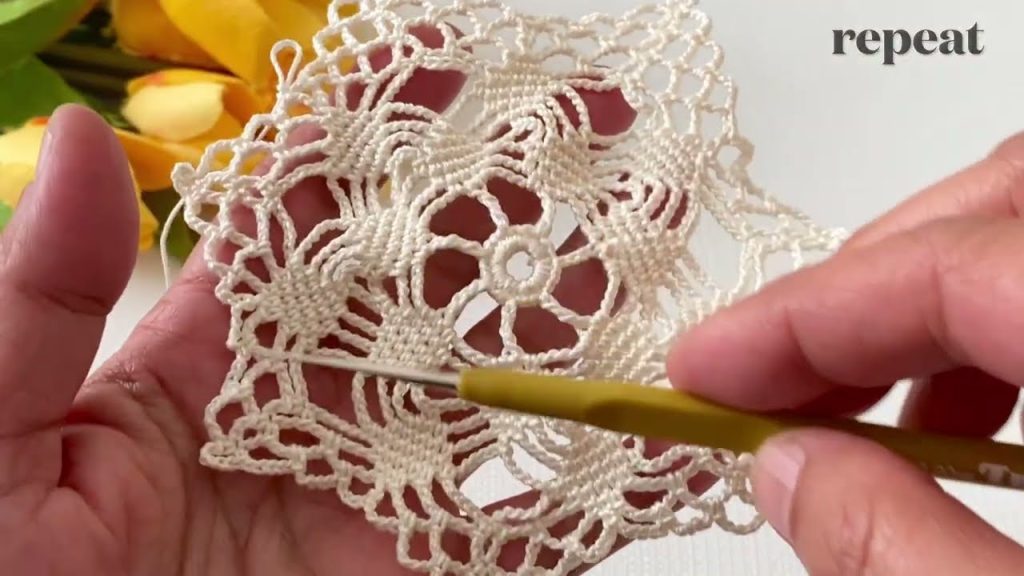
Inspired by the stunning and intricate design of the “New Design Crochet Motif” video from Crochet Knitting Therapy, this pattern utilizes a unique, multi-layered stitch combination to create a beautiful, geometric fabric. We’ve named this piece the Sunburst Mandala Runner for its radiant, medallion-like appearance when the motifs are joined.
This pattern is written for a versatile Table Runner, but the motifs can be easily adapted for a stunning blouse or shawl.

📋 Project Details & Materials
| Item | Detail | Notes |
| Project | Sunburst Mandala Runner | Length is customizable by joining more motifs. |
| Skill Level | Intermediate | Requires concentration on precise stitch placement. |
| Yarn | Sport Weight (Category 2) or DK Weight (Category 3) Cotton/Mercerized Cotton | Choose a yarn with good stitch definition. Approx. 500-800 yards total. |
| Hook | 3.5 mm (E/4) or size needed to obtain gauge. | Use a smaller hook for a tighter, more defined motif. |
| Notions | Stitch markers (to mark corners), Tapestry needle, Scissors. |
Gauge
One completed Sunburst Mandala Motif (through Round 8) should measure approximately 5 inches x 5 inches.
📚 Abbreviations (US Crochet Terms)
| Abbreviation | Meaning |
| Ch | Chain |
| St(s) | Stitch(es) |
| SC | Single Crochet |
| DC | Double Crochet |
| Tr | Treble Crochet |
| Dtr | Double Treble Crochet |
| Sl St | Slip Stitch |
| Sp | Space |
| Sk | Skip |
| Beg | Beginning |
✨ Special Stitches
| Stitch Name | Abbreviation | Instruction |
| Mandala Cluster (MC) | MC | [Yarn over, insert hook into designated St/Sp, pull up a loop, yarn over, pull through 2 loops] 3 times. Yarn over, pull through all 4 loops on hook. Ch 1 to secure. |
| Petal Shell (PS) | PS | (3 DC, Ch 1, 3 DC) into the designated stitch or space. |
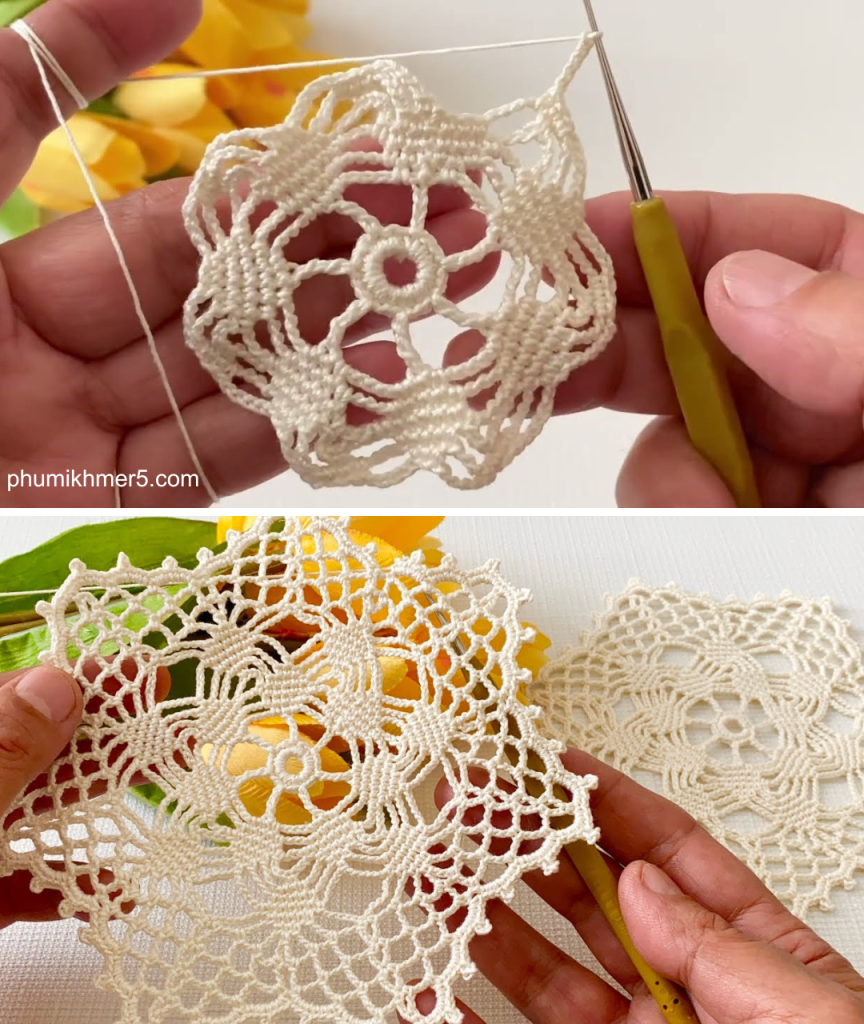
Part 1: The Sunburst Mandala Motif
The motif is worked in the round, starting with a 12-point circle and expanding into a square.
Foundation Ring: Magic Ring OR Ch 4, Sl St to the first Ch to form a ring.
Round 1: Ch 3 (counts as 1st DC). 11 DC into the ring. Sl St to the top of the Beg Ch 3 to join. (12 DC)
Round 2 (Lace Set-up): Ch 1 (does not count as St). SC in the same St. *Ch 5, Sk 1 DC, SC in the next DC. Rep from * 5 more times. Ch 5, Sl St to the Beg SC to join. (6 Ch-5 loops)
Round 3 (Sunburst Base): Sl St into the first Ch-5 Sp. Ch 3 (counts as 1st DC). (2 DC, Ch 3, 3 DC) into the same Ch-5 Sp. *Ch 1, 3 DC Cl in the next SC. Ch 1, (3 DC, Ch 3, 3 DC) in the next Ch-5 Sp. Rep from * around, ending with Sl St to the top of the Beg Ch 3.

Round 4 (Mandala Cluster): Sl St until you reach the corner Ch-3 Sp. Ch 4 (counts as 1st Tr). (2 Tr, Ch 3, 3 Tr) into the same corner Sp. *Ch 2, MC in the top of the 3 DC Cl from the previous round. Ch 2, PS in the center Ch-1 Sp of the previous round (between the two clusters). Ch 2, MC in the top of the next 3 DC Cl. Ch 2, (3 Tr, Ch 3, 3 Tr) in the next corner Ch-3 Sp. Rep from * around, Sl St to the top of the Beg Ch 4 to join.
Round 5 (Shaping the Square): Sl St across the Tr stitches to the corner Ch-3 Sp. Ch 1. Work Corner (SC, Ch 3, SC) in the corner Sp. *Ch 3, Sk 3 Tr, 3 DC Cl in the next Ch-2 Sp. Ch 3, Sk MC, SC in the center Ch-1 Sp of the PS. Ch 3, Sk MC, 3 DC Cl in the next Ch-2 Sp. Ch 3, SC in the corner Ch-3 Sp. Rep from * around, ending with Sl St to the Beg SC.
Round 6 (Solid Foundation): Ch 3 (counts as 1st DC). 2 DC in the first Ch-3 Sp. *Work (3 DC, Ch 2, 3 DC) in the corner Ch-3 Sp. 3 DC in the next Ch-3 Sp. DC in the next SC. 3 DC in the next Ch-3 Sp. DC in the center SC. Rep from * around, ending with 3 DC in the last Ch-3 Sp. Sl St to the top of the Beg Ch 3 to join.

Round 7 (Final Lace Frame): Ch 1 (does not count as St). SC in the same St. SC in the next 2 Sts. *Ch 5, Sk 4 Sts, SC in the next St. Ch 5, Sk 4 Sts, SC in the corner Ch-2 Sp. Work (SC, Ch 3, SC) in the corner Ch-2 Sp. SC in the next St. Rep from * around. Ensure you have the same number of Ch-5 Sp’s on each side. Sl St to the Beg SC to join.
Round 8 (Joining Round – Solid Edge): Sl St to the first Ch-5 Sp. Ch 3 (counts as 1st DC). 4 DC into the same Sp. *5 DC into the next Ch-5 Sp. Work 3 DC into the corner Ch-3 Sp. Rep from * around. Sl St to the top of the Beg Ch 3 to join.
Finishing Motif: Fasten off, weave in ends. Block the square firmly. (Make approximately 5-7 motifs for a standard runner).
Part 2: Assembly (Join-As-You-Go)
The motifs are joined along the edges of Round 8 as the second motif is being completed. This creates a seamless connection and eliminates tedious sewing.
Joining Motif 2 to Motif 1 (along one side):
Work Motif 2 exactly as written through Round 7. Start Round 8 on Motif 2.
- Start Corner: Sl St to the corner Ch-3 Sp. Ch 3 (counts as 1st DC). 2 DC into the corner Sp. Ch 1. Sl St into the corner Ch-3 Sp of Motif 1. Ch 1. 3 DC into the corner Sp of Motif 2. (First joined corner established)
- First Side: DC in the next 5 Sts of Motif 2.
- Joining Point: Ch 1. Sl St into the next Ch-5 Sp of Motif 1. Ch 1.
- DC in the next 5 Sts of Motif 2.
- Joining Point: Ch 1. Sl St into the next Ch-5 Sp of Motif 1. Ch 1.
- Next Corner: 3 DC into the corner Sp of Motif 2. Ch 1. Sl St into the next corner Ch-3 Sp of Motif 1. Ch 1. 3 DC into the corner Sp of Motif 2.
- Continue working the remaining three sides of Motif 2 as written in Round 8.
Joining Sequence: Join a straight line of 5 to 7 motifs along one edge to form the length of the runner.
Part 3: Edging and Finishing
Once all motifs are joined in a line, a final border is added to define the edges.
Round 1 (Foundation): Rejoin yarn to a corner Ch-3 Sp on the top/bottom edge of the runner.
- Ch 1, SC evenly around the entire perimeter of the runner (top, bottom, and short ends).
- Work 3 SC in each corner Ch-3 Sp.
- When crossing a motif join point, work a SC through both adjacent stitches for a tight connection.
- Sl St to the Beg SC.
Round 2 (Shell Border): Ch 3 (counts as 1st DC).
- Work 3 DC into the same St.
- *Sk 2 SC, SC in the next SC. Sk 2 SC, work Petal Shell (PS) (3 DC, Ch 1, 3 DC) in the next SC. Rep from * around.
- When you reach a corner, work a large shell (5 DC, Ch 1, 5 DC) into the center SC of the corner 3-SC group.
- Sl St to the top of the Beg Ch 3 to join.
Finishing:
- Fasten off and weave in all ends securely.
- Blocking is Essential: Lay the finished runner flat, gently stretch it, and mist it with water (or steam block). Pin the points to emphasize the intricate lace design and let it dry completely.

Your Sunburst Mandala Runner is now ready to decorate your space!
Video tutorial: