
Crocheting is a timeless craft, and granny squares are one of the most popular and beginner-friendly motifs. They’re versatile, colorful, and perfect for everything from blankets to bags. In this tutorial, we’re going to add a fun twist to the traditional granny square: a Crochet Granny Square Star!
This step-by-step guide is perfect for beginners and experienced crocheters alike who are looking to expand their pattern repertoire. Let’s get started!
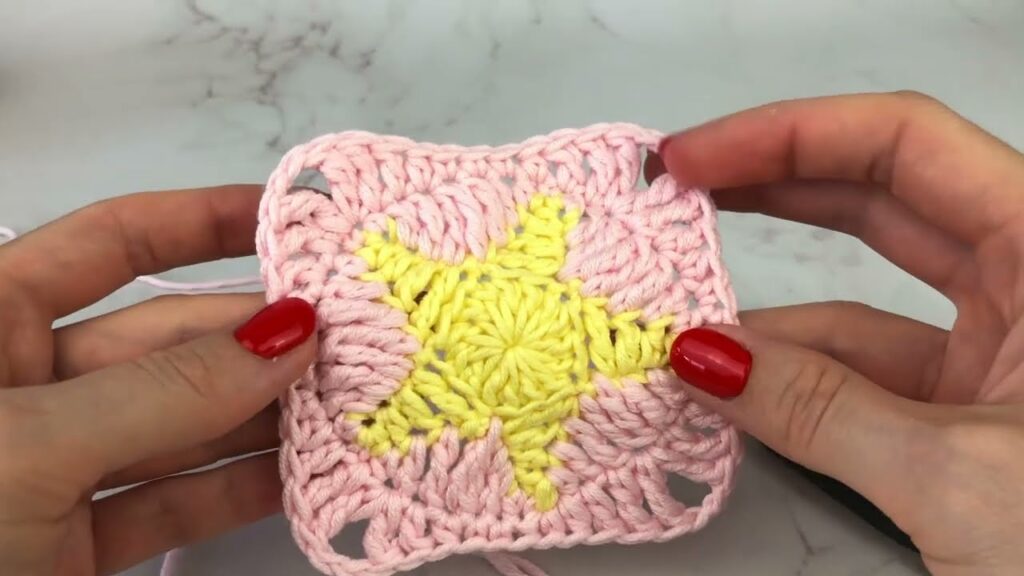
✨ What is a Granny Square Star?
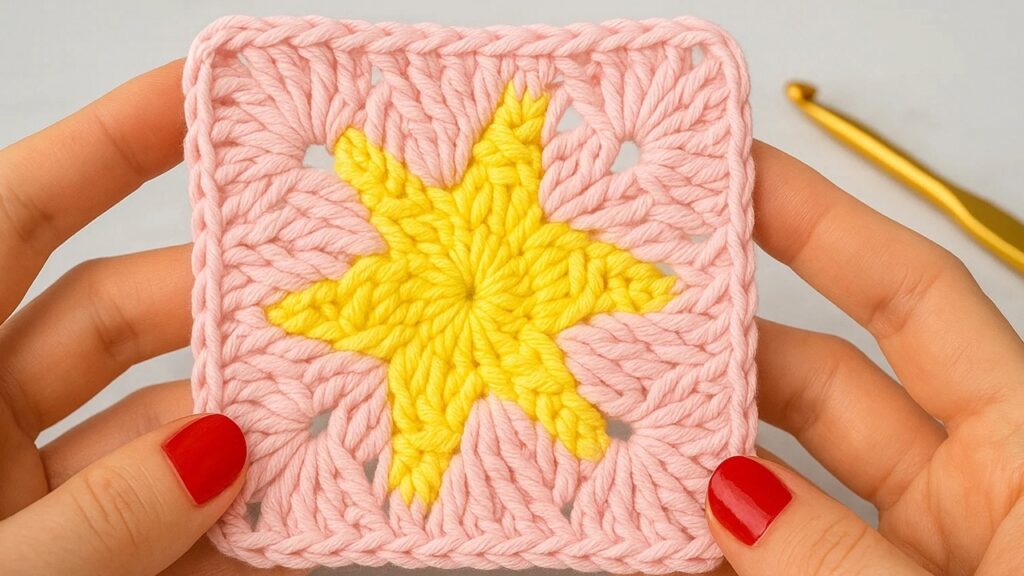
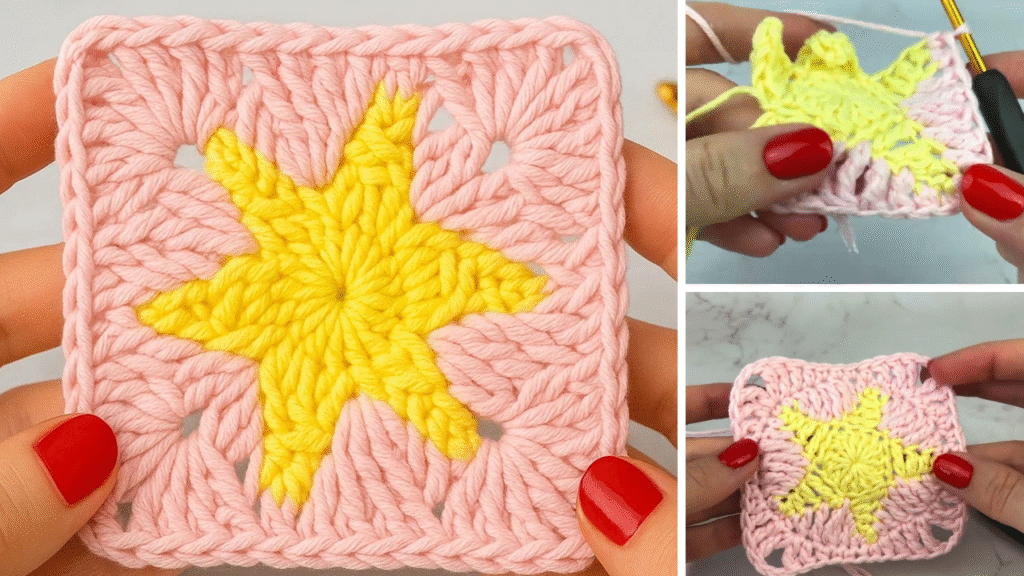
A Granny Square Star combines the charm of a classic granny square with a beautiful central star motif. The center features a star shape, which is then squared off to form a standard square that can be joined with others.
🧶 Materials You’ll Need:
- Yarn: Worsted weight yarn (4) in two or more contrasting colors
- Hook: 5.0 mm (H-8) crochet hook
- Tapestry needle (for weaving in ends)
- Scissors
- Stitch marker (optional)
💡 Tip: Choose a light or neutral background color to make the star pop!
📏 Finished Size
Approximately 5 x 5 inches, depending on yarn and hook used. You can adjust the size by using a different yarn weight or adding rounds.
🧵 Stitches & Abbreviations (US Terms)
- ch – chain
- sl st – slip stitch
- sc – single crochet
- dc – double crochet
- tr – treble crochet
- sp – space
- st(s) – stitch(es)
⭐ Step-by-Step Instructions
🔸 Round 1 – Start the Star
- Make a magic ring (or ch 4 and join to form a ring).
- Ch 3 (counts as dc), 2 dc into ring, ch 2.
- (3 dc into ring, ch 2) repeat 4 more times (total of 6 clusters).
- Join with a sl st to the top of ch-3.
You now have a hexagonal base for your star!
🔸 Round 2 – Form the Star Points
- Sl st into next 2 dc and into ch-2 sp.
- (Ch 3, 2 tr, ch 3, sl st) in same sp – this forms one point.
- Sl st into next 3 dc and into next ch-2 sp.
- Repeat step 2 in each ch-2 space around (total of 6 star points).
- Fasten off and weave in ends.
🌟 A beautiful star shape should now be visible!
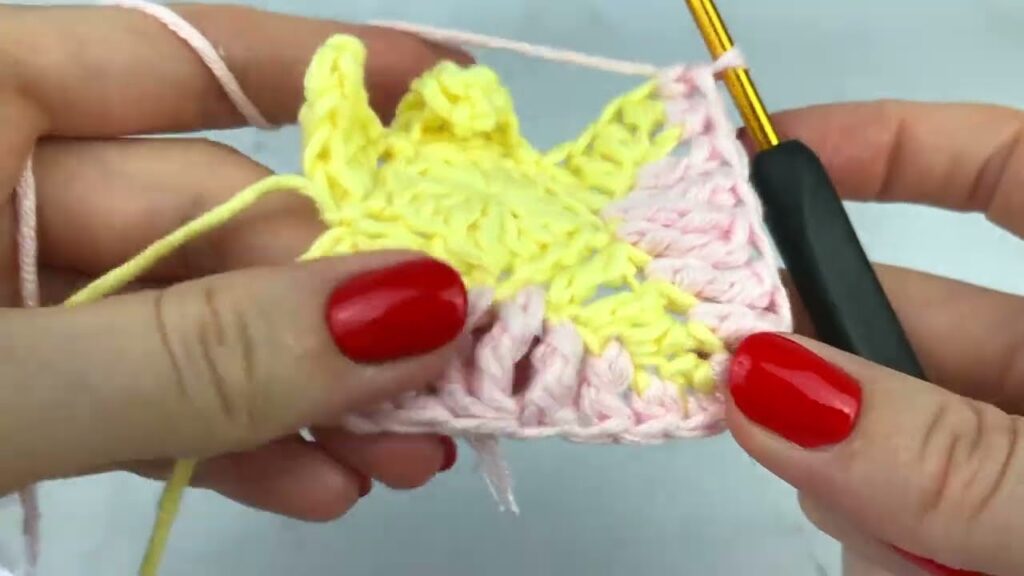
🔸 Round 3 – Start Squaring Off
Switch to background color yarn.
- Attach yarn in space between any two star points.
- Ch 3 (counts as dc), 2 dc into same space, ch 1.
- (3 dc into next space between points, ch 1) repeat 5 times.
- Join with sl st to top of ch-3.
This fills the gaps between the points and starts forming a squarish shape.
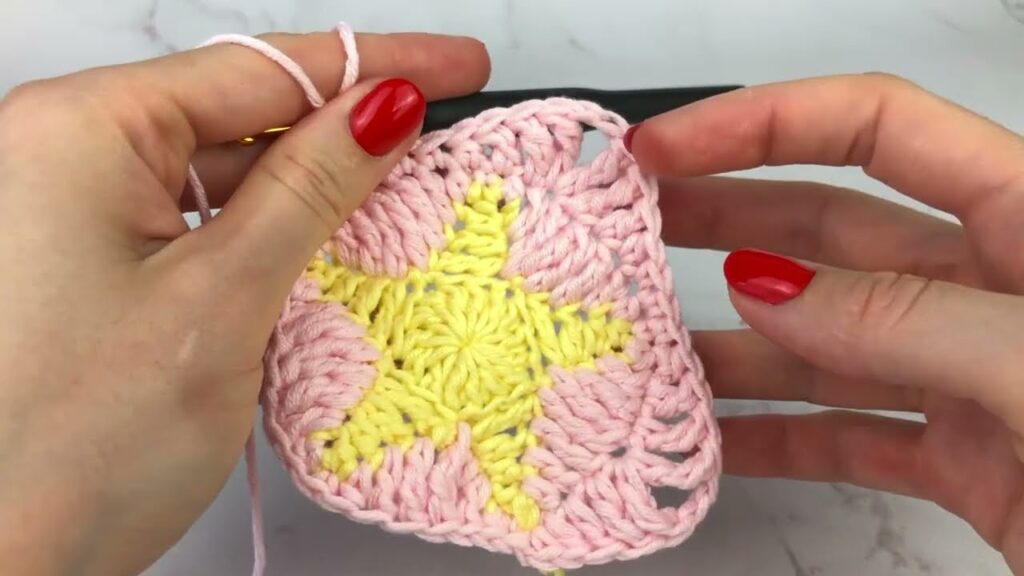
🔸 Round 4 – Form the Square
- Sl st into next dc and into ch-1 sp.
- Ch 3 (counts as dc), 2 dc, ch 2, 3 dc in same sp – corner made.
- (3 dc in next sp, 3 dc in next sp, 3 dc, ch 2, 3 dc in next sp) – repeat around.
- Join with sl st to top of ch-3. Fasten off.
You now have a finished Granny Square with a star center!

🎨 Optional: Add More Rounds
To increase the size:
- Continue with granny square rounds (3 dc clusters separated by ch-1, corners with ch-2).
- Change colors every round for a vibrant effect.
🧺 Uses for Granny Square Stars
- Star-themed blankets
- Decorative pillows
- Baby clothes
- Wall hangings
- Combine with plain granny squares for a mixed design
📝 Final Tips
- Block your squares to keep them neat and uniform.
- Use stitch markers if you struggle to find the beginning of rounds.
- Mix and match yarn colors for a bold look or stick to neutrals for something more subtle.
📷 Share Your Work!
Don’t forget to share your Crochet Granny Square Star creations on social media using hashtags like #GrannyStarSquare or #CrochetStarSquare. You can inspire others and even get new color combo ideas!
Happy crocheting! 🧶🌟 Let me know if you’d like a printable PDF version or a visual diagram to go with this pattern.
Video tutorial:


