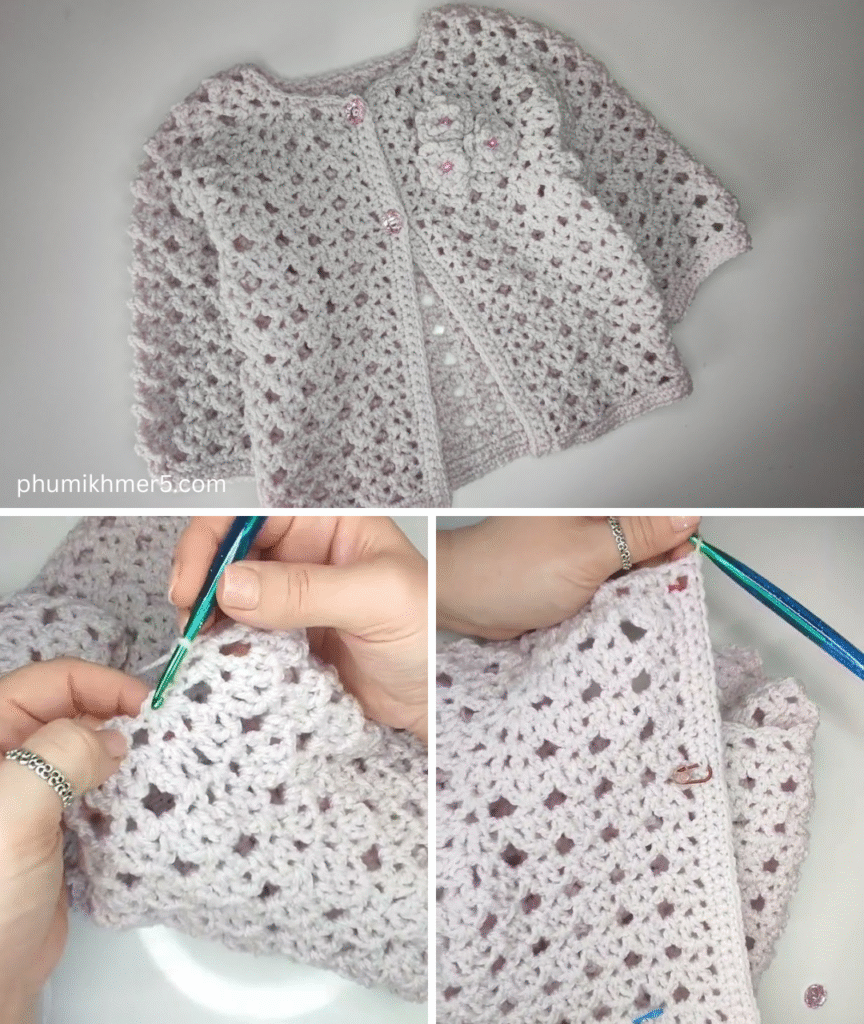
How to Crochet a Summer Lace Cardigan for Girls: A Light & Airy Layer of Charm
A crocheted cardigan for a little girl is always a delightful project, but for summer, a lace cardigan truly shines! It’s the perfect light and airy layer for cool evenings, air-conditioned rooms, or simply adding a touch of elegant charm to any outfit. This detailed tutorial will guide you through creating a beautiful summer lace cardigan for a girl, focusing on a top-down, seamless construction that makes for a comfortable fit and minimizes finishing work.
We’ll use an open, lacy stitch pattern that is breathable and drapes beautifully, perfect for warm-weather wear.
Why Crochet a Summer Lace Cardigan?
- Lightweight & Breathable: The open lace pattern and summer-friendly yarns make it ideal for warmer temperatures.
- Versatile Layering: Perfect over dresses, t-shirts, or swimsuits for a touch of warmth without being heavy.
- Elegant & Charming: The lace stitch adds a delicate, pretty touch that elevates any little girl’s outfit.
- Skill Building: Practice top-down garment construction, raglan shaping, and working with openwork stitches.
- Seamless Construction: Minimizes seaming, resulting in a smoother, more comfortable garment for active kids.
1. Planning Your Summer Lace Cardigan: Size & Materials
Careful planning ensures your cardigan is comfortable, fits well, and has that lovely summer drape.
- Size: This pattern is primarily written for Girls’ Size 2T (Toddler), with notes on how to adjust for other common girls’ sizes.
- Finished Chest Circumference (approx.):
- 12-18 Months: 20 inches (51 cm)
- 2T: 22 inches (56 cm)
- 3T-4T: 24 inches (61 cm)
- 5-6: 26 inches (66 cm)
- Pro Tip: Measure the girl’s actual chest for the best fit, and add 1-2 inches (2.5-5 cm) for positive ease (wiggle room).
- Finished Chest Circumference (approx.):
- Yarn Choice (Crucial for Summer Comfort!):
- Fiber: Opt for 100% cotton, cotton blends, bamboo, or linen blends. These fibers are breathable, absorb moisture, have excellent drape, and feel cool against the skin. Avoid wool or heavy acrylics for this particular project.
- Weight: DK (Light Worsted / #3) weight yarn is ideal for lace cardigans. It’s light enough for summer but still allows for good stitch definition.
- Quantity:
- 12-18 Months: Approx. 350-400 yards (320-365 meters)
- 2T: Approx. 400-450 yards (365-410 meters)
- 3T-4T: Approx. 450-500 yards (410-457 meters)
- 5-6: Approx. 500-600 yards (457-550 meters)
- Always buy a bit extra to be safe!
- Lace Stitch Pattern: We’ll use a variation of the V-stitch to create an open, lacy fabric that works well with increases.
2. Materials You’ll Need
- Yarn: Your chosen quantity of DK (Light Worsted / #3) weight cotton or cotton blend yarn.
- Crochet Hook: 4.0 mm (G-6 US). (Or the size needed to obtain your gauge.)
- Scissors: For cutting yarn.
- Yarn Needle (Tapestry Needle): For weaving in ends.
- Stitch Markers (Essential!): At least 4, for marking raglan increase points.
- Measuring Tape: Crucial for checking gauge and garment dimensions.
- Small Buttons (Optional): 3-5 small (0.5-0.75 inch / 1.25-2 cm) buttons.
- Needle and Thread: For attaching buttons.
3. Essential Crochet Stitches & Techniques (Review & Practice)
Ensure you’re comfortable with these before you begin:
- Slip Knot
- Chain (ch)
- Slip Stitch (sl st): For joining.
- Single Crochet (sc)
- Double Crochet (dc)
- V-stitch (V-st): (Dc, ch 1, dc) all into the same stitch or chain space. This forms the basis of our lace pattern.
- Foundation Single Crochet (FSC) or Foundation Half Double Crochet (FHDC): (Recommended for garment necklines!) These create a stretchy, non-restrictive start. If new, a traditional chain and first row of sc/hdc works too. This tutorial uses a chain.
- Working in Rows: Turning your work at the end of each row.
- Understanding Turning Chains: Ch 3 at the start of a row will count as your first DC.
- Raglan Increases: A specific increase method to shape the shoulders and sleeves in top-down garments.
4. Gauge Swatch: Your Blueprint for the Right Fit (Do Not Skip!)
Gauge is absolutely critical for garments to ensure the correct size and drape.
- Make a Gauge Swatch (using the V-stitch pattern):
- Chain 22.
- Row 1: Dc in 4th ch from hook, ch 1, sk 1 ch, dc in next ch. Repeat from * to * across to last 2 ch. Ch 1, sk 1 ch, dc in last ch. (You’ll have 10 dc and 9 ch-1 spaces).
- Row 2: Ch 3 (counts as 1st dc), turn. Dc in first ch-1 sp. Ch 1, sk dc, dc in next ch-1 sp. Repeat from * to * across. Ch 1, sk dc, dc in top of turning chain.
- Repeat Row 2 until your swatch measures about 4 inches (10 cm) tall.
- Measure: Lay your swatch flat. Count how many dc stitches (and their corresponding ch-1 spaces) you have in 4 inches (10 cm) horizontally, and how many rows you have in 4 inches (10 cm) vertically.
- Target Gauge: Approximately 16 dc + 8 ch-1 sps (or 8 V-sts) in 4 inches (10 cm) and 8-9 rows in 4 inches (10 cm).
- Adjust:
- If you have more stitches/rows, your tension is too tight; go up a hook size.
- If you have fewer stitches/rows, your tension is too loose; go down a hook size.
- Remake your swatch until you match the target gauge as closely as possible.
5. Let’s Crochet Your Summer Lace Cardigan! (Top-Down Construction)
We’ll start at the neckline and work downwards, shaping the yoke, then separating for the body and sleeves.
Pattern Note: Ch 3 at the start of a row counts as the first DC. Ch 1 spaces form part of the V-stitch pattern.
Part 1: The Yoke (Neckline & Shoulder Shaping)
This section creates the neckline and the increases that form the shoulders and armholes. The number of stitches will be based on the desired size.
- Foundation Chain (Neckline): Ch 52 (56, 60, 64).
- 12-18 Months: Ch 52
- 2T: Ch 56
- 3T-4T: Ch 60
- 5-6: Ch 64
- Row 1 (Yoke Setup): Dc in 4th ch from hook (counts as 2 dc).
- [Right Front Panel] Dc in next 6 (7, 8, 9) chs. Total 7 (8, 9, 10) dc.
- [1st Raglan Corner] (Dc, ch 1, dc) in next ch. Place stitch marker in ch-1 sp.
- [1st Sleeve Panel] Dc in next 8 (9, 10, 11) chs. Total 9 (10, 11, 12) dc.
- [2nd Raglan Corner] (Dc, ch 1, dc) in next ch. Place stitch marker in ch-1 sp.
- [Back Panel] Dc in next 14 (16, 18, 20) chs. Total 15 (17, 19, 21) dc.
- [3rd Raglan Corner] (Dc, ch 1, dc) in next ch. Place stitch marker in ch-1 sp.
- [2nd Sleeve Panel] Dc in next 8 (9, 10, 11) chs. Total 9 (10, 11, 12) dc.
- [4th Raglan Corner] (Dc, ch 1, dc) in next ch. Place stitch marker in ch-1 sp.
- [Left Front Panel] Dc in next 7 (8, 9, 10) chs. Total 8 (9, 10, 11) dc.
- Total stitches: 68 (76, 84, 92) dc + 4 ch-1 sps.
- Row 2 (Lace Yoke Increase): Ch 3 (counts as 1st dc), turn.
- Work (Dc, ch 1, dc) into the first dc of the row (this creates the first V-stitch on the edge).
- Ch 1, sk next st, (dc, ch 1, dc) into next st. Repeat from * to * across until you reach the 1st marked ch-1 sp.
- (Dc, ch 1, dc) into the marked ch-1 sp (move marker to new ch-1 sp).
- Ch 1, sk next st, (dc, ch 1, dc) into next st. Repeat from * to * across until you reach the 2nd marked ch-1 sp.
- (Dc, ch 1, dc) into the marked ch-1 sp (move marker).
- Ch 1, sk next st, (dc, ch 1, dc) into next st. Repeat from * to * across until you reach the 3rd marked ch-1 sp.
- (Dc, ch 1, dc) into the marked ch-1 sp (move marker).
- Ch 1, sk next st, (dc, ch 1, dc) into next st. Repeat from * to * across until you reach the 4th marked ch-1 sp.
- (Dc, ch 1, dc) into the marked ch-1 sp (move marker).
- Ch 1, sk next st, (dc, ch 1, dc) into next st. Repeat from * to * across. Work the last (dc, ch 1, dc) into the top of the turning chain of the previous row.
- This pattern creates new V-stitches within the body sections and at each raglan corner.
- Repeat Row 2: Continue repeating Row 2 for a total of 6 (7, 8, 9) increase rows.
- 12-18 Months: 6 rows total
- 2T: 7 rows total
- 3T-4T: 8 rows total
- 5-6: 9 rows total
- At the end of the final yoke row, your piece should lay relatively flat and the sleeve sections should be wide enough to form armholes comfortably.
Part 2: Separating Body and Sleeves
This step creates the main body and defines the armholes, maintaining the lace pattern.
- Next Row (Separation): Ch 3 (counts as 1st dc), turn.
- Work (dc, ch 1, dc) into the first dc of the row.
- Ch 1, sk next st, (dc, ch 1, dc) into next st. Repeat from * to * across the Front Panel until you reach the 1st marked ch-1 sp.
- (Dc, ch 1, dc) into the marked ch-1 sp.
- Skip all stitches and V-stitches of the 1st Sleeve Panel until you reach the 2nd marked ch-1 sp.
- (Dc, ch 1, dc) into the 2nd marked ch-1 sp.
- Ch 1, sk next st, (dc, ch 1, dc) into next st. Repeat from * to * across the Back Panel until you reach the 3rd marked ch-1 sp.
- (Dc, ch 1, dc) into the 3rd marked ch-1 sp.
- Skip all stitches and V-stitches of the 2nd Sleeve Panel until you reach the 4th marked ch-1 sp.
- (Dc, ch 1, dc) into the 4th marked ch-1 sp.
- Ch 1, sk next st, (dc, ch 1, dc) into next st. Repeat from * to * across the Left Front Panel. Work the last (dc, ch 1, dc) into the top of the turning chain of the previous row.
- You will now be working on the main body of the cardigan.
Part 3: The Body (Working Downwards)
Continue the lace pattern down the body until you reach the desired length.
- Body Row 1: Ch 3 (counts as 1st dc), turn.
- Work (dc, ch 1, dc) into the first dc of the row.
- Ch 1, sk next st, (dc, ch 1, dc) into next st. Repeat from * to * across the entire body, working V-stitches into the central dc of the corner V-stitches from the separation row.
- Work the last (dc, ch 1, dc) into the top of the turning chain of the previous row.
- Repeat Body Row 1: Continue repeating Body Row 1 until the cardigan measures approximately 9 (10, 11, 12) inches / 23 (25.5, 28, 30.5) cm from the neckline down to the bottom edge.
- Try it on a doll or measure against the girl’s torso for the best length.
- Fasten Off, leaving a tail for weaving.
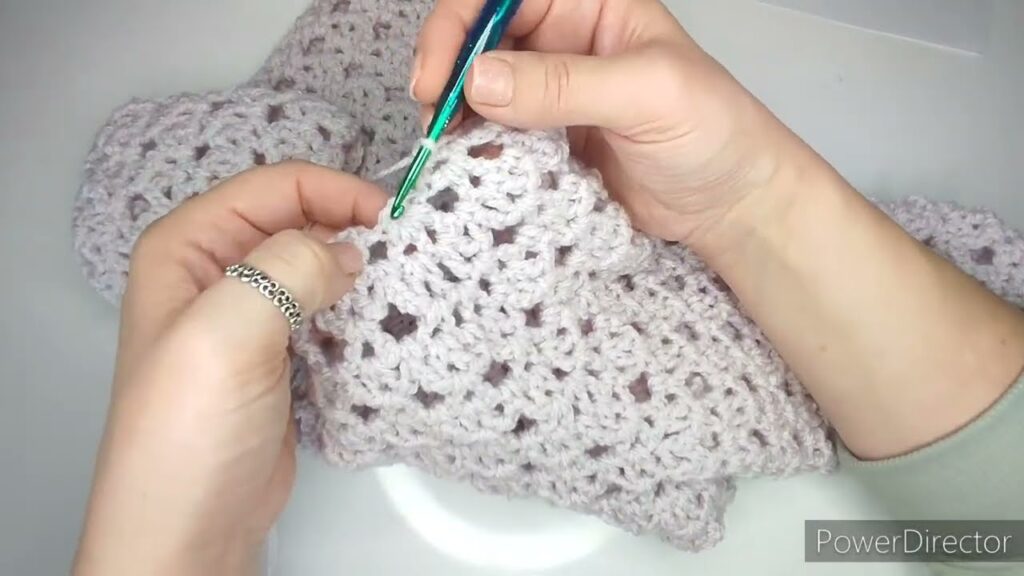
Part 4: The Sleeves (Short Summer Sleeves)
For a summer cardigan, short sleeves are perfect.
- Join Yarn: Join yarn with a sl st in the armpit area of one armhole (e.g., in the ch-1 sp from the corner V-stitch where you skipped stitches).
- Sleeve Round 1: Ch 3 (counts as 1st dc).
- Work (dc, ch 1, dc) into the next ch-1 space around the armhole, and into the center of any V-stitch on the armhole.
- Join with a sl st to the top of the beginning ch 3.
- Adjust stitch count for a neat circle of V-stitches. You might need to work a (dc, ch 1, dc) directly into a dc if no ch-1 sp aligns perfectly, or skip a stitch if it seems too full.
- Sleeve Round 2 (Optional, for slightly longer short sleeves): Ch 3. Work (dc, ch 1, dc) into each ch-1 sp around. Join with a sl st.
- Sleeve Edging (Optional): Ch 1. Sc in each dc and each ch-1 sp around. Join with a sl st.
- Fasten Off, leaving a tail for weaving.
- Repeat for the second sleeve.
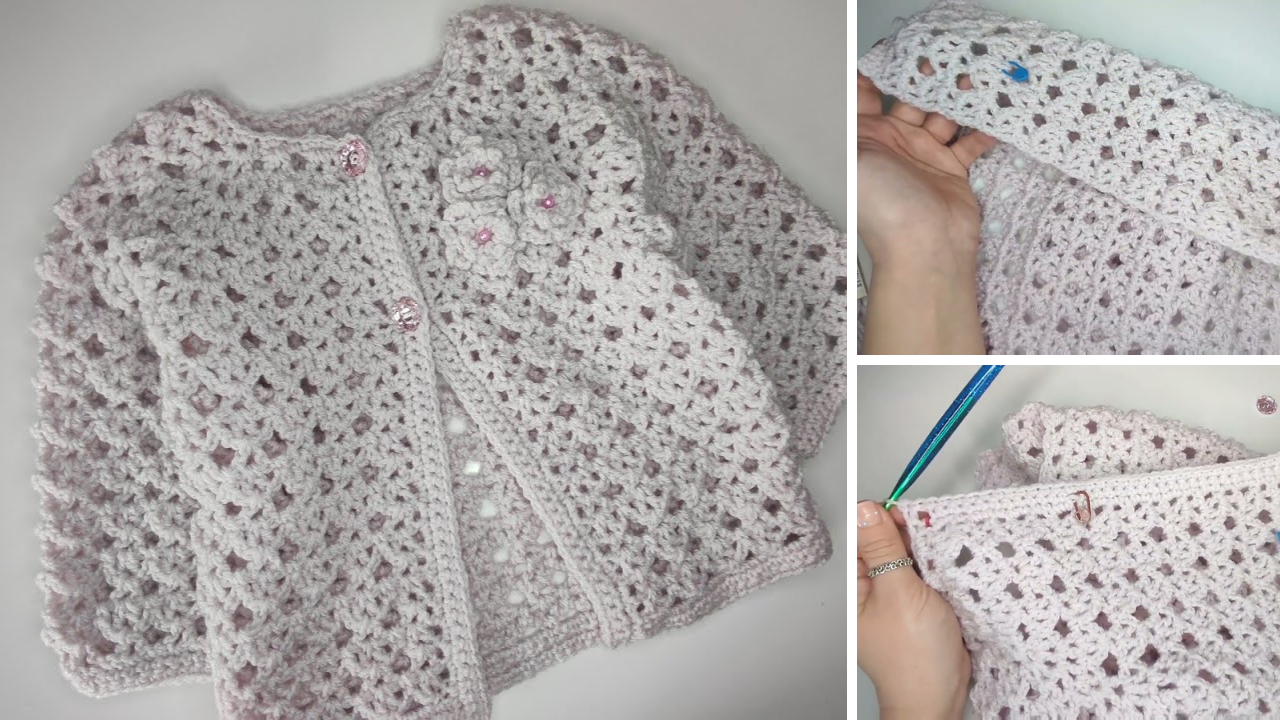
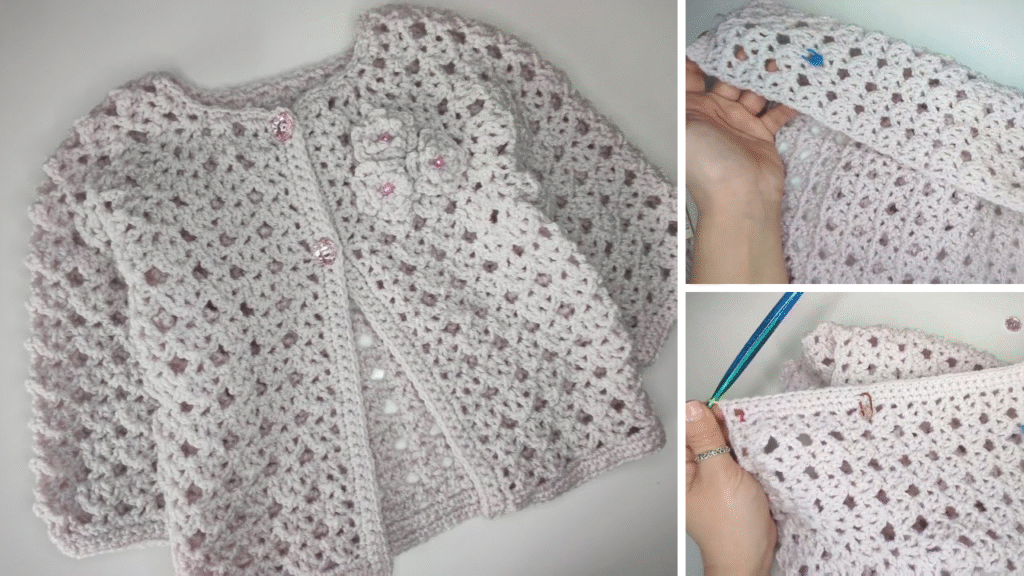
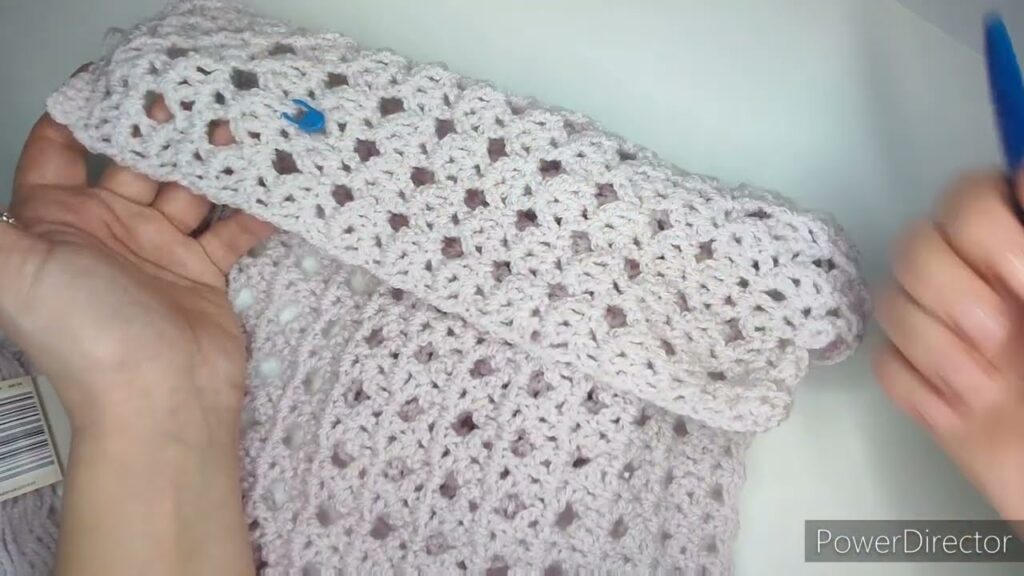
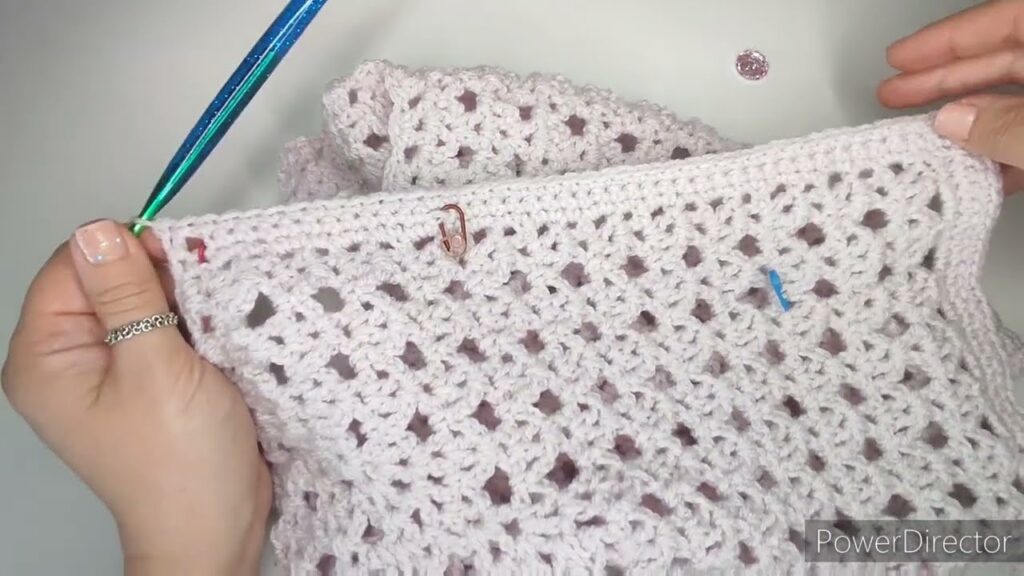
6. Edging & Finishing Touches
A simple border adds a neat finish to the front bands and hem.
- Front Bands & Hem Edging:
- Join yarn with a sl st at the bottom right corner of the cardigan (looking at the front).
- Row 1 (Bottom Hem): Ch 1 (does NOT count as a st). Sc in each V-stitch (work into the ch-1 sp) and into each dc across the entire bottom hem.
- Row 2 (Front Bands & Neckline): Ch 1, turn. Sc evenly up the side of the right front panel (about 1 sc per dc row end, or 2 sc per V-stitch row for a smoother edge).
- When you reach the neckline, sc evenly around the entire neckline.
- Continue sc evenly down the side of the left front panel to the bottom.
- Do NOT fasten off yet if adding buttonholes.
Adding Buttonholes (If Using Buttons):
Work these on the Right Front Panel if you want buttons on the left (traditional boys’ wear), or Left Front Panel for buttons on the right (traditional girls’ wear). This tutorial assumes traditional Girls’ Wear (buttons on Right Front Panel).
- Buttonhole Row (Optional): Ch 1, turn.
- Sc in the first few sc sts along the right front band.
- Make Buttonhole: Ch 2 (or 3, depending on button size), sk 2 (or 3) sts. Sc in next few sts. Repeat for desired number of buttonholes (e.g., 3-5 evenly spaced).
- Sc in remaining sc sts up to neckline. Sc around neckline. Sc down other front panel. Sc across bottom hem. Sl st to join.
- Final Edging Row (Optional): Ch 1, turn. Sc in each sc around, working 2 (or 3) sc into each ch-2 (or ch-3) buttonhole space. Join with sl st.
- Fasten Off.
7. Final Assembly & Blocking
- Weave in All Ends: Use your yarn needle to carefully weave in any remaining loose yarn tails. Ensure they are very secure, especially for kids’ garments.
- Attach Buttons (If Using): Sew your small buttons onto the opposite front band, aligning them with the buttonholes. Secure them very well with needle and thread.
- Blocking (Highly Recommended!):
- Blocking is crucial for lace garments to open up the stitch pattern, even out stitches, and set the final shape and drape.
- Wet Blocking (for cotton/blends): Gently submerge the cardigan in cool water with a little mild soap. Squeeze out excess water without twisting. Lay it flat on a clean towel or blocking mats. Gently shape it to the desired measurements (chest, length, sleeve opening), gently stretching the lace to open it up. Pin in place if using mats. Let it air dry completely (24-48 hours).
8. Care for Your Crocheted Summer Lace Cardigan
Always refer to your yarn label for specific care instructions. For most cotton or cotton blend yarns:
- Machine Washable: Usually machine wash on a gentle cycle in cool water. Place in a mesh laundry bag to protect the delicate lace.
- Drying: Lay flat to air dry to maintain shape and prevent stretching or distortion of the lace pattern. Avoid hanging wet garments.
- Avoid Bleach: Do not use bleach unless specifically instructed by the yarn label.
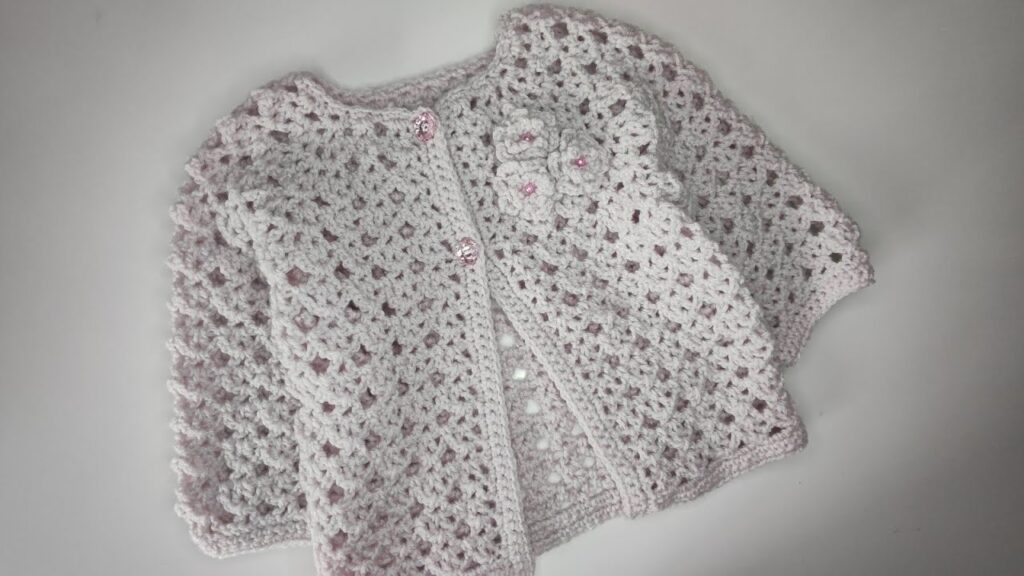
Congratulations! You’ve just crocheted a beautiful, airy, and practical summer lace cardigan for a special little girl. This charming handmade garment is sure to be a treasured item, adding a touch of delicate style to her warm-weather wardrobe. Enjoy seeing it on her!
Video tutorial:


