
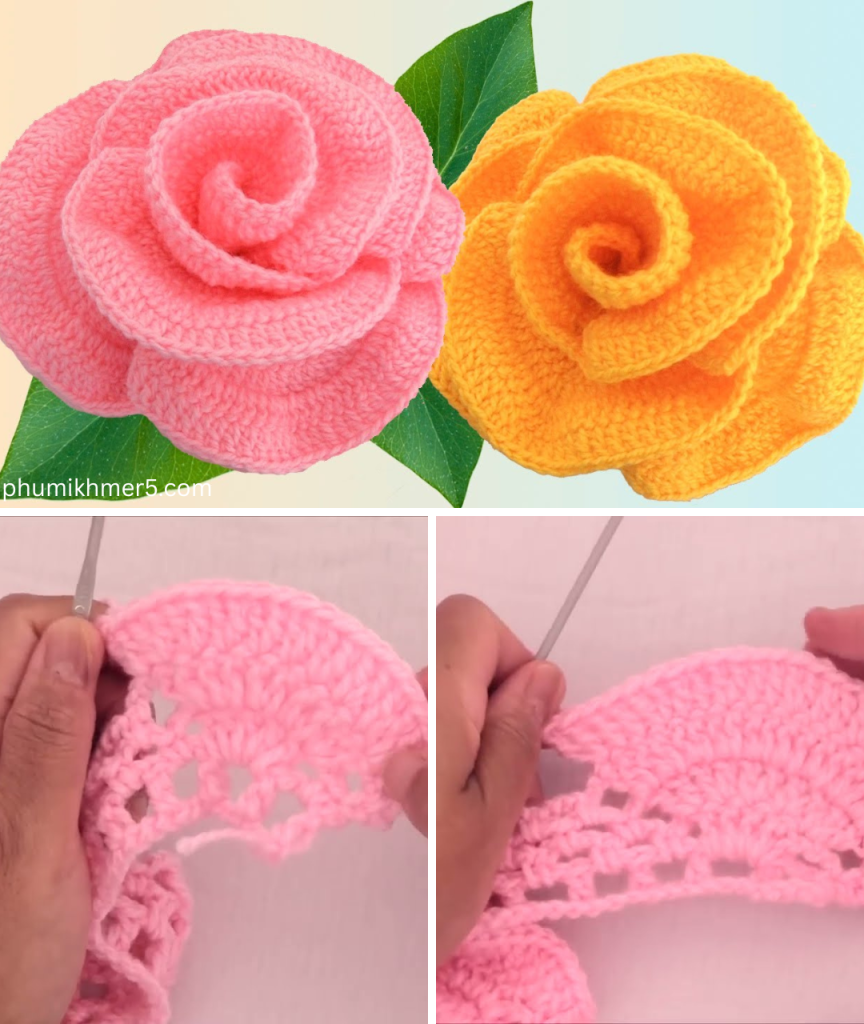
Crochet flowers have long been a favorite among fiber artists for their charm, versatility, and timeless elegance. Among the many floral designs, 3D giant roses stand out for their bold beauty and intricate texture. These oversized blooms can be used for bridal bouquets, home décor, fashion embellishments, or even as centerpieces for events and special occasions.
In this comprehensive guide, you’ll learn how to crochet 3D giant roses that are both striking and surprisingly achievable, whether you’re a confident beginner or an experienced crocheter ready to bloom into a new technique.
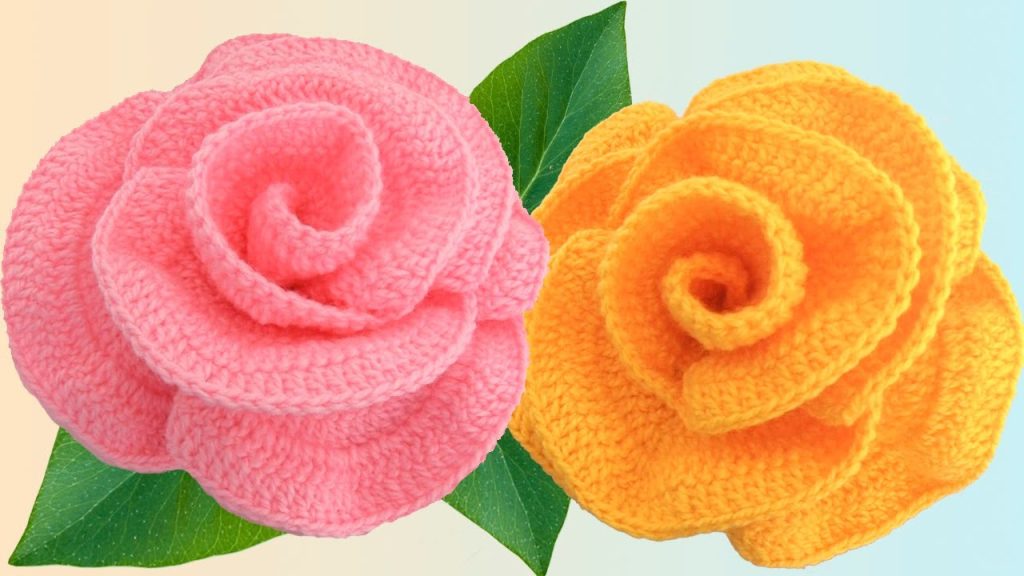
🧶 What Are 3D Giant Crochet Roses?
A 3D giant crochet rose is a layered flower made with multiple rows of petals, gradually increasing in size to form a realistic, spiraled shape. Unlike flat rose appliqués, 3D roses are sculptural and textured, mimicking the look of a blooming garden rose.
What makes them “giant” is not just the petal count but the scale — they can measure from 6 inches to over 12 inches in diameter, depending on the yarn and hook size.
🧵 Materials You Will Need
To create a 3D giant crochet rose, you’ll need:
🧶 Yarn
- Worsted weight (Category 4) or bulky weight (Category 5) yarn for large size
- Recommended fiber: Acrylic, cotton, or polyester (easy to shape and holds structure)
- Choose rose-inspired colors like red, pink, white, burgundy, or even bold hues like teal or purple for an artistic flair
🧷 Tools
- Crochet hook: 5.5 mm (I/9) to 8 mm (L/11), depending on yarn thickness
- Tapestry needle for sewing
- Scissors
- Hot glue gun (optional for mounting)
- Floral wire or stem (optional if making a bouquet)
📐 Size Notes
The size of your rose will depend on:
- Yarn thickness
- Number of petal rows
- Stitch tension
A rose with 4 to 6 petal rows in worsted-weight yarn and a 6.5 mm hook typically measures 8–10 inches wide when fluffed and shaped properly.

🌸 Key Techniques and Stitches
Before starting, make sure you’re familiar with the following crochet stitches (US terms):
- ch – chain
- sl st – slip stitch
- sc – single crochet
- hdc – half double crochet
- dc – double crochet
- tr – treble crochet
Most of the flower will be made using dc and tr stitches for the petal shaping.
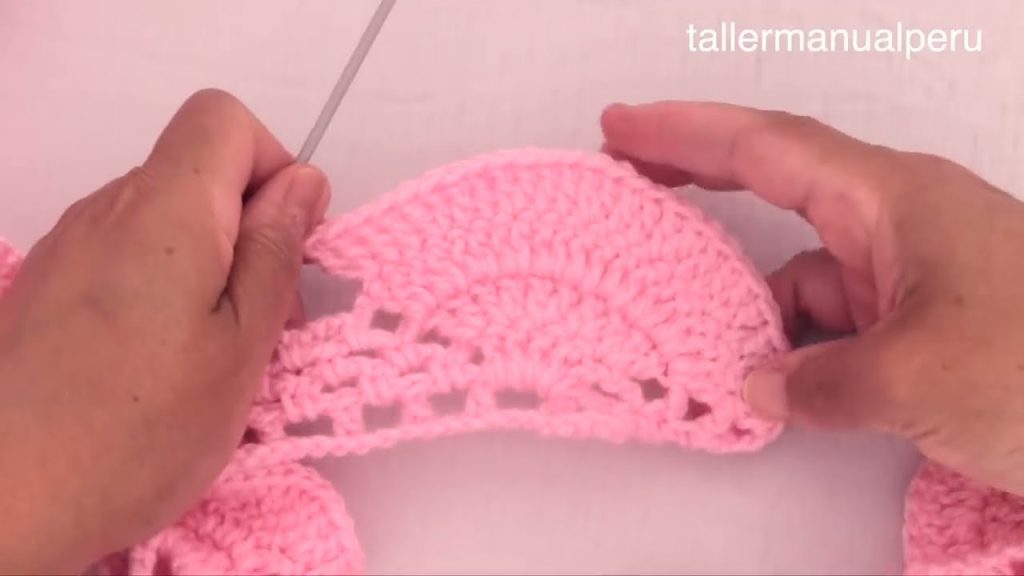
🌹 Part 1: How to Crochet the Base Strip for Petals
The rose is built from a long strip of connected petals that will be rolled into a spiral.
Step 1: Create a Foundation Chain
- Ch 70 to 100 depending on desired fullness.
- 70 chains = smaller rose (approx. 6–7 petals)
- 100+ chains = large, full rose
Step 2: Row 1 – Base Row
- In 3rd ch from hook, dc across the entire row.
- Turn. You now have a row of dc stitches forming the base for your petals.
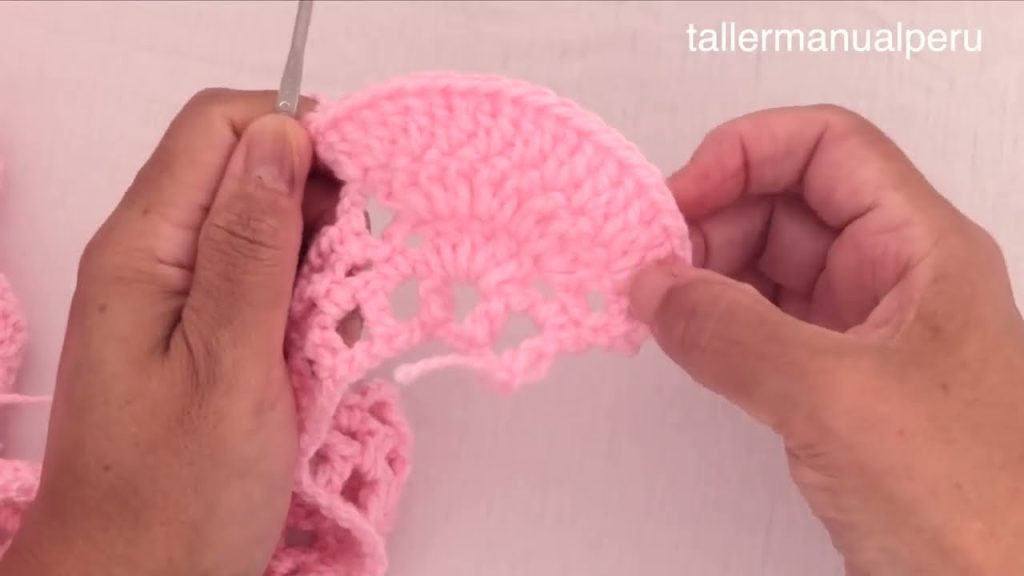
🌹 Part 2: Crochet the Petals
The petals are created in clusters, each spanning a set number of stitches. You’ll work multiple layers of petals in increasing sizes.
Row 2 – First Petal Layer (Inner Bud Petals)
- In the next 5 stitches, work:
- (sc, hdc, 3 dc, hdc, sc) — 1 petal
- Repeat this petal cluster across the row, every 5 stitches
- You should have ~14 petals
Fasten off. This creates the tight inner spiral.
Row 3 – Optional Second Layer (More Volume)
- Attach yarn to the back loops of the dc row.
- Work larger petals:
- In every 6 stitches: (sc, hdc, 4 dc, hdc, sc)
- Continue across row
Row 4 – Outer Petal Layer
- Repeat again using even larger petals:
- (sc, hdc, 5 dc, tr, 5 dc, hdc, sc)
- This layer creates the flared outer petals
🪡 Part 3: Assembling the Giant Rose
After creating the petal strip, it’s time to shape the flower.
Step 1: Rolling the Rose
- Start with the smallest petals, tightly rolling them to form the inner bud.
- Continue spiraling the strip, allowing the outer petals to flare more loosely.
Step 2: Sewing the Base
- Using a yarn needle and matching yarn, stitch through the bottom edges of each layer to secure.
- Sew across layers multiple times to stabilize the structure.
Optional: Hot Glue
- For permanent mounting (e.g., on a board or bouquet), use hot glue instead of sewing.
💡 Design Variations
🌈 Color Play
- Use ombre yarn or alternate petal colors (light to dark) for a gradient effect
- Make two-tone roses by changing colors mid-row
💮 Layered Petals
- Instead of one strip, create multiple rows of petals and stack them for extra volume
🍃 Add Leaves
- Use green yarn to crochet simple leaves:
- Ch 10, sc, hdc, dc, tr, dc, hdc, sc in return for a leaf shape
- Sew them to the rose base
🏵️ Creative Uses for 3D Giant Crochet Roses
These bold flowers can be used in a variety of ways:
| Use Case | Description |
|---|---|
| Wall Art | Mount roses on a hoop or canvas for a floral wall |
| Bouquets | Attach floral stems and arrange for weddings |
| Headbands & Clips | Sew to elastic bands or barrettes |
| Bag Appliqués | Add to tote bags, backpacks, or clutches |
| Gift Toppers | Use in place of bows for an elegant presentation |
| Photo Props | Ideal for maternity and baby photoshoots |
🧺 Care Instructions
- Dust regularly if used as décor
- Hand wash gently with cold water if needed
- Reshape petals while damp, allow to air dry
- Avoid ironing directly; steam from a distance for reshaping
⏳ Time Estimate
| Step | Estimated Time |
|---|---|
| Crochet base strip | 30–45 minutes |
| Crochet petals | 1–2 hours |
| Assembly & finishing | 30–60 minutes |
| Total | 2–4 hours |
✨ Final Thoughts
Crocheting a 3D Giant Rose is a rewarding project that captures the timeless beauty of flowers using nothing more than yarn, a hook, and a little patience. These bold blooms are perfect for making a statement — whether in your home, wardrobe, or special events.
With endless options for size, color, and design, you can personalize your rose to suit any style or purpose. Once you master the technique, you’ll likely find yourself crocheting entire bouquets of roses for gifts, décor, and joy.
Video tutorial:


