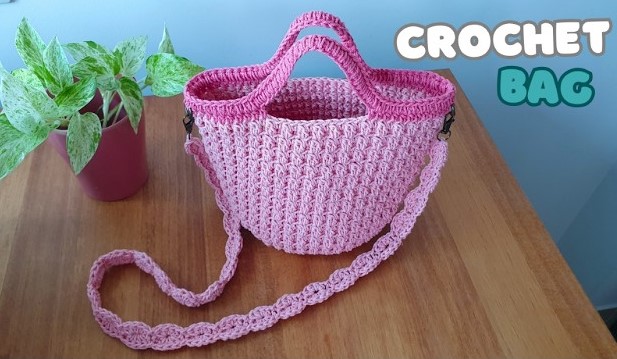
The Art and Charm of Crochet Crossbody Bags
Crochet crossbody bags are more than just accessories—they are a fusion of craftsmanship, utility, and fashion. With the revival of handmade and sustainable fashion, these charming bags have carved out a significant niche in the world of accessories. Whether you’re a seasoned crocheter, a fashion enthusiast, or simply someone who appreciates artisanal beauty, the crochet crossbody bag is a timeless piece worth celebrating.
A Brief History of Crochet
Crochet, derived from the French word “croche” meaning hook, is a needlework technique that dates back to the early 19th century in Europe. While knitting has been around for much longer, crochet quickly gained popularity because of its speed and the decorative possibilities it offered. Unlike knitting, crochet uses a single hook to create fabric by interlocking loops of yarn, making it ideal for intricate and sturdy designs—perfect for accessories like bags.
Over time, crochet evolved from purely utilitarian functions (like making household items) into a creative outlet for fashion and art. The 1960s and 1970s saw crochet boom as part of the bohemian and hippie fashion movements. Fast forward to today, and it’s experiencing a renaissance thanks to the resurgence of handmade crafts and sustainable living.
What Is a Crochet Crossbody Bag?
A crochet crossbody bag is a handbag created using crochet techniques and designed with a long strap that allows it to be worn across the body. This design distributes weight evenly, making it more comfortable and secure than shoulder bags. Crossbody bags are particularly favored for their practicality and casual elegance, and when crafted with crochet, they take on a unique, textured appearance that stands out from mass-produced fashion.
These bags come in various shapes and sizes—from minimalist pouches perfect for festivals to more elaborate, structured designs suitable for everyday use or even formal occasions. Their versatility lies in their adaptability: color, stitch type, pattern complexity, and materials can all be tailored to suit the maker’s or wearer’s style.

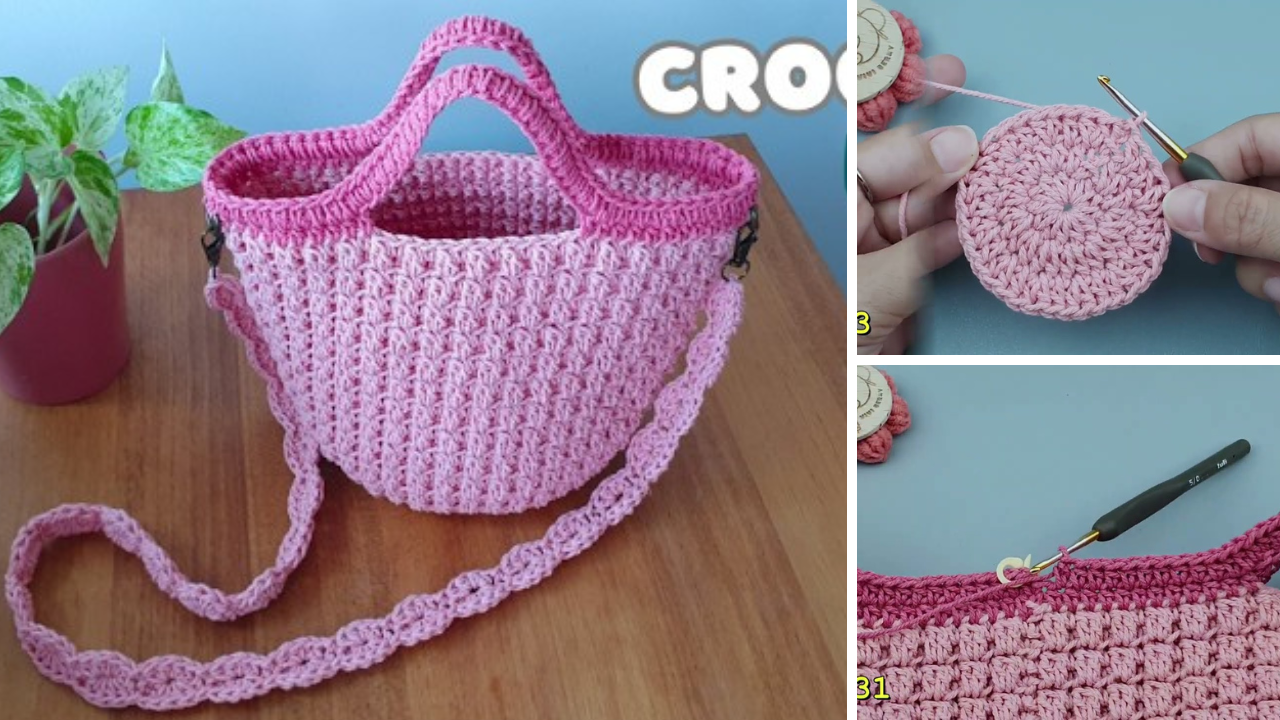
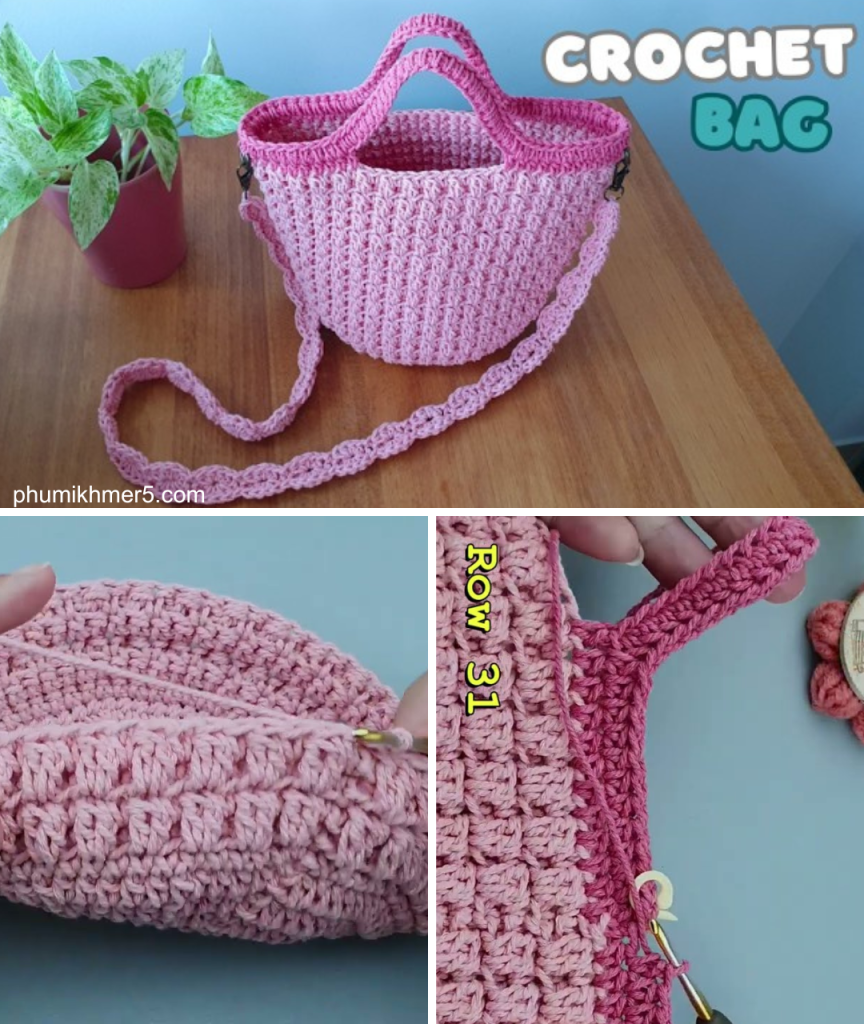
🧶 Simple Crochet Crossbody Bag – Step-by-Step Tutorial
🪡 Skill Level: Beginner
⏱️ Time: 3–5 hours (depending on experience)
✅ Materials You’ll Need:
| Item | Description |
|---|---|
| Yarn | Medium weight cotton yarn (e.g., Worsted/Aran weight) – approx. 100g |
| Crochet Hook | Size 4.0mm or 4.5mm (check your yarn label for guidance) |
| Tapestry Needle | For weaving in ends |
| Scissors | For cutting yarn |
| Button or Snap | For the closure |
| (Optional) Lining Fabric | For durability – small fabric piece, needle & thread |
| Stitch Markers | Helpful for beginners to mark rounds |
✨ Pattern Overview:
We’ll make a rectangular base, then work in the round to build up the body of the bag. The strap is crocheted as a long chain and reinforced. Finally, we’ll add a flap and closure.
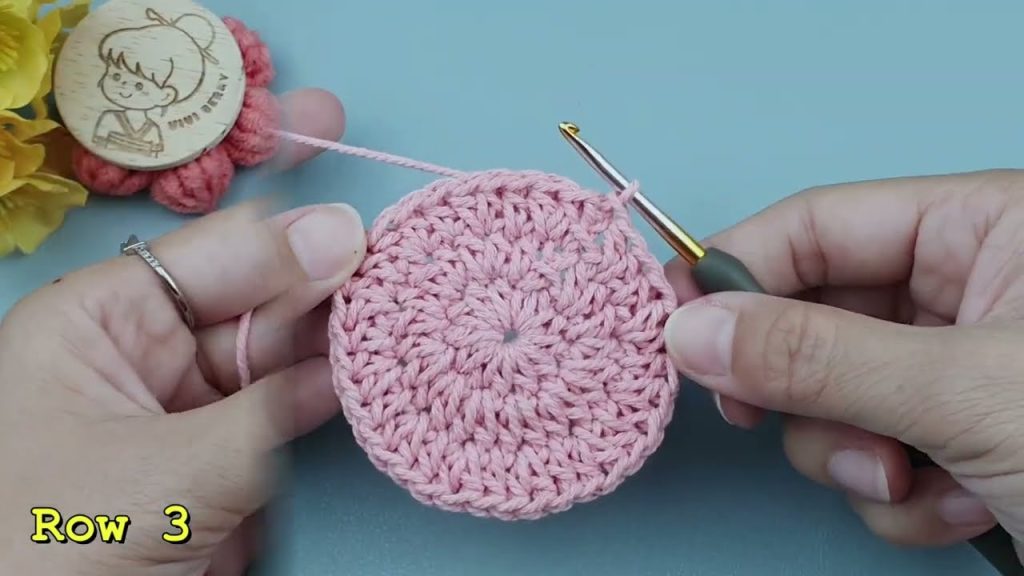
🧵 STEP 1: Crochet the Base
Foundation Chain:
- Chain 26 (this gives you a 9–10 inch wide bag)
Row 1:
- Single crochet (SC) in 2nd chain from hook and in each across (25 SC).
- Chain 1, turn.
Rows 2–8:
- SC in each stitch across. (25 SC)
- Chain 1, turn each row.
You now have a rectangle – the bottom of the bag.
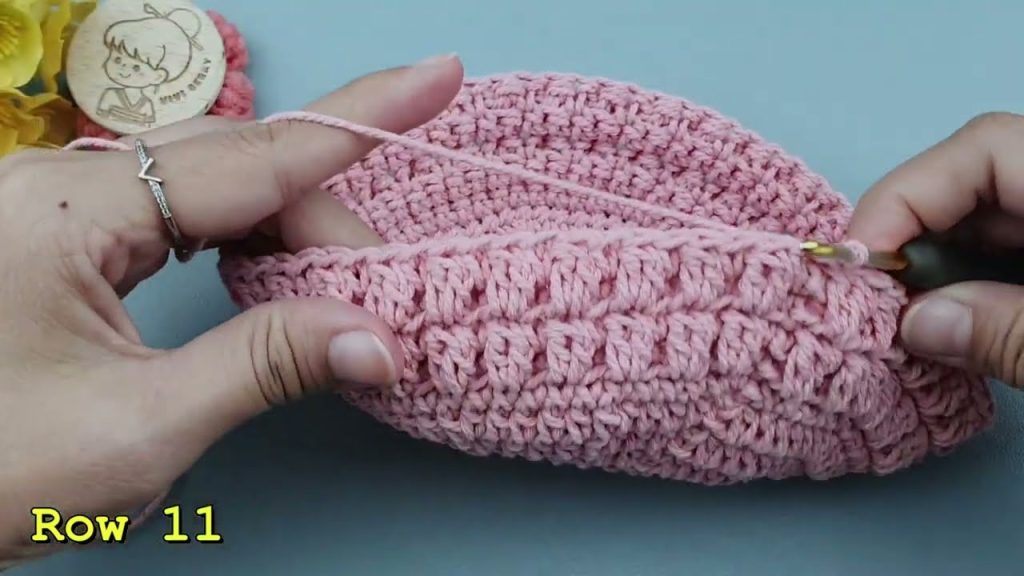
🧱 STEP 2: Build the Body
Now, instead of turning at the end of the row, start crocheting around the entire rectangle to build the sides.
Round 1:
- SC around the entire rectangle, placing 1 SC in each stitch along the sides, and 2 SC in each corner.
- Join with a slip stitch to the first SC.
Round 2–20:
- SC in each stitch around.
- Join each round with a slip stitch and chain 1 to continue.
Optional: Use HDC (half double crochet) for a slightly taller stitch.
After about 20 rounds, you’ll have a nice bag height (roughly 7–8 inches tall). You can add more or fewer rounds depending on the depth you want.
🎒 STEP 3: Make the Flap
After you finish the final round:
Flap Row 1:
- SC in the next 20 stitches only (center the flap on one side of the bag).
- Chain 1, turn.
Rows 2–6:
- SC across. (20 SC)
- Chain 1, turn each row.
Row 7:
- SC2tog (decrease) at the beginning and end of the row for a slight taper. (18 SC)
- Chain 1, turn.
Row 8:
- Repeat decrease. (16 SC)
Row 9:
- SC across.
- Fasten off, weave in ends.
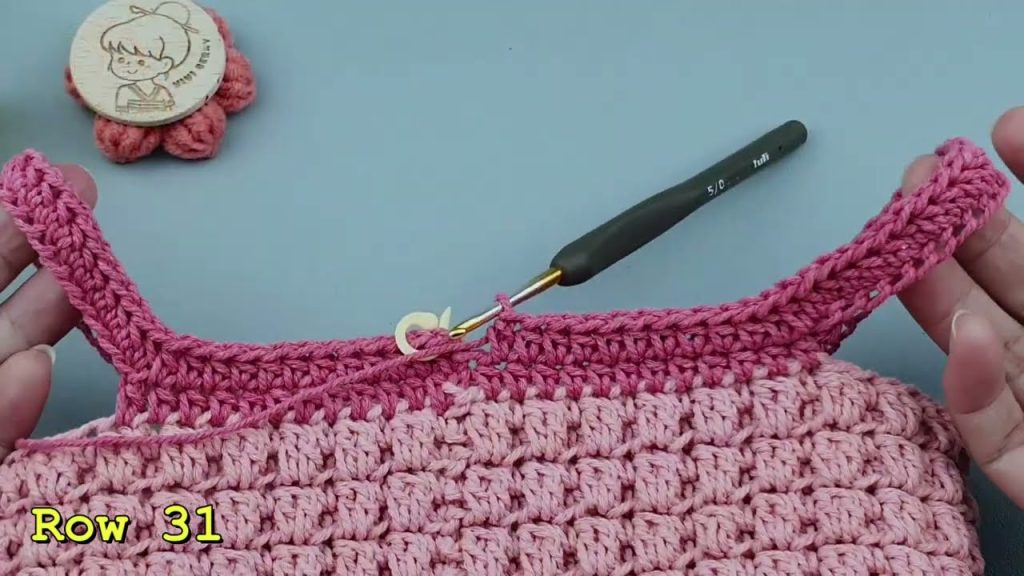
🧶 STEP 4: Add the Strap
Option 1: Crochet Strap
- Chain 120–150 (depending on how long you want your strap).
- SC in each chain back across.
- Fasten off, sew each end to opposite sides of the bag.
Option 2: Use a Leather Strap or Rope
- Attach with metal rings or sew directly to the bag corners.
💡 Reinforcement tip: You can fold the strap and crochet a double layer for extra strength.
🪡 STEP 5: Add Closure
- Sew a button on the body of the bag.
- Create a buttonhole by chaining a loop on the flap or skipping a stitch in the last row.
You can also sew in a magnetic snap for a modern touch.
🧵 Optional: Add Lining
- Cut a piece of fabric slightly larger than your bag’s interior.
- Fold edges inward, sew with running stitch or backstitch.
- Hand-stitch the lining into the bag using needle and thread.
🧼 Care Tips:
- Spot clean with mild soap and water.
- Air dry.
- Store flat to keep shape.
👜 Customization Ideas:
- Use color-blocking (2 or 3 yarn colors)
- Add tassels, fringe, or pom-poms
- Crochet a flower or motif for decoration
- Try a granny square version if you’re feeling creative!
Conclusion
The crochet crossbody bag is a beautiful marriage of art and function. Whether handcrafted by a local artisan or made with your own hands, each bag carries a story of patience, creativity, and heritage. In a world leaning increasingly toward fast fashion, the timeless charm and individuality of crochet bags offer a refreshing return to craftsmanship and sustainability.
Whether you’re looking to buy one or make your own, adding a crochet crossbody bag to your accessory rotation is a choice you’ll wear with pride.
Video tutorial:


