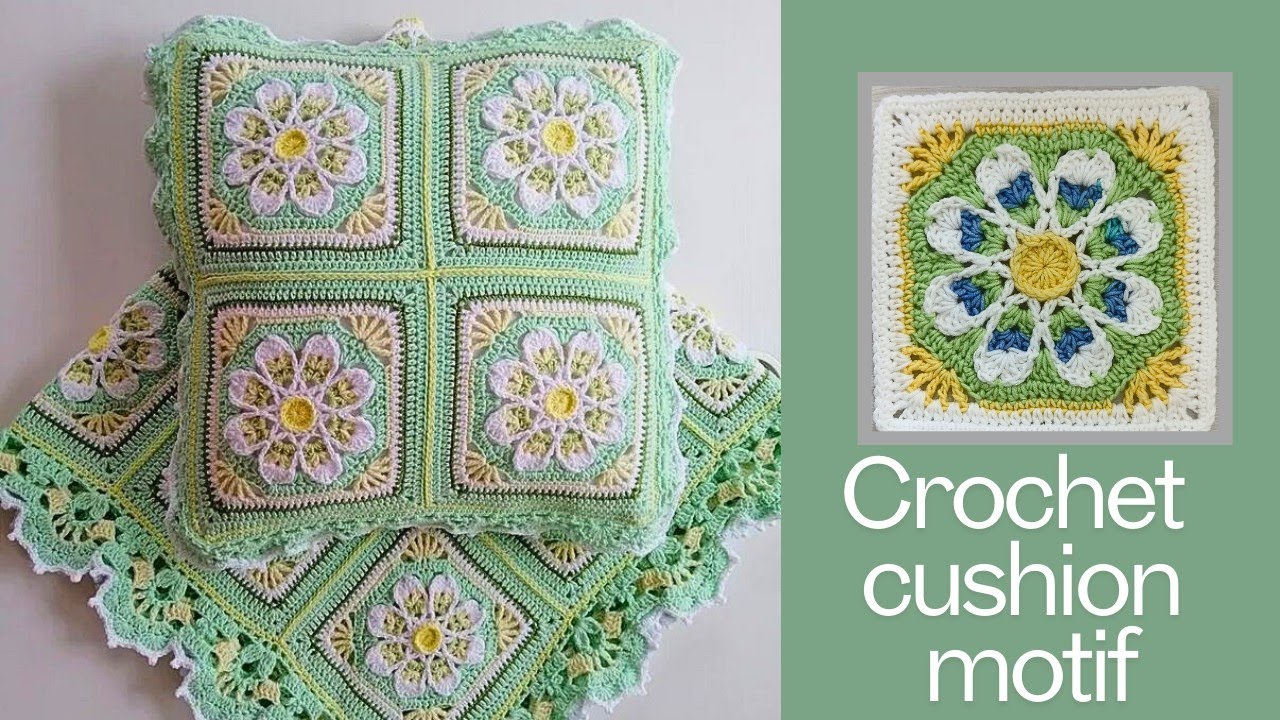
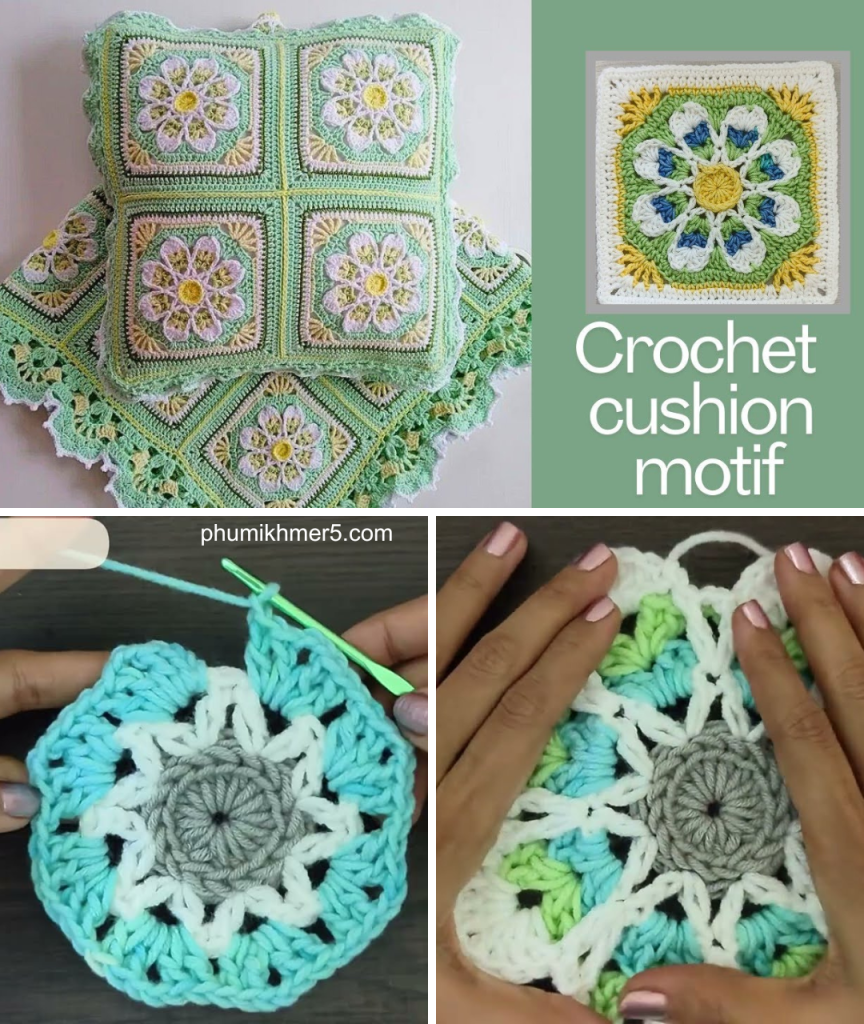
Hello, fellow makers! Are you ready to create a crochet square that is truly unique and beautiful? I’m excited to share this detailed pattern for the Petal Power Granny Square, a design that features a stunning eight-petal flower at its center. This square is perfect for adding a touch of floral elegance to any project, whether you’re making a blanket, a pillow, a tote bag, or a wall hanging.
What makes this pattern so special is its clever construction. We’ll start with a circular flower, then strategically build the corners and sides to transform it into a perfect square. The design is a wonderful way to practice color changes and a variety of stitches, resulting in a textured, eye-catching piece that is sure to be admired. Let’s grab our hooks and yarn and get ready to make some beautiful flowers!

Why You’ll Love This Square:
- Stunning Design: The beautiful eight-petal flower at the center is a unique and charming feature.
- Skill-Building: You’ll practice a variety of stitches, from basic double crochets to more advanced clusters and corners.
- Perfect for Scraps: This is an excellent pattern for using up smaller amounts of yarn in different colors, making each square a unique creation.
- Versatile: The finished squares are ideal for joining into larger projects like blankets, pillows, or shawls.
- Detailed Instructions: The round-by-round guide is broken down into easy-to-follow steps, perfect for crocheters of all levels.
What You’ll Need:
- Yarn: 100% Premium acrylic yarn is recommended for a soft and durable finish. You’ll need at least three different colors for a vibrant look.
- Crochet Hook: A 4mm hook, or the size recommended for your yarn.
- Yarn Needle (Tapestry Needle): For weaving in all those ends.
- Scissors:
- Stitch Markers (optional): To mark corners or the beginning of a round.
Essential Crochet Abbreviations:
- ch: chain
- sl st: slip stitch
- sc: single crochet
- hdc: half-double crochet
- dc: double crochet
- trc: treble crochet
- st(s): stitch(es)
- sp: space
- magic ring: a method for beginning a project in the round
- FO: fasten off
The Pattern: The Petal Power Granny Square
This pattern is worked in the round, from the center outwards. The finished square will be approximately 9 inches.
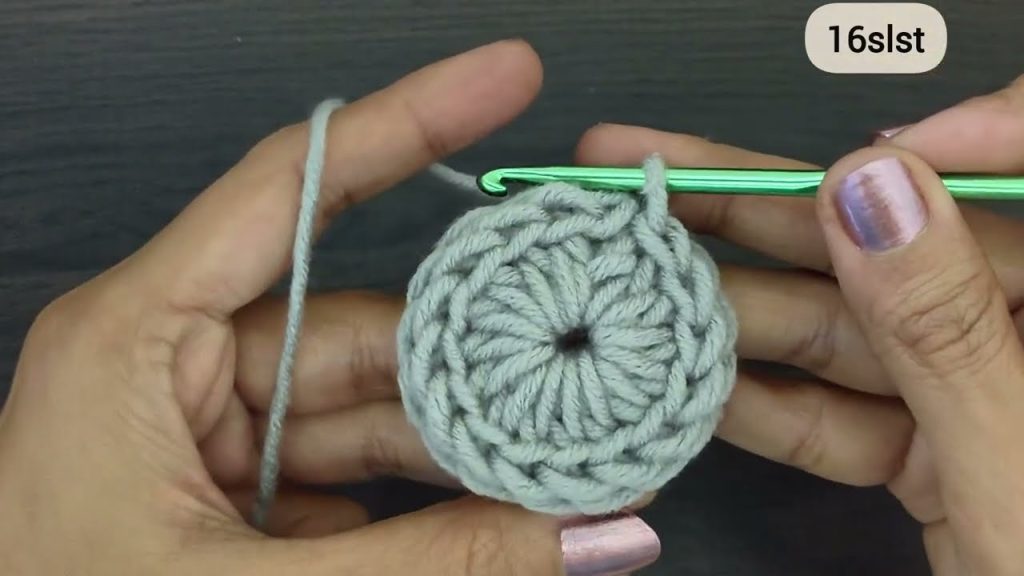
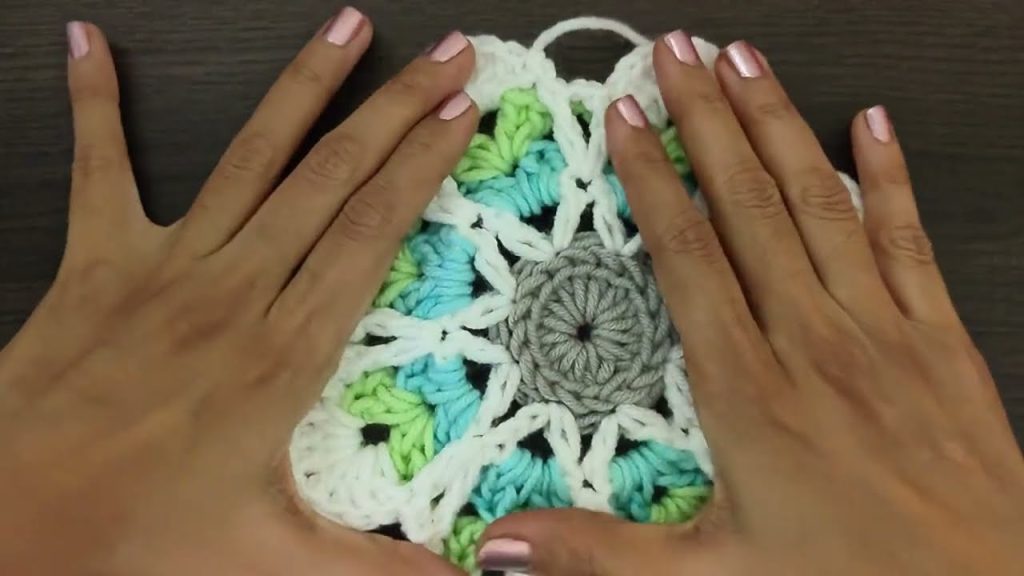
Round 1 (Color A – Grey Yarn in video):
- Start with a magic ring.
- Ch 3 (counts as your first
dc). - Crochet 15
dcinto the ring. - Pull the yarn tail to close the ring tightly and join with a
sl stinto the 3rd ch of the beginning ch-3. - FO, leaving a long tail for weaving in.
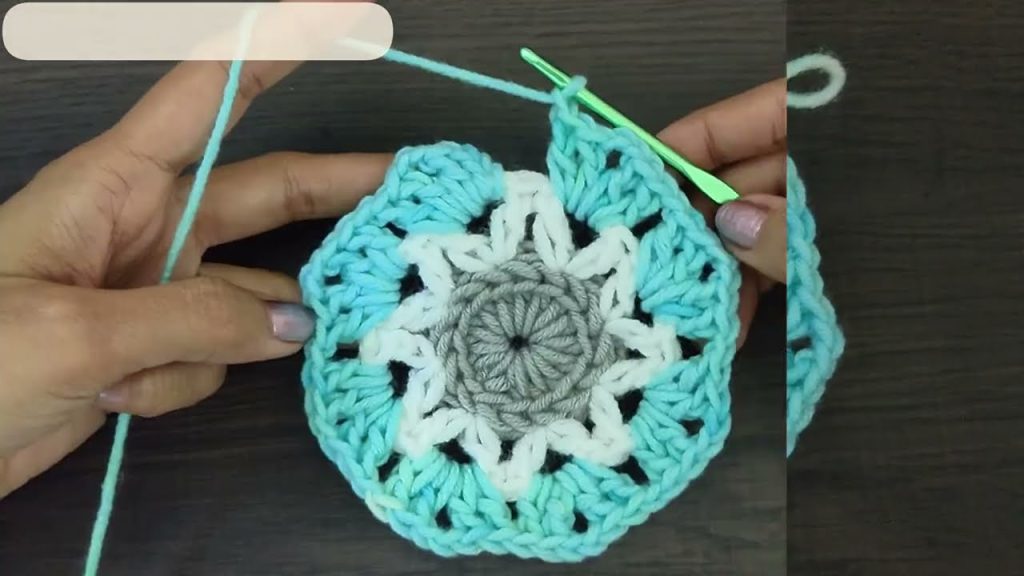
Round 2 (Color B – White Yarn in video):
- Join the new yarn in any stitch from the previous round.
Dc,2 ch,dcin the same stitch (this is your first V-stitch).Ch 2, skip 2 sts.Dc,2 ch,dcin the next stitch.- Repeat this pattern of V-stitch followed by
ch 2, skip 2 sts around the circle, creating a total of eight V-stitches. - Join with a
sl stinto the 3rd ch of the beginning ch-3. - FO, leaving a long tail for weaving in.
Round 3 (Color C – Blue Yarn in video):
- Join the new yarn in any V-stitch space from the previous round.
2 dc,2 ch,2 dcin the same V-stitch space.Ch 1, skip 1 ch sp.2 dc,2 ch,2 dcin the next V-stitch space.- Repeat this pattern of
(2 dc, 2 ch, 2 dc)in each V-stitch space, with ach 1in between. - Join with a
sl stinto the 3rd ch of the beginning ch-3. - FO, leaving a long tail for weaving in.
Round 4 (Color A – Green Yarn in video):
- Join the new yarn in any V-stitch space from the previous round.
2 dc,3 ch,2 dcin the same V-stitch space (this is your first corner!).2 dcin the nextch 1space.2 dc,2 ch,2 dcin the next V-stitch space.- Repeat this pattern around, creating four corners and four sides.
- Join with a
sl stinto the 3rd ch of the beginning ch-3. - FO, leaving a long tail for weaving in.
Round 5 (Color B – Light Green Yarn in video):
- Join the new yarn in any corner
ch 3space from the previous round. 1 ch,scin the corner space.- Work
dcstitches along the side, with1 dcin each stitch and1 dcin eachch 2space. - When you reach the next corner,
sc,1 ch,scin thech 3space. - Repeat this pattern around, creating four corners and four sides.
- Join with a
sl stinto the firstsc. - FO, leaving a long tail for weaving in.
Round 6 (Color A – White Yarn in video):
- Join the new yarn in any corner
ch 1space from the previous round. 1 ch,scin the corner space.Scin each stitch and chain space along the side.- When you reach the next corner,
sc,1 ch,scin thech 1space. - Repeat this pattern around.
- Join with a
sl stinto the firstsc. - FO, leaving a long tail for weaving in.
Round 7 (Color B – Grey Yarn in video):
- Join the new yarn in any corner
ch 1space from the previous round. 3 dcin the corner space.- Work
dcstitches along the side, with1 dcin each stitch. - When you reach the next corner,
3 dcin thech 1space. - Repeat this pattern around.
- Join with a
sl stinto the 3rd ch of the beginning ch-3. - FO, leaving a long tail for weaving in.
Round 8 (Color C – White Yarn in video):
- Join the new yarn in any corner
ch 3space from the previous round. 2 dc,3 ch,2 dcin the corner space.- Work
hdcstitches along the side, with1 hdcin each stitch. - When you reach the next corner,
2 dc,3 ch,2 dcin thech 3space. - Repeat this pattern around.
- Join with a
sl stinto the 3rd ch of the beginning ch-3. - FO, leaving a long tail for weaving in.

Round 9 (Color A – Grey Yarn in video):
- Join the new yarn in any corner
ch 3space from the previous round. 2 dc,3 ch,2 dcin the corner space.- Work
2 dcin each space along the sides, with ach 1in between. - Repeat this pattern around.
- Join with a
sl stinto the 3rd ch of the beginning ch-3. - FO, leaving a long tail for weaving in.
Final Round (Color B – White Yarn in video):
- Join the new yarn in any corner
ch 3space from the previous round. sc,1 ch,scin the corner space.scin each stitch and chain space along the side.- When you reach the next corner,
sc,1 ch,scin thech 3space. - Repeat this pattern around.
- Join with a
sl stinto the firstsc. - FO, leaving a long tail for weaving in.
Finishing Your Square:
- Weave in All Ends: This is the most important step for a neat and professional finish! Use your yarn needle to weave in every single yarn tail securely.
- Blocking (Optional): To ensure your square is perfectly flat and the corners are crisp, you can gently mist it with water, pin it to a flat surface, and let it air dry completely.
Congratulations, you’ve created a beautiful and unique Petal Power Granny Square! You can stop here, or continue adding more rounds for a larger square, or join multiple squares together to create a stunning blanket or pillow. Happy hooking!
Video tutorial:


