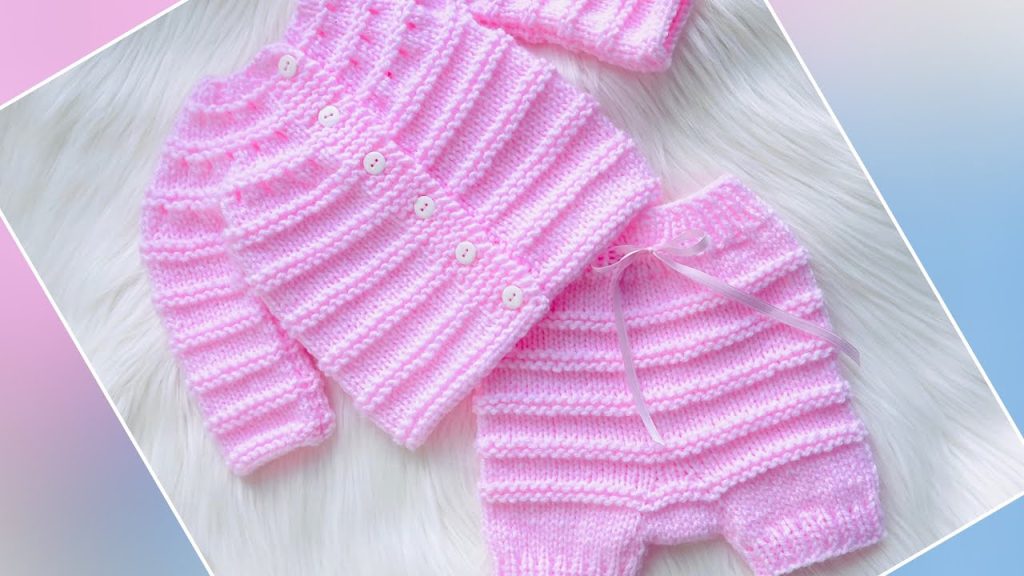
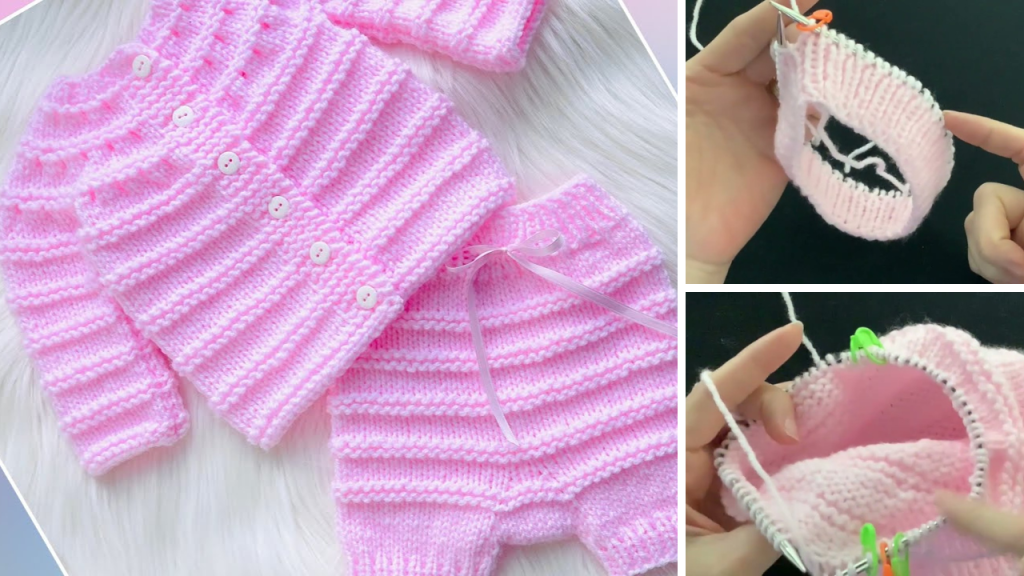
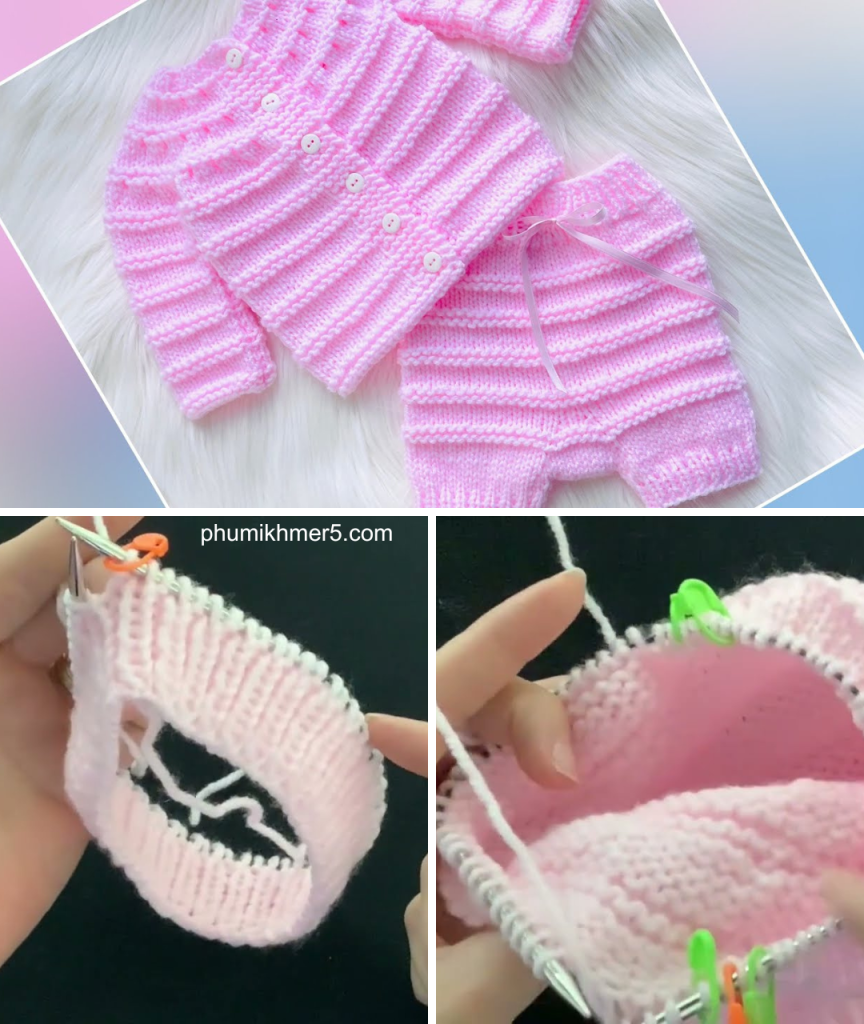
When it comes to knitting for babies, few things are more rewarding than creating something both practical and adorable. One timeless favorite is the knit diaper cover—a sweet little piece that offers functionality, warmth, and handmade charm. Pair it with matching baby shorts and the Lily Cardigan, and you’ve got a delightful ensemble that’s perfect for gifting or dressing your own baby in cozy, cottagecore style.
In this article, we’ll guide you through the concept of knitting easy diaper covers and baby shorts that beautifully complement the popular Lily Cardigan, a soft and floral-inspired baby sweater that’s beloved among knitters. Whether you’re a confident beginner or an intermediate knitter looking for a quick project, this pattern set will keep your needles clicking and your creativity blooming.
🧶 What Is a Knit Diaper Cover?
A knit diaper cover (sometimes called a wool soaker) is a soft, stretchy cover that goes over a baby’s diaper—cloth or disposable. Historically used with cloth diapers to prevent leaks, these covers are now often made for aesthetic and comfort purposes. They can be worn alone in warmer months or layered under dresses, cardigans, or over tights in colder seasons.
🌸 Why Match It With the Lily Cardigan?
The Lily Cardigan is a popular baby sweater pattern featuring soft yarn, a delicate leaf or petal lace motif, and a vintage feel that’s both elegant and sweet. A diaper cover and pair of shorts made in a complementary yarn or matching stitch design make for a complete outfit, turning a simple cardigan into a stylish set.
Matching garments also make wonderful baby shower gifts or photo shoot outfits, especially when knit in gender-neutral tones like cream, sage, lavender, or dusty rose.
🧷 WHAT YOU’LL NEED
Materials:
- Yarn: DK (double knitting) weight baby-friendly yarn (approx. 100g / 250m for diaper cover, 150m more for shorts)
- Knitting Needles:
- US 6 (4mm) circular needles (16” or DPNs)
- Or size needed to get gauge
- Stitch markers
- Tapestry needle
- Scissors
- Measuring tape
- Optional: ½” wide soft elastic or i-cord for waistband
Gauge:
- 22 stitches x 30 rows = 4 inches in stockinette
🧸 EASY KNIT DIAPER COVER PATTERN
👶 Sizes:
- 0–3 months (3–6 months, 6–12 months)
🪡 STEP 1: Cast On Waistband
- Cast on:
- 56 (64, 72) stitches using a stretchy cast-on like the long-tail cast-on.
- Join in the round, being careful not to twist.
- Ribbing:
- Work in k1, p1 ribbing for 1.5 inches.
- Optional: Create a folded waistband by knitting 3 rounds, then one round of purl (for a fold line), then 3 more rounds before continuing. You can later insert elastic inside.
🪡 STEP 2: Body of the Cover
- Switch to Stockinette:
- Knit every round until work measures:
- 4” (4.5”, 5”) from cast-on edge.
- Knit every round until work measures:
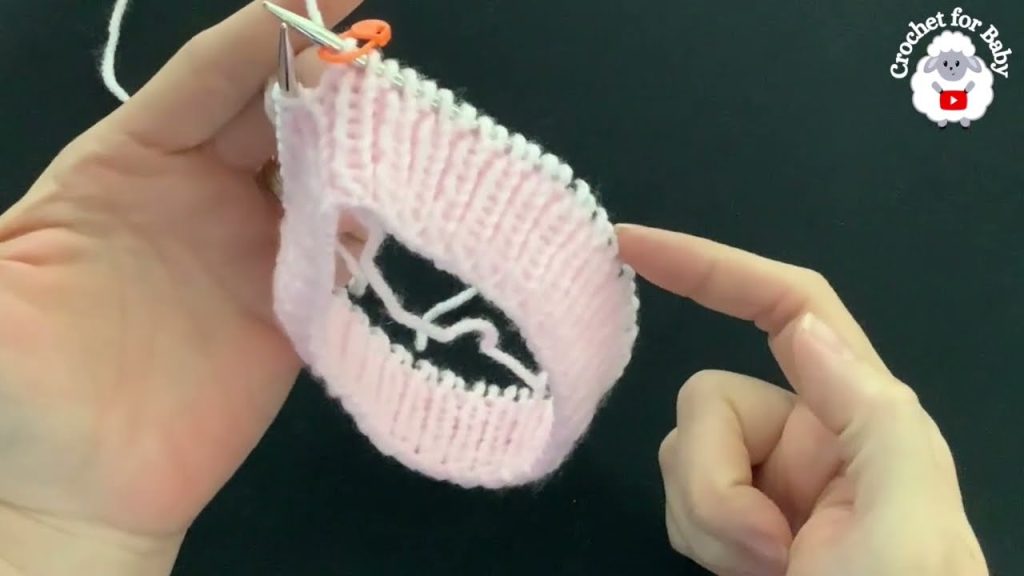
🪡 STEP 3: Shape the Leg Openings
- Divide for front and back:
- Split your stitches in half (28/28, 32/32, 36/36). Place half on a holder — that’s the back.
- Work back and forth on the front stitches only:
- Work 6 rows in stockinette (knit one row, purl one row).
- Then bind off loosely.
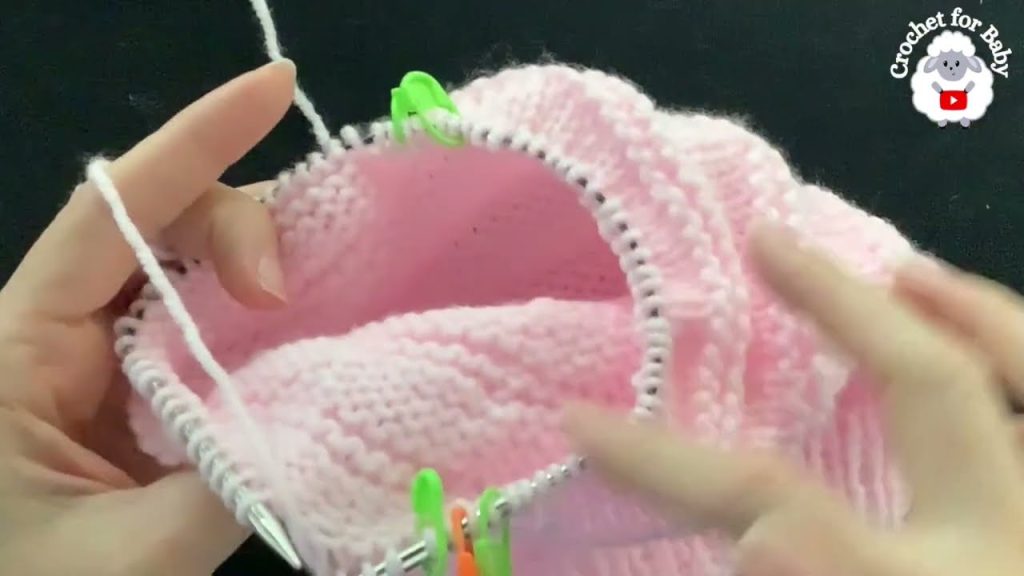
- Return to back stitches:
- Place back stitches on needles.
- Work 8 rows in stockinette, using short rows to make room for the diaper:
- Row 1: Knit 24 (28, 32), wrap and turn
- Row 2: Purl back
- Row 3: Knit 20 (24, 28), wrap and turn
- Row 4: Purl back
- Knit across, picking up wraps
- Bind off.
🪡 STEP 4: Leg Openings
- Pick up stitches around each leg opening (approx. 32–36 stitches).
- Work 5 rounds of k1, p1 ribbing, then bind off loosely.
🪡 STEP 5: Finishing
- Weave in all loose ends.
- Block gently with steam or wet blocking.
- If you made a folded waistband, sew it down and insert elastic or a drawstring.
🎉 Congratulations—you’ve made a diaper cover!
👖 TO MAKE MATCHING BABY SHORTS
The shorts are an extension of the diaper cover — with longer legs and slightly more shaping.
🪡 STEP 1: Follow Diaper Cover Through Waistband
- Cast on the same as diaper cover and work waistband in ribbing or folded waistband with elastic.
🪡 STEP 2: Knit the Body Longer
- Instead of stopping after 4–5 inches, knit until piece measures:
- 6″ (7″, 8″) from waistband, or desired short length.
- Optional short-row shaping for diaper space (same as diaper cover back).
🪡 STEP 3: Divide for Legs
- Split the stitches evenly for the legs.
- Place half of the stitches on a holder or spare yarn.
- Work each leg in the round.
- Knit leg in stockinette for 2”, or longer if you want mid-thigh shorts.
- Work 0.5″ of k1, p1 ribbing at the end, then bind off.
- Repeat for second leg.
🌼 OPTIONAL ADD-ONS TO MATCH LILY CARDIGAN
- Add lace panel: Knit a small lace leaf motif on the back center of shorts to echo the cardigan.
- Embroider leaves or flowers: Use duplicate stitch or embroidery thread.
- Add matching buttons: Sew wooden buttons at waistband for a vintage look.
🧽 CARE INSTRUCTIONS
- Hand wash if using wool or delicate yarns.
- Lay flat to dry.
- Use gentle baby detergent.
📌 Summary Pattern at a Glance
| Section | Stitches | Length | Notes |
|---|---|---|---|
| Waistband | k1, p1 ribbing | 1.5” | Add elastic or drawstring |
| Diaper cover body | Stockinette | 4–5” | Add short rows in back |
| Leg openings | Ribbing | 0.5” | Pick up stitches around legs |
| Shorts body | Stockinette | 6–8” total | Longer version of diaper cover |
| Leg cuffs | Ribbing | 0.5” | Optional: longer legs |
🎁 Perfect for Gifting
A hand-knit baby set featuring the Lily Cardigan, matching diaper cover, and shorts makes a heartfelt and memorable gift. Wrap it in tissue paper, add a handwritten care card, and you’ve got a baby shower showstopper.
🧶 Final Thoughts
Knitting a matching diaper cover and baby shorts to go with the Lily Cardigan is a satisfying project that balances beauty and practicality. Whether you’re a new parent, a grandparent, or a seasoned knitter making gifts, these handmade garments will be cherished for years.
Their timeless style, comfort, and personal touch are exactly what handmade baby items are all about.
Video tutorial: