🎉 PERFECT FOR BEGINNERS – STEP-BY-STEP TUTORIAL
Knitting for babies is one of the most joyful and rewarding ways to practice your craft. Small in size, forgiving in fit, and absolutely adorable when finished, baby sweaters are a go-to project for beginners wanting to try their hand at garment-making.
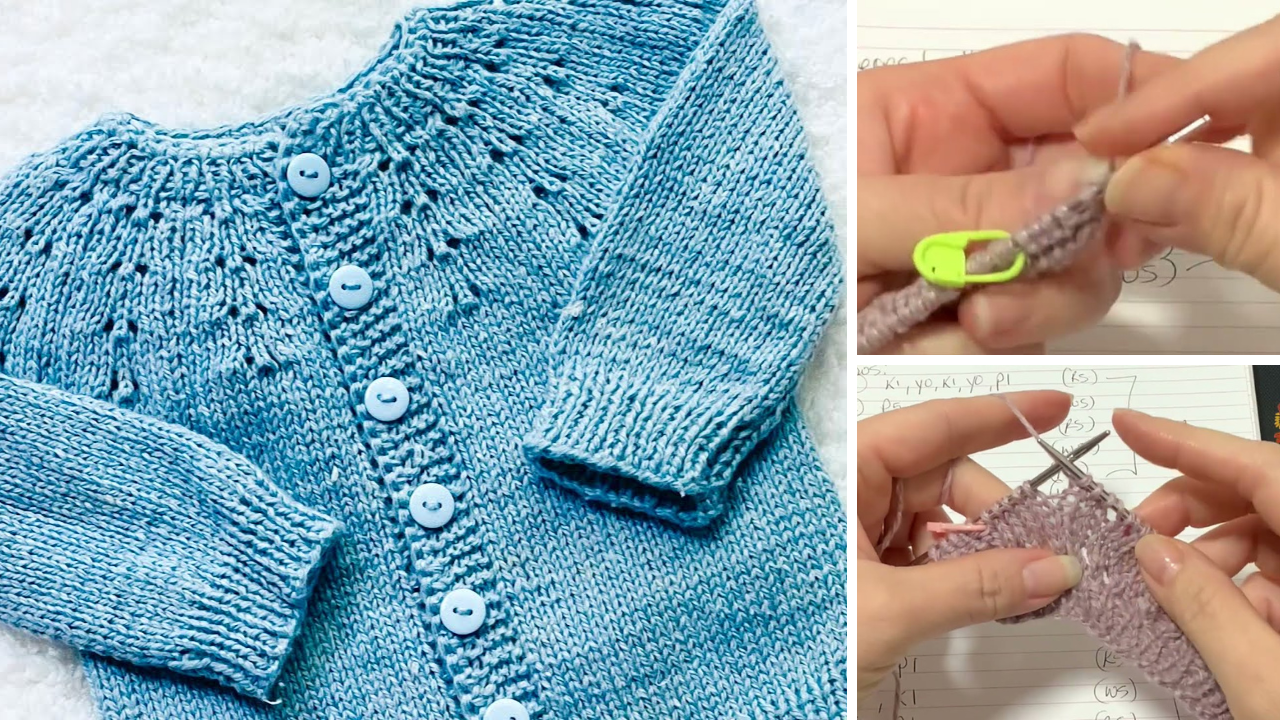
This tutorial will walk you through knitting an easy baby cardigan sweater on straight needles—no circulars, no complicated shaping, no experience necessary. If you can knit and purl, you can make this sweater.
This pattern is seamed, meaning you’ll knit flat pieces (like a puzzle), then sew them together. It’s a traditional and simple method that builds skills and confidence.
🧵 What You’ll Love About This Project:
- Only uses basic knit and purl stitches
- No need for circular needles or knitting in the round
- Fully customizable: add stripes, buttons, or even embroidery
- Ideal as a baby shower gift, photo outfit, or everyday cozy cardigan
✂️ Materials You’ll Need
| Item | Details |
|---|---|
| Yarn | DK or worsted weight baby-safe yarn (approx. 300–400 yards) |
| Needles | US size 6 (4mm) straight knitting needles (or size to match gauge) |
| Buttons | 3–5 small buttons (½” size) |
| Tapestry Needle | For seaming and weaving in ends |
| Stitch Holders | Or scrap yarn to hold sleeve stitches |
| Measuring Tape | For checking length and size |
| Scissors | Good sharp pair |
Optional: Stitch markers, blocking mats & pins
📏 Sizing
This pattern is written for 0–6 months with instructions on how to adjust for larger sizes.
Finished chest size: approx. 18–20 inches
Finished length: approx. 10 inches from shoulder to hem
🧶 Gauge (Important!)
Before starting, knit a gauge swatch:
Gauge: 20 stitches x 28 rows = 4 inches in stockinette stitch
If your gauge is off, switch needle sizes until you match this.

👶 Design Overview
You’ll knit five flat pieces:
- Back Panel
- Left Front
- Right Front
- Sleeves (x2)
Then you’ll seam them together and knit the neckband or button band (optional).
🪡 Step-by-Step Instructions
1️⃣ BACK PANEL
Cast on: 50 stitches
Bottom Ribbing:
- Row 1 (RS): K1, P1 across
- Repeat this row for 6 rows (or 1 inch)
Main Body:
- Switch to stockinette stitch:
- Row 1 (RS): Knit across
- Row 2 (WS): Purl across
- Continue until piece measures 10 inches from cast-on edge.
Bind off all stitches and place piece aside.
2️⃣ LEFT FRONT PANEL
Cast on: 26 stitches
Bottom Ribbing:
- Work K1, P1 rib for 6 rows
Main Body:
- Continue in stockinette stitch
- Work until the piece measures 7.5 inches
Shape Neck:
- At the beginning of every RS row, bind off 1 stitch 5 times to create neck curve.
- Continue straight until the piece measures 10 inches, then bind off all stitches.
3️⃣ RIGHT FRONT PANEL
Same as left front, but mirror the neck shaping:
- Bind off 1 stitch at the end of every RS row, 5 times.
4️⃣ SLEEVES (Make 2)
Cast on: 30 stitches
Cuff Ribbing:
- Work K1, P1 rib for 6 rows
Main Sleeve:
- Switch to stockinette
- Increase 1 stitch at each end every 6th row 3 times (you’ll end up with 36 stitches)
- Knit until sleeve measures 6.5 inches
- Bind off loosely
5️⃣ ASSEMBLY (Seaming the Sweater)
🧵 Block first (optional but recommended):
- Wet block or steam your pieces flat.
🧵 Shoulder Seams:
- Lay back piece flat
- Align front panels on top
- Seam shoulders together using mattress stitch
🧵 Attach Sleeves:
- Pin center of sleeve to shoulder seam, then work your way out
- Seam sleeve cap to armhole using mattress or backstitch
🧵 Side Seams & Sleeve Seams:
- Seam from bottom hem up to armpit, then down the sleeve to cuff

6️⃣ NECKBAND & FRONT BANDS (Optional)
Neckband:
- Pick up stitches evenly around the neckline (about 60–70 sts)
- Knit 4 rows of k1, p1 rib
- Bind off loosely
Front Button Bands:
Left Front:
- Pick up stitches along front edge (approx. 3 sts per 4 rows)
- Work 4 rows of k1, p1 rib, then bind off.
Right Front (Buttonhole Side):
- Same as left, but make buttonholes on Row 3:
- For each buttonhole: K2, YO, K2tog (space them evenly)
🪡 Finishing Touches
- Sew on buttons across from buttonholes.
- Weave in all ends with tapestry needle.
- Give it a light steam or block again to shape.
🧺 Care Instructions
Choose yarn that is machine washable (like superwash wool or acrylic blends). Babies get messy!
- Wash on delicate or hand wash
- Lay flat to dry
- Avoid ironing directly—use a cloth barrier
🎨 Ideas to Customize
- 🌈 Stripes: Use scrap yarn to create colorful stripes every few rows
- 🧵 Embroidery: Add a simple heart, flower, or baby’s initials
- 🍄 Themed buttons: Wooden animals, stars, or classic mother-of-pearl
- 🐑 Textured stitch: Replace stockinette with seed stitch or garter for a different look
💡 Beginner Tips
- Keep track of rows with a row counter or tally sheet.
- Use safety pins or stitch markers to mark right side vs wrong side.
- Don’t stress over perfection—babies won’t notice a wobbly seam.
🎁 Perfect Gift Alert
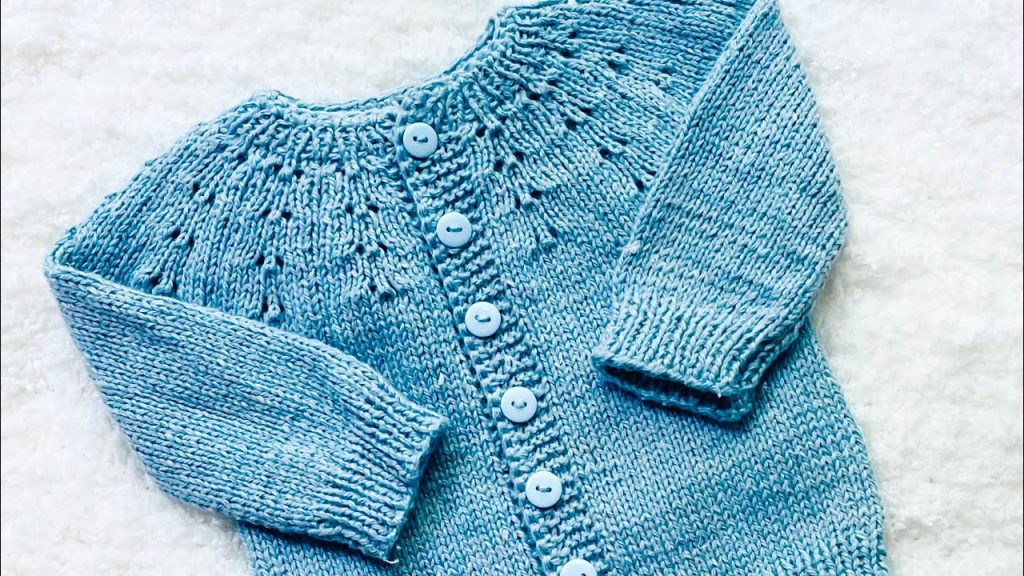
This easy baby cardigan is a heartfelt handmade gift that’s:
- Lightweight and comfy
- Gender-neutral when knit in creams, greys, or soft pastels
- Ideal for newborn photos, Christenings, or first birthdays
Pair it with a matching hat, booties, or knit shorts for a complete set.
🧶 Final Thoughts
Knitting a baby cardigan sweater with straight needles is a fantastic first sweater project. It gives you experience with shaping, simple seaming, and finishing—all while creating something warm and meaningful.
Whether you’re knitting for your own baby or a loved one’s, this cardigan will be cherished, worn, and remembered.
Video tutorial: