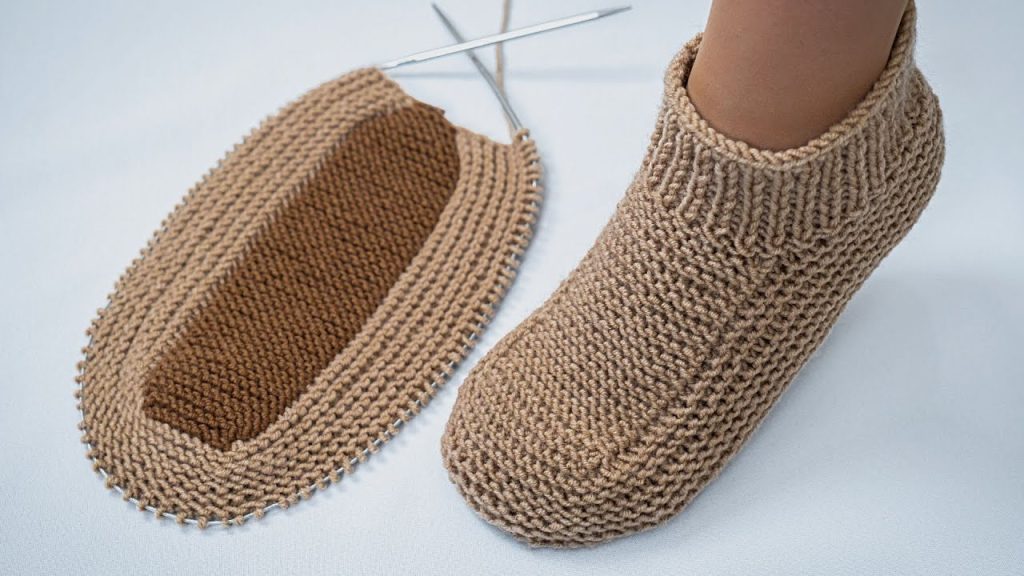
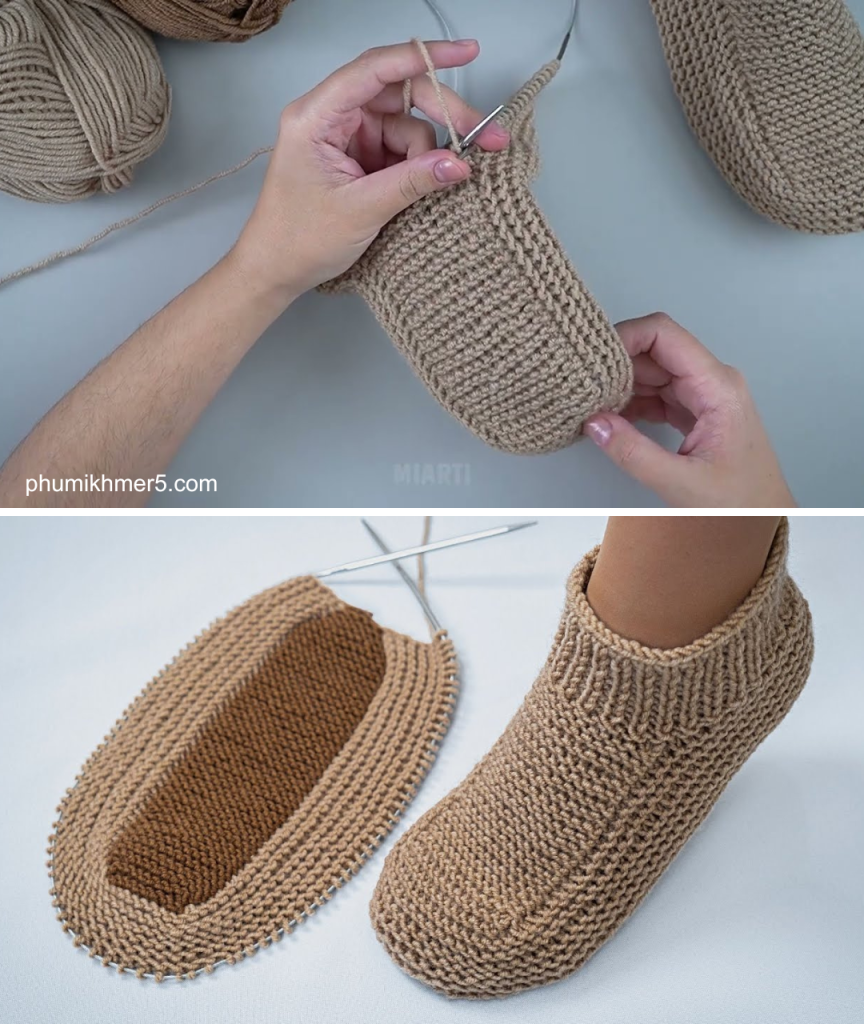
🧶 Effortless Comfort: Knitting Slippers with No Seam on the Sole
Inspired by the brilliant, quick-knit tutorial from Miarti – Crochet and Knitting, “How to knit slippers without a seam on the sole out of 4 stitches – it’s easy and quick!”, this pattern utilizes a clever construction method to create a wonderfully simple and perfectly shaped slipper.
The secret? We start with just four stitches and gradually build out the top of the foot before moving into the body and employing a short-row technique to form the sole and heel. The result is a cozy, durable slipper with absolutely no bulky seam along the bottom, making it feel like custom-made comfort!
📋 Pattern Details & Materials
| Item | Detail | Notes |
| Skill Level | Intermediate | Assumes familiarity with increases, decreases, and knitting in the round. |
| Size | Women’s Medium (US 7-9) | Instructions are provided for this size. Adjustments needed for other sizes (see Gauge). |
| Yarn | Worsted Weight (Category 4) or Bulky (Category 5) | Using a slightly denser yarn helps with slipper durability. Approximately 150-200 yards. |
| Needles | 4.5 mm (US 7) DPNs or a 40″ circular for Magic Loop. | Adjust needle size to meet gauge. |
| Notions | Stitch markers, Tapestry needle, Scissors. |
Gauge (Measured in Garter Stitch)
4 stitches and 8 rows = 1 inch (2.5 cm) in Garter Stitch (knitting every row).
It is critical to meet this gauge for proper sizing.
📚 Abbreviations (US Knitting Terms)
| Abbreviation | Meaning |
| CO | Cast On |
| St(s) | Stitch(es) |
| K | Knit |
| P | Purl |
| BO | Bind Off |
| M1L | Make One Left (Increase) |
| K2TOG | Knit Two Together (Decrease) |
| PM | Place Marker |
| SM | Slip Marker |
| RS | Right Side |
| WS | Wrong Side |
Part 1: The Four-Stitch Foundation (The Toe/Instep)
We begin knitting flat, starting from the toe and increasing to form a slightly pointed instep panel.
CO 4 stitches.
Row 1 (RS): K1, M1L, K2, M1L, K1. (6 sts)
Row 2 (WS): Knit all stitches.
Row 3 (RS): K1, M1L, Knit to last st, M1L, K1. (2 sts increased)
Row 4 (WS): Knit all stitches.
Repeat Rows 3 and 4 until you have 24 stitches on your needle. This piece should now be wide enough to cover the top of your foot.
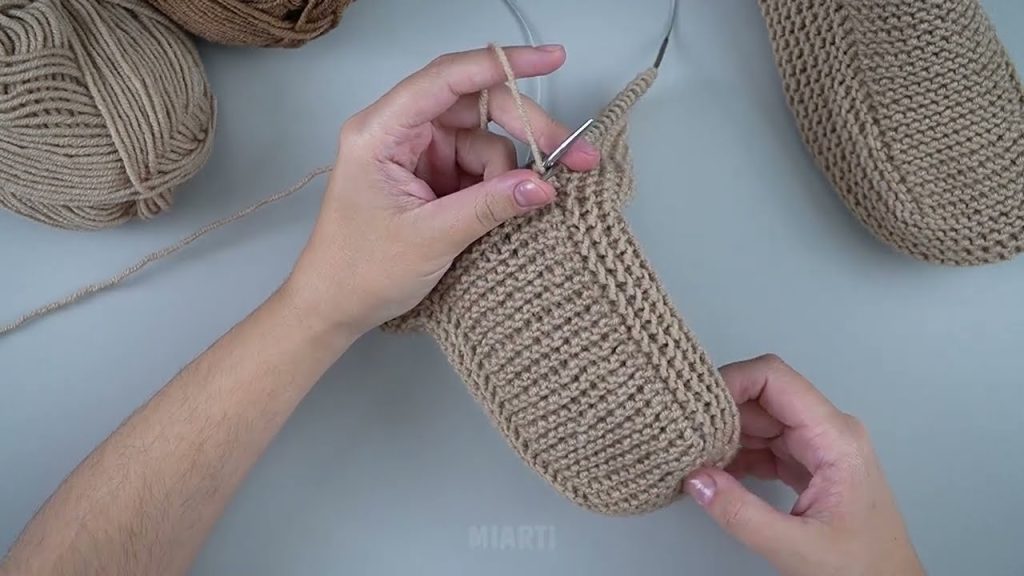
Part 2: Building the Foot Body
Now we switch to knitting in the round to create the space for the rest of the foot.
Setup for In-the-Round:
- Knit all 24 stitches (this is your first round).
- Do not join. We need to create the side stitches by picking up.
Picking Up Side Stitches:
- Side A: With your working needle, pick up and knit 20 stitches evenly along the left edge of the flat instep piece you just created.
- Back: CO 12 stitches using the knitted cast-on method (this will form the first half of the ankle opening/heel).
- Side B: Pick up and knit 20 stitches evenly along the right edge of the flat instep piece.
- You are now back at the beginning of the first 24 stitches.
- Join in the round. PM for the beginning of the round.
Total Stitches: 24 (Instep) + 20 (Side A) + 12 (Heel CO) + 20 (Side B) = 76 stitches.
Foot Body Rounds:
- Knit every round until the piece reaches the beginning of your ankle bone (where the shoe should start to turn down for the heel/sole). This is typically 2.5 to 3 inches (6 to 7.5 cm) from where you joined in the round.
Part 3: The Seamless Sole (Short Row Construction)
The key to the seamless sole is creating a center panel (12 stitches) and gradually joining it to the remaining side stitches using K2TOG. This mimics a heel flap construction, but runs the entire length of the foot.
Preparation
- Sole Marker Setup: This is a crucial step.
- Starting at the BOM (Beginning of Round) marker, K all the way around until you have 44 stitches remaining.
- PM (Marker A).
- Knit 12 stitches (these are your sole stitches).
- PM (Marker B).
- The remaining 32 stitches will be your side stitches.
Short Row Sole Work (Working Back and Forth)
You will now work back and forth only on the sole and a few side stitches.
Row 1 (WS): Purl to 1 st before Marker A, P2TOG (Sole st and side st). Turn. (Marker A is now the sole edge)
Row 2 (RS): Slip 1 st (as if to purl), K to 1 st before Marker B, K2TOG (Sole st and side st). Turn. (Marker B is now the sole edge)
Repeat Rows 1 and 2 until you have consumed all of the side stitches (the stitches between Marker B and the BOM, and the stitches between Marker A and the other side of the slipper). You will be left with only the 12 sole stitches and no side stitches.

Part 4: The Heel
Now that the sole is finished, you will work a simple heel flap and turn using the remaining 12 stitches.
- Heel Flap: Work in Garter Stitch (Knit all rows) for 10 rows (5 ridges).
- Turn the Heel (Short Rows):
- Row 1 (RS): K8, K2TOG, Turn.
- Row 2 (WS): Slip 1, P5, P2TOG, Turn.
- Row 3 (RS): Slip 1, K to 1 st before the gap, K2TOG, Turn.
- Row 4 (WS): Slip 1, P to 1 st before the gap, P2TOG, Turn.
- Repeat Rows 3 and 4 until all stitches on the sides are consumed. You should be left with 6 stitches (or your original sole stitch count).
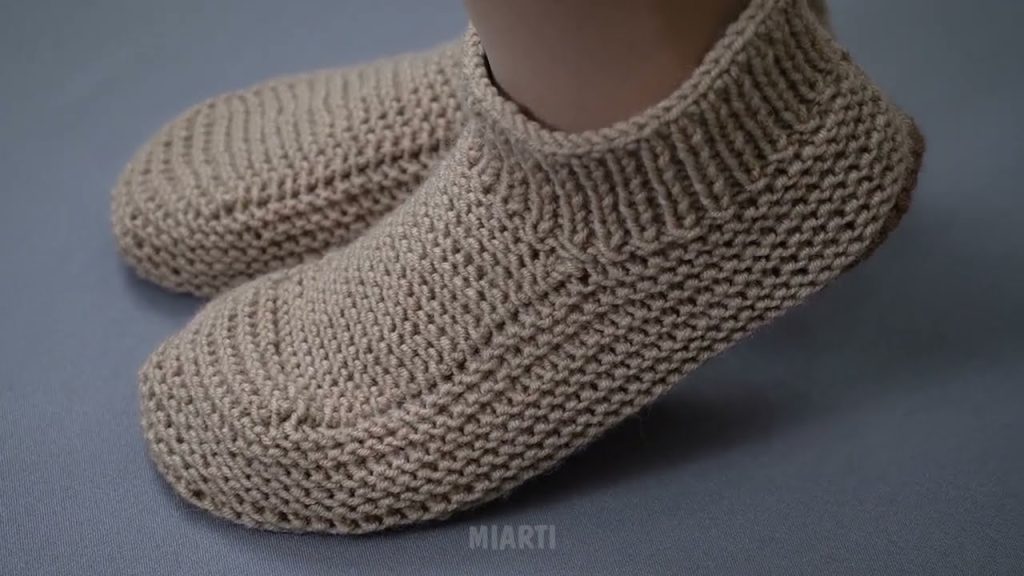
Part 5: The Cuff and Finishing
We finish the slipper by creating a ribbed cuff around the entire opening.
- Pick Up for Cuff: Using your working needle, pick up and knit stitches evenly around the entire heel and ankle opening. Aim for approximately 48-60 stitches total, ensuring the count is a multiple of 2 for the ribbing. PM for the new BOM.
- Cuff: Work in 1×1 Ribbing (K1, P1) for 10 rounds (or desired height).
- BO all stitches loosely in the 1×1 Ribbing pattern.
- Finishing: Cut yarn, leaving a tail. Weave in all ends securely using your tapestry needle.

Repeat all steps to knit your second “Four-Stitch Foundation Slipper” and enjoy your perfectly seamless, handcrafted footwear!
Video tutorial: