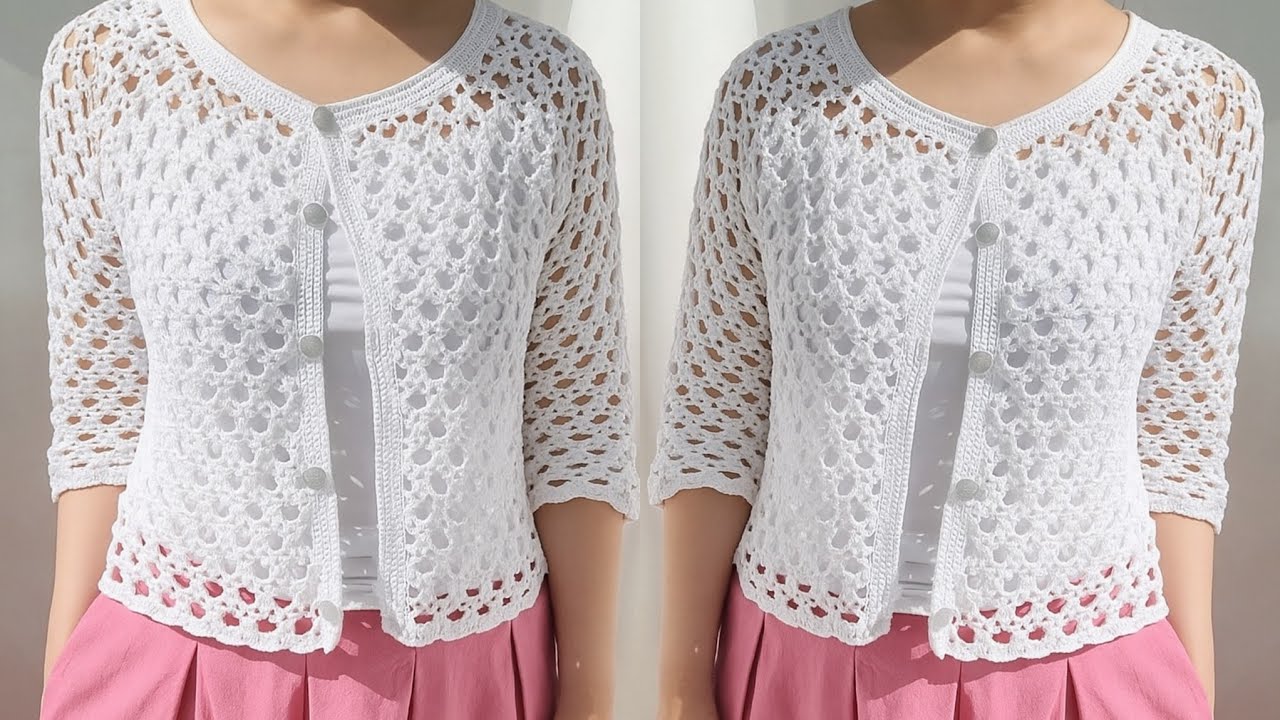
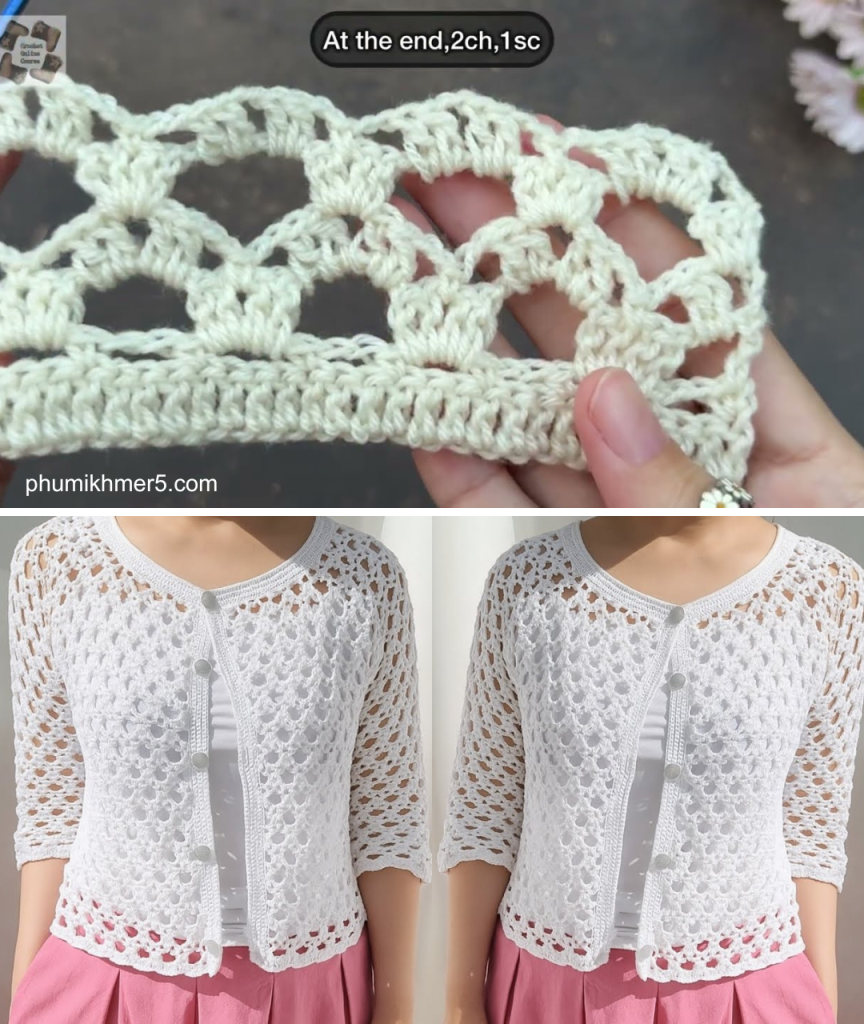
Hello, makers! Have you ever seen a crochet stitch so beautiful and light that you immediately knew it belonged in your wardrobe? That’s exactly how I felt watching the stunning work in the video, “Beautiful Crochet Cardigan pattern 🤩 sweater pattern super easy Top blouse 🤩*stitch only” by Crochet Online Course🧶! The airy, lacy texture shown is perfect for a lightweight, all-season layering piece.
Inspired by the elegance and simplicity of that flowing fabric, I’ve designed the Coastal Drift Cardigan. This pattern uses my original Whispering Waves Stitch (WWS), a delicate repeat of double crochet fans and chain spaces that creates a fabric with fantastic drape and a subtle, rippling texture. It’s a surprisingly easy stitch that yields professional, polished results.

This cardigan is constructed using four simple rectangular panels (back, two fronts) and two tapered sleeves, then sewn together. Let’s dive in and create your new favorite cardi!
Coastal Drift Cardigan Pattern Details
| Section | S/M (Sizes 4-12) | L/XL (Sizes 14-22) |
| Finished Bust | 40 inches (102 cm) | 48 inches (122 cm) |
| Finished Length | 28 inches (71 cm) | 30 inches (76 cm) |
| Skill Level | Easy-Intermediate | |
| Gauge | 4 WWS repeats (or 16 dc) and 8 rows = 4 inches (10 cm) |
Materials
- Yarn: DK Weight (Category 3) yarn. Approximately 1,600 (2,000) yards. We recommend a cotton blend for maximum drape.
- Hook: U.S. G/6 (4.0 mm) or size needed to obtain gauge.
- Notions: Measuring tape, scissors, yarn needle, and 4-5 stitch markers.
Special Stitches & Abbreviations
- ch: chain
- sl st: slip stitch
- sc: single crochet
- dc: double crochet
- WWS: Whispering Waves Stitch (defined below)
- ch-sp: chain space
The Whispering Waves Stitch (WWS)
The WWS is worked in multiples of 4 + 3 (your starting chain).
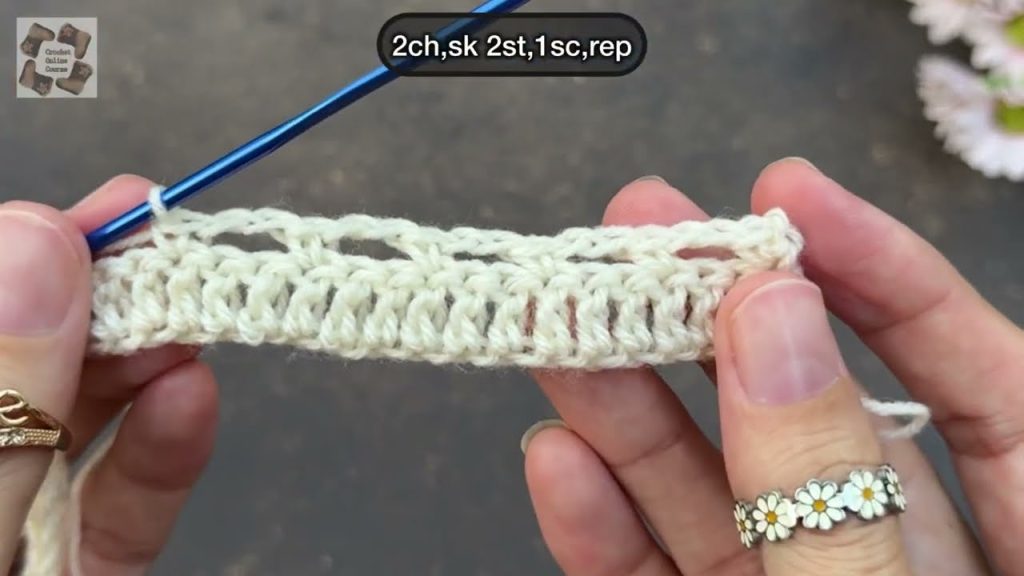
Foundation Row (Setup): Dc in the 4th ch from the hook and in every ch across. Ch 3 (counts as first dc), turn.
Row 1 (The Wave Base):
- Dc in the next 2 dc (4 dc total including the turning chain).
- Ch 1, skip 1 dc, dc in the next 3 dc. Repeat from * to * across the row until 2 stitches remain.
- Ch 1, skip 1 dc, dc in the last dc (the top of the turning chain).
- Ch 3 (counts as first dc), turn.
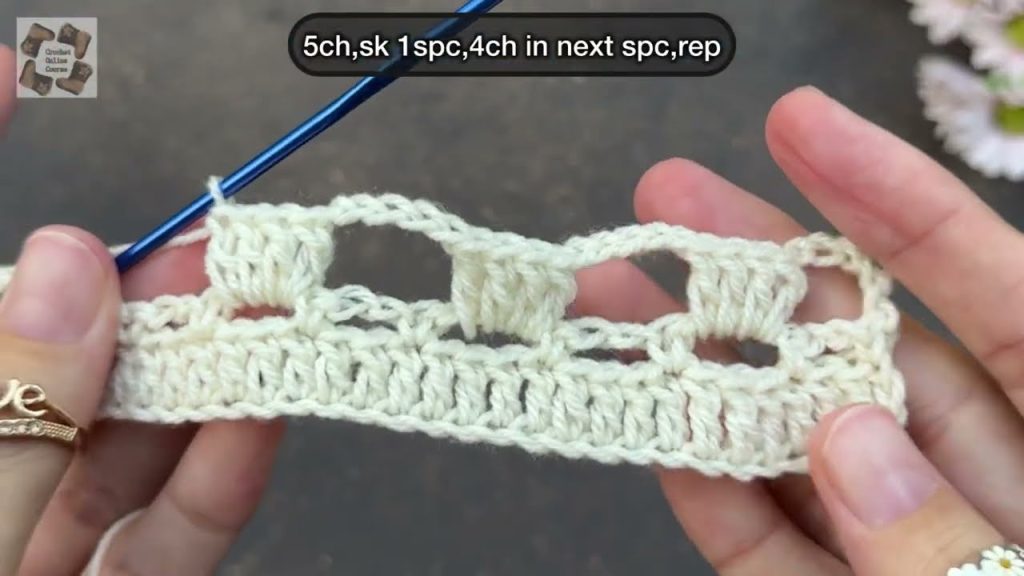
Row 2 (The Fan Peak):
- Dc in the next 2 dc.
- Work 2 dc into the next ch-1 space, dc in the next 3 dc. Repeat from * to * across the row until you reach the final ch-1 space.
- Work 2 dc into the final ch-1 space, dc in the last dc (the top of the turning chain).
- Ch 3 (counts as first dc), turn.
Row 3 (The Wave Base):
- Dc in the next 2 dc.
- Dc in the next dc, ch 1, skip 1 dc, dc in the next 2 dc. Repeat from * to * across the row until 4 stitches remain.
- Dc in the next dc, ch 1, skip 1 dc, dc in the top of the turning chain.
- Ch 3 (counts as first dc), turn.
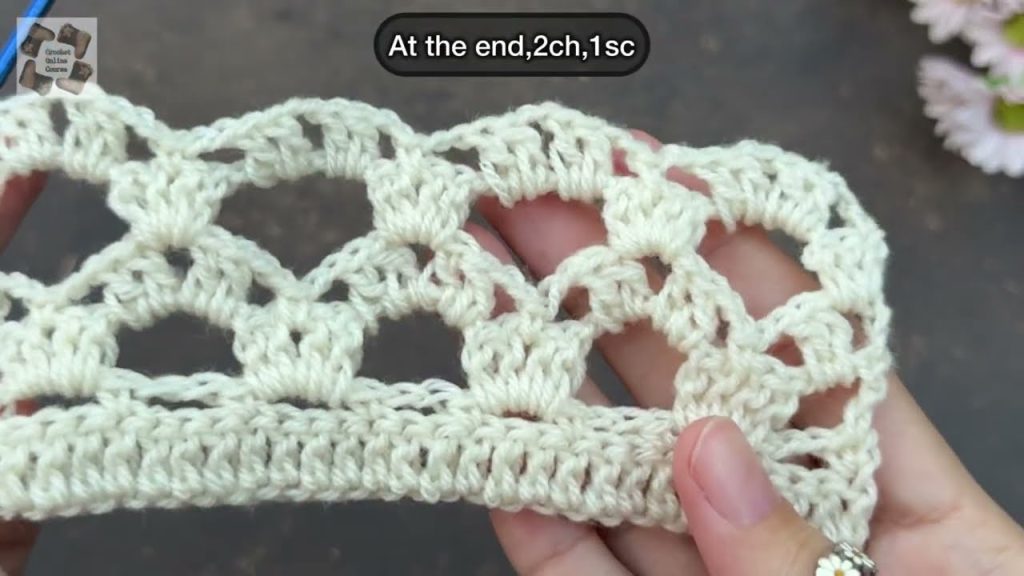
Row 4 (The Fan Peak):
- Dc in the next 2 dc.
- Dc in the next 2 dc, 2 dc into the next ch-1 space. Repeat from * to * across the row until you reach the final ch-1 space.
- 2 dc into the final ch-1 space, dc in the top of the turning chain.
- Ch 3 (counts as first dc), turn.
Repeat the pattern: Rows 1-4 establish the WWS. Continue repeating Rows 1-4 for the remainder of the project panels.
Garment Construction
The construction of this cardigan is modular. You will create a Back Panel, two Front Panels, and two Sleeves.
1. Back Panel
This panel is worked flat and creates the full width of the back.
| Size | Starting Chain (Multiple of 4+3) | Total Rows (Height) |
| S/M | Chain 83 | Work until panel measures 28 inches (approx. 112 rows) |
| L/XL | Chain 99 | Work until panel measures 30 inches (approx. 120 rows) |
- Start: Ch the appropriate number of stitches for your size.
- Row 1 (Setup): Follow the Foundation Row instructions.
- Pattern: Continue working the WWS by repeating Rows 1-4 until your panel reaches the target length.
- Finish: Fasten off, leaving a long tail (about 20 inches) for seaming one shoulder.
2. Front Panels (Make 2 Identical)
These panels are half the width of the back panel.
| Size | Starting Chain (Multiple of 4+3) | Total Rows (Height) |
| S/M | Chain 43 | Work until panel measures 28 inches (approx. 112 rows) |
| L/XL | Chain 51 | Work until panel measures 30 inches (approx. 120 rows) |
- Start: Ch the appropriate number of stitches for your size.
- Row 1 (Setup): Follow the Foundation Row instructions.
- Pattern: Continue working the WWS by repeating Rows 1-4 until your panel reaches the target length.
- Finish: Fasten off, leaving a long tail (about 20 inches) for seaming one shoulder on both panels.
3. Sleeves (Make 2 Identical)
The sleeves are worked flat in rows and tapered slightly using decreases.
| Size | Starting Chain (Multiple of 4+3) | Total Rows (Length) |
| S/M | Chain 59 (Widest point: Bicep) | Work approx. 60 rows |
| L/XL | Chain 75 (Widest point: Bicep) | Work approx. 64 rows |
- Start: Ch the appropriate number of stitches for your size.
- Row 1 (Setup): Follow the Foundation Row instructions.
- Pattern: Continue working the WWS by repeating Rows 1-4.
- Tapering/Decreases: To create a slight taper towards the wrist, work an invisible decrease (dc2tog) at the beginning and end of every 8th row. This is done by skipping the turning chain and working a dc2tog over the first two stitches of the row.
- Wrist Cuff: When the sleeve reaches your desired length (or approx. 5 rows from the end), switch to a simple half-double crochet (hdc) ribbing:
- Row 1 (HDC): Ch 2 (does not count as st), hdc evenly across. Turn.
- Row 2 (Ribbing): Ch 2, hdc in the third loop only across the row. Turn.
- Repeat Row 2 for 4 more rows.
- Finish: Fasten off, leaving a long tail for seaming.
Assembly and Edging
Step 1: Shoulder Seams
- Lay the Back Panel flat. Place the two Front Panels on top, aligning the long edges and the top short edges (shoulders).
- Using the long yarn tails left on the Front Panels, seam the shoulders together using the mattress stitch or a simple sl st seam (sl st through both loops of the Front Panel and the corresponding loop of the Back Panel).
- Leave an opening for the neck hole (approx. 8-10 inches wide, centered). Weave in the remaining yarn ends.
Step 2: Side Seams
- Lay the entire piece flat, wrong side facing up.
- Measure down from the shoulder seam 8 (9) inches and place a stitch marker. This is the top of the armhole opening.
- Seam the sides together from the bottom edge up to the stitch marker using your preferred seaming method (sl st seam is quickest).
Step 3: Sleeve Seams and Attachment
- Fold each sleeve in half lengthwise and seam the long edges together, from the wrist cuff up to the bicep edge.
- Turn the cardigan right side out. Insert a sleeve into an armhole opening, aligning the seam of the sleeve with the side seam of the body.
- Pin the sleeve evenly around the armhole opening.
- Seam the sleeve to the armhole using the long yarn tail left on the sleeve. Repeat for the second sleeve.
Step 4: Final Edging
To give the cardigan a crisp finish, work a simple single crochet (sc) border around the entire opening (bottom edge, up the front, around the neck, and back down the other front edge).
- Join yarn with a sl st at the bottom front corner.
- Round 1: Ch 1 (does not count as st). Work sc evenly around the entire perimeter of the cardigan opening. Aim for approximately 2 sc per double crochet row along the sides. Join with a sl st to the first sc.
- Round 2: Ch 1, turn. Work 1 sc into the back loop only of every sc around. Join with a sl st. (This creates a subtle, neat ridge.)
- Fasten off and weave in all remaining ends.
Your Coastal Drift Cardigan is complete! This lightweight piece is perfect for tossing over a sundress or layering with jeans on a cool evening. Enjoy the beautiful, breezy drape of the Whispering Waves Stitch!
Video tutorial:


