
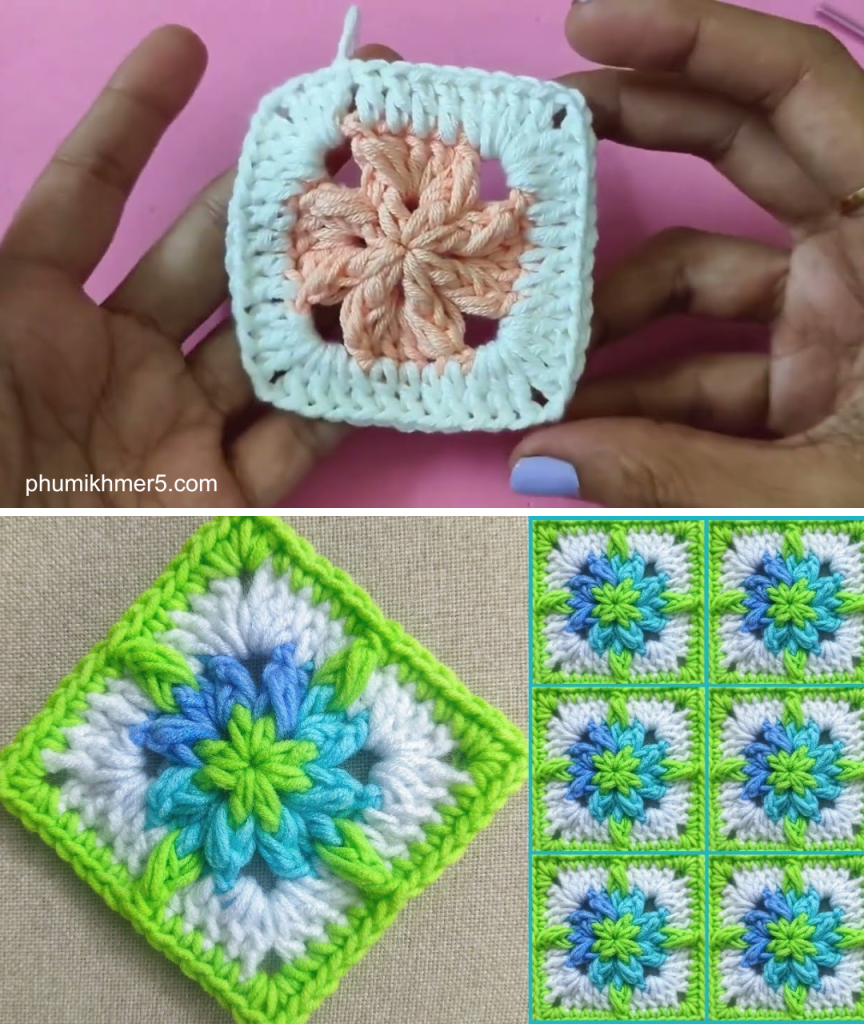
Welcome, fellow hookers! If you’re anything like me, the classic crochet granny square is the foundation of your craft. It’s simple, versatile, and instantly satisfying. The beautiful beginner’s crochet work by Sara’s crochet in her video, “Beautiful Beginner’s Crochet Granny Square”, is a perfect reminder of the simple joy of that iconic motif.
Inspired by the elegance of that foundational square, I’ve designed a detailed and unique pattern that elevates the traditional form by adding a beautiful, textured center—the Desert Bloom Sunburst Square. This square transitions a gorgeous rounded mandala center into the classic, crisp corner structure of a granny square, making it a showstopper for blankets, pillows, or bags.
Ready to add this stunning pattern to your repertoire? Let’s get hooking!
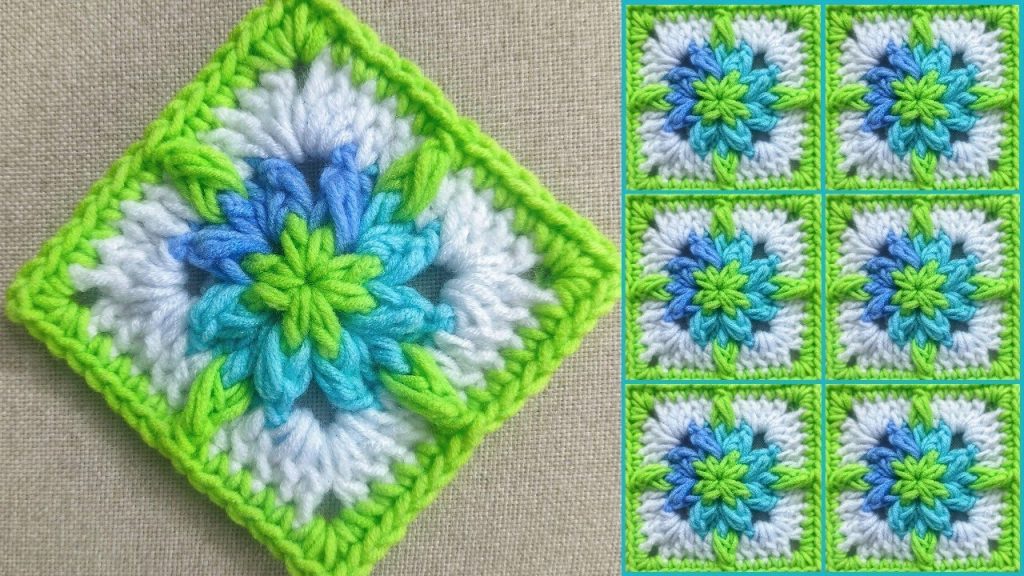
The “Desert Bloom” Sunburst Square Pattern
| Section | Details |
| Skill Level | Easy-Intermediate |
| Finished Size | Approximately 6 x 6 inches (15 x 15 cm) using recommended materials. |
| Gauge | Not critical for this project, but your square should measure about 4.5 inches after Round 4. |
Materials
- Yarn: Worsted Weight (Category 4) yarn. You can use two colors: Color A (CA) for the center burst and Color B (CB) for the squaring and border.
- Hook: U.S. I/9 (5.5 mm) or size needed to obtain gauge.
- Notions: Yarn needle for weaving in ends, scissors, and optional stitch markers.
Special Stitches & Abbreviations
This pattern uses a Puff Stitch to create the sunburst texture.
- Puff Stitch (PS): (Yarn over, insert hook into specified stitch, yarn over, pull up a loop) 3 times in the same stitch (7 loops on hook). Yarn over and pull through all 7 loops on hook. Chain 1 to close the stitch.
- CL (Cluster): A modified PS used in Round 3 to create a less bulky texture. (Yarn over, insert hook into specified stitch, yarn over, pull up a loop) 2 times in the same stitch (5 loops on hook). Yarn over and pull through all 5 loops on hook.
- MC: Magic Circle (or Magic Ring)
- ch: chain
- sl st: slip stitch
- sc: single crochet
- dc: double crochet
- tr: treble crochet (or triple crochet)
- sp: space
Pattern Instructions
Center Sunburst (Use Color A)
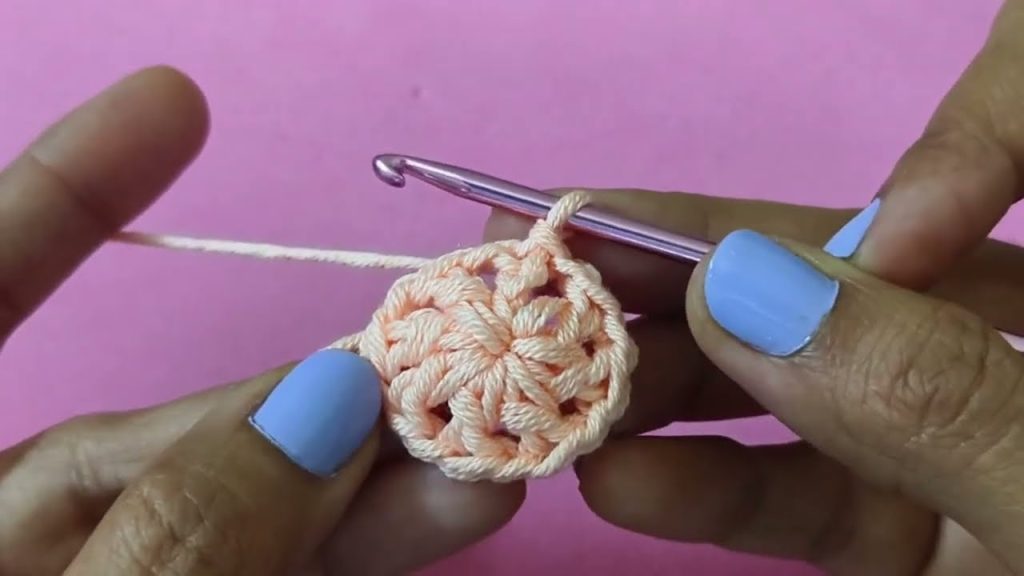
Round 1: Establishing the Center
- Start with a MC (or ch 4 and sl st to first ch to form a ring).
- Ch 2 (counts as first hdc). Hdc 11 into the ring. (12 hdc total)
- Sl st to the top of the beginning ch 2 to join.(Tip: Pull your MC tail tight to close the center hole completely.)
Round 2: The Puff Stitch Sunburst
- Ch 2 (does not count as a stitch).
- PS into the first join space (where you made the sl st).
- Ch 1, skip next hdc, PS into the following hdc. Repeat from * to * 10 more times.
- Ch 1, skip the last hdc. Sl st to the top of the first PS to join. (12 PS and 12 ch-1 spaces)
Round 3: Preparing to Square
- Ch 1 (does not count as a stitch). Sc into the top of the first PS.
- Ch 2, CL into the next ch-1 space, ch 2, sc into the top of the next PS. Repeat from * to * 10 more times.
- Ch 2, CL into the last ch-1 space, ch 2. Sl st to the first sc to join. (12 CL, 12 sc, and 24 ch-2 spaces)
- Fasten off Color A.
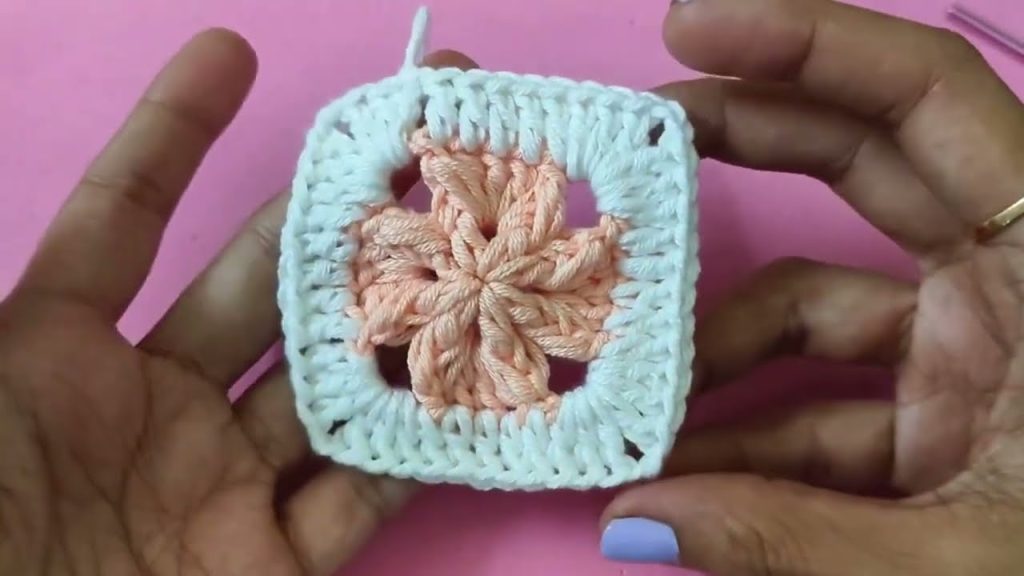
Squaring the Circle (Join Color B)
Round 4: Forming the Corners
- Join Color B (CB) into any sc stitch. Ch 3 (counts as first dc). Dc 2 in the same sc. (This is the start of a side.)
- Corner Group: Tr 3 into the next ch-2 space, ch 3, Tr 3 into the next ch-2 space. (This creates your first corner.)
- Side Group 1: Dc 3 into the top of the next CL.
- Side Group 2: Dc 3 into the next ch-2 space.
- Side Group 3: Dc 3 into the top of the next sc. (This completes the first side section, which has 3 groups of 3 dc.)
- Repeat steps 2, 3, 4, and 5 three more times around the square to form all four sides and corners.
- The final side will end after the last dc 3 into the sc. Sl st to the top of the beginning ch 3 to join. (4 corners, 4 sides of 3 dc-groups each).
Round 5: Granny Structure
- Ch 3 (counts as first dc). Dc 2 into the same space (ch-3 space from previous round, centered over the first dc-group).
- Side: Ch 1, Dc 3 into the space between the next two 3-dc groups. Repeat until you reach the corner ch-3 space. (You should have two ch-1 spaces along this side).
- Corner: (Dc 3, ch 3, Dc 3) into the ch-3 corner space.
- Repeat steps 2 and 3 around the square.
- When you reach the starting point, ch 1 and sl st to the top of the beginning ch 3 to join.
Round 6: Final Border
- Ch 3 (counts as first dc). Dc 2 into the same ch-1 space. (Start of the side).
- Side: Ch 1, Dc 3 into the next ch-1 space. Repeat along the side until you reach the corner ch-3 space.
- Corner: (Dc 3, ch 3, Dc 3) into the ch-3 corner space.
- Repeat steps 2 and 3 around the square.
- Ch 1 and sl st to the top of the beginning ch 3 to join.

Finishing:
- Fasten off and weave in all loose ends securely.
- Optional but recommended: Lightly block your square by pinning it to a flat surface and steaming or misting it with water. This helps the corners lie flat and the overall shape become crisp and professional.
Project Ideas
This square works perfectly for modular projects. Here are a few ideas for what you can create with a collection of “Desert Bloom” squares:
- Boho Throw Blanket: Alternate your Color A and Color B combinations for a vibrant, mismatched look.
- Market Bag: Join 13-16 squares in a tube shape and add a simple sc border and handle.
- Pillow Cover: Join a front panel of 9 squares (3×3) and use a solid piece of fabric or a matching solid crochet piece for the back.
Video tutorial:


