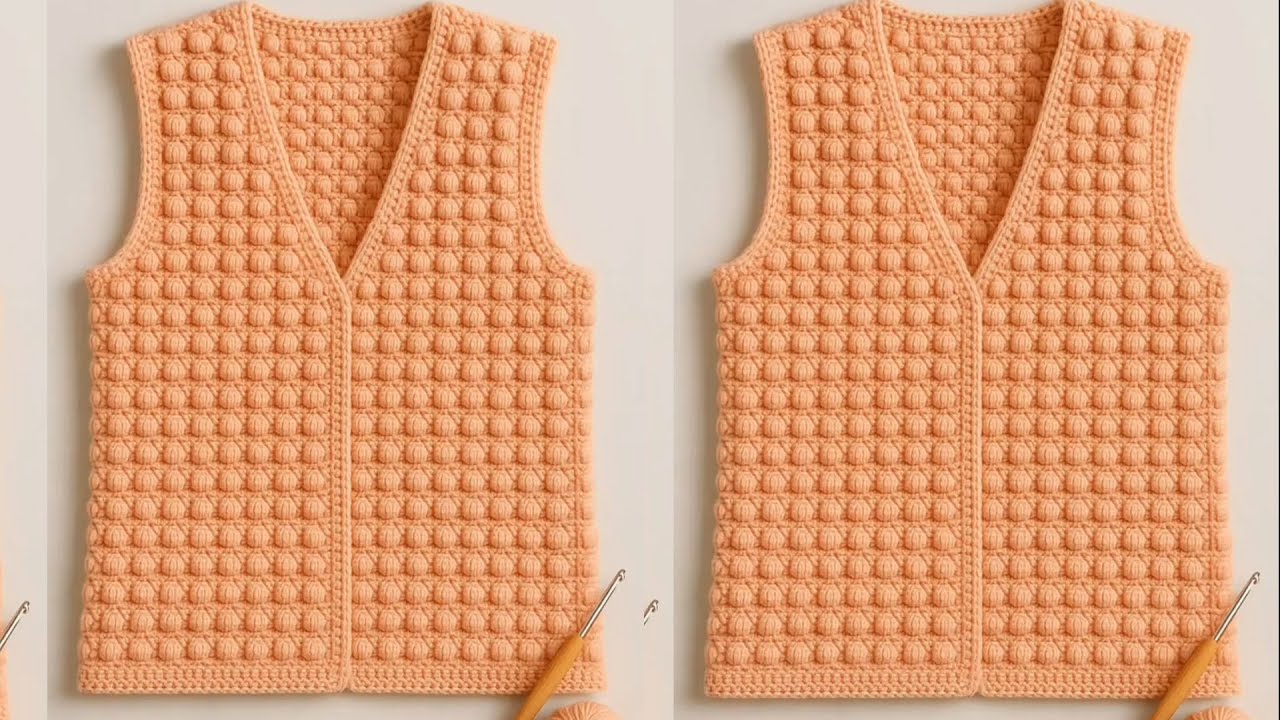
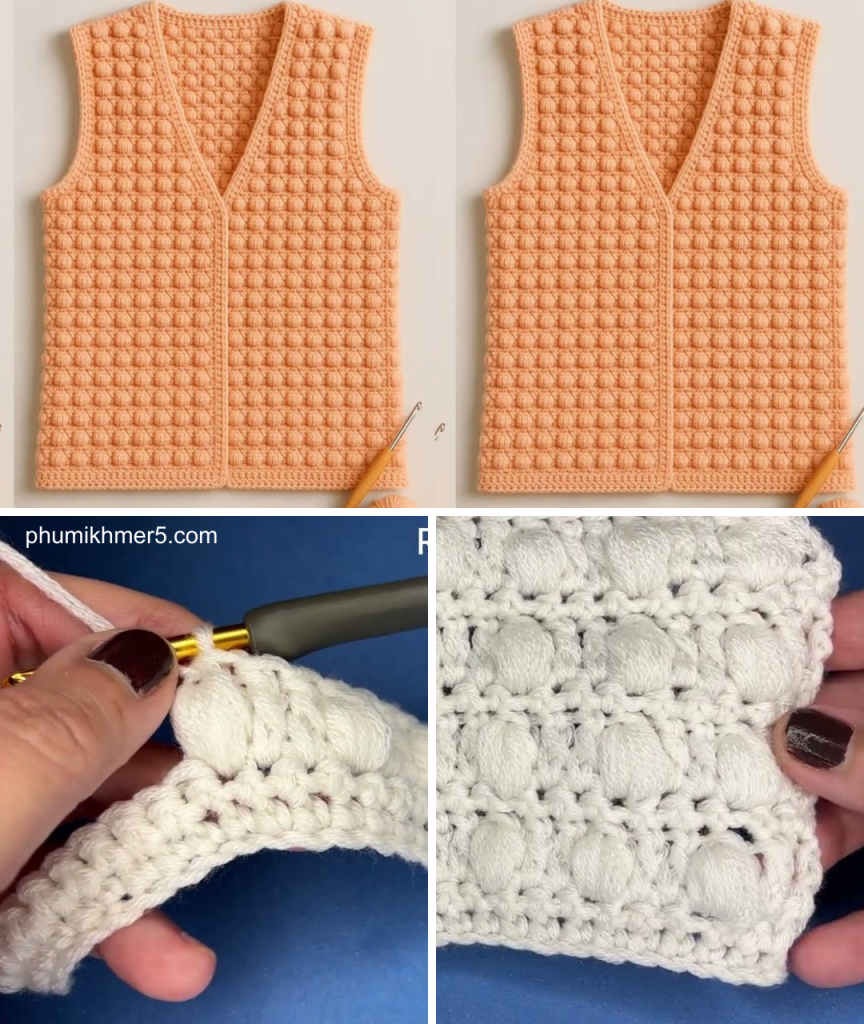
Ready to add a touch of unique texture to your next crochet project? While many patterns create a flat fabric, some stitches can add a beautiful, raised design that makes your work pop. This guide, inspired by an excellent video tutorial, will introduce you to a fantastic stitch that creates a captivating, dotted pattern. It’s perfect for blankets, scarves, bags, or anything else that could use a little extra dimension!
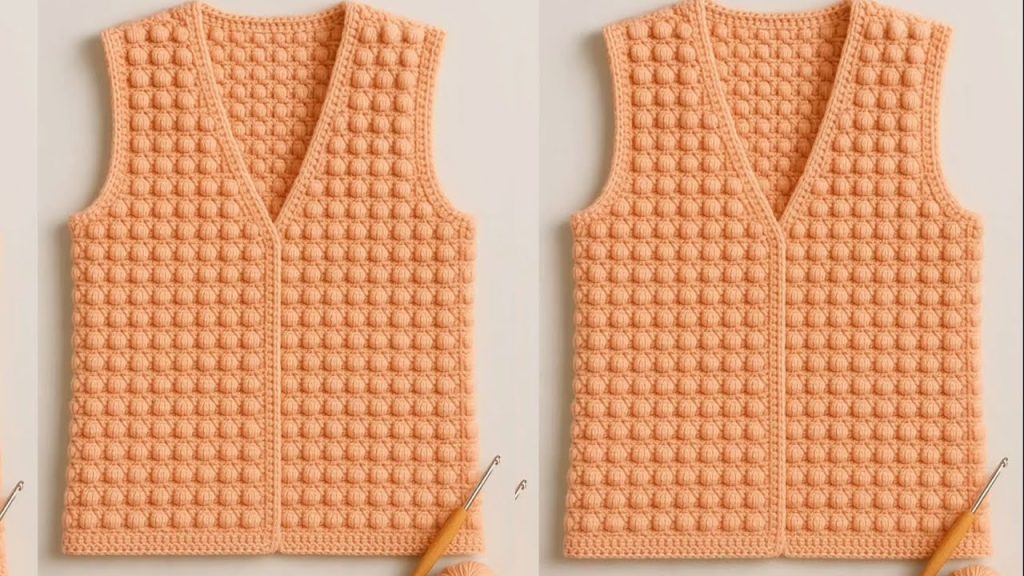
Why You’ll Love This Textured Stitch
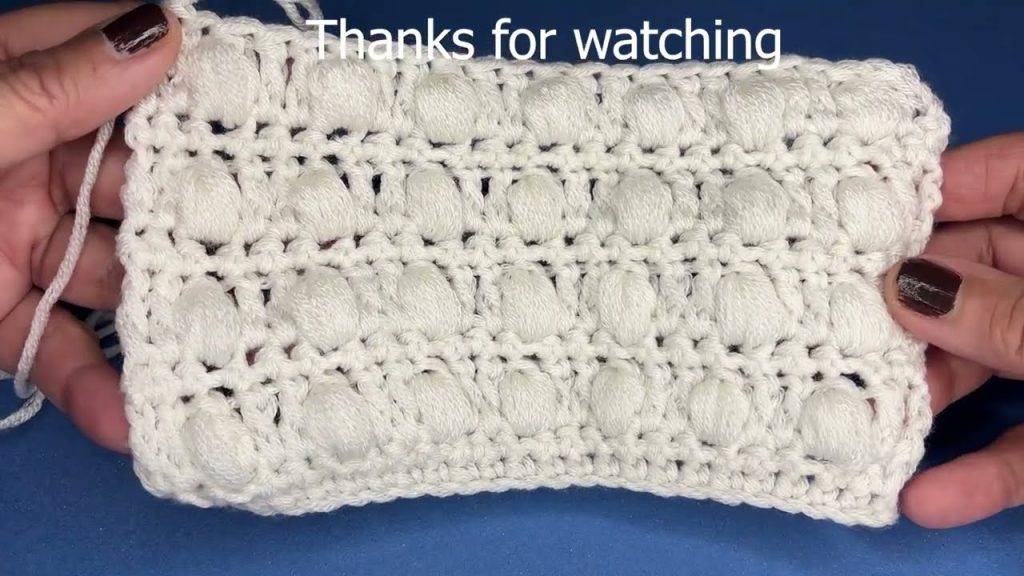
- Visually Striking: The combination of single crochet and puff stitches creates a beautiful “dotted” effect that is both modern and eye-catching.
- Adds Dimension: The raised texture of the puff stitches makes the fabric feel plush and adds a cozy, substantial feel to your finished item.
- Great for All Yarn Weights: This stitch works beautifully with a variety of yarn types, from a thin cotton for a dishcloth to a bulky wool for a warm blanket.
- A Skill-Builder: If you’re new to puff stitches, this pattern is a perfect way to practice them and see how they can transform a simple fabric.
Before You Begin: Gathering Your Materials
The video tutorial uses simple, standard materials that you likely already have.
- Yarn: Choose a yarn in your favorite color. The pattern looks great in both solid and variegated yarns.
- Crochet Hook: The video uses a 4mm hook, but you should choose a hook size that is appropriate for your chosen yarn.
- Scissors
- Stitch Marker (optional but helpful): Useful for marking the beginning of your rows.
Understanding the Pattern: Key Stitches
This pattern is created by alternating two different rows. Here’s a quick breakdown of the stitches you’ll be using:
- Chain Stitch (ch): The foundation of the project.
- Single Crochet (sc): A basic, tight stitch that creates the flat base for the dots.
- Triple Crochet (tr): A tall stitch that provides the height for the puff stitches.
- Puff Stitch: The star of the show! The puff stitch is a cluster of stitches worked into the same space, which is then pulled together to create a rounded “puff” or “dot” on the fabric.
The Step-by-Step Tutorial: Creating the Dotted Fabric
The video provides a clear, close-up look at each step of the process.
The Foundation:
- The video starts by showing you how to chain a foundation row with a stitch count of a multiple of 3, plus an extra 2 stitches. This ensures the pattern will work out correctly.
Row 1: The Single Crochet Base
- This row is a simple single crochet row.
- Skip the first chain from the hook and then work one single crochet into each chain stitch across the row. This creates a solid foundation for the next row of dots.
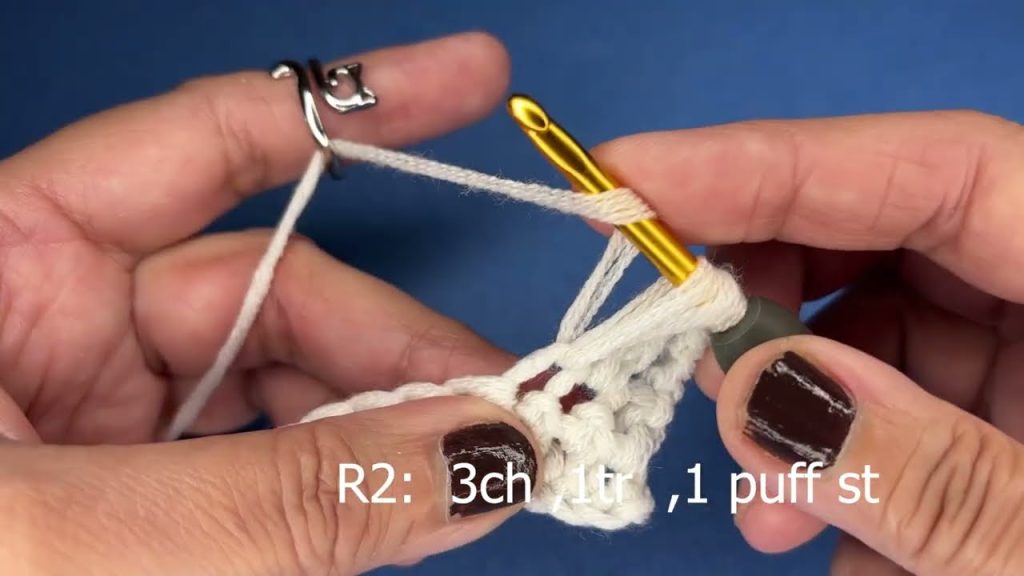
Row 2: Creating the “Dots”
- This is where the magic happens!
- Chain 3 (this counts as your first triple crochet).
- Work a triple crochet into the very first stitch.
- The video then shows you how to create the puff stitch and where to place it in the pattern.
- You’ll repeat the pattern of two triple crochets followed by one puff stitch across the row.

Repeating the Pattern:
- The final part of the tutorial demonstrates how to alternate between repeating the simple single crochet row (Row 1) and the textured “dot” row (Row 2).
- By alternating these two rows, you create a beautiful, staggered pattern where the puff stitches sit perfectly between the puff stitches of the previous row.
- The video concludes by showing a full swatch, so you can see how the pattern looks when completed.
Grab your hook and yarn, and get ready to add a new favorite stitch to your crochet repertoire. Happy crafting!
Video tutorial:


