Hey there, fellow yarn enthusiasts! Are you ready to add a touch of floral charm to your crochet projects? Today, we’re diving into the delightful world of flower granny squares, a versatile and utterly charming motif that can transform anything from blankets to bags into a blooming masterpiece. Inspired by the beautiful “Perfect Flower Blanket” tutorial by Sara’s Crochet on YouTube, we’re going to break down the steps to create your own vibrant floral squares.

What You’ll Need:
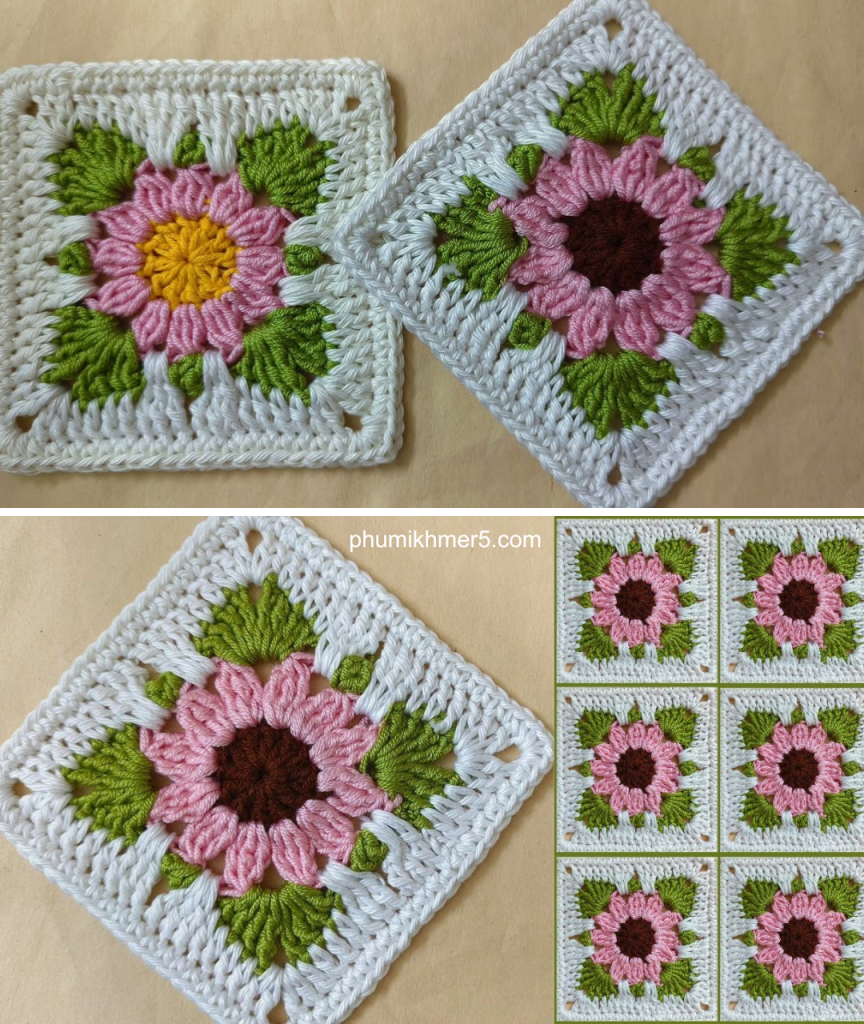
Before we begin our floral adventure, gather your supplies. The video uses a 3.5mm hook, and I recommend a sport weight or DK yarn for a similar delicate look. You’ll need at least three colors: one for the flower center, one for the petals, one for the leaves, and one for the outer square. Think contrasting colors to make your flower pop!
- Yarn: Worsted weight yarn in at least 4 colors (e.g., Yellow, Pink, Green, White)
- Hook: 3.5mm crochet hook (or size appropriate for your yarn)
- Scissors
- Yarn Needle
Let’s Get Started: The Heart of the Flower (Round 1)
Our journey begins with the very core of our flower. This initial step sets the stage for all the beautiful petals to come.
- Create a Magic Circle: If you’re new to magic circles, don’t worry! The video at shows a clear demonstration. It’s a fantastic way to create a tight center with no gaps.
- Chain 3 (counts as first double crochet) and make 11 Double Crochets (dc) into the magic circle: This will give you a total of 12 double crochets, including your initial chain 3.
- Slip stitch to the top of the initial chain 3 to close the round: Gently pull your magic circle tight, but not too tight that it puckers.
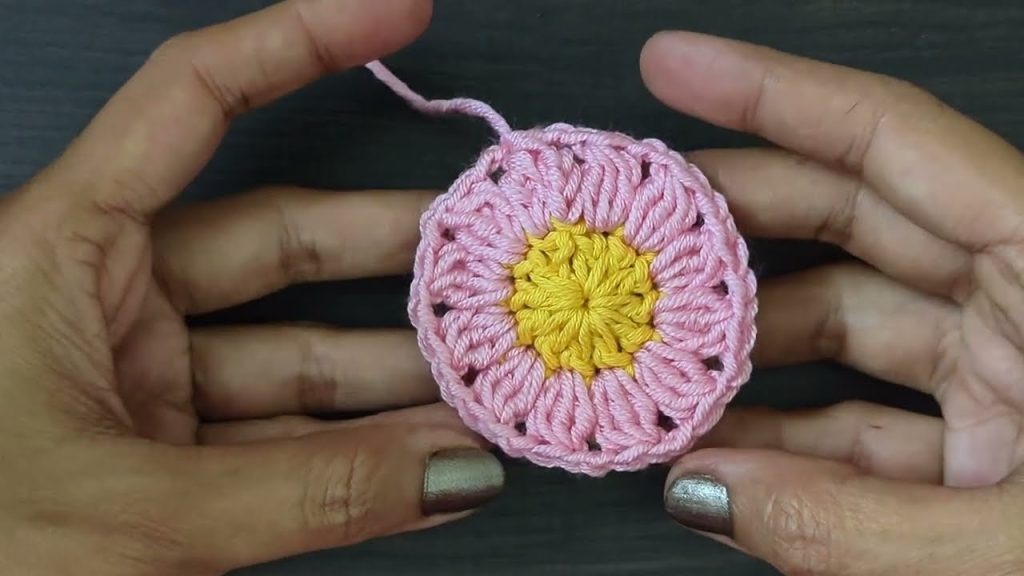
(You should now have a small, colorful circle. This is your flower’s bright center!)
Petal Power: Bringing the Flower to Life (Round 2)
Now for the fun part – crafting those lovely petals!
- Change to your petal color. You can join your new yarn with a slip stitch in any chain space or between any two double crochets from the previous round.
- Chain 3 (counts as first part of dc3tog).
- Work 2 double crochets together (dc2tog) in the same stitch: This forms your first “petal” stitch, a cluster that gives the petals their beautiful texture.
- Chain 2.
- Repeat (dc3tog, chain 2) in each chain space around. You should have 12 petal clusters in total.
- Slip stitch into the top of the initial dc3tog to complete the round.
- Fasten off your petal color and weave in ends.
(Your flower should now be taking shape with lovely, puffy petals!)
Leafy Borders: Adding a Touch of Green (Round 3)
Next, we’ll introduce some green to frame our bloom, transforming our circular flower into the beginning of a square.
- Join your green yarn in any chain 2 space from the previous round with a slip stitch.
- Chain 3 (counts as first double crochet), then 1 double crochet in the same space.
- Work 2 Treble Crochets (Trc) in the next chain space.
- Then, 2 double crochets in the next chain space.
- In the corner space, work (2 double crochet, 2 treble crochet, chain 2, 2 treble crochet, 2 double crochet). This creates the distinct corner of our granny square.
- Repeat the side and corner pattern around your square. Each side will consist of (2 double crochet, 2 treble crochet, 2 double crochet) and each corner will be the established (2 dc, 2 Trc, ch 2, 2 Trc, 2 dc) pattern.
- Slip stitch into the top of the initial chain 3 to close the round.
- Fasten off your green yarn and weave in ends.
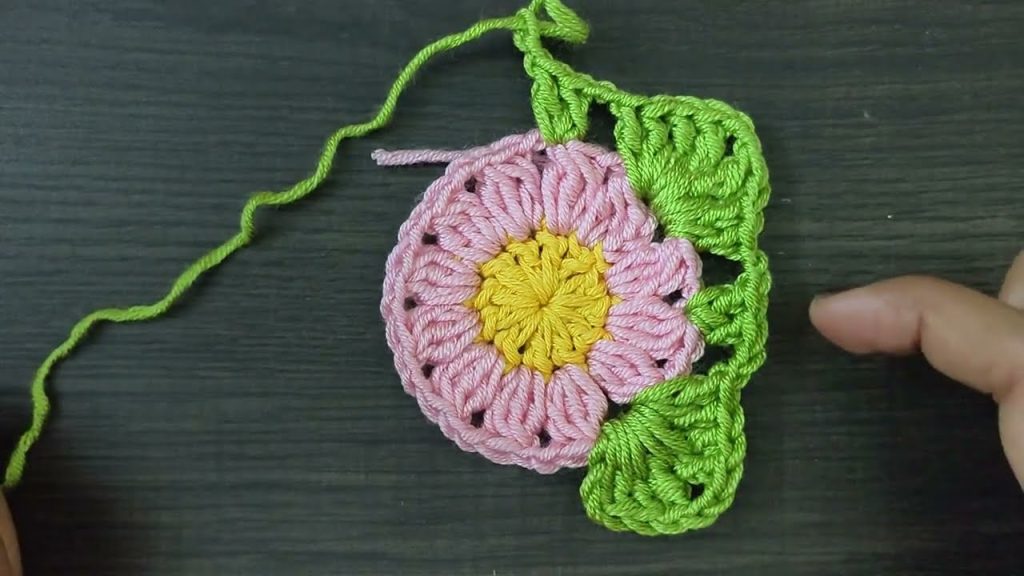
(You should now have a clear square shape with green “leaves” framing your flower.)
Squaring It Up: The Final Border (Round 4)
To complete our granny square, we’ll add a final border, typically in a neutral color to really make the flower and leaves pop.
- Join your main square color (e.g., white) in any chain 2 corner space with a slip stitch.
- Chain 3 (counts as first double crochet), then 1 double crochet in the same corner space.
- Chain 2, then 2 double crochets in the same corner space. This completes your first corner.
- Work 4 double crochets across the first side.
- In the next corner space, work (2 double crochet, chain 2, 2 double crochet).
- Repeat (4 double crochets along the side, then a corner of 2 dc, ch 2, 2 dc) around the square.
- Slip stitch into the top of the initial chain 3 to close the round.
- Fasten off your yarn and weave in all remaining ends.
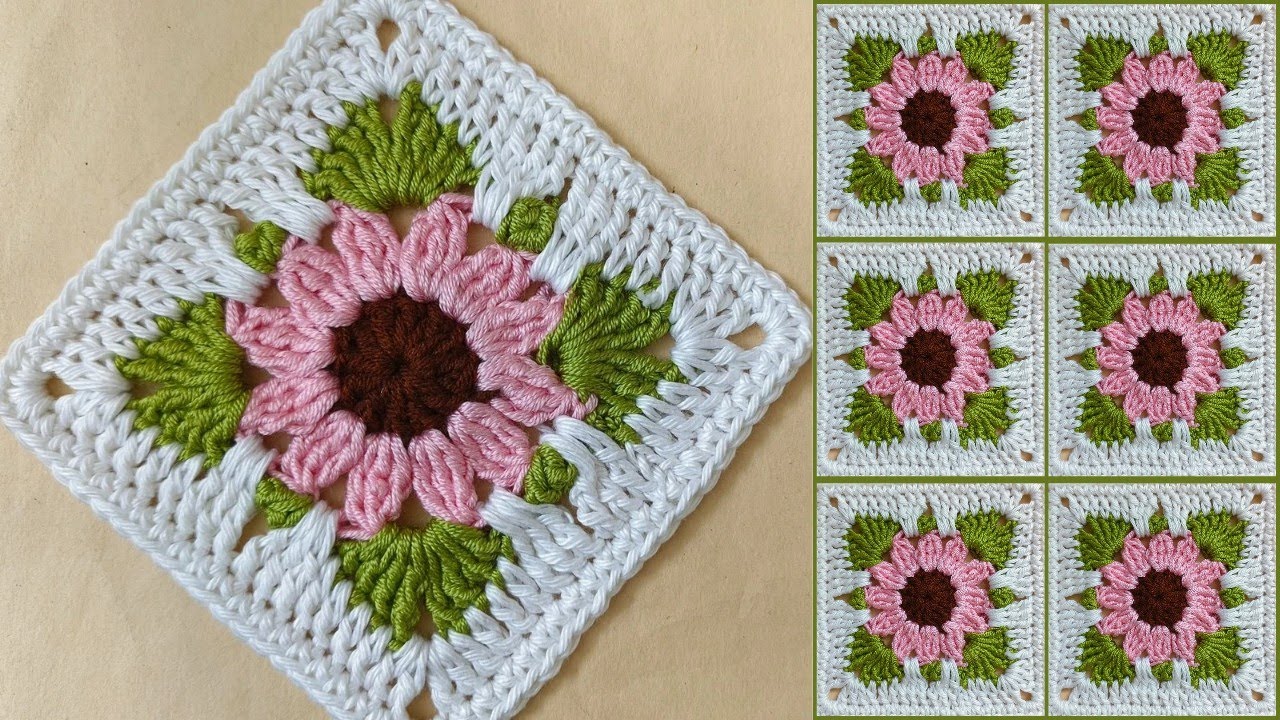
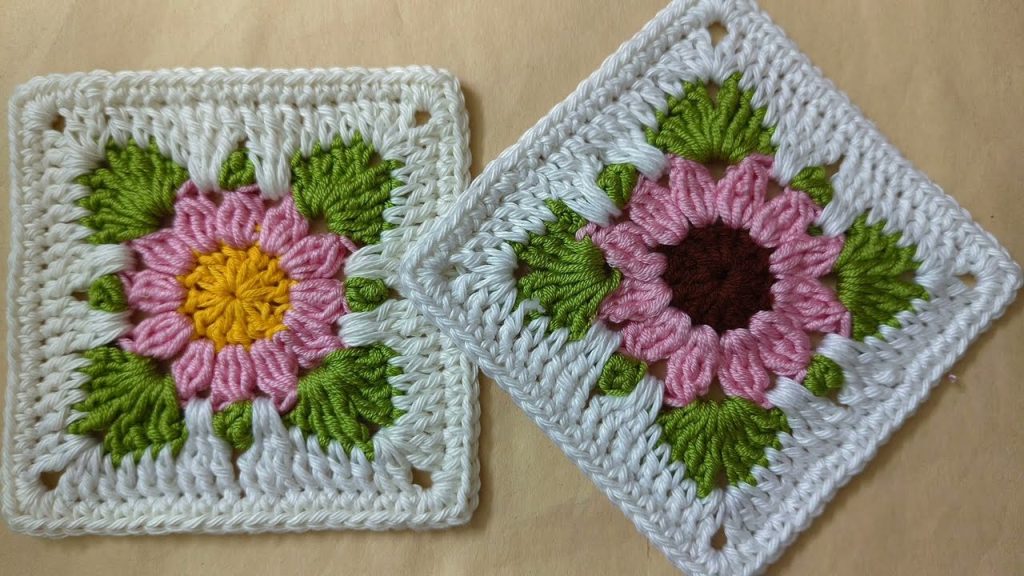
(Voila! You now have a beautiful floral granny square ready to be joined with others to create a stunning blanket, cushion cover, or anything your heart desires!)
Finishing Touches (Optional, but Recommended!):
- Blocking: For a professional finish and to ensure your squares are all the same size and shape, gently wet your squares and pin them to a foam board or mat to their desired dimensions. Let them dry completely.
- Joining: Once you have a collection of these lovely squares, you can join them using your preferred method (e.g., slip stitch, single crochet, invisible seam) to create a larger project.
I hope you enjoyed this detailed pattern! Feel free to experiment with different color combinations and yarn weights to make each flower granny square truly your own. Happy crocheting!
Video tutorial:


