Hello, fellow makers! Ready to infuse your wardrobe with some airy, vintage charm? I’m excited to share this pattern for the Starlight Square Summer Vest. This project is the definition of mindful crochet—it’s made entirely of two large granny square motifs that are joined together, forming the front and back of the vest in one seamless piece. The open, lacy texture is perfect for layering over a tank top or a dress when the evening breeze kicks in.
The beauty of this design is its simplicity and adaptability. We’ll be using a DK weight yarn (or similar) to give the squares drape, and the size can be adjusted simply by continuing to add rounds until the square covers the width of your back and chest. Grab your favorite lightweight yarn and let’s get started on this chic, celestial piece!

Why You’ll Love Crocheting This Vest:
- Modular Construction: Made from just two main squares—no complicated body shaping required.
- Size Adjustable: Simply stop adding rounds when the square reaches your desired width.
- Lightweight & Airy: Perfect for summer layering with a beautiful, open texture.
- Skill-Building: Great practice for mastering Granny Square construction and seamless joining.
What You’ll Need:
- Yarn: DK Weight (#3) yarn. A cotton or cotton blend is recommended for best drape.
- Approximate Yardage: 500 – 900 yards, depending on the size (S/M vs. L/XL).
- Crochet Hook: 4.0 mm hook (or size needed to obtain gauge).
- Stitch Markers: To mark corners and armhole positions.
- Tapestry Needle: For weaving in ends.
- Scissors:
Essential Crochet Abbreviations:
- ch: chain
- st(s): stitch(es)
- sl st: slip stitch
- sc: single crochet
- dc: double crochet
- sp: space
- ch-sp: chain space
- Cluster (Cl): (dc 2, ch 1, dc 2) worked in the same corner space.
- sk: skip
Gauge (Crucial for Sizing)
- 4 Rounds of the Granny Square should measure approximately 4 inches (10 cm).
- Note: To ensure the finished vest fits, measure the square diagonally across your bust. The diagonal length of the finished square should be slightly less than your total shoulder-to-shoulder width.
The Pattern: Starlight Square Vest
This pattern consists of two identical, oversized squares.
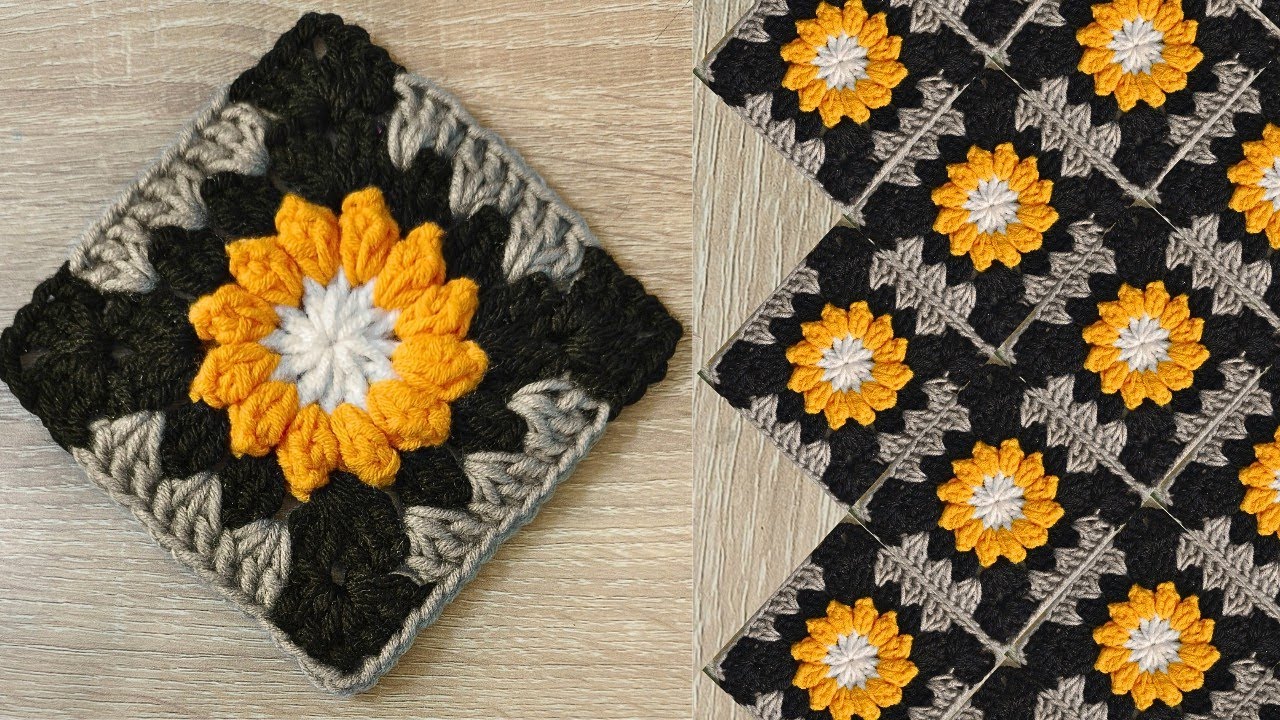
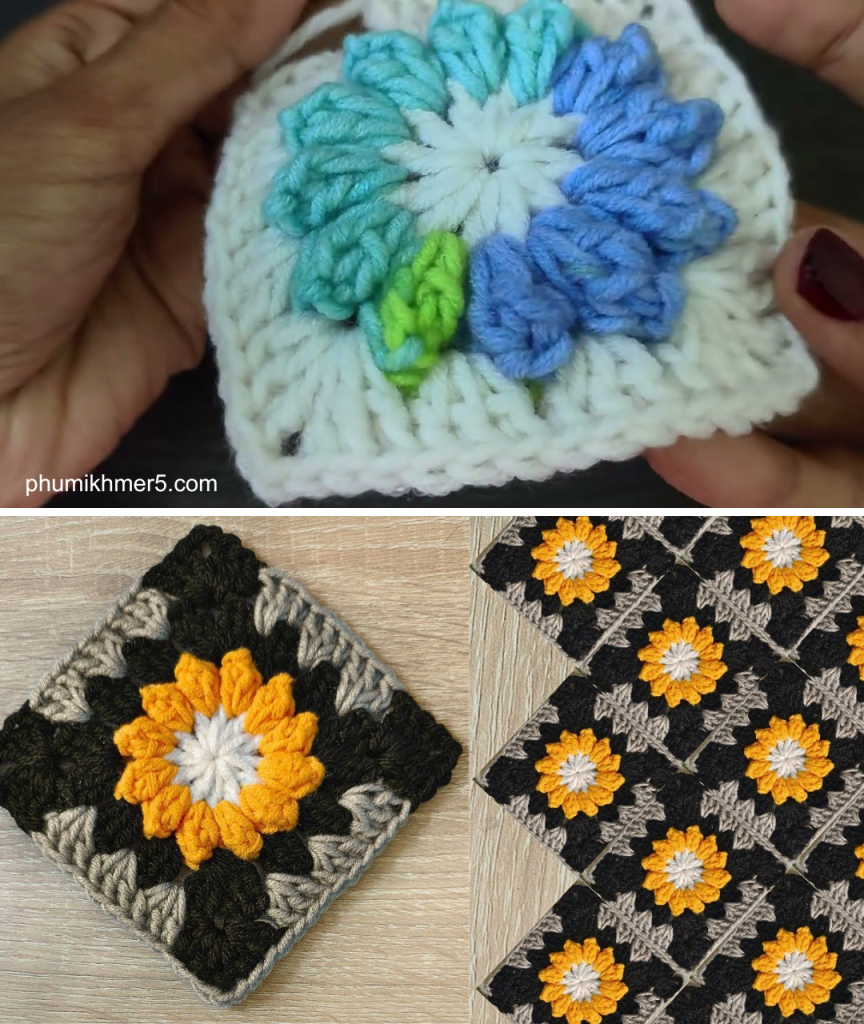
Part 1: The Oversized Granny Square (Make 2)
The square is worked in the round, joining with a sl st at the end of each round.
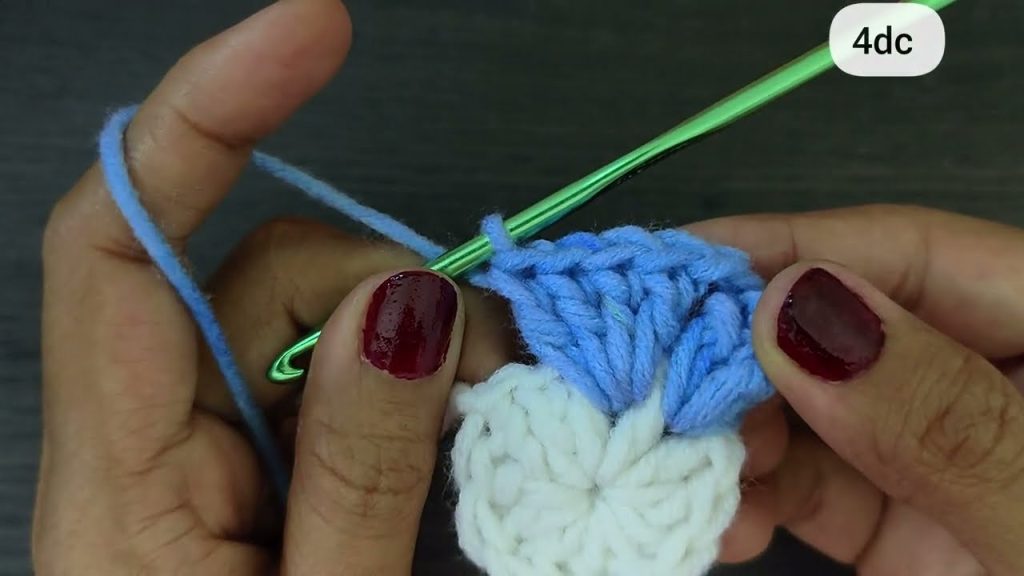
- Round 1: Start with a magic ring.
Ch 3(counts as firstdc). Work 2dcinto the ring. This is your first 3-dc cluster.(Ch 2, dc 3)three times into the ring.Ch 2.Sl stto the top of the initialch 3to join. (4 clusters, 4 ch-2 corners).
- Round 2:
Sl stinto the next 2dcand into the firstch-2 sp.Ch 3. Work(dc 2, ch 2, dc 3)into the samech-2 sp. This is your first corner.Ch 1. Work(dc 3, ch 2, dc 3)into the nextch-2 sp. This is the second corner.- Repeat
(Ch 1, dc 3, ch 2, dc 3)in the remaining two corners.Ch 1.Sl stto the top of the initialch 3to join. (8 clusters, 4 ch-2 corners).
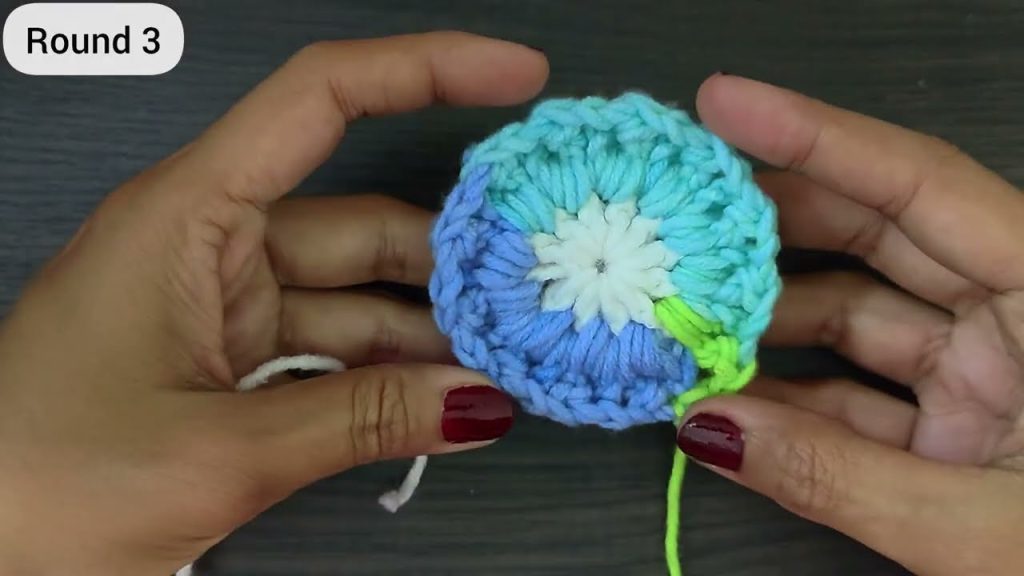
- Round 3 (Side Detail):
Sl stinto the next 2dcand into the cornerch-2 sp.Ch 3. Work(dc 2, ch 2, dc 3)into the samech-2 sp.Ch 1. Workdc 3into the nextch-1 sp(the side).Ch 1.- Repeat
(dc 3, ch 2, dc 3)in the corner,ch 1, thendc 3in the sidech-1 sp,ch 1around.Sl stto the top of the initialch 3to join.
- Round 4 (The Bloom Edge):
Sl stto the cornerch-2 sp.Ch 1. Worksc 3into the cornerch-2 sp.Ch 3. Worksc 1into the top centerdcof the next 3-dc cluster (the side).Ch 3.- Repeat
(sc 3 in corner, ch 3, sc 1 in side cluster, ch 3)around.Sl stto the initialscto join.
- Round 5 (Return to DC):
Sl stinto the next 2scto reach the corner.Ch 3. Work(dc 2, ch 2, dc 3)into the centerscof the corner (where the 3sccluster was).Ch 1. Workdc 3into the nextch-3 sp.Ch 1. Workdc 3into the nextch-3 sp.Ch 1.- Repeat corner and side clusters around.
Sl stto the top of the initialch 3to join.
- Continue:Repeat Rounds 4 and 5 (alternating the Bloom Edge and the DC cluster rows) until the square is large enough to cover half your torso, from the collarbone to the waist, or reaches the desired width.
- Typical Sizes:
- Small/Medium (US 4-10): Approx. 16-18 inches (40-45 cm) wide.
- Large/X-Large (US 12-18): Approx. 20-22 inches (50-55 cm) wide.
- Typical Sizes:
- Finish Square 1:
FOand weave in ends. - Finish Square 2: Do NOT fasten off. Proceed to Part 2.
Part 2: Joining and Shaping
- Lay Out: Lay Square 1 flat. Place Square 2 (still attached to the yarn) on top, ensuring the corner alignment is precise.
- Seam the Shoulders: You will join the top edges of the two squares together.
- Use a
sl storscseam. Starting from the outside edge, join the sides for approximately 5-7 inches (12-18 cm) across the top. This forms the shoulder seams. - Leave the central 8-10 inches (20-25 cm) unseamed for the neck opening.
- Use a
- Seam the Sides (Armholes):
- Measure down from the shoulder seam for the desired armhole depth (e.g., 7-9 inches / 18-23 cm). Place a stitch marker here.
- Starting at the marked stitch, join the remaining side edges of the two squares together using a
sl storscseam, working all the way down to the bottom corner. - Repeat for the opposite side.
Part 3: Edging and Finishing
- Armhole Trim: Reattach yarn at the bottom of one armhole.
Ch 1. Workscevenly around the entire armhole opening.Sl stto join. Repeat for the other armhole. - Bottom and Front Trim: Reattach yarn at the bottom center of the vest. Work a decorative row along the entire bottom and up the front opening.
Ch 1. Work one row of sc or a shell stitch pattern (e.g.,sk 2, dc 5, sk 2, sc 1) around the entire perimeter (bottom, up the front, around the neck, and down the other side).
- Finalize: Fasten off and weave in any remaining loose ends. Block the vest gently to open up the lace pattern and enhance the drape.
Congratulations! You have completed your stunning Starlight Square Summer Vest—a beautiful, adaptable piece that will be a favorite for layering. Happy hooking!
Video tutorial:


